Guides & Walkthroughs New Guides Popular RPG Action Strategy Adventure YouTube Guides Mobile App

Desperados 3 Guide by gamepressure.com

Desperados 3 Guide

Table of Contents
Desperados 3 - Mission 3
Mission starting area. Cooper and Hector begin in the location with several hostile thugs. Eliminating two of them is very simple by relying on the bear trap + whistel combo. One of the thugs is a Long Coat and you must attack him controlling Hector (use the axe or rely on melee combat).
Exit from the starting location. You must reach a gate. Cooper and Hector can freely move around the central part of Flagstone and you don't have to sneak even when approaching a thug marked with a red dot. Forbidden areas can be recognized by the red lines at their entrances.
Entrances to the stables area. They're marked with red lines and crossing the line will result in being attacked upon detection.
Entrance to a corner building. This is an alternative way of reaching the stables. You can exit through the door on the upper floor. This is a great opportunity to eliminate a poncho enemy and to hide his body inside the building. Watch out for enemies patrolling the area and don't let them to see you the attack or when you're dragging the body.
Building roof. This is an excellent spot to perform a coin throw in order to anger the bull and kill Jarvis (red 1 on the map). His death will be treated as an accident.
Area with the bull. Jarvis is one of the 4 main mission targets. He's trying to ride the bull. You can eliminate with a cunning trick after reaching a nearby roof (blue 5 on the map). Alternatively you can get rid of all of the stables areas enemies to be able to kill Jarvis and his buddy yourself (they're havin conversations from time to time).
Chest with ammo for McCoy's revolvers. It's on the highest roof - use a ladder to get there.
Entrances to the brothel area. They're marked with red lines and crossing the line will result in being attacked upon detection.
Area behind the brothel. You can eliminate all of the enemies from this area quite easily - either approach them from the back or use the bear trap combined with whistling. Remember to hide all bodies in the bushes. Clearing out this area isn't mandatory, but it will make much easier to sneak inside the brothel and optionally also to reach the church.
Chest with ammo for McCoy's revolvers. You'll find it next to the well.
Scaffolding. You can climb the ladder, jump on top of the carriage and then jump towards a balcony located next to the room with Wild Marge (red 2 on the map). It's the best way to get closer to the mission target.
Room on the upper floor. Wild Marge is one of the 4 main mission targets. Don't attack her using traditional means, because she's accompanied by poncho thugs and it'e extremely difficult to kill them without triggering an alarm. Wait until it's safe to sneak side and pick up laudanum - you can use it on a barrel on the ground floor (blue 9 on the map) to posion Wild Marge.
Room with the alcohol barrel. Open the back door of the brothel and swiftly deal with the poncho thug (hide his body in the bushes). You can use laudanum posion taken from the room on the upper floor (red 2 on the map) on the barrel to apply poison. Wait for the waitress to show up. She will deliver poisoned alcohol to Wild Marge and the mission target will die (it's going to be an "accident kill").
Entrances to the construction site area. They're marked with red lines and crossing the line will result in being attacked upon detection.
Ladder. Using it is an alternatively way of reaching the construction area.
Chest with ammo for McCoy's revolvers. It's on the ground floor of the building under construction. One of the enemies is carrying wooden boards and you can easily kill him by using a bear trap.
Bushes by the tracks. This is a good area to infiltrate the construction site and to eliminate the first few enemies. Always check if the enemy you're about to attacked is in the line of sight of other thugs.
Wall of the building under construction. You can sneak there by travelling through the northern part of the construction site and avoiding McBane (red 3 on the map). Reach the upper floor and use Showdown Mode to eliminate 2 enemies who are looking at each other. You can then push the wall when McBane will stop close to it. The mission target will die in a tragic accident.
Construction site. McBane is one of the 4 main mission targets. He stops by the table and to the left. It's best to sneak your way to the building under construction with one of the walls already standing (blue 13 on the map). You can push the wall on McBane to kill him in an accident.
Northern street. The Duke (mission target) appears here from time to time with this bodyguards. Don't attack him in a public place. Instead wait for him to go to the church at the norhtern edge of the map (red 4 on the map).
Main entrance to the church grounds. It's guarded by a poncho thug so it's better for Cooper to climb using ivy (blue 16's on the map). You can then attack the poncho enemy from the back or kill Duke while controlling only Cooper.
Ivy. Cooper (sadly not Hector) can visit these locations to climb the ivy and use this to access church grounds.
Grave. When you approach the church for the first time a funeral will be taking place. You can use the fact that the church is unguarded. After the funeral enemies will go back to their posts. One of the mission challenges is about throwing a specific body into the grave.
Church. The Duke is one of the 4 main mission targets. You can use the ladder to the right to climb to the church roof. Stand next to the bell and interact with it after Duke will stop in front of the church. The bell will drop on him and the mission target will die in an arranged accident.
Area where you finish the mission. You only have to get here with both characters after killing all mission targets (red 1-4 on the map).
Entrances to the stables area. They're marked with red lines and crossing the line will result in being attacked upon detection.
Entrances to the brothel area. They're marked with red lines and crossing the line will result in being attacked upon detection.
Entrances to the construction site area. They're marked with red lines and crossing the line will result in being attacked upon detection.
Ivy. Cooper (sadly not Hector) can visit these locations to climb the ivy and use this to access church grounds.
Enlarge this map

Desperados 3: Mission 3 - map, badges Desperados 3 guide, walkthrough

Last update: 24 February 2021

Key points of Desperados 3 - Mission 3

Four main mission targets

Important locations on the map

Supply chests

This page of the world atlas for Desperados 3 has a detailed map of mission 3 - Troublemakers in Flagstone. On the map of Flagstone town, we have marked four main targets that have to be eliminated, although we have also shown other important locations. Our walkthrough of mission 3 provides a detailed description of all its challenges (badges) - you have to kill main targets by causing some accidents and avoid hiding in the bushes.

A full description of mission 3 can be found on the following four pages of this chapter. Our guide also contains links and indications that refer to the map. For example, the marking (M3,1) indicates that you should look for the red point labeled with the number 1 on the map of mission 3 and the symbol (M3,5) indicates that you should look for the blue point number 5 on the map of mission 3.

Mission 3: Markings on the map

  1. Red points mark the places where the 4 main mission targets have to be eliminated - Jarvis, Wild Marge, McBane and Duke.
  2. The red dots symbolize minor thugs of the DeVitt Company, while the white dots indicate horses and innocent civilians who are in the town.
  3. We have marked all important locations (worth visiting) with blue dots. Descriptions of these areas can be found just below the map.
  4. Green points indicate the locations of crates with ammunition supplies for the revolvers used by Cooper.

Mission 3: General information

Mission 3 (Troublemakers in Flagstone) takes place in the title town - Desperados 3: Mission 3 - map, badges - Mission 3 - Troublemakers in Flagstone - Desperados 3 Guide

Mission 3 (Troublemakers in Flagstone) takes place in the title town. Cooper and Hector, after getting out of the initial small ambush, can move around the city freely and eliminate all major targets in any order. You don't have to kill all enemies in the order we described in our walkthrough. You have to assassinate Jarvis, Wild Marge, McBane and The Duke. Each of these DeVitt Company employees is in a different part of town, except Wild Marge who never moves. An important feature of this mission is that all main targets can be eliminated in arranged accidents and these are the best ways to get rid of them without setting off the alarm. In the third mission Cooper is accompanied by a new team member, Hector. He has several very useful abilities - he can, among other things, disassemble bear traps, distract enemies by whistling, or easily carry up to two bodies at once.

Additional note: This is an unusual mission because you can move around the entire central part of Flagstone without the need of sneaking around. Heroes will not be detected and attacked even if they approach the thugs marked with red dots on the minimap. The forbidden zones are represented by red lines at their entrances - these are the points (M3,3), (M3,6), (M3,10) and (M3,15) ) on our map.

Playable characters:

  1. Cooper - he is available for the entire mission and you can use all his skills and equipment right away.
  2. Hector - he is available for the entire mission and you can use all his skills and equipment immediately.

Mission 3: Badges / challenges

In mission 3 you can find a total of 8 Badges. We have listed and explained them below. Challenges are initially hidden, although you can complete them during the first playthrough of the mission.

Make the deaths of 4 targets look like accidents

This is the best way to play the whole mission, because murdering the targets by causing accidents reduces the risk of triggering an alarm and you dont have to worry about eliminating other enemies in the area beforehand - Desperados 3: Mission 3 - map, badges - Mission 3 - Troublemakers in Flagstone - Desperados 3 Guide

This is the best way to play the whole mission, because murdering the targets by causing accidents reduces the risk of triggering an alarm and you don't have to worry about eliminating other enemies in the area beforehand. We have described in detail how to arrange all 4 accidents on the following pages of our walkthrough:

  1. Jarvis (M3,1) can be kicked by the bull and killed. To irritate the bull you have to toss a coin at it.
  2. Wild Marge (M3,2) can be poisoned by pouring laudanum into a liquor barrel.
  3. McBane (M3,3) may die by being crushed by the wall of the building that is under construction.
  4. A church bell may fall on The Duke (M3,4).

Don't kill or knock out anyone in the train track area

We are talking about the northeastern part of the map, that is, the construction site adjacent to the railway track where McBane can be killed (M3,3) - Desperados 3: Mission 3 - map, badges - Mission 3 - Troublemakers in Flagstone - Desperados 3 Guide

We are talking about the northeastern part of the map, that is, the construction site adjacent to the railway track where McBane can be killed (M3,3). We recommend sneaking into the area by using the easternmost passageway. The opponents are positioned in such a way that you can sneak into the next bushes and obstacles without having to eliminate them. Head north towards McBane. You can eliminate him in any way you want (it's worth distracting him). All that matters is that no one else dies or gets stunned.

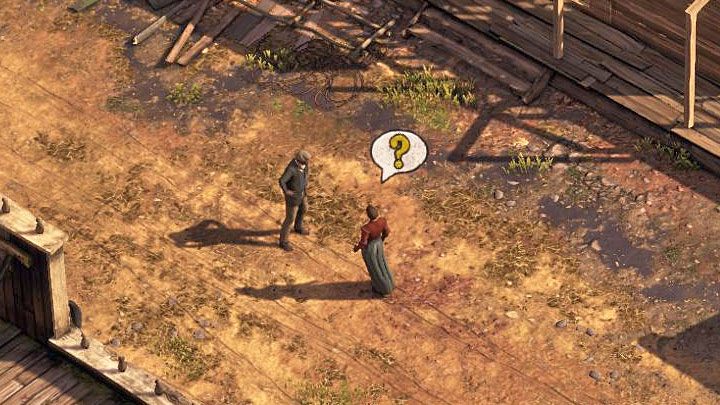
Don't touch any bushes or haystacks

It is best to replay the whole mission just for this challenge - Desperados 3: Mission 3 - map, badges - Mission 3 - Troublemakers in Flagstone - Desperados 3 Guide

It is best to replay the whole mission just for this challenge. Play on a easy difficulty level so you can easily avoid being spotted by your opponents. You can also switch to Highlight Mode, where interactive elements are highlighted. This will allow you to stay away from all kinds of bushes (an example of highlighted bushes is shown in the above picture). Try to limit all optional attacks on your opponents and if you need to hide a body, look for other ways, for example, throw the corpse behind a large obstacle or throw it into a well.

Bury Josh

Josh is one of the common bandits who takes part in the funeral in the northern part of the map (M3,17) - Desperados 3: Mission 3 - map, badges - Mission 3 - Troublemakers in Flagstone - Desperados 3 Guide

Josh is one of the common bandits who takes part in the funeral in the northern part of the map (M3,17). Wait until the funeral is over, so Josh will leave the grave and stop at the ladder leading to the roof of the church (M3,4).

Besides eliminating Josh, get rid of all other enemies from the cemetery. Only then pick up Josh's body and throw it into the open grave.

Listen in on 10 private conversations

This is a fairly simple task - Desperados 3: Mission 3 - map, badges - Mission 3 - Troublemakers in Flagstone - Desperados 3 Guide

This is a fairly simple task. As you complete your mission, look for NPCs with comic book bubbles over their heads symbolizing conversation. Stop next to these characters to eavesdrop the conversation.

Kill 3 targets at the same time

Become interested in this challenge only after you've explored the whole map and completed the mission for the first time, as it is very troublesome and forces you to know the circumstances in which the main targets may die. Below we present an example of how you can complete this challenge:

  1. Complete the preparations for poisoning Wild Marge (pour laudanum into the barrel).
  2. Quickly move hero 1 to the site where you can drop the wall on McBane.
  3. Quickly move hero 2 to the church tower with the intention of dropping the bell on Duke.
  4. Plan to push the wall and drop the bell in the Showdown Mode.
  5. Launch the planned actions when the Wild Marge gets poisoned (after the waitress delivers the poisoned drink).

Speedrun: Complete the mission in under 07:00 minutes

Be sure to play on the easy difficulty level to be able to reach the main objectives of the mission more quickly. In the case of Jarvis and Duke, it is best to use the option of an arranged accident to avoid confrontation with other enemies in the area. As for Wild Marge and McBane, you can kill them with a firearm or a throwing knife. If you play on easy and you alarm the area, you will still have time to escape. We also advise you to frequently save your game and load an older save if you wasted too much time in some locations.

Complete the mission on Hard difficulty

This is the best choice to complete the mission for the first time. Reaching some of the mission's targets (especially Jarvis) is not particularly easy, although you don't have to rush it and have an opportunity to save your game in case of any mistakes.

See/Add Comments

You are not permitted to copy any image, text or info from this page.

This site is not associated with and/or endorsed by the THQ Nordic / Nordic Games or Mimimi Games. All logos and images are copyrighted by their respective owners.

Copyright © 2000 - 2024 GRY-Online S.A. for gamepressure.com, unofficial game guides, walkthroughs, secrets, game tips, maps & strategies for top games.