

Desperados 3: Mission 10 - map, badges Desperados 3 guide, walkthrough
Last update: 24 February 2021
Key points of Desperados 3 - Mission 10
Areas where you can find the suspects (main mission targets)
Important locations on the map
On this page of the Desperados 3 world atlas, you can find a high-quality map of mission 10 - Back Alley Jazz. It it the map of New Orleans, where the action of the mission takes place. Protagonists must find an important NPC and then get to the location where Isabelle's friend - Wayne - is being held. In our walkthrough guide, we have included all of Mission 10's challenges (badges) regarding e.g. completing the mission without killing anyone.
The full Mission 10 walkthrough description can be found on the below pages of this chapter. Our guide also contains links and indications that refer to the map. For example, the designation (M10, 1) indicates that you should look for a red point number 1 on the Mission 10 map, while the designation (M10,5) indicates that you should look for the blue point number 5 on the Mission 10 map.
Mission 10: Markings on the map
- Red points mark the locations of Suspects. You can eliminate or rob any of them.
- Red dots represent the opponents in New Orleans, while the white dots symbolize the civilians. There are loads of them in the city. They can raise an alarm if, for example, they notice an attack.
- We have marked all important locations (worth visiting) with blue points. Descriptions of these areas can be found just below the map.
Mission 10: General information

Mission 10 (Back Alley Jazz) is the first one to take place on the streets of New Orleans. In the early part of the level, the characters travel through many public locations and meet a lot of neutral characters. Unfortunately, the presence of large numbers of civilians makes it difficult to eliminate enemies and sneak into forbidden areas marked with red lines. There is a high risk that an attack on any opponent could be recorded by others. However, Kate is able to obtain a prostitute's disguise in this mission and use it to enter inaccessible locations.
The first part of the mission features some nonlinearity and revolves around the three suspects. You can reach all three characters or take action to determine which of the suspects has the right letter to advance to the second stage.
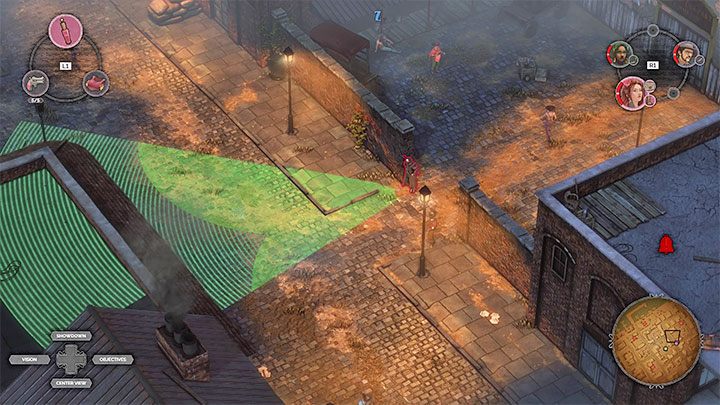
In the second part of the mission, the heroes must pass through many side alleys on their way to the warehouse area. Kate can still rely on her disguise, though in addition to enemy Long Coats she must also be wary of the guard dogs. The overall route through the alleyways is pre-determined, but you can choose different paths along the way and climb onto the roofs of some buildings, which is an ideal proposition for McCoy and his snipers.
Playable characters:
- Kate - she is available throughout the entire mission. You can use all of her skills and equipment. There is also an opportunity to get an optional disguise for Kate.
- McCoy - he is available throughout the entire mission and you can use all his skills and pieces of equipment immediately.
- Isabelle - she is available throughout the entire mission. You can use all of her skills and equipment.
Mission 10: Badges / Challenges
There are a total of 8 badges to collect in Mission 10. We have described all of them below. Challenges are initially hidden, although you can complete them during the first playthrough of the mission.
Challenges are unavailable if you play on the Beginner difficulty level. In order to access the challenges, you need to choose at least the normal difficulty level. The same goes for replaying missions to get the remaining challenges.
- Don't kill any suspects
- Kill all suspects
- Don't jump, and don't use any ladders, ropes or ivies
- Kill 3 guards using dogs
- Don't kill anyone
- Get information on aliases and locations for all suspects - Gather the codenames and locations for all suspects
- Speedrun: Complete the mission in under 15:00 minutes
- Complete the mission on Hard difficulty
Don't kill any suspects
This and the next challenge are mutually exclusive. Suspects (M10,1) (M10,2) (M10,3) are three people on the map who are in possession of letters. If you investigate properly, you only have to pick up the letter from the one right suspect. In order to win the badge, however, you must reach all three characters.
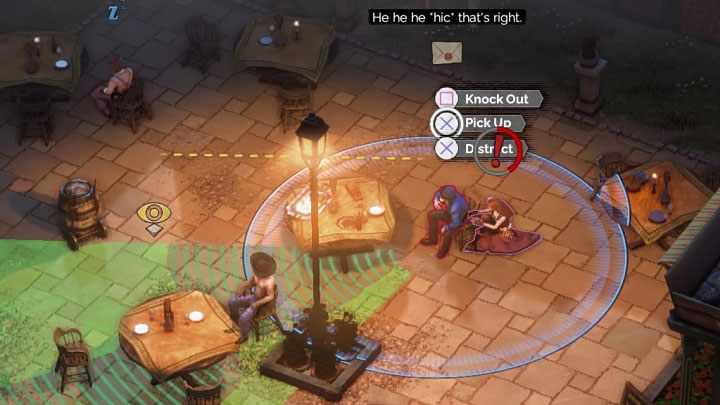
The game does not allow you to kill any of the suspects. This means you have to rob them as Kate in the guise of a prostitute - when you stand behind the suspect you have to hold down the interaction button. You can't activate pocket theft right away, as you'll be spotted Use our walkthrough guide to figure out how to clear the area and sneak up to each of the suspects.
Kill all suspects
You can eliminate suspects (M10,1)(M10,2)(M10,3) in any way. However, we still recommend sneaking up and relying on Kate's disguise to be able to safely reach the designated NPCs and acquire their letters. If you've already obtained a letter that allows you to advance in the mission, you might decide to shoot the remaining suspects as McCoy from a distance. Alternatively, setting an alarm in the first part of the map won't prevent you from crossing the second part of New Orleans.
Don't jump, and don't use any ladders, ropes or ivies
This is a difficult challenge that is best left for repeating missions at a easy level of difficulty. Prohibitions on jumping and using ladders, ropes, and vines will make it much harder for you to complete the mission. Keep in mind that you can still reach some roofs using building entrances. But you can't jump off the rooftops and you have to go back down the same road. Here are some important information about this Badge:
- You can easily get a disguise for Kate (M10.5) because you reach the roof of the house using the door.
- Try to eavesdrop on all 6 conversations (M10,3)(M10,4) so that you can easily identify the suspect with the letter. You'll only have to get to one suspect instead of all three.
- When crossing the back alleys (M10,9) (M10,10) you can send McCoy to the rooftops to cover Kate, but each time use only the building entrances.
- The final part of the mission will be much more troublesome. You can't get into the storage area by climbing a ladder to the roof of the building (M10,12). Instead, you have to choose the main entrance (M10, 11) and this may mean having to deal with an extra Long Coat opponent.
Kill 3 guards using dogs
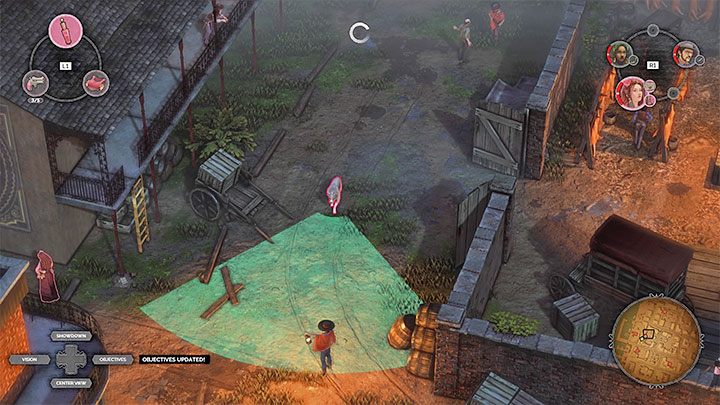
You will encounter the first guard dog when you reach the first back-alley (M10,9), which is when you find the right letter on one of the suspects.
Sneak up on the animal as Isabelle and use her mind-control skills on the dog. The key to success is to choose isolated opponents, i.e. those who are not in the field of view or the hearing range of other enemies. Otherwise, the dog will get shot prematurely. If you don't see any good "candidates" to be bitten by a dog, get rid of uncomfortable opponents before exercising mind control. Do this a total of 3 times.
Don't kill anyone
This is a difficult challenge that is best left for repeating missions at a easy level of difficulty. The ban on killing characters will be particularly troublesome for McCoy - you can't use the sniper rifle to eliminate opponents in hard-to-reach locations. As a result, you have to spend more time distracting or disorienting/blinding these types of characters.
Get information on aliases and locations for all suspects - Gather the codenames and locations for all suspects

The pattern of action is described in detail on the next page of our description of the transition. It involves eavesdropping on six conversations in the first part of the mission. Three conversations can be overheard in the public areas of New Orleans (M10,3). Simply stop by the talking characters.
Three more will take place in forbidden locations (M10,4). The solution to this problem is to get a disguise for Kate (M10,2). Even then, in forbidden zones, you must avoid being detected by Long Coats, who can compromise the heroine's disguise. Eavesdrop on conversations from cover so you don't get noticed by Long Coats.
Speedrun: Complete the mission in under 15:00 minutes
Be sure to play at the easy difficulty level, so that you will encounter less problematic opponents on the map, and enemies ' reactions will be slightly slower. Don't visit all three locations with suspects. Acquiring a disguise for Kate is worth the interest, however, because it can be acquired quite quickly and will be useful later to distract some enemies from the other side of the map. Remember to frequently sever and load older records in case too much time is wasted in a given location.
Complete the mission on Hard difficulty
This is the best choice to complete the mission for the first time, although playing at a high level of difficulty you will have to deal with "uncomfortably" spaced opponents. This is especially troublesome when sneaking into suspects, as 2 out of 3 such NPCs are watched by elite enemies of Long Coats. Fortunately, this challenge doesn't have a time limit, and you can save your progress freely.