

Desperados 3: Mission 2 - map, badges Desperados 3 guide, walkthrough
Last update: 24 February 2021
Key points of Desperados 3 - Mission 2
Important locations on the map
Supply chests
This page of the world atlas for Desperados 3 has a detailed map of mission 2 - Running Late on Payday. We have marked all the important places around the robbed train and described each of them in detail. We have also included all the challenges (Badges) in mission 2, and they relate to e.g. saving all innocent people or killing bandits with dynamite.
The full walkthrough for mission 1 is on the next three pages of this chapter. Our guide also contains links and indications that refer to the map. For example, the designation (M2,5) indicates that you should search for the blue dot with the number 5 on the map for mission 2, and the designation (M2,3) indicates that you should search for the green dot with the number 3 on the map for mission 2.
Mission 2: Markings on the map
- Red dots symbolize bandits who attacked the train and are hostile, while the white dots symbolize horses and innocent civilians who traveled on the train.
- Blue dots indicate all the important places that can be explored. Descriptions of these points are located directly below the map.
- Green dots indicated where you can find boxes with ammunition for the weapons used by Cooper and McCoy.
Mission 2: General information

Mission 2 (Running Late on Payday) opens the first chapter of the campaign called The Doctor & The Bride. This isn't a fully-fledged mission yet, because as you progress through it, you will find new tutorials and gradually unlock new skills and equipment. Also, the initial part of the mission is rather linear and forces you to follow a predetermined path. The second part of the stage will give you a little more freedom. This stage focuses on train robbery. Cooper didn't take part in it; he was only one of the passengers. The main character must deal with the bandits and use dynamite to blow up boulders lying on the rails. Important information about this mission is that the team will be joined by another hero - Doc McCoy. From now on, you can control two characters at the same time.
Playable characters:
- Cooper - Available throughout the entire mission. The game will gradually unlock his new inventory items.
- McCoy - You must save him first (M2,4). This character also doesn't have immediate access to his gadgets.
Mission 2: Badges / challenges
Mission 2 has a total of 8 Badges. We have listed and explained them below. Challenges are initially hidden, although you can deal with them during the first playthrough.
- Save all groups of civilians 5/5
- Kill 3 bandits at the same time
- Kill 10 bandits using dynamite
- Distract 3 bandits at the same time using Cooper's coin
- Don't save during the mission
- Don't use firearms
- Speedrun: Complete the mission in under 05: 30 minutes
- Complete the mission on Hard difficulty
Save all groups of civilians 5/5
This task isn't very difficult, although it can be easily failed at the very end.
The first four groups of civilians are in places (M2,3), (M2,10), (M2,14) and (M2,1). Every time you need to get rid of all the surrounding bandits. You don't need to rush, even if the bandits are shooting at hiding civilians or aiming at them. Rescued civilians will always thank you for your help and then run away.
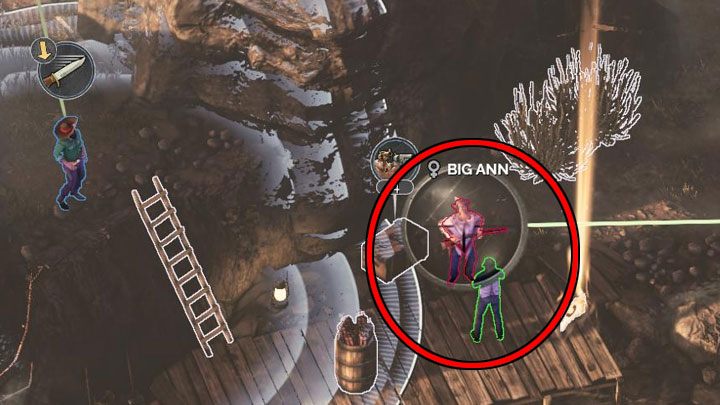
The last civilian from the fifth place is the most problematic - he is being interrogated by Big Ann (M2,17). The problem is that Big Ann might shoot this civilian soon after you get close to them. This isn't caused by your team getting caught, it will simply trigger the corresponding story event. As a result, you must be the first to kill Big Ann before she uses the weapon. We recommend using Showdown Mode to get rid of Big Ann and the bandit to her left at the same time, as shown in the picture.
It is worth noting that you can make it easier for yourself and get rid of all the "lesser" bandits in the area first. Don't get too close to Big Ann too soon, so you won't trigger the interrogation scene.
Kill 3 bandits at the same time

This is a very simple challenge that can be easily unlocked at the end of the mission. One of the main objectives is to get dynamite in (M2,17) and throw it at the boulders blocking the railway tracks.
The explosion triggers an alarm - a three-man patrol will appear in the area. Hide and wait for the alarm to stop - the bandits will start patrolling the area around the train. Just throw another dynamite stick at them. The explosion should kill all enemies without any problems, even when you are playing on hard difficulty level.
Kill 10 bandits using dynamite

This is a very similar challenge to the one described above. For reference, dynamite is located on a hill above the tracks (M2,17), and to get to it, you must deal with Big Ann and at least 1-2 enemies nearby.
If you want to get the badge, don't eliminate all the enemies immediately after encountering them. Try to avoid them as much as possible, so that when you get access to the dynamite, you can go back to them. After the alarm is triggered, the bandits will receive reinforcements. You can let yourself get detected by enemies deliberately (preferably by those standing farther away) and then hide while waiting for reinforcements to arrive.
Distract 3 bandits at the same time using Cooper's coin

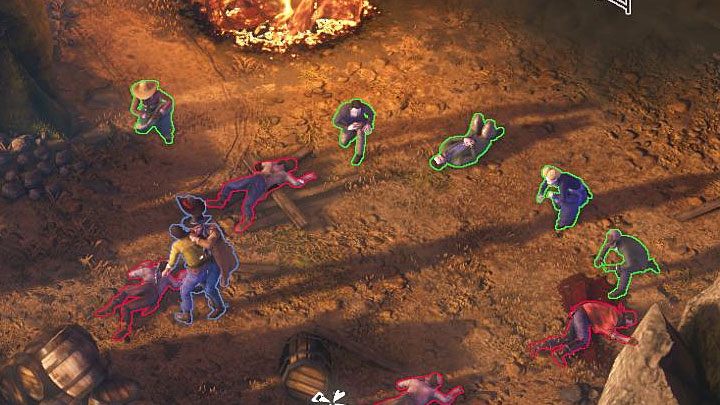
There are a few parts in the mission where you complete this challenge. The picture above shows an example of a good location for this challenge - the place where hostages are held (M2, 10). A large group of opponents spawns here, even when playing on the easier difficulty levels.
Another very good opportunity to complete the challenge comes after destroying the boulders (M2,17) lying on the rails. After that, wait for the three-man patrol. Instead of dynamite, throw a coin and make sure that it lands in front of the opponents.
Don't save during the mission
This challenge is best done separately, while you are playing on easy difficulty level. The enemies' awareness will be reduced, and even if you make some mistake, you will have more chances to escape and, if necessary, heal the hero.
Don't use firearms

You can get this challenge even during your first playthrough of this mission. Here are some general tips:
- Try to use a throwing knife as a replacement for Cooper's revolvers, but don't forget that you can't make a second throw until you pull the knife out of the corpse.
- The most problematic locations are (M2,3) and (M2,4), when you still need to work alone and can't rely on team actions in Showdown Mode. In both cases, it is best to throw a knife at the first opponent and attack the second with your fists. You can also experiment with throwing coins to separate enemies from each other temporarily.
- For McCoy, the most problematic places are (M2,6) and (M2,13), where the scouts in ponchos are located (they don't leave their posts). When you are in the point 6, wait for a good moment and order Cooper to run to the ivy (check the picture above). As for the location from point 13, ignore the enemies in the area to the west of the train and approach the enemy in poncho from the side of the hill (by going down the ladder).
Speedrun: Complete the mission in under 05: 30 minutes
Be sure to play on easy difficulty level so that you can avoid enemies faster or just run, even if you trigger an alarm. Don't waste time on rescuing the civilians. At the end of the stage, you can use dynamite to clear the route to the place where the mission ends. We also recommend saving frequently - you can load the previous state if you lost too much time in a given location.
Complete the mission on Hard difficulty
This is the best way to complete the mission for the first time. This isn't a very difficult level, and even when you are playing on hard, you can easily complete it while saving all the civilians.