
Desperados 3: Get dynamite - mission 2, walkthrough Desperados 3 guide, walkthrough
Last update: 22 February 2021
This page of the guide to Desperados 3 has the second part of the walkthrough for mission 2 - Running Late on Payday. Cooper and McCoy must work together to get to the locomotive. The team's task is to get dynamite stored in a barrel on a nearby hill. Of course, the heroes will encounter many bandits standing on their way.
Our walkthrough for mission 2 refers to the map in the world atlas, which can be found on the first page of this chapter. For example, the designation (M2,5) indicates that you should search for the blue dot with the number 5 on the map for mission 2, and the designation (M2,3) indicates that you should search for the green dot with the number 3 on the map for mission 2.
Our walkthrough is based on hard difficulty. If you choose one of the lower levels, some actions will be easier to perform. We don't recommend choosing the Desperado difficulty for your first playthrough. Leave it for later.
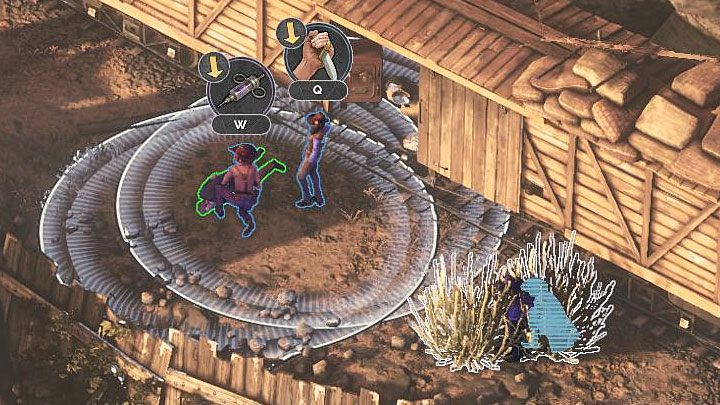
After saving McCoy (M2,4), you can immediately use one of his skills, namely the medicine bag (D key on PC). This item has two main uses - it can force an opponent to approach the bag (except for enemies in ponchos - more on this later in the guide) and temporarily blind them after they open it.
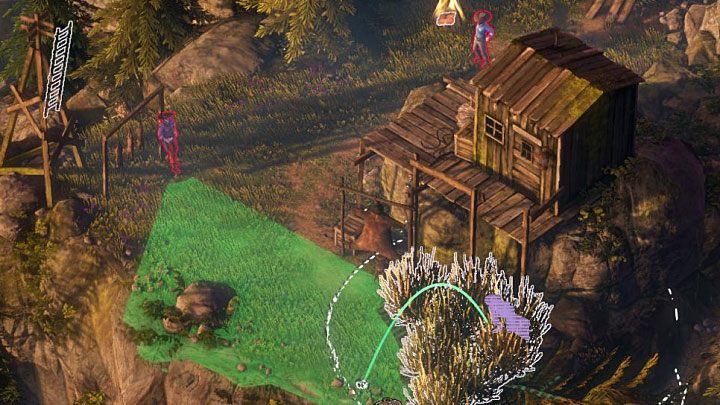
The bag will help you get rid of two enemies walking near the hut (M2,5). Throw the bag in such a place that it would get the attention of only the first enemy. The important information is that the enemy is blinded only for a short time - you need to quickly finish him off. Use McCoy's syringe (A key on PC) to kill him, or select chloroform (Y key on PC) to simply render him unconscious (tie him up!). Do the same with the second bandit.
Another area is observed by the opponent in a poncho (M2,6) - the unique feature of these enemies is that they don't move from their place, even if you use a medicine bag (or other similar "gadgets" of other heroes). The game unlocks McCoy's scoped revolver - Buntline. Using this weapon is the most obvious way to get rid of the enemy in a poncho. Stand in an open area, activate the skill (S key on PC), and aim at the enemy. The green line means that you can make a shot, and the red line means that there are obstacles on the way.
If you want to complete the no firearms challenge, then order Cooper to sneak and stand at the northern edge of the glade. Run fast when the enemy in the poncho starts looking the other way. No matter how you dealt with that problem, Cooper has to lower the rope ladder for McCoy - climb up the ivy to get to the place where the opponent in a poncho stood.
The next place you have to visit is a small camp with 4 opponents (M2,7). You can get rid of them easily. Pay attention to the gunslinger, who stops near one of the enemies and in the main part of the camp alternately. Wait until he moves towards the camp, and use the medicine bag on the enemy with whom she spoke. Make him approach the bushes where you can easily eliminate him and hide his body.
After that, get rid of the gunslinger. There are only two enemies left. Use the medicine bag and Cooper's coin again. This should cause the enemy to turn for a moment towards the medicine bag and, after noticing it, move to it.
The next target is the entrance to the mine (M2,8) - this place is much more problematic. An opponent in a poncho is standing at the table, and you can't force him to move away. One of the opponents is moving bags to the mine's entrance. There are several possible solutions to this problem:
- Throw a knife at the opponent in a poncho when the opponent with bags stands at the entrance to the mine. Run up to this enemy and quickly knock him out.
- Use Cooper's coin to distract the opponent in poncho for a brief moment. Use this opportunity to quickly move McCoy to the bushes behind him. Use Showdown Mode to plan a joint attack - McCoy uses a syringe on the opponent in a poncho, and Cooper uses a knife on the enemy carrying bags.
You shouldn't have problems eliminating the last enemy - he doesn't turn in default. This can only happen if an alarm is triggered or one of your attacks is within his hearing range.
Jump off the car and reach 2 opponents (M2,9). The game will suggest using Showdown Mode to attack them. You can use any attacks e.g. order Cooper to use a knife on the first opponent and McCoy to use a syringe on the second.
A little further on there is a large group of opponents holding hostages (M2,10). You can act here in two ways - if you just want to continue the mission, use the ladder to climb to the roof of the next train. If you want to save the hostages (one of the challenges of this mission), then you need to get rid of all the bandits. This won't be easy. It is easy to get spotted here. Also, two of the enemies are wearing a poncho.
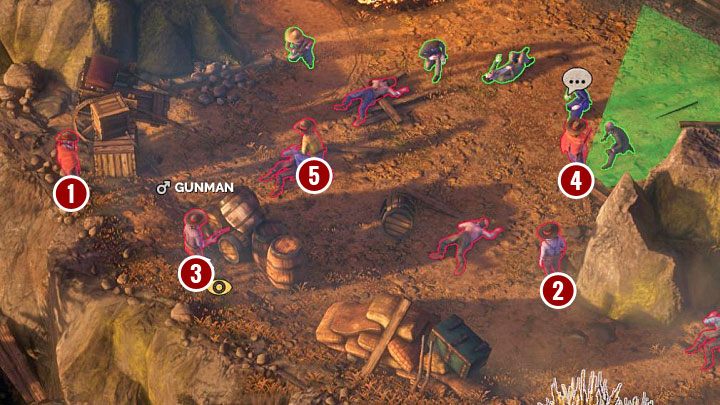
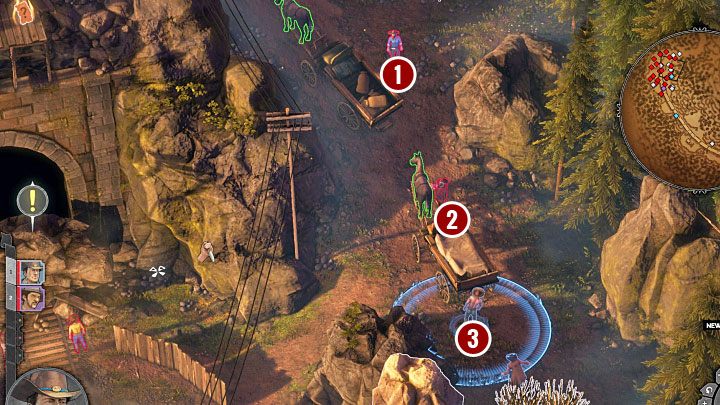
We recommend dealing with bandits in the order shown in the picture:
- Opponent 1 wears a poncho and travels along the edge of the cliff. Wait until he moves as far to the south as possible, and attack him from behind when he is walking next to the sandbags. The attack won't be seen by the other opponent in a poncho. Wait for the right moment to move the body into the bushes.
- Use the medicine bag and coin to make enemy 2 turn 180 degrees and move away from the others. Get rid of him in any way and then hide his body in the bushes.
- Use the medicine bag and coin again, this time to attract the attention of the enemy 3. Make sure that the bag lands behind the rocks and is out of sight of the enemy in a poncho.
- Go behind the enemy 4 (the other in a poncho) and get rid of him.
- Eliminate opponent 5 however you want.
Move on the train cars and head north. You will end up in a slightly larger area, which finally gives you a little more freedom. In this area, it is possible to rescue two new groups of civilians (optional challenge).
The first group of civilians is guarded on the right (M2,1). Pay attention to the opponent in the green shirt - he runs alternately between the areas to the left and right of the train. Before you attack his friend guarding the prisoners, make sure that one of the opponents to the north doesn't go/look in this direction. In addition to the hostages, you will find an ammunition box of for the Buntline (McCoy's scoped gun).
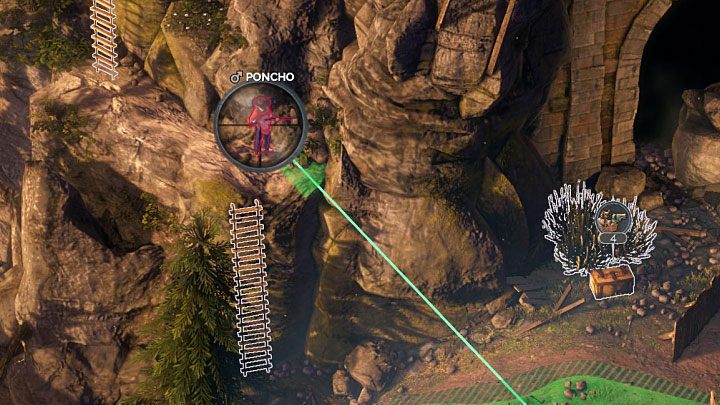
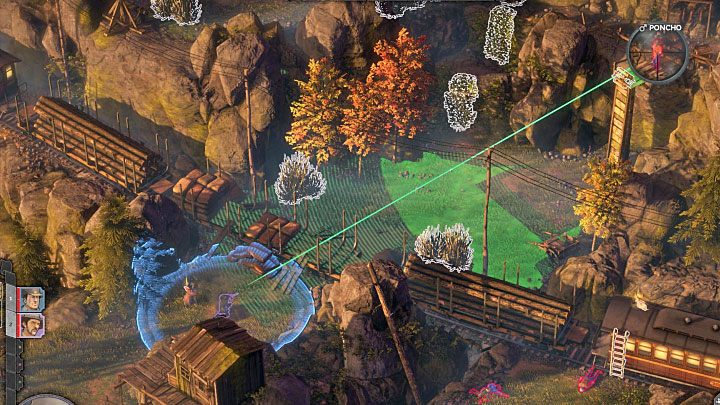
Buntline is useful for rescuing civilians held west of the train (M2,14). Do not rush with eliminating the bandit aiming at them, because this way you can easily raise the alarm. An enemy in a poncho is standing on a nearby hill (M2,13) - he watches the area. It's best to shoot him with a Buntline (don't worry - no one will notice his death or find his corpse). If this isn't possible, then it is better to postpone the rescue of civilians for later and go down the ladders to approach the enemy in a poncho.
That's not all. Take care of the aforementioned running bandit in a green shirt and the enemy who comes up to the train from time to time. Only then decide to eliminate the bandit targeting the prisoners.
There are two paths leading to the hill. If you choose the right path, you will be able to drop a large boulder (M2,11) on two or three bandits. Even if other enemies notice that they will qualify it as an accident, and the alarm won't be triggered. The road leading to the hill is guarded by 3 bandits - it is very important to first get rid of the enemy standing closest to the top of the hill. Start going down the hill and eliminate more bandits.
If you choose the left path, you will pass by the place where the enemy in a poncho stood (M2,13), and immediately get to the upper camp (M2,16).
Regardless of the chosen path, don't approach the area with the barrel with dynamite yet (M2,17). Otherwise, the last civilian may be killed prematurely, and you will fail one of the challenges of this mission.

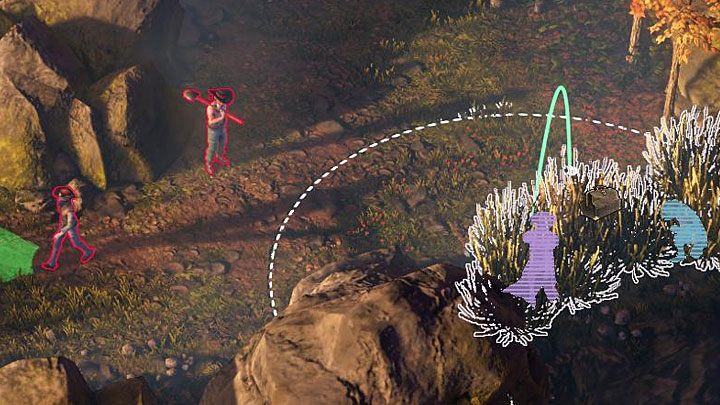
A fork in the road is in the northern part of the map (M2,15) - there are 5 bandits there. You don't have to kill them but this can be helpful in the mission. Start by getting rid of the bandits standing near the wagons. Note that one of the enemies is wearing a poncho and that one of the enemies is moving here from the camp (M2,16). Wait until the above-mentioned bandit starts to move away, and act quickly.
We suggest using the Showdown Mode to simultaneously eliminate two enemies shown in the picture - the opponent in a poncho and the enemy leaning on the train car. Then hide their bodies before the other bandit returns from the camp.
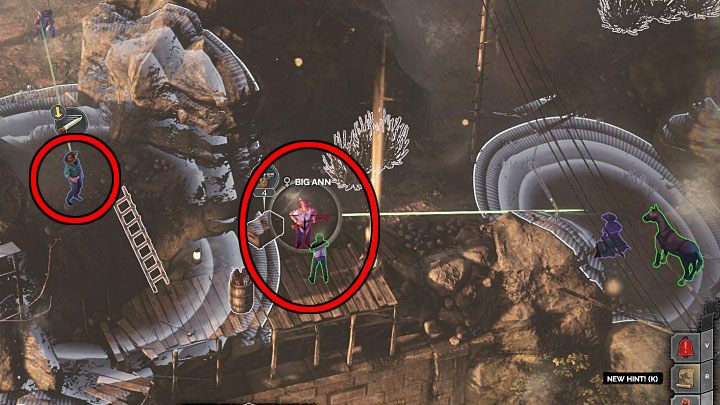
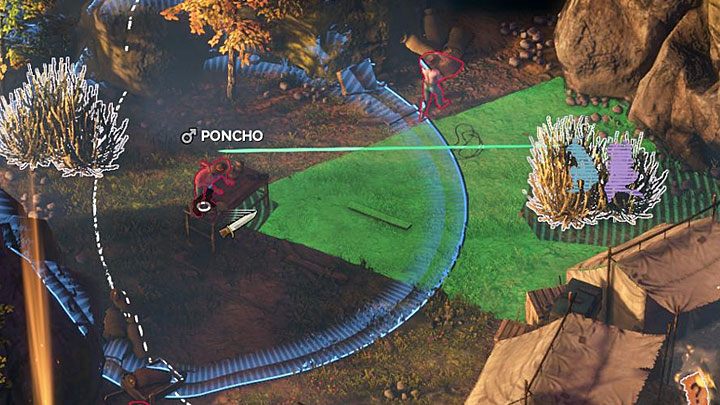
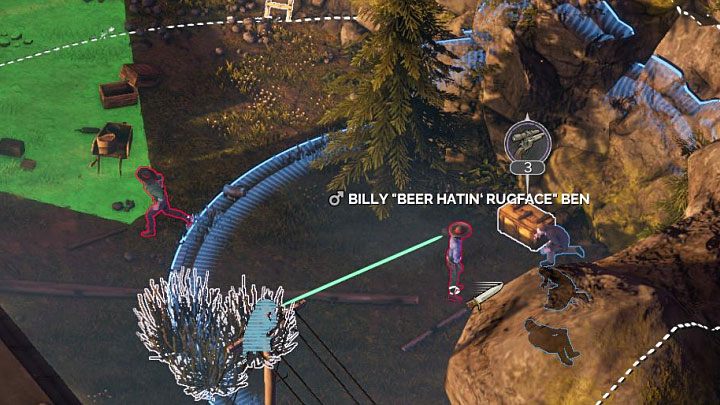
The most problematic moment of this mission is when you have to rescue the last hostage interrogated by Big Ann - these characters are standing next to a dynamite barrel on a hill above a destroyed tunnel (M2,17). When you get closer to them, you will trigger the final part of the interrogation. Big Ann will lose her temper and shoot the man. The death of a civilian doesn't mean that you have failed the mission. However, you won't be able to complete one of the challenges.
You can prevent the civilian's death by killing Big Ann before she uses a rifle. The Showdown Mode can be very useful here. Use it to simultaneously attack Big Ann and the gunman watching the interrogation site - see the picture.