

Desperados 3: Mission 16 - map, badges Desperados 3 guide, walkthrough
Last update: 24 February 2021
Key points of Desperados 3 - Mission 16
Main mission target - Frank
Important locations on the map
On this page of the World Atlas for Desperados 3 we have posted a detailed map of the mission 16 (final) - The Old and the New. All the important locations in the canyon which is traversed on the way to the chapel are marked - the location is a site of the final confrontation with Frank. The section also lists and offers tips for challenges (badges) for Mission 16 - these involve dropping large boulders on enemies or reaching the cemetery from different directions.
A full walkthrough for Mission 16 can be found on the following pages of this chapter. Our walkthrough also contains links which refer back to the map. For example, the designation (M16,5) indicates that you should find a blue point numbered 5 on the map for Mission 16.
Mission 16: Markings on the map
- Red spot on the map is Frank, who you confront in the final moments of the mission. It will appear upon reaching the cemetery adjacent to the chapel.
- Red dots symbolize the opponents in the canyon area. During this mission, Kate can obtain a disguise that allows her to explore the location freely (with the exception of elite enemies - Long Coats).
- We have marked all important locations (worth visiting) with blue dots. Descriptions of these areas can be found just below the map.
Mission 16: General information

Mission 16 (The Old and the New) is the final stage of the campaign. Its main objective is to reach Frank, who is staying in the cemetery chapel located at the opposite end of the map. On their way to the final antagonist's location, all five heroes must pass through a canyon that is swarming with opponents. The disguise for Kate, which you can get in the early stages of the mission will be a big help. It helps with distracting opponents and sneaking into guarded locations.
The canyon is visibly divided into the left and right sections. Some team members start in the left part of the map and some in the right. Fortunately, you don't have to stay on the same side of the canyon (unless you're after one of the challenges) which you've begun in, and can freely use one of a few passageways connecting both parts of the map. There are two paths leading to the chapel. The left path, in our opinion, is much harder, even for a single hero. The right path allows you to reach your destination more easily. There is a separate challenge associated with each path, so it is ultimately worth exploring both (though not necessarily within the same playthrough).
Canyon crossings are protected by three-man patrols led by Long Coats. In general, they can be dealt with in two ways - either by observing the patrol's route and sneaking past it, or attacking the patrol with Hector's sawed-off shotgun. The good news is that in several places in the canyon you will find, among other things, large boulders, a cannon, or a mining wagon. They allow you to arrange a variety of accidents so that you can get rid of inconvenient opponents without the risk of setting off an alarm. In some places, however, you have to be careful about leaving footprints in the sand, although you can also use this mechanic to draw some enemies out of their default patrol routes or posts.
Playable characters:
- Cooper - begins the level on the left side of the canyon (M16,1).
- Hector - starts on the left side of the canyon (M16,1).
- Kate - begins the level on the left side of the canyon (M16,1).
- Isabelle - begins the level on the right side of the canyon (M16,2).
- McCoy - begins the level on the right side of the canyon (M16,2).
Mission 16: Badges / Challenges
In Mission 16, there are a total of 8 Badges available. We have listed and explained them below. The challenges are initially hidden, although you can still unlock them during your first playthrough.
Challenges are unavailable if you play on the Beginner difficulty level. In order to access the challenges, you need to choose at least the normal difficulty level. The same goes for replaying missions to get the remaining challenges.
- Don't switch sides with any character
- Reach the chapel via the left entrance
- Reach the chapel via the right entrance
- Don't kill anyone (except mission targets)
- Kill 6 guards with falling rocks
- Don't use a disguise
- Speedrun: Complete the mission in under 15:00 minutes
- Complete the mission on Hard difficulty
Don't switch sides with any character
This is a difficult challenge that you should approach only when repeating the mission at a easy difficulty level, As this means that there will be less opponents on the map and sneaking past them will be much easier. To get this badge:
- Cooper, Kate, and Sanchez must remain on the left side of the canyon - the side where they began the mission. They must also choose the left path leading to the cemetery (M16,17).
- Isabelle and McCoy must remain on the right side of the canyon - the side where they began their mission. They must also choose the right path leading to the cemetery (M16,18).
It is worth remembering that you can freely eliminate opponents on the other side of the canyon, provided you won't cross to the other side. McCoy can use his sniper rifle on enemies on the left side of the canyon, and Cooper, Kate or Hector can, for example, use a cannon (M16, 10) to kill several opponents on the right side of the canyon.
Reach the chapel via the left entrance
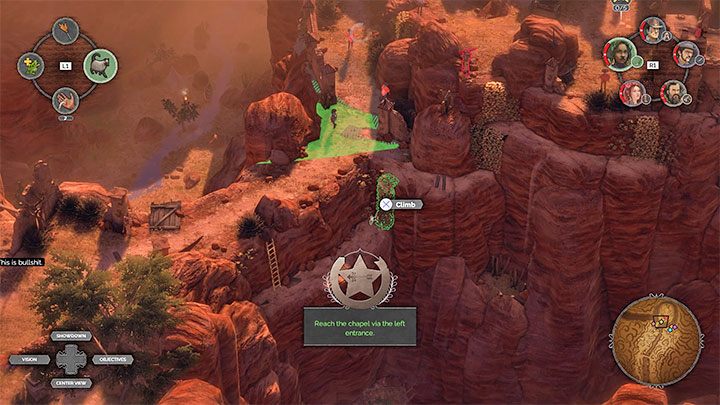
This and the next challenge are theoretically mutually exclusive, although after winning one of these badges you can load the previous save and choose a different path. This will allow you to win both badges in a single playthrough. You can also, of course, "not cheat" and choose a different path during next playthroughs.
The left path (M16,17) is unfortunately much more difficult to pass through because of e.g. a few Long Coats that are in each other viewcones. A walkthrough for this path can be found in our guide.
Reach the chapel via the right entrance
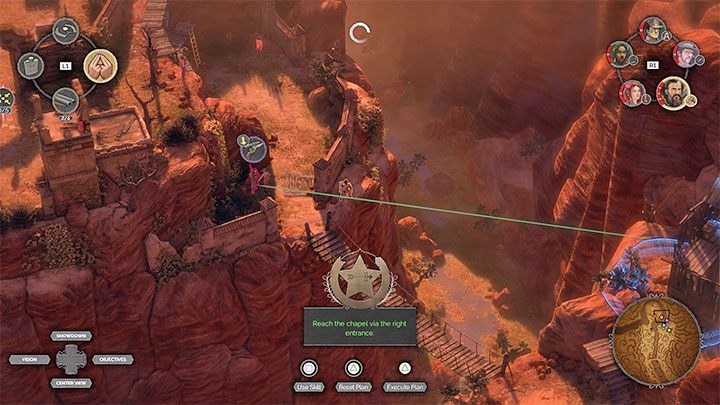
The right path (M16,18) involves crossing the bridge - this way is much easier to sneak through. A description of reaching the hill from the right side can be found in our solution.
Don't kill anyone (except mission targets)
This challenge complicates the mission immensely, so you should make an attempt to get it only when repeating the level on a easy difficulty level. The requirement to leave everyone alive is particularly complicated:
- Dealing with three-man patrols - you cannot take them out the easy way (using sawed-off shotgun) You must sneak past them or, for example, blind them with Kate's perfume.
- Avoiding snipers and characters standing on vantage points - You cannot use McCoy's sniper rifle (except for the final confrontation with Frank). Check snipers' viewcones often and try to distract them by using Kate.
- The final confrontation in the cemetery - you can only kill those bandits that aim their guns at McCoy along with Frank. All the other bandits in this location must be stunned or simply ignored.
Kill 6 guards with falling rocks

The first large boulder (M16.5) can be found above the location in the canyon area, where Kate's disguise is obtained.

A second large boulder (M16,6) can be found on the right side of the canyon, close to where Isabelle and McCoy begin their mission.
Dropping boulders as you found them will eliminate only 3 of the 6 required characters. Fortunately, this problem has an easy solution - take an interest in the more easily accessible second boulder and stun and tie a total of 6 nearby opponents. Move the bound enemies to where the pushed boulder will land - this is symbolized by a red circle. Only then do you push the boulder onto tied opponents.
Don't use a disguise
This challenge completely forbids the use of a disguise that can be obtained from the woman in the canyon (M16,4). It's best to ignore it completely.
Getting this Badge will cause you a lot of trouble, as Kate, once wearing a disguise, can effectively draw many ordinary opponents into secluded areas. We strongly advise you to play at a easy difficulty level, so that you meet fewer enemies that have slower reaction times.
Speedrun: Complete the mission in under 15:00 minutes
Play on the easy difficulty level in order to encounter less problematic opponents on the map. Also, enemy reactions will be a little bit slower.
15 minutes isn't much time, so you have to hurry. Bring the two groups of heroes together, e.g. by using the first crossing available (M16,5). Head towards the bridge (M16,18) and avoid all unnecessary confrontations along the way. Kate's perfume or Cooper's coin may help in avoiding stationary enemies. After advancing to the final confrontation with Frank, don't waste time getting rid of all the optional enemies. Focus on placing the characters as quickly as possible in places that will allow them to kill those targeting Cooper.
Complete the mission on Hard difficulty
This is the best choice when completing the mission for the first time, but playing on a high level of difficulty means having to deal with uncomfortably positioned opponents. The most trouble is likely to come from ordinary opponents who are in each others' viewcones. Many of them are unfortunately women and this prevents them from using flirting as a distraction.
In the final part of the mission, you'll find it easier if you choose the right path. Rely on sniper attacks and finishing Long Coat enemies around the cemetery area. Fortunately, this challenge doesn't have a time limit, and you can save your progress freely.