
Horizon Forbidden West: Seeds of the Past - walkthrough Horizon Forbidden West guide, walkthrough
This page of the Horizon Forbidden West guide contains the walkthrough for the main mission Seeds of the Past - Greenhouse, Demeter, and the boss Dreadwing.
Last update: 02 June 2022
On this page of our Horizon Forbidden West guide you can find a walkthrough for Seeds of the Past story quest. Our walkthrough explains how to get inside The Greenhouse, how to solve the puzzles in Ivy and Elm stations, how to restore the power to the control room, how to defeat Dreadwing, how to obtain the Vine Cutter, used to open metal flowers, and where to find DEMETER.
- Quest rewards
- Go to DEMETER's coordinates
- Kill the ambushers
- Search the complex
- Examine the console
- Find Test Station Ivy
- Examine the paired console
- Search the tunnels for an exit
- Find an entrance to Test Station Elm
- Search the Test Station Elm
- Restore power to the Control Room door
- Return to Alva
- Enter the tunnels
- Kill the Dreadwing - boss encounter
- Search Test Station Ivy
- Craft the Vine Cutter
- Return to the Data Core
- Recover DEMETER
- Return to the Base
Quest rewards
- 19200 XP
- 2 skill points
- Vine Cutter - an item that allows you to open metal flowers and destroy their vines. They will be useful during the quest and further adventures.
Go to DEMETER's coordinates

This is one of the 3 main quests you can undertake after your first visit to the Base and talking to GAIA (a part of The Eye of the Earth story quest) The quest has a recommended level of 24 - consider reaching this level of experience before embarking on the quest, as you'll have an easier time dealing with the boss encounter taking place during the quest.
You must travel to the ancient ruins located in the northwestern part of the world map. Upon approaching her destination, Aloy will be unexpectedly attacked by people hiding in the ruins.
Kill the ambushers

Avoid staying with the initial cover, as soon you'll be overwhelmed by melee-armed enemies. Kill them with your bow so to avoid melee combat.
The enemies hiding in the ruins can be eliminated with a bow or you can quickly close the distance between you and them. You can use the hooks to reach upper floors more easily. When dealing with archers, consider killing them with melee weapons, as they are weak in close combat.
After the battle concludes, explore the upper floor of the ruined building where the enemies were hiding. Proceed to the area shown in the screenshot and ride down the rope - you should be nearby The Greenhouse.
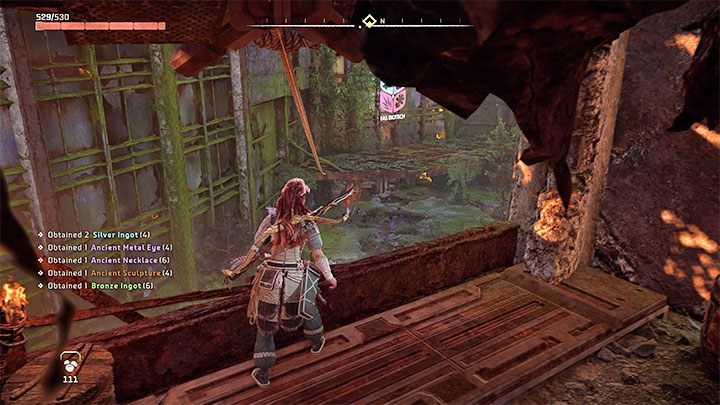
Search the complex
There are numerous loot containers to be found when exploring the greenhouse. You will also notice a metal flower - remember this location, as you'll be back here in the further part of the quest.
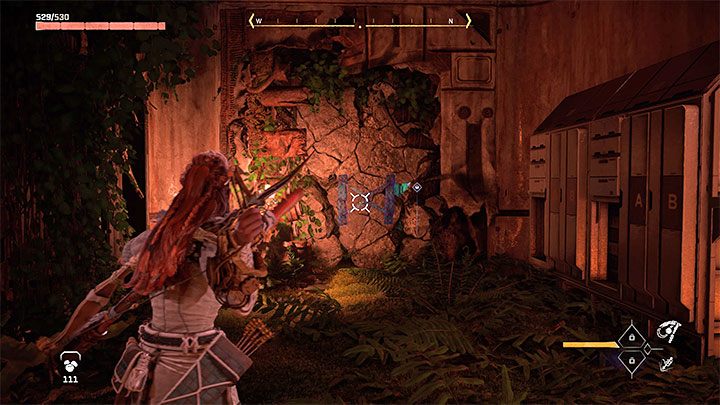
Use the Pullcaster on the weakened wall from the screenshot above to bring it down and unlock the path forward. You need to use the Pullcaster once again to rip the ventilation shaft grille from its hinges.
Examine the console
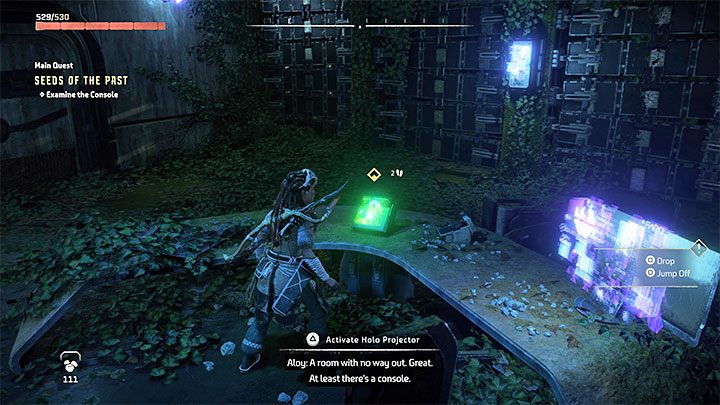
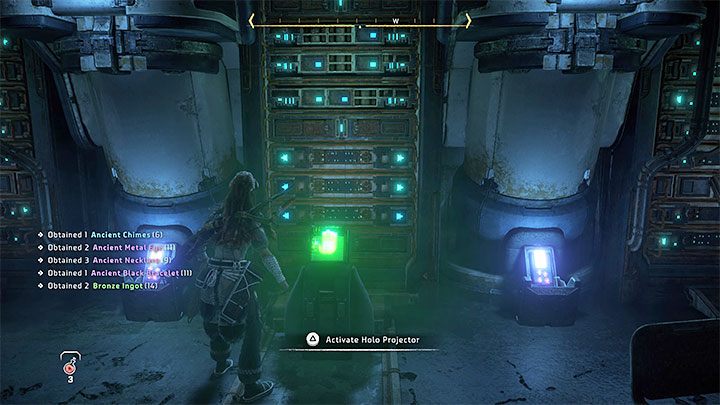
You will find yourself in a inactive elevator shaft. Follow the yellow elements while climbing to reach the open door on the upper floor. You will reach a room with a holo projector. Activate it to start the recording.
Find Test Station Ivy
Descend using the rope to reach a new area inhabited by enemies. They are not aware of your presence - use this advantage to get rid of them with stealth attacks.
f you've decided upon open combat, make use of barrels that place negative statuses on the enemies. Watch out for the opponent armed with Plasma Bomb Launcher - target him first, as you can pick it up once he is defeated and use it on remaining opponents.

After the combat concludes, travel to the southern door. A cut-scene depicting the meeting with Alva will be activated. You can exhaust all dialogue options, or ask the question pushing the plot forward. Alva will accompany you in certain parts of this quest, but she won't take part in combat.
Examine the paired console
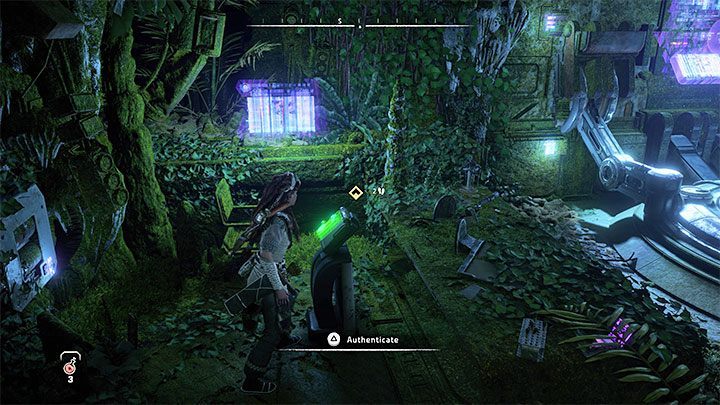
There are two consoles in the room which have to be activated at the same time. Approach the left console. Alva will approach the second one and both consoles will be activated.
Search the tunnels for an exit
A hatch leading to the tunnels will be unlocked. As you make your way through the tunnels of the complex, you can try to stay on the main path or explore the side corridors to find optional loot.
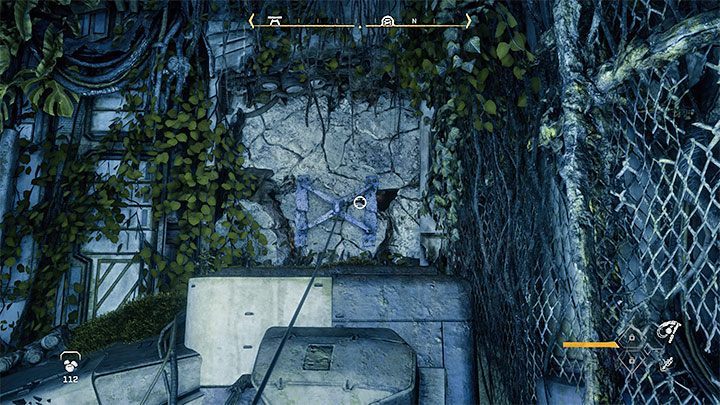
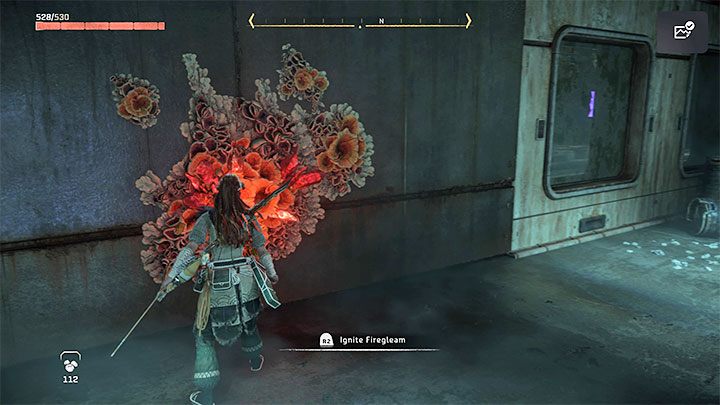
Along the way, use Igniterto blow up Firegleams. The next room may cause some problems - you need to use the Pullcaster on the wall fragment shown in the screenshot. Position yourself exactly in front of the wall and a little away from it so the Pullcaster can unlock the way forward. Finally, you will reach a long ladder leading to the surface.
Find an entrance to Test Station Elm

The entrance to Elm Station is located north of your current position, with enemy machines standing in your way. You don't have to clear the area of machines, but you'll have to employ stealth to get through the room.
If you're planning on dealing with the machines, scan them with your Focus to learn their weaknesses and adjust your equipment to make use of them. You can also set up traps in the area or sneak up on at least one of the machines to land a silent strike.

Ultimately, you must locate the metal ladder on one of the walls of the north building (screenshot above). The ladder will lower once you hit the yellow hinge, but you need to fully charge the shot in order for it to work. Otherwise, the hit will be insufficient to free the ladder.
Use the ladder to reach the outside balconies. Turn to the right and jump over the metal beams. You will reach the grate of a ventilation shaft - rip it out using the Pullcaster and head inside.
Search the Test Station Elm
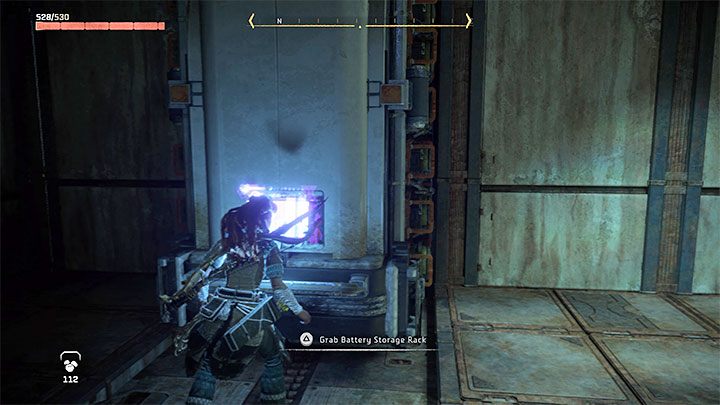
There is a console in the first room of the Station Elm, but it requires an access key. Get acquainted with Battery Storage Racks - you can grab them and pull them out.
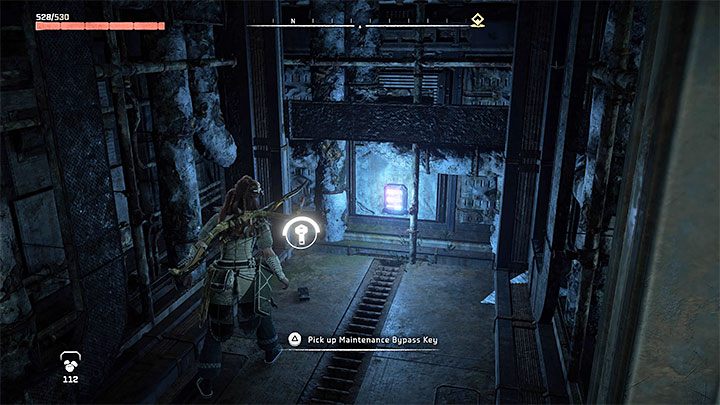
The Maintenance Bypass Key you're looking for is behind one of the racks. Bring it to the console to unlock the door.
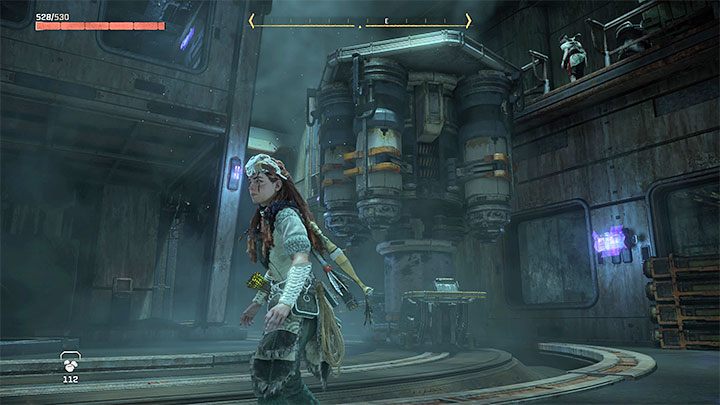
Behind the unlocked door you will find a Storage Unit. Drag it along the tracks and stop in two places - the first time so that Alva can place herself on it, and the second time so that she can reach the console.
Restore power to the Control Room door
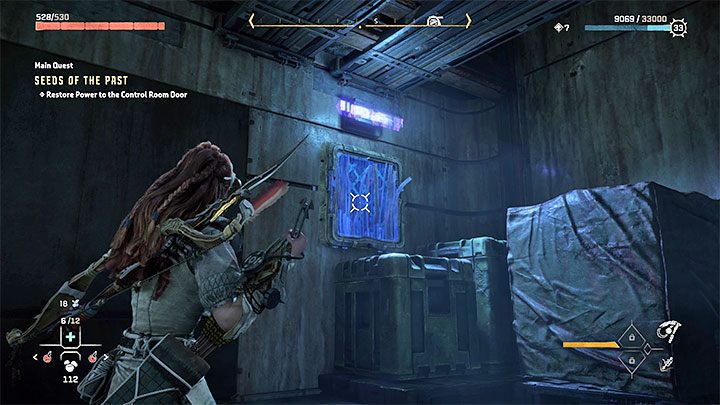
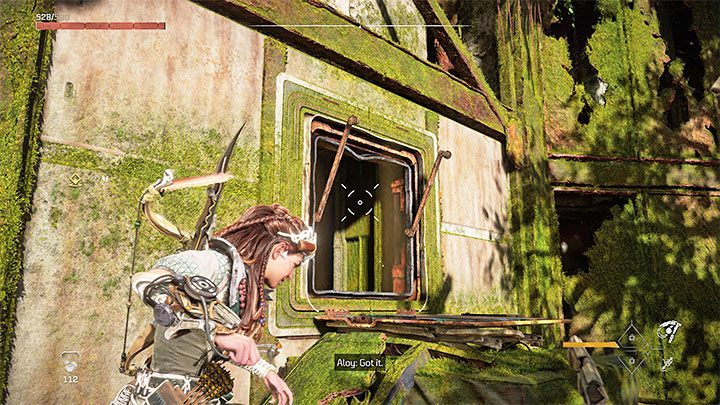
Start by looking for the grate shown in the screenshot above. You can use the Pullcaster on it. After pulling out the grate, use the shaft to get into the neighboring room.
In the new room, use the Igniter on the Firegleam shown in the picture. The explosion will create a large hole in the wall. Return to the main room.
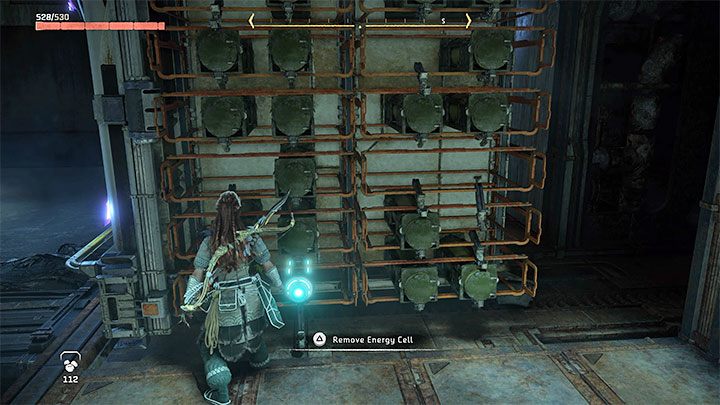
Take a look at the new rack that can be pulled from the wall. Examine its side and you will be able to pick up an Energy Cell.
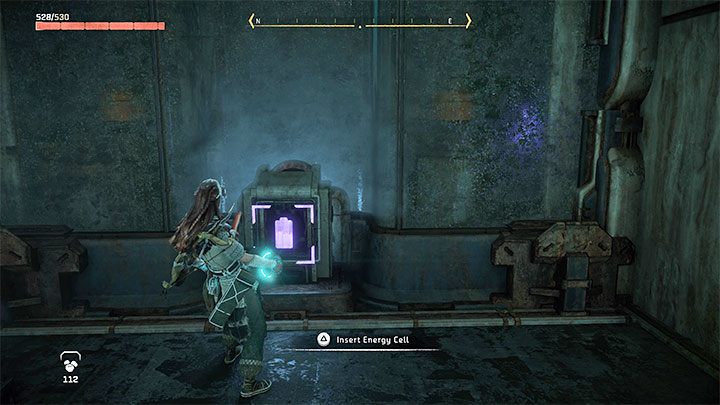
With the battery, walk through the hole that was created when the firegleam was blown up. You will find a slot where you can insert the battery.
Return to Alva
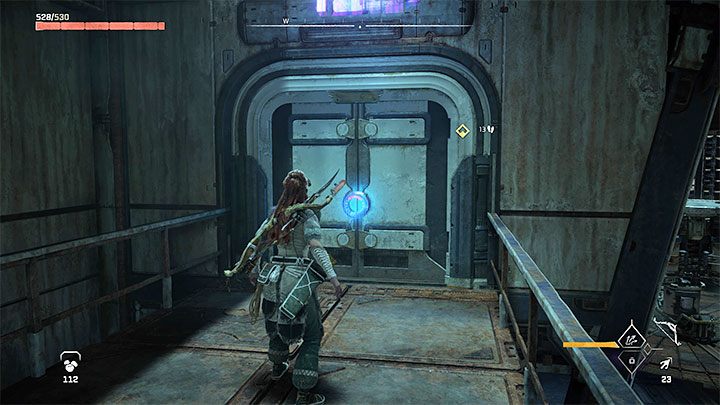
Return to the main room once again. Use the ladder to return to the upper balconies. The door to the room upstairs is now open and you can go inside to join Alva.
Head to the indicated console to complete another "combined" action with Alva, which activates a new cut-scene.
Enter the tunnels
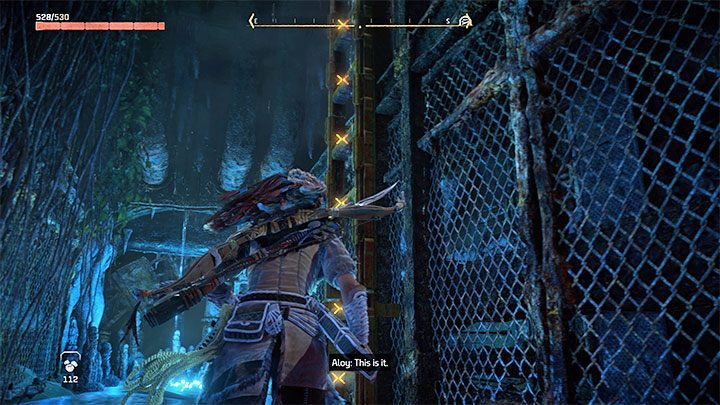
The path to the tunnels is in the same area. As with the earlier tunnel crossing, you can focus only on finding the exit or explore optional corridors and come across valuable loot.
Reach the ladder and, after resurfacing, swim to the arena-shaped room. You now have to face a boss - Dreadwing.
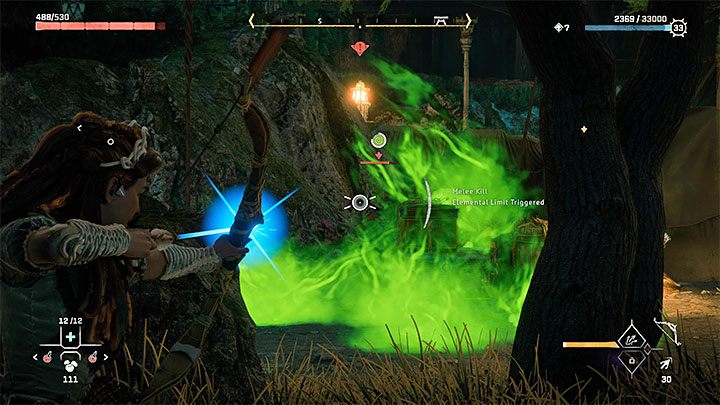
Kill the Dreadwing - boss encounter

As always, you should begin the fight against the Dreadwing by scanning the large flying bat-like machine. This is mainly to learn the boss's weakness, namely the fire element.
Check out the other tabs as well - they will allow you to determine the boss's attacks and what parts need to be destroyed/detached to prevent the Dreadwing from launching specific attacks and using its unique skills.

Dreadwing stays airborne most of the time by default, but be prepared for sudden landings mixed with attempts to hurt the main heroine. You can make it less effective by damaging the machine's fangs. You can always roll to a side as the boss swoops down.


The Dreadwing also has dangerous area-of-effect attacks. These mainly include:
- Acid spray - try to move away from the poisonous cloud to avoid the main character being affected by a negative status effect. You can get rid of the status by ingesting the correct potion or you could equip an outfit that highly resists this element.
- Scattering bombs- quickly move away while the bombs are still in mid-air. Fortunately, it's fairly easy to predict where they are going to land.

Another unique aspect of this fight is that the Dreadwing can use camouflage. It won't become fully invisible, but it becomes difficult to locate it and you can't detect it in focus mode.
You can inspect your surroundings to spot the camouflaged boss (in order to attack him) or continue to run around the arena until invisibility wears off.
Continue attacking the Dreadwing, targeting his weak points until it is defeated. Once the battle concludes, loot the remains of the machine to get valuable loot and a unique metal flower.
Search Test Station Ivy
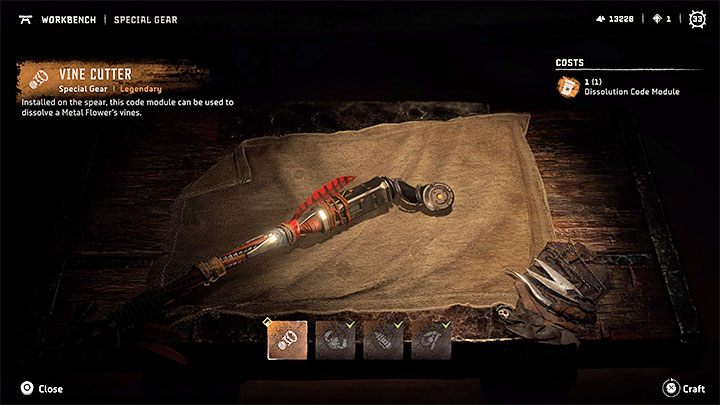
The entrance to the Station Ivy is on the outskirts of the arena. You will find a new holo projector - interact with it activate a new Aquino hologram and receive a special Dissolution Code Module.
Craft the Vine Cutter
The next door has to be opened by force. You will reach a new shaft and eventually be back to the surface.
You should see a nearby Workbench. Go to the Special Gear tab and confirm the creation of a Vine Cutter - a new gadget to be used by Alloy.
Return to the Data Core
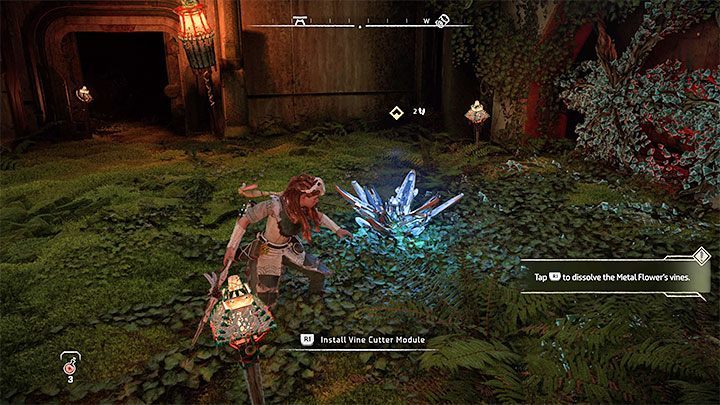
Make your way along the path leading to the Data Core. There is a Metal Flower that you've passed by before, but this time you can interact with it. Hit it a few times with your spear to open it.
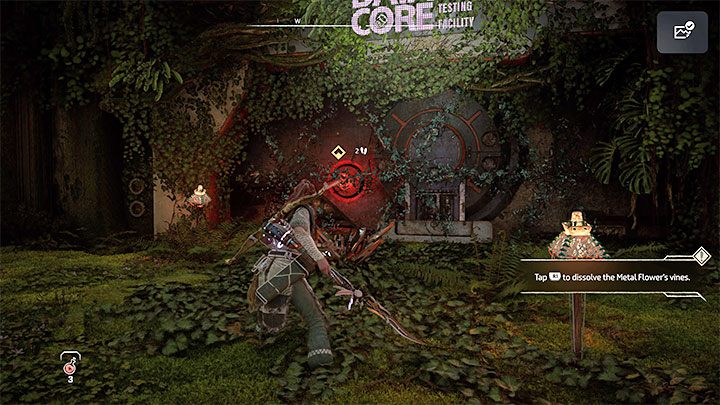
Now you can press R1 to place the spear equipped with the Vine Cutter module unlocked moments ago inside. This will remove the vines, which blocked access to the core.
Recover DEMETER
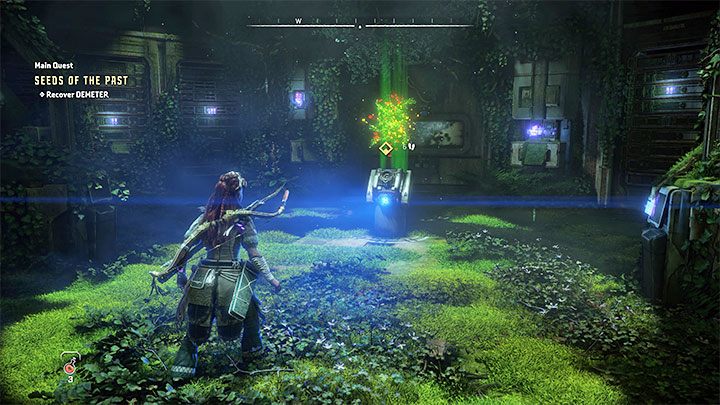
Enter the data core room and use the interactive console to download DEMETER. A new cut-scene will start.
Return to the Base
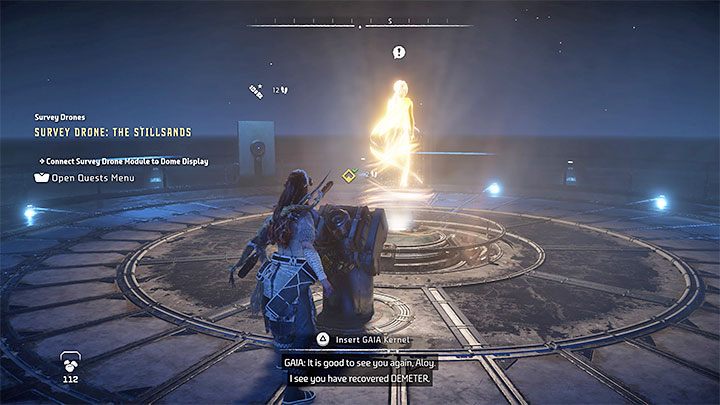
Head straight ahead to The Greenhouse exit. To continue, use fast travel to teleport to the Base and reach its side entrance following a short climb.
Head to the GAIA room and interact with the interactive slot to "deliver" the DEMETER.