
Walkthrough - Chapter XIII | Walkthrough Final Fantasy XIII Guide
Last update: 11 May 2016
 |  |
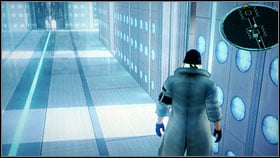
At the beginning make few steps and watch another cut scene. Then save the game and go straight ahead. Kill some enemies and soon you will get to the place with three portals [2]. Use them to return to Gran Pulse to finish undone missions. Complete list of them can be found at the end of this chapter.
 |  |
When you will complete everything take the path located left of the save point. It will lead you to a small crossroad. Turn left and you will get to the chest guarded by Megrim Threshera. Open it and take Millerite [2].
 | ![Go straight ahead and open the chest with Librascope [1] - Walkthrough - Chapter XIII - Walkthrough - Final Fantasy XIII - Game Guide and Walkthrough](/finalfantasy13/gfx/word/577080796.jpg) |
Go straight ahead and open the chest with Librascope [1]. Return to the main path and it will lead you to a strange creature. Use it and two platforms will suddenly appear [2]. At the beginning chose his one located on the left.
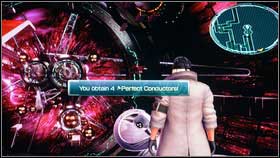 | ![Keep to the right side and you will find some treasures: 4x Perfect Conductor [1] and 5x Turboprop [2] - Walkthrough - Chapter XIII - Walkthrough - Final Fantasy XIII - Game Guide and Walkthrough](/finalfantasy13/gfx/word/577080828.jpg) |
Keep to the right side and you will find some treasures: 4x Perfect Conductor [1] and 5x Turboprop [2]. Take them and move along.
 | ![In the next part of the island you will find chests with 3x Particle Accelerator and Uraninite [2] - Walkthrough - Chapter XIII - Walkthrough - Final Fantasy XIII - Game Guide and Walkthrough](/finalfantasy13/gfx/word/577080859.jpg) |
In the next part of the island you will find chests with 3x Particle Accelerator and Uraninite [2]. Take them and return to the second platform [2]. Elevator will take you to the next flying area.
 | ![At the beginning you should find a chest with 20x Seaking's Beard [1] - Walkthrough - Chapter XIII - Walkthrough - Final Fantasy XIII - Game Guide and Walkthrough](/finalfantasy13/gfx/word/577080890.jpg) |
At the beginning you should find a chest with 20x Seaking's Beard [1]. Turn round and enter the path located on the left. It will lead you to the upper location. Kill all enemies [2] and open all chests.
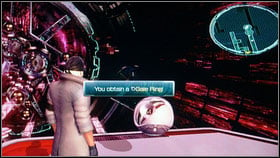 | ![You will find: 2x Aegisol, Gale Ring [1] and 9x Tear of Woe [2] - Walkthrough - Chapter XIII - Walkthrough - Final Fantasy XIII - Game Guide and Walkthrough](/finalfantasy13/gfx/word/577080921.jpg) |
You will find: 2x Aegisol, Gale Ring [1] and 9x Tear of Woe [2]. Take everything and go down.
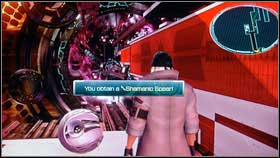 |  |
The next treasure will be located at the dead end located on the right. This time, you will find Shamanic Spear [1] - new weapon for Fang. Few step further, you will have to use the strange robot once again. Area will change and you will have to go to the elevator marked on the map. Do not enter it now, but look for the chest with Tetradic Crown [2].
 | ![Now you can use the platform [1] - Walkthrough - Chapter XIII - Walkthrough - Final Fantasy XIII - Game Guide and Walkthrough](/finalfantasy13/gfx/word/577080984.jpg) |
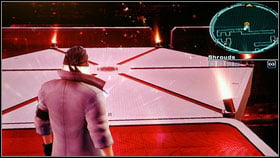
Now you can use the platform [1]. You be transported to the lower level of this location where you will have two roads. Take the path located on the right and find a chest with 6x Starblossom Seed [2]. Return to the left path and go straight ahead.
 |  |
In one moment, you will be able to jump on the fragment on the left. One chest is located there. Open it and take 8x Black Mycelium [1]. The next treasure is located soon before the end of this road (Rhodohrosite) [2].
 |  |
Now you can activate the strange creature once again. You will have to fight with Jabberwocky [1] and Bandersnatch [2]. This fight is quite simple, but you have to remember to kill Jabberwocky first (in other way he will be healing his friend).
 | ![Save the game and go straight ahead [1] - Walkthrough - Chapter XIII - Walkthrough - Final Fantasy XIII - Game Guide and Walkthrough](/finalfantasy13/gfx/word/577081078.jpg) |
Save the game and go straight ahead [1]. Soon you will have to fight will another enemy - Immortal [2].
 |  |
After the fight use the red mechanism that will take you to the area located above. You will find two chests here. Open them and take Weirding Glyph [1] and Adamant Bangle [2]. Take this items and use the portal on the other side of the platform.
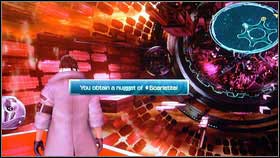 |  |
You will be teleported to another area. At the beginning open two chests and you will find Scarletite [1] and Elixir [2]. The next portal will take you to the main path.
 |  |
Now you have two roads to chose. Each of the is full of enemies and will lead you to the same target - robot. This time you will be teleported to the chamber with Wladislaus [1]. Your enemy is almost immune to stagger so try do defeat him in another way. The most important thing is to force your opponent to attack only tank. Remember to keep all buffs on Sentinel. Wladislaus attacks are very strong so do not attack without maximum HP. After few minutes your enemy will be dead and you will be able to move along.
 | ![Go in the direction of marked point and find two chests with 3000 [1] and 5000 gils [2] - Walkthrough - Chapter XIII - Walkthrough - Final Fantasy XIII - Game Guide and Walkthrough](/finalfantasy13/gfx/word/577081203.jpg) |
Go in the direction of marked point and find two chests with 3000 [1] and 5000 gils [2]. Few steps further you will have to fight with Bandersnatch and Jabberwocky once again.
 | 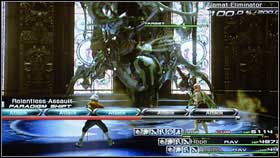 |
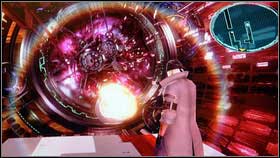
Repeat the same tactic and get close to the strange creature once again. This time it will move you to Tiamat Eliminator [1]. This enemy is simple but very irritating. Do not use Saboteur and Synergist. Your enemy is immune to debuffs and he will remove your buffs too. The most important thing is that your enemy will change his form from time to time and that will reset his chain gauge. The best option is to stagger enemy in his ground form. As a result your Commando will be able to throw your enemy into the air. After the fight enter the portal.
 | ![Save the game inside the new room [1] and go straight ahead taking Ethersol [2] - Walkthrough - Chapter XIII - Walkthrough - Final Fantasy XIII - Game Guide and Walkthrough](/finalfantasy13/gfx/word/577081265.jpg) |
Save the game inside the new room [1] and go straight ahead taking Ethersol [2]. Few steps further, you will be forced to fight with Barthandelus.
 |  |
This battle will be simple if you have many HP. You have to use standard tactic and remember to change paradigm to two Medics when he will raise his head. He will do a very strong attack then so everyone must have 100% of their health.
 | ![After the battle you will have to fight with Orphan [1] - Walkthrough - Chapter XIII - Walkthrough - Final Fantasy XIII - Game Guide and Walkthrough](/finalfantasy13/gfx/word/577081328.jpg) |
After the battle you will have to fight with Orphan [1]. This is much more difficult fight and the most important thing is to chose your team mates in a proper way. I advise you to take Lightning, Fang and Hope. The prepare four necessary paradigms:
Sentinel + Medic + Medic
Commando + Ravager + Ravager
Medic + Synergist + Saboteur
Sentinel + Medic + Synergist
 | ![Start the fight with two Medics and wait for Merciless Judgment [1] - Walkthrough - Chapter XIII - Walkthrough - Final Fantasy XIII - Game Guide and Walkthrough](/finalfantasy13/gfx/word/577081359.jpg) |
Start the fight with two Medics and wait for Merciless Judgment [1]. This is a very powerful attack and you have to heal fast. Then buff your team and debuff the boss (4-5 buffs will be enough). Now you can attack: stagger your enemy and when the bar will be almost empty change to paradigm: Medic + Medic + Sentinel and wait for the next Mercilles Judment.
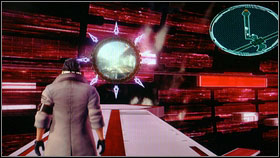
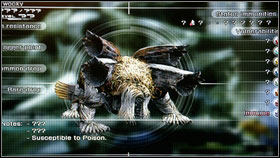
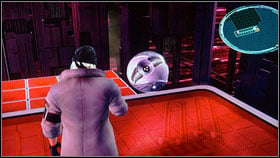
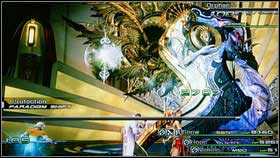 | ![In the first phase, a white orb was healing the boss [1] - Walkthrough - Chapter XIII - Walkthrough - Final Fantasy XIII - Game Guide and Walkthrough](/finalfantasy13/gfx/word/577081390.jpg) |
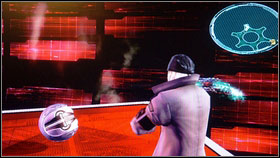
In the first phase, a white orb was healing the boss [1]. In the second part of the battle the dark ball will appear and it will be shooting with a laser. In addition, from time to time, you will be attacked by some strange tentacle that is poisoning your characters. You have to neutralize it fast, because in other way your teammates will gain debuffs that will disable them from fighting and casting spells. The rest is as in the previous phase: stagger your enemy and change to two Medics to heal before the Mercilles Judgment. At the end your enemy will start to attack with some energy blasts [2] but Sentinel along with two Medics should be able to handle that.
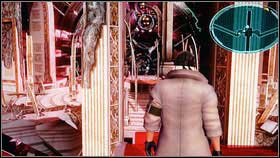
 | ![After the battle you will see a film and then you will have to fight with Orphanem [1] [2] fir the last time - Walkthrough - Chapter XIII - Walkthrough - Final Fantasy XIII - Game Guide and Walkthrough](/finalfantasy13/gfx/word/577081421.jpg) |
After the battle you will see a film and then you will have to fight with Orphanem [1] [2] fir the last time. This is a very simple fight.
 |  |
Buff yourself and attack. Stagger and kill him fast. After the battle you will see a final cut scene.