
Walkthrough - Chapter IV | Walkthrough Final Fantasy XIII Guide
Last update: 11 May 2016
 |  |
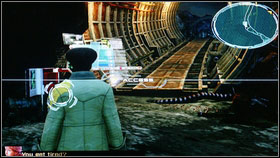
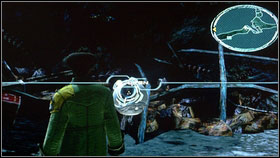
After killing one group of mobs, you will take control over Sahz. You will see that one machine fragment is falling into the water. Then you will be able to see your companions memories.
 | ![Then you will learn some information about the role of Synergist [1] - Walkthrough - Chapter IV - Walkthrough - Final Fantasy XIII - Game Guide and Walkthrough](/finalfantasy13/gfx/word/576591234.jpg) |
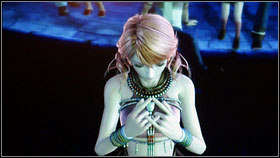
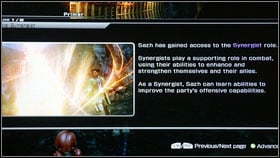
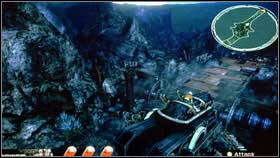
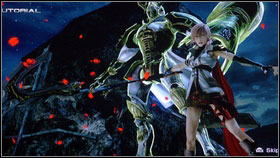
Then you will learn some information about the role of Synergist [1]. This is a very helpful character: may raise your teammates attack of defense rating. One of your Synergist is Hope. After starting this chapter run to the nearest save point. They buy some most necessary things and jump over the barricade [2].
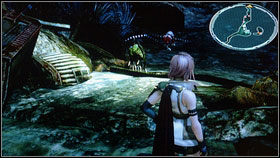 |  |
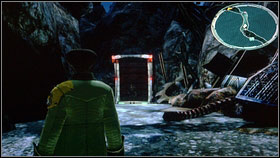
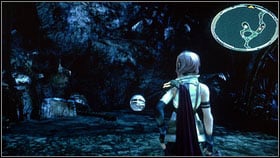
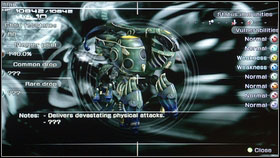
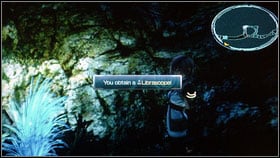
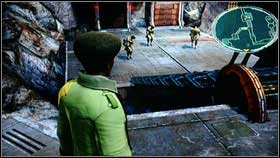
You will find a chest guarded by Thexteron here. You enemy is quite easy so you can check your new paradigms. After dealing with him take Librascope. Now you can go back to the main path. You will have to fight with another group of enemies [1]. After the battle go straight ahead. Kill all opponents and note that there will be one new creature - Pulsework Soldier [2].
 |  |
Wait until he will turn back and then attack. If you will be quick, he won't be able to move [1]. Jump down and watch some Lightning memories [2]. Now it is time to get back to Sahz and Vanille.
 |  |
It will turn out that Sahz can be a Synergist too (he is more effective in buffing attack stats). Faith spell will raise your Magic and Bravery - Strength. Enter the Crystarium to learn your new abilities and then save the game [1]. On the other side of the tunnel you will see that robots are fighting among themselves [2].
 |  |
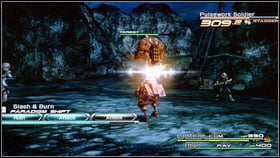
Destroy two drones and then take care of Pulseworker. Now you can use the mechanism in the middle to open the passage. Go straight ahead and kill all enemies. You will find a chest here with Black Belt [2] - it will raise your physical damage resistance. You exit the tunnel use the mechanism on the right and defeat your opponents.
 | 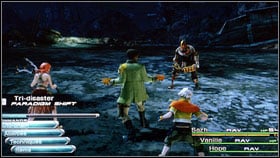 |
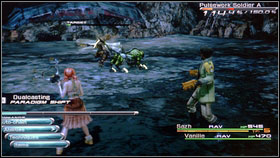
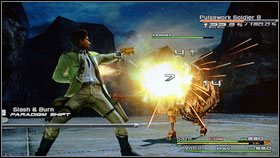
After few step, you will get to Hope. He will tell you something about his past. Then go upstairs [1] where you will be attacked by Pulseworker [2]. Change paradigm to Superiority and, after a while, return to Tri-disaster. As a matter of fact Synergists will buff the team, Saboteur will weak your enemies and Ravagers will end the fight.
 | ![In the nearby chest [1] you will find Ninutral - new weapon for Hope - Walkthrough - Chapter IV - Walkthrough - Final Fantasy XIII - Game Guide and Walkthrough](/finalfantasy13/gfx/word/576591421.jpg) |
In the nearby chest [1] you will find Ninutral - new weapon for Hope. Now go to the next save point [2].
 | ![After few steps you will get to the gates guarded by a robot [1] - Walkthrough - Chapter IV - Walkthrough - Final Fantasy XIII - Game Guide and Walkthrough](/finalfantasy13/gfx/word/576591453.jpg) |
After few steps you will get to the gates guarded by a robot [1]. Kill him fast, turn left and defeat flying Incubuses [2]. Then go to the wreck.
 | ![After a short cut scene run straight ahead [1] and kill every creature that you can find - Walkthrough - Chapter IV - Walkthrough - Final Fantasy XIII - Game Guide and Walkthrough](/finalfantasy13/gfx/word/576591484.jpg) |
After a short cut scene run straight ahead [1] and kill every creature that you can find. Go to the another save point and two chests [2].
 | ![In the first chest you will find Phoenix Down [1], in another - Metal Armband - Walkthrough - Chapter IV - Walkthrough - Final Fantasy XIII - Game Guide and Walkthrough](/finalfantasy13/gfx/word/576591515.jpg) |
In the first chest you will find Phoenix Down [1], in another - Metal Armband. Now you may return to the main path and fight with another Incubusses and one Succubus. They should be very easy, if you will attack from surprise [2]. The same thing with the next group and two Pulseworkers.
 | ![When you will be on stairs, Lighting will join you [1] - Walkthrough - Chapter IV - Walkthrough - Final Fantasy XIII - Game Guide and Walkthrough](/finalfantasy13/gfx/word/576591546.jpg) |
When you will be on stairs, Lighting will join you [1]. Follow her killing everything on your sight. Then use the special mechanism to create stairs. Go upstairs and kill all demons there. You may take the shortcut when the road will turn left. You will pass some enemies but also a chest with Ember Ring [2]. Follow the Lightning and save the game.
 | ![Now you will have to fight with Dreadnought [1] - Walkthrough - Chapter IV - Walkthrough - Final Fantasy XIII - Game Guide and Walkthrough](/finalfantasy13/gfx/word/576591578.jpg) |
Now you will have to fight with Dreadnought [1]. This is a difficult battle but the tactic is quite simple. Start with Libra and Bully paradigm. When your opponent will use his mightiest attack change to Diversity and heal the party. At the end use Relentless Assault and stagger you enemy. Repeat the same action until he will be dead. Remember that you can use Relentless Assault only when all you teammates are 100% healthy.
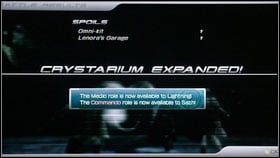 | ![As a reward of killing him, some new roles will be available - Medic for Lightning and Commando for Sahz [1] - Walkthrough - Chapter IV - Walkthrough - Final Fantasy XIII - Game Guide and Walkthrough](/finalfantasy13/gfx/word/576591609.jpg) |
As a reward of killing him, some new roles will be available - Medic for Lightning and Commando for Sahz [1]. Also, you will be given a possibility to upgrades your weapons at save points [2]. To raise EXP of your items you will need components.
 |  |
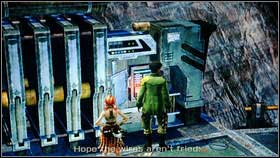
Few step later, you will get to another ship wreck. A very long film will start and then, you will have to fight with PSICOM Hit Squad. At the beginning the battle will be very difficult. Use the paradigm with medics to heal your team. Then use Blitz to deal some damage to many targets. After the battle go to nearest save point. Sometimes you will be attacked by Corps Regulars [1] and Corps Gunners. You shouldn't have problems with them. On the first crossroads turn left. Take Fiber-optic Cable [2]. This is a very useful component.
 |  |
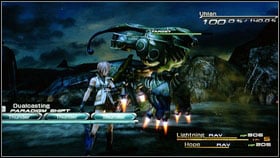
Get back to the road and run straight ahead. After dealing with Uhlana [1] turn right and open the chest with Librascope [2]. Now kill another group to have a clear path to the battle machine.
 |  |
Go straight ahead and attack with A button. To restore your power you may destroy barricades that are on your way. After killing few enemies you will fall down and take control over Lightning.
 | ![At the beginning open two chests [1] - Walkthrough - Chapter IV - Walkthrough - Final Fantasy XIII - Game Guide and Walkthrough](/finalfantasy13/gfx/word/576591734.jpg) |
At the beginning open two chests [1]. You will find Spark Ring and 100 gils. At the end of the tunnel there is another chest [2].
 | ![Open it and take Electrolytic Capaciter [1] - Walkthrough - Chapter IV - Walkthrough - Final Fantasy XIII - Game Guide and Walkthrough](/finalfantasy13/gfx/word/576591765.jpg) |
Open it and take Electrolytic Capaciter [1]. Now save the game and attack the next group [2].
 |  |
On the crossroads, turn right. Go upstairs and attack your enemy from behind [1]. At the beginning eliminate a soldier with grenades (they are really powerful).
 | ![After the fight open the chest with Spark Ring [1] and jump down - Walkthrough - Chapter IV - Walkthrough - Final Fantasy XIII - Game Guide and Walkthrough](/finalfantasy13/gfx/word/576591828.jpg) |
After the fight open the chest with Spark Ring [1] and jump down. Kill another soldiers and turn right. Inside the chest, you will find a Phoenix Down [2].
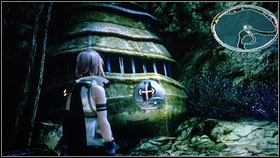
 | ![Now you may enter the tunnel [1] - Walkthrough - Chapter IV - Walkthrough - Final Fantasy XIII - Game Guide and Walkthrough](/finalfantasy13/gfx/word/576591859.jpg) |
Now you may enter the tunnel [1]. As a result, you won't be forced to fight with two grenadiers. Few steps later, you will be able to save the game. Then, you will have to fight with another Eidolon - Odin [2].
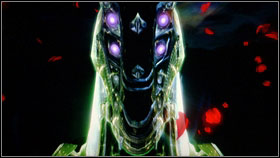 |  |
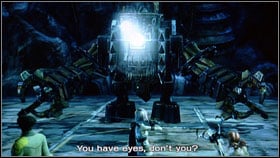
This is the best moment to use Crystarium. Odin have very powerful attacks and additional HP will be very handy. At the beginning of the fight use Libra and Synergist. After you will get all necessary buffs, change role to Avengers. The whole fight is bout changing between Dualcasting and Double Dose. After the fight, you will get an ability to summon Odin. Also an Lightning ATB bar will raise. Then run straight ahead until you will be attacked by some enemies. Now you will learn how to use your Eidolons.
 | ![To summon Odin [1] you have to chose Techniques and then Summon - Walkthrough - Chapter IV - Walkthrough - Final Fantasy XIII - Game Guide and Walkthrough](/finalfantasy13/gfx/word/576591921.jpg) |
To summon Odin [1] you have to chose Techniques and then Summon. Test your new ability on next enemies. After summoning Eidolon an SP bar will appear. It will go down over time and when Odin is taking damage. When it will come to zero, your magic creature will disappear. A very interesting ability is Gestalt Mode. Activate it with X button when your summon is next to you. As a matter of fact, you will be able to attack your enemies from his back. Gestalt Mode depends on Gestalt Gauge of your character and this bar will recharge during combined attacks. When you will be sitting on Odin attacks with combinations that are appearing in lower left corner of the screen. Save the game after the fight and return to Shaz and Vanille [2].
 | ![Turn back and open the chest with Phoenix Down [1] - Walkthrough - Chapter IV - Walkthrough - Final Fantasy XIII - Game Guide and Walkthrough](/finalfantasy13/gfx/word/576591953.jpg) |
Turn back and open the chest with Phoenix Down [1]. Then return to main path [2].
 | ![You will get to the strange red block that will be your enemy [1] - Walkthrough - Chapter IV - Walkthrough - Final Fantasy XIII - Game Guide and Walkthrough](/finalfantasy13/gfx/word/576591984.jpg) |
You will get to the strange red block that will be your enemy [1]. It is very weak, but if you do not kill it fast, it will do huge damage. After the fight, follow the Vanille and eliminate another red bombs [2].
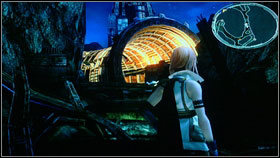
 | ![After the fight jump down and use the strange mechanism [1] - Walkthrough - Chapter IV - Walkthrough - Final Fantasy XIII - Game Guide and Walkthrough](/finalfantasy13/gfx/word/576592015.jpg) |
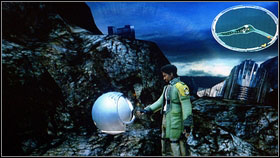
After the fight jump down and use the strange mechanism [1]. Your passage will be clear now. Couple of meters further you will have to fight. Then after next few meters, you will find another strange mechanism that needs some electricity [2]. Leave it for now.
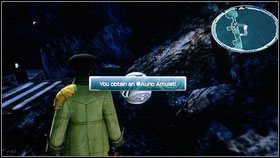 | ![You will find chest with Auric Amulet on the right [1] - Walkthrough - Chapter IV - Walkthrough - Final Fantasy XIII - Game Guide and Walkthrough](/finalfantasy13/gfx/word/576592046.jpg) |
You will find chest with Auric Amulet on the right [1]. Take this item and attack the nearest enemies. After the battle save the game [2].
 | ![Now you will have to fight with new opponents - Gremlins [1] - Walkthrough - Chapter IV - Walkthrough - Final Fantasy XIII - Game Guide and Walkthrough](/finalfantasy13/gfx/word/576592078.jpg) |
Now you will have to fight with new opponents - Gremlins [1]. They are very easy so kill them fast. Next creatures will be waiting for you in a gorge, near the chest with Ember Ring [2].
 | ![Defeat them and get close to the strange construction [1] - Walkthrough - Chapter IV - Walkthrough - Final Fantasy XIII - Game Guide and Walkthrough](/finalfantasy13/gfx/word/576592109.jpg) |
Defeat them and get close to the strange construction [1]. Kill everything on your way and go to the right [2].
 | ![Use two mechanisms to activate the lights in the middle [1] - Walkthrough - Chapter IV - Walkthrough - Final Fantasy XIII - Game Guide and Walkthrough](/finalfantasy13/gfx/word/576592140.jpg) |
Use two mechanisms to activate the lights in the middle [1]. Repeat the same action on the other side [2]. Now you can go back to the mechanism that has needed the power and create the stairs leading to the platform.
 |  |
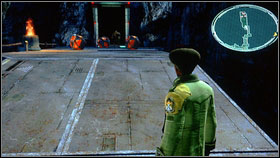
A very difficult fight is waiting for you here. You have to surprise your enemies [1]. The best option is to use paradigm Slash & Burn - this is the only way to stagger your opponents. After the fight open the chest [2]. You will find Vibrant Ooze there. Now get back to the ravine entrance.
 |  |
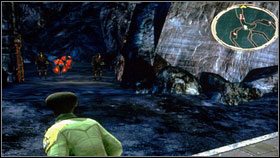
Once again kill the group with two grenadiers and use the elevator. Defeat your enemies and use the mechanism on the right [2]. New stairs will lead you to the next switch.
 | ![As a result you will get to area where you will have to fight with three grenadiers [1] - Walkthrough - Chapter IV - Walkthrough - Final Fantasy XIII - Game Guide and Walkthrough](/finalfantasy13/gfx/word/576592234.jpg) |
As a result you will get to area where you will have to fight with three grenadiers [1]. Just before the battle change paradigm to have a Medic in your group and use Fortisol, Deceptisol and Aegisol [2]. After dealing with them open the chest and take Iron Shells. Now, you can get back to the power station.
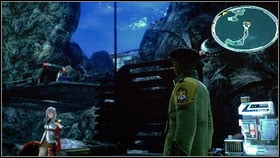
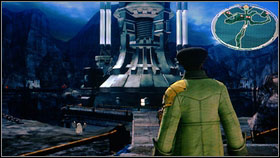
 | ![Get on the middle platform, save the game and run into the cave in front of you [1] - Walkthrough - Chapter IV - Walkthrough - Final Fantasy XIII - Game Guide and Walkthrough](/finalfantasy13/gfx/word/576592265.jpg) |
Get on the middle platform, save the game and run into the cave in front of you [1]. Entrance is guarded but it shouldn't be a problem. Go to the other side of the cave and open the chest with 300 gils [2]. Now you will see a film that will remind you about some memories of one of your friends.
 |  |
As a Snow run to the marked building.
 |  |
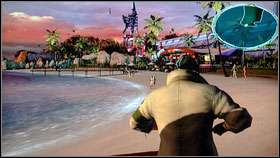
Speak with the bartender and with the bartender on the other side of the beach. After the conversation go to the bridge [2] and meet Sarah. After the cut scene, you will have to enter second CD.