
Walkthrough - Chapter XI - Part 1 | Walkthrough Final Fantasy XIII Guide
Last update: 11 May 2016
 |  |
Save the game at the beginning and run straight ahead killing all enemies.
 | ![Near one yellow maggot [1] you will find a chest with Partisan - new weapon for Fang [2] - Walkthrough - Chapter XI - Part 1 - Walkthrough - Final Fantasy XIII - Game Guide and Walkthrough](/finalfantasy13/gfx/word/576942859.jpg) |
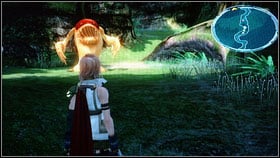
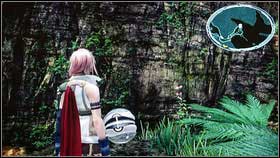
Near one yellow maggot [1] you will find a chest with Partisan - new weapon for Fang [2].
 | ![Few steps further you will get to Hope where you will have to fight with Eidolon - Alexander [1] [2] - Walkthrough - Chapter XI - Part 1 - Walkthrough - Final Fantasy XIII - Game Guide and Walkthrough](/finalfantasy13/gfx/word/576942890.jpg) |
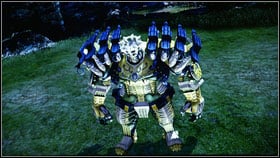
Few steps further you will get to Hope where you will have to fight with Eidolon - Alexander [1] [2]. To get this summon you must start wit paradigm called Evened Odds. First of all, buff the team and start the battle with Ravagers. Repeat the same operation until stagger bar of your enemy will be charged. As a reward you will get this summon and Hope will get another part of her ATB bar.
 |  |
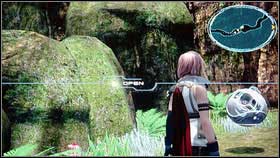
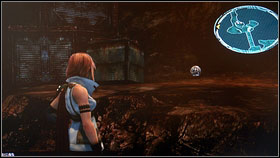
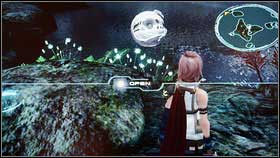
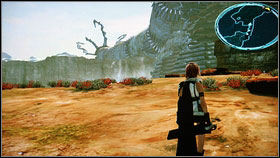
Now it is time to move to some "open" spaces [1]. At the beginning you will learn bout a new game element Cie'th stones [2]. These are Cie'th in their last phase of metamorphosis and you can take some quests from them. Remember that in one moment you can have only one active mission. Full list of all available quest are in the next part of this guide.
 |  |
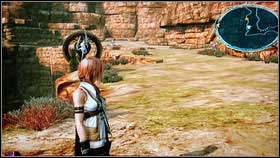
Activate the first stone and go to the red star marked on the map. You should see a chest on your way. Open it and take a new weapon for Vanille - Rod of Throne [2].
 | ![After dealing with Ectopudding [1] the mission will be over and another task will appear - Walkthrough - Chapter XI - Part 1 - Walkthrough - Final Fantasy XIII - Game Guide and Walkthrough](/finalfantasy13/gfx/word/576942984.jpg) |
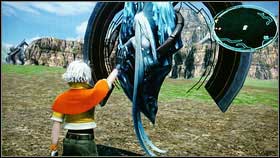
After dealing with Ectopudding [1] the mission will be over and another task will appear. Accept it. This time you have to deal with Gorgonopsids [2] that are very dangerous in large groups. Attack them from surprise and use the paradigm with two Medics and Sentinel.
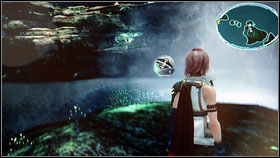
 | ![After the fight get close to the next stone [1] - Walkthrough - Chapter XI - Part 1 - Walkthrough - Final Fantasy XIII - Game Guide and Walkthrough](/finalfantasy13/gfx/word/576943015.jpg) |
After the fight get close to the next stone [1]. Keep to the right side while going to your target. You will find a chest guarded by some Rangda [2].
 | ![Inside you will find Zephyr Ring [1] - Walkthrough - Chapter XI - Part 1 - Walkthrough - Final Fantasy XIII - Game Guide and Walkthrough](/finalfantasy13/gfx/word/576943046.jpg) |
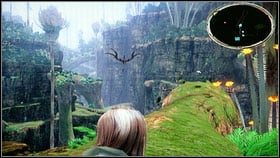
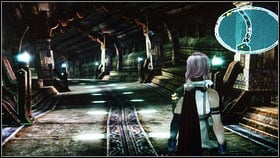
Inside you will find Zephyr Ring [1]. Now you have to run for a long time. When you will get to the ravine look right [2].
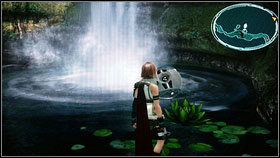 |  |
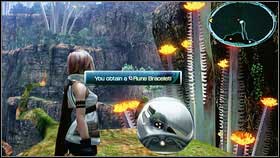
You will find next chest ear the waterfall. Open it and take Rune Bracelet [1]. When you will be at this place kill your opponent, save the game and go in the direction of yellow point marked on the map. Somewhere here you will find another chest with Diabolic Tails [2].
 |  |
After the cut scene accept another mission. Note that the quest giver is a stone classified as a Waypoint [1]. These are teleports scattered all over the Gran Puse that will allow you to travel fast. To use them, you have to find at least two of them. On the lower level, turn round and get close to another chest (with Esoteric Oil) [2].
 |  |
The next chest is located right of the next save point. It is guarded by a monster called Svarog [2].
 | ![For defeating him you will be able to take Rune Bracelet [1] - Walkthrough - Chapter XI - Part 1 - Walkthrough - Final Fantasy XIII - Game Guide and Walkthrough](/finalfantasy13/gfx/word/576943171.jpg) |
For defeating him you will be able to take Rune Bracelet [1]. The rest of your journey should be without any surprises. Keep to the left side after the crossroad. As a result, you will find a chest with 1827 gils [2].
 |  |
The last fight in this quest is quite simple but very long. Your enemies are very resistant to most of your attacks.
 | ![After completing this quest you will be able to open the chest with 2x Millerite [1] - Walkthrough - Chapter XI - Part 1 - Walkthrough - Final Fantasy XIII - Game Guide and Walkthrough](/finalfantasy13/gfx/word/576943234.jpg) |
After completing this quest you will be able to open the chest with 2x Millerite [1]. You can turn back and use the stone another time [2]. Accept next mission and go in the marked direction.
 |  |
You have to win couple of battles to get to the crossroad. Now turn right to get to the chest with Mythril Bangle [1]. Now another cut scene will start. When it will end get back to the yellow point.
 |  |
When you will be at the upper level of this area, go and complete your mission and then get back to the main plot of the game. Monster that you have to defeat is called Edimmu [2]. This is quite difficult fight but a standard tactic should be enough. As a reward for defeating him you will be able to take Millerite from the chest located behind him and you will complete the achievement called Kelger's Cup.
 |  |
During your trip to the previous save point take the second turning right. You will find a chest with Watchmen's Amulet [1]. Then go to the yellow point marked on the map.
 |  |
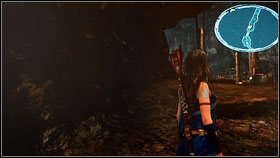
On the way to the cave you will find another chest. Open it and take Hauteclaire - weapon for Lightning [1]. On the crossroad go straight ahead, because on the left you will find Juggernaut [2]. He is too strong for you in that moment. The best option is to return to him after completing the game.
 |  |
Few meters further another cut scene will start. Then follow the yellow arrow. On the left side, you will see two ruined tunnels. In of them you will find 4x Electrodes [1], in another - 4x Chobham Armor [2].
 | ![After another movie go straight ahead [1] and at the end, turn left - Walkthrough - Chapter XI - Part 1 - Walkthrough - Final Fantasy XIII - Game Guide and Walkthrough](/finalfantasy13/gfx/word/576943421.jpg) |
After another movie go straight ahead [1] and at the end, turn left. Jump on the lower platform and take 4x Tesla Turbines [2]. Now you can return to the main path and go to the marked direction.
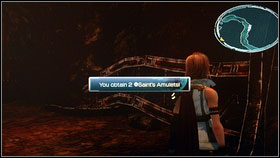 |  |
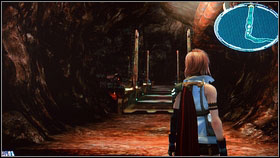
If you will have some problems with creatures, summon Odin and he will help you with the strongest opponents. Soon, you will notice a chest lying on the road. Inside, you will find 2x Saint's Amulet [1]. Few meters further you will be able to save the game. Then you will have to fight with the last Eidolon - Hetaconcheir [2].
 |  |
To get this summon you will need only two paradigms. Use Saboteur + Sentinel to attack and Medic + Sentinel for healing. Switch between these two tactics and you will win before the time will expire. As a result you will get additional ATB bar for your character. Now it is time to move along.
 |  |
After a long walk, you will get to the next save point. Then turn right and you will find a chest with Particle Accelerator [2].
 |  |
Now use the road on the other side. On the right you will see Juggernaut but leave him once again - he is too strong for you at this time. Soon you will see another chest. This time you will be able to take 3x Crystal Oscillator [1]. Then follow the yellow arrow and take next treasures: 3x Perfect Conductor [2].
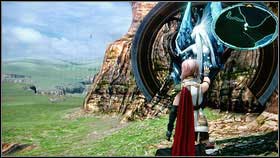
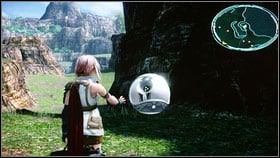
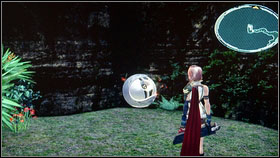
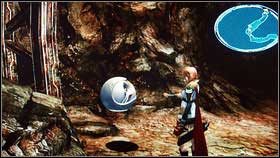
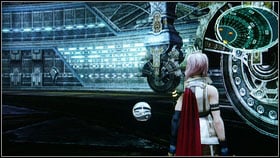
 | ![When you will be at the end, press A, watch another movie and jump to the huge ball - Atomos [1] - Walkthrough - Chapter XI - Part 1 - Walkthrough - Final Fantasy XIII - Game Guide and Walkthrough](/finalfantasy13/gfx/word/576943578.jpg) |
When you will be at the end, press A, watch another movie and jump to the huge ball - Atomos [1]. This huge creature will start to move. Few moments later he will free us near the save point where you will be able to do some shopping.
 |  |
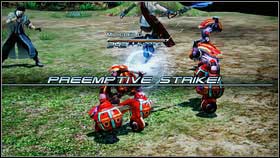
After visiting the save point, move along to the next cave. Watch another long cut scene and you will learn about the meeting between Vanille and Sarah. Then run straight ahead and open the chest with 13x Strange Fluid [1]. On the upper level, you will meet some new enemies. They are quite strong and they are appearing in large groups [2]. The best option is to use Libra and Slow and then kill your opponents as fast as possible.
 |  |
After the fight jump on the rock on the right. Open the chest with 10x Enigmatic Fluid [1]. Go further and you will get to three chests. Open them and take 6x Moistened Scale, 6x Seapetal Scales and Aquabane Brooch [2]. Now you can return to the main path.
 | ![Few steps further you will see another film and you will be able to open another chest with 7x Abyssal Scales [1] - Walkthrough - Chapter XI - Part 1 - Walkthrough - Final Fantasy XIII - Game Guide and Walkthrough](/finalfantasy13/gfx/word/576943671.jpg) |
Few steps further you will see another film and you will be able to open another chest with 7x Abyssal Scales [1]. After the fight you will see another animation [2]. Now save the game in the nearest save point.
 |  |
Follow the yellow arrow and open another chest. Take Cie'th Tear [1], watch another movie and accept the mission number 20 [2].
 | ![It will lead you to the next chest with 20x Sinister Fang [2] - Walkthrough - Chapter XI - Part 1 - Walkthrough - Final Fantasy XIII - Game Guide and Walkthrough](/finalfantasy13/gfx/word/576943734.jpg) |
It will lead you to the next chest with 20x Sinister Fang [2].
 |  |
After completing this quest, you will be able to return to your main task (which is to get to the huge chamber).
 |  |
After the cut scene turn round and open the chest with 4721 gils. Examine this room and find another two chest. One with 12x Chipped Fang [1] and second with Sparkbane Brooch [2].