Walkthrough - Chapter XI - Part 2 | Walkthrough Final Fantasy XIII Guide
Last update: 11 May 2016
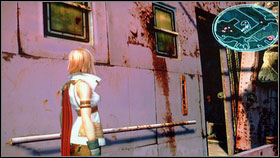
 | ![Now you can get close to the strange mechanism [1] and chose a Second Tier [2] - Walkthrough - Chapter XI - Part 2 - Walkthrough - Final Fantasy XIII - Game Guide and Walkthrough](/finalfantasy13/gfx/word/577003921.jpg) |
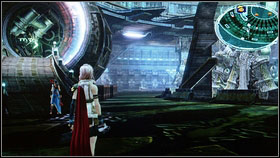
Now you can get close to the strange mechanism [1] and chose a Second Tier [2]. Here an interesting quest will be waiting for you.
 | ![To get to the top of the tower you have to complete missions [1] given by three statues - Menhirrim [2] - Walkthrough - Chapter XI - Part 2 - Walkthrough - Final Fantasy XIII - Game Guide and Walkthrough](/finalfantasy13/gfx/word/577003953.jpg) |
To get to the top of the tower you have to complete missions [1] given by three statues - Menhirrim [2]. First of them is past the gap in the wall. Accept this quest and move in the direction of the star.
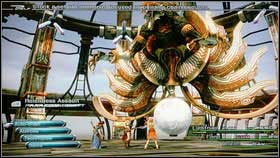
 | ![Your task is to kill Gelatitan [1] - Walkthrough - Chapter XI - Part 2 - Walkthrough - Final Fantasy XIII - Game Guide and Walkthrough](/finalfantasy13/gfx/word/577003984.jpg) |
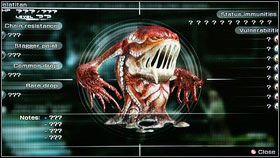
Your task is to kill Gelatitan [1]. You should kill him with easy. After the fight you will have to accept another quest and kill another creature. This time it will be Ambling Bellows [2]. Start the fight with killing one guard and then take care of the min enemy. After his death you can take the third quest.
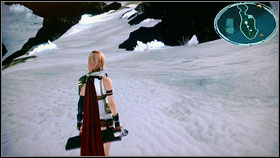
 | ![Your last target is Gurangatch [1] - Walkthrough - Chapter XI - Part 2 - Walkthrough - Final Fantasy XIII - Game Guide and Walkthrough](/finalfantasy13/gfx/word/577004015.jpg) |
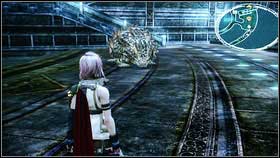
Your last target is Gurangatch [1]. He can be surprised with easy so killing him shouldn't be a problem for you. After the fight fire will disappear and you will be able to move along. Try to get to the point marked on the map. As a reward you will get 5x Spark Plugs [2].
 |  |
You will find the next chest by moving in the direction of the yellow arrow. Inside, you will find another weapon for Hope - Simurgh [1]. Few steps further you will get to the third level. Kill two groups of enemies and get close to the statue [2] that will turn on the elevator.
 | ![It will take to you to the fourth floor [1] - Walkthrough - Chapter XI - Part 2 - Walkthrough - Final Fantasy XIII - Game Guide and Walkthrough](/finalfantasy13/gfx/word/577004078.jpg) |
It will take to you to the fourth floor [1]. Go straight ahead and find a chest with 2x Glass Orb [2]. Take this items and enter the next lift.
 |  |
Now you will find yourself on the fifth floor where you will get the mission number 24. Your task is to eliminate some creatures locates few steps away.
 | 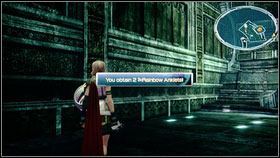 |
Kill them fast and open the chest with 9x Ancient Bones, then enter the elevator and return to 4th floor. Enter the elevator located on the opposite side and go to floor number 6. Before that open all chests and take Gale Ring [1] and 2x Rainbow Anklets [2].
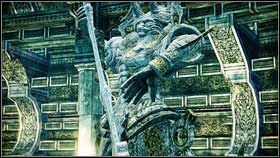
 | ![When you will be upstairs, take another quest from the statue [2] - Walkthrough - Chapter XI - Part 2 - Walkthrough - Final Fantasy XIII - Game Guide and Walkthrough](/finalfantasy13/gfx/word/577004171.jpg) |
When you will be upstairs, take another quest from the statue [2]. To get to the marked location, you have to use statue located in the next room. Circles of the tower will move and you will be able to complete this quest.
 | ![While going to the marked monster, open the chest containing Unsetting Sun [1] - Walkthrough - Chapter XI - Part 2 - Walkthrough - Final Fantasy XIII - Game Guide and Walkthrough](/finalfantasy13/gfx/word/577004203.jpg) |
While going to the marked monster, open the chest containing Unsetting Sun [1]. Your enemy is quite difficult by remember to use Ensune - it will help you for sure.
 | ![After the fight go straight ahead and open the chest with Librascope [1] - Walkthrough - Chapter XI - Part 2 - Walkthrough - Final Fantasy XIII - Game Guide and Walkthrough](/finalfantasy13/gfx/word/577004234.jpg) |
After the fight go straight ahead and open the chest with Librascope [1]. Few meters further you will et to the next statue that will give you a mission number 26 [2]. Soon, you will be attacked by a huge snake. This time your enemy will freeze your passage. You have turn round and move along with the yellow arrow. Statues will activate and ice will disappear. Now you can return.
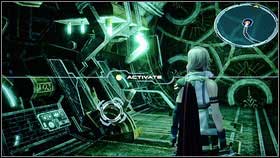
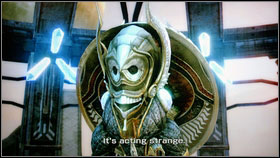
 | ![After another cut scene go to the statue that was blocked couple of minutes ago [1] - Walkthrough - Chapter XI - Part 2 - Walkthrough - Final Fantasy XIII - Game Guide and Walkthrough](/finalfantasy13/gfx/word/577004265.jpg) |
After another cut scene go to the statue that was blocked couple of minutes ago [1]. Touch it and passage to the next elevator will be unblocked. Now this is time to move to the level called Apex [2].
 | ![Before you will enter the elevator located in the middle [1] examine this area and open the chest with 2x Frostbane Brooches and Ethersol - Walkthrough - Chapter XI - Part 2 - Walkthrough - Final Fantasy XIII - Game Guide and Walkthrough](/finalfantasy13/gfx/word/577004296.jpg) |
Before you will enter the elevator located in the middle [1] examine this area and open the chest with 2x Frostbane Brooches and Ethersol. When you will get close to the point marked on the map a fight with Dahaka will start.
 |  |
This fight is very simple but you have to have many HP. As in the previous fights start with Libra and Saboteurs. The boss will be weaker and you will be able to stagger him faster.
 |  |
His normal attacks are not so strong, but from time to time he will use his special attacks. Two of them are quite harmful. First one will hit the whole team and you will be able to heal it. Second attack is more complicated. All of your teammates will get many debuffs and they will have to be removed with Esuna. In other way, you won't be able to survive another hit. The rest of the fight is simple.
 | ![After the battle use the elevator [1] - Walkthrough - Chapter XI - Part 2 - Walkthrough - Final Fantasy XIII - Game Guide and Walkthrough](/finalfantasy13/gfx/word/577004390.jpg) |
After the battle use the elevator [1].
 |  |
Downstairs go straight ahead and the turn left at the end.
 | ![Soon, you will find a chest with Perovskite [1] and a stone with quest 28 [2] - Walkthrough - Chapter XI - Part 2 - Walkthrough - Final Fantasy XIII - Game Guide and Walkthrough](/finalfantasy13/gfx/word/577004453.jpg) |
Soon, you will find a chest with Perovskite [1] and a stone with quest 28 [2].
 |  |
Few steps later you will get to the big square. Before this area, on the right, you will find stairs that will lead you to a room with an odd mechanism [1]. Return here later and now go to the building located on the side of the square [2].
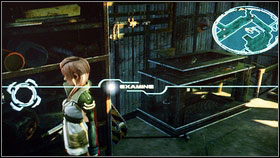
 | ![Enter the first floor and check little robot lying on the floor [1] - Walkthrough - Chapter XI - Part 2 - Walkthrough - Final Fantasy XIII - Game Guide and Walkthrough](/finalfantasy13/gfx/word/577004515.jpg) |
Enter the first floor and check little robot lying on the floor [1]. This the old friend of Vanille and he need to be repaired. Your task is to find some missing parts (they are marked on the map). Enter the building and you will find first cables in the right part of the square [2].
 | ![Second part of missing screws is located in the building with strange mechanism and Vetala inside [1] - Walkthrough - Chapter XI - Part 2 - Walkthrough - Final Fantasy XIII - Game Guide and Walkthrough](/finalfantasy13/gfx/word/577004546.jpg) |
Second part of missing screws is located in the building with strange mechanism and Vetala inside [1]. The next part is near the yellow mark shown on the map. You will get it for killing one of creatures wandering here [2].
 | ![It is good to find a new weapon for Vanille - Heavenly Axis [1] - Walkthrough - Chapter XI - Part 2 - Walkthrough - Final Fantasy XIII - Game Guide and Walkthrough](/finalfantasy13/gfx/word/577004578.jpg) |
It is good to find a new weapon for Vanille - Heavenly Axis [1]. When you will be near the star shown on map, enter the stairs and go upstairs. You will find a chest and Librascope inside [2].
 | 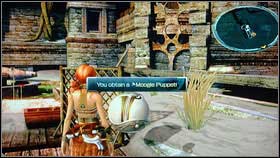 |
Now your task will be to eliminate a group of Ceratosaurs. Enemies are numerous and that is why you have to surprise them. If you will have some problems, summon one of your friends and enter the gestalt mode. Now you can start looking for next parts [1]. You will find them in the building on the right. The best option is to use stairs. You will find chests with Moogle Puppet and Pleiades Hi-Powers [2].
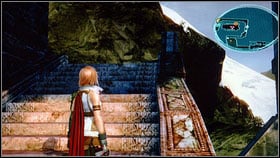 | ![On the upper level you will find the last missing part [2] - Walkthrough - Chapter XI - Part 2 - Walkthrough - Final Fantasy XIII - Game Guide and Walkthrough](/finalfantasy13/gfx/word/577004640.jpg) |
On the upper level you will find the last missing part [2].
 |  |
Before you will return to him open the chest located on the left. Inside, you will find Flamebane Brooch [1]. When the robot will be repaired, return to him.
 | ![As a reward you will get 10x Deceptisol, 2x Ultracompact Reactor, Gold Nugget, 5x Perfume and 3x Platinum Ingots [1] - Walkthrough - Chapter XI - Part 2 - Walkthrough - Final Fantasy XIII - Game Guide and Walkthrough](/finalfantasy13/gfx/word/577004703.jpg) |
As a reward you will get 10x Deceptisol, 2x Ultracompact Reactor, Gold Nugget, 5x Perfume and 3x Platinum Ingots [1]. Now this is the time to move to the next mission [2].
 | ![Soon you will find another chest and a new weapon for Fang - Taming Pole [1] - Walkthrough - Chapter XI - Part 2 - Walkthrough - Final Fantasy XIII - Game Guide and Walkthrough](/finalfantasy13/gfx/word/577004734.jpg) |
Soon you will find another chest and a new weapon for Fang - Taming Pole [1]. The next chest is near the save point. This time, you will find Ethersol [2].
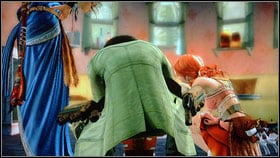
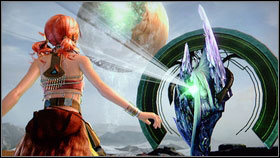
 | ![Few steps further you will have to fight with Barthandelus [2] - Walkthrough - Chapter XI - Part 2 - Walkthrough - Final Fantasy XIII - Game Guide and Walkthrough](/finalfantasy13/gfx/word/577004765.jpg) |
Few steps further you will have to fight with Barthandelus [2].
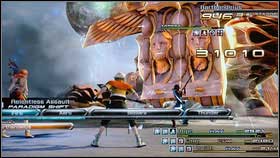 |  |
This battle is simple but you have to have good team. I advise you to take Hope, Vanille and Fang. Start with Libra, Synergist and two Saboteurs, debuff your enemy and then attack.
 |  |
Change to the healing paradigm when someone of your teammates will have 50 of his/hers HP. The best ability is Cura. The battle with be very long but easy. You should be able to do this without any problems.
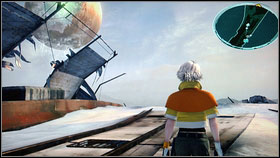
 |  |
As a reward you will get another circles in your Crystarium. You may now get close to the statue located in front of you and watch the cut scene [1]. After a long movie jump on the board of the nearby ship that will take you to the Cacoon [2].