
Walkthrough - Chapter III | Walkthrough Final Fantasy XIII Guide
Last update: 11 May 2016
 |  |
At the beginning of this chapter, a fight will start. Fortunately it is a good thing, because you will have a chance to learn something about paradigms [1]. Press LB to open the paradigm tab and choose the proper tactic. Change paradigm to Solidarity to heal the whole party. Then return your previous tactic and kill Ghasts. More information about each paradigm you will find in another chapter of this guide.
 |  |
After the fight run straight ahead. During the short cut scene, you will learn about another element - Crystarium [1][2]. It is a system that will help you to develop your character. The major thing here is to choose the correct path for the role you are interested in. As a result, you will get new abilities and your stats will improve.
 |  |
Choose your standard paradigm strategy and go to the crossroads. Take the right path to save the game [1]. Then take another road [2].
 | ![At the end you will find a chest with Pearlwing Staff [1] - Walkthrough - Chapter III - Walkthrough - Final Fantasy XIII - Game Guide and Walkthrough](/finalfantasy13/gfx/word/576511671.jpg) |
At the end you will find a chest with Pearlwing Staff [1]. Get back to save point and then run to the point marked on the map. After killing Ghast jump on the platform on the right where you will find another chest. Inside you will find 7x Chipped Fangs [2].
 |  |
Jump above and you will find another chest - 200 gils. When you will get close to Snow another cut scene will start. Then you will have to fight with soldiers. During the battle, you will learn a new ability - command execution [1]. It will let you to use your attacks without charging the ATB bar. Just chose the proper attack and press Y. After the battle go straight ahead [2].
 | ![Kill another group of enemies and turn right to open the chest with 5x Cie'th Tears [1] - Walkthrough - Chapter III - Walkthrough - Final Fantasy XIII - Game Guide and Walkthrough](/finalfantasy13/gfx/word/576511734.jpg) |
Kill another group of enemies and turn right to open the chest with 5x Cie'th Tears [1]. Then you will meet another opponents. You will have to kill many monsters at once so be careful. When your HP bar will get below 150, change paradigm to Solidarity to heal the team. After the fight turn left, kill another group and open the chest with Silver Bangle [2]. Use this item and return to main path.
 |  |
Save your game using the next save point (on the right). After few steps you will get to Pantherons [2].
 |  |
Kill them fast and open the chest on the left. You will Phoenix Down [1]. another chest is on the right - 50 gils [2].
 | ![Third chest with Strange Fluid is on the path [1], but you can also find another treasure that is guarded by some soldiers - Walkthrough - Chapter III - Walkthrough - Final Fantasy XIII - Game Guide and Walkthrough](/finalfantasy13/gfx/word/576511828.jpg) |
Third chest with Strange Fluid is on the path [1], but you can also find another treasure that is guarded by some soldiers. After defeating them you will get Magician's Mark. Go in the direction marked by the game - you will get to another save point and then, to Sarah.
 | ![After a short cut scene [1] you will have to fight with the enemy from the tutorial - Walkthrough - Chapter III - Walkthrough - Final Fantasy XIII - Game Guide and Walkthrough](/finalfantasy13/gfx/word/576511859.jpg) |
After a short cut scene [1] you will have to fight with the enemy from the tutorial. Now you will have a chance to learn paradigms for good [2].
 | ![To defeat Manasvin Warmech [1] you will have to change between Relentless Assault and Solidarity - Walkthrough - Chapter III - Walkthrough - Final Fantasy XIII - Game Guide and Walkthrough](/finalfantasy13/gfx/word/576511890.jpg) |
To defeat Manasvin Warmech [1] you will have to change between Relentless Assault and Solidarity. When any of your team mates will have low HP, change to the healing paradigm and then to Relentless Assault. You have to be fast to stagger the enemy.
 | ![After another cut scene run straight ahead and defeat some Terraquatiks [2] - Walkthrough - Chapter III - Walkthrough - Final Fantasy XIII - Game Guide and Walkthrough](/finalfantasy13/gfx/word/576511921.jpg) |
After another cut scene run straight ahead and defeat some Terraquatiks [2].
 | ![On the first crossroads turn right to get the Strange Fluid [1] - Walkthrough - Chapter III - Walkthrough - Final Fantasy XIII - Game Guide and Walkthrough](/finalfantasy13/gfx/word/576511953.jpg) |
On the first crossroads turn right to get the Strange Fluid [1]. Jump down and kill another enemies [2].
 |  |
Use the bridge to get to the other side and open two chests with 240 gils and Deneb Duellers. Now, you can get back. Chose the bridge located upstairs [1]. On the other side you will be attacked by Terraquatiks.
 | 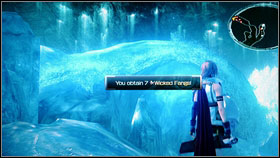 |
Kill them fast and open the next chest. Take 6 bottles of Enigmatic Fluid [1]. Get back to the main path and you will get to the destroyed machine. Use it to brake the ice. Before you will go to the right open another chest. You will find 7x Wicked Fangs [2].
 | ![Now you can cross the bridge [1] - Walkthrough - Chapter III - Walkthrough - Final Fantasy XIII - Game Guide and Walkthrough](/finalfantasy13/gfx/word/576512046.jpg) |
Now you can cross the bridge [1]. On the other side you will see an ice ravine with the next save point. After few seconds you will be attacked bys Alpha Behemoth [2] and before the battle you will learn how to use Techniques.
 |  |
These are some kind of a special abilities. To use them, you have to have TP points than you can get after successful combos. The first technique is Libra - use it to know many interesting details about your enemies. Press RB to see his abilities and weaknesses. To learn all stats you must use Libra twice.
 |  |
Fortunately, our friends will accommodate to your new ability and they will use their most effective spells. After the fight take the right path to get the Librascope [2].
 | ![After the cut scene [1] go straight ahead and kill all soldiers - PSICOM Trackers [2] - Walkthrough - Chapter III - Walkthrough - Final Fantasy XIII - Game Guide and Walkthrough](/finalfantasy13/gfx/word/576512140.jpg) |
After the cut scene [1] go straight ahead and kill all soldiers - PSICOM Trackers [2].
 | ![You meet more powerful Watchdrons too [1] - Walkthrough - Chapter III - Walkthrough - Final Fantasy XIII - Game Guide and Walkthrough](/finalfantasy13/gfx/word/576512171.jpg) |
You meet more powerful Watchdrons too [1]. Defeat them and turn right to get 2x Digital Circuit [2]. Now you can go back and enter the tunnel.
 | ![At the end of the tunnel you will have to fight [1] - Walkthrough - Chapter III - Walkthrough - Final Fantasy XIII - Game Guide and Walkthrough](/finalfantasy13/gfx/word/576512203.jpg) |
At the end of the tunnel you will have to fight [1]. After few steps you will get to the crossroads. Go straight ahead and open the chest with Paraffin Oil [2]. Get back to another path and climb to the top.
 | ![During you trip you will find a chest with 50 gils [1] - Walkthrough - Chapter III - Walkthrough - Final Fantasy XIII - Game Guide and Walkthrough](/finalfantasy13/gfx/word/576512234.jpg) |
During you trip you will find a chest with 50 gils [1]. When you will be at the top go right to open the chest with Insulated Cabling [2]. Get back and kill Ciconia Velocycle, then save the game. After a few steps, another cut scene will start. Then go straight ahead and kill one Dron group. Then open the chest with 30 gils.
 |  |
Then you will find another chest with Begrimed Claw. Some time later, you will exit the cave and it will be possible to save the game [1]. Then enter the mysterious room where you will have to fight with Alpha Behemoth [2].
 |  |
After the battle, go to corner on the right. In the chest you will find 600 gils [1]. Get back and turn right just before stairs. You will get to another chest with 2x Digital Circuits inside [2].
 | ![Run to the room located nearby and kill another group of enemies [1] - Walkthrough - Chapter III - Walkthrough - Final Fantasy XIII - Game Guide and Walkthrough](/finalfantasy13/gfx/word/576512328.jpg) |
Run to the room located nearby and kill another group of enemies [1]. Then go to the upper level [2] and jump on the other side.
 | ![Here you will have to fight with Crusader [1] - Walkthrough - Chapter III - Walkthrough - Final Fantasy XIII - Game Guide and Walkthrough](/finalfantasy13/gfx/word/576512359.jpg) |
Here you will have to fight with Crusader [1]. After the battle turn right and localize the chest with 7x Begrimed Claws [2]. Now return to the place of your last fight.
 | ![On the other side of the square there is another chest guarded by some soldiers [1] - Walkthrough - Chapter III - Walkthrough - Final Fantasy XIII - Game Guide and Walkthrough](/finalfantasy13/gfx/word/576512390.jpg) |
On the other side of the square there is another chest guarded by some soldiers [1]. Inside you will find a Sparked Ring [2].
 | ![Use the stairs [1] and take another treasure - 3x Potions [2] - Walkthrough - Chapter III - Walkthrough - Final Fantasy XIII - Game Guide and Walkthrough](/finalfantasy13/gfx/word/576512421.jpg) |
Use the stairs [1] and take another treasure - 3x Potions [2].
 |  |
Run to the top and save the game. Kill another two groups of enemies [1]. In one of them you will meet PSICOM Executioner [2]. The best option is to kill his guards first, then take care of the boss.
 |  |
After the third fight open the chest with Millerite. Now you will have to handle with another groups of weaker enemies. After dealing with three Pantherons [1] use stairs and then turn right. Now you may pass to the other side [2] to get to the save point. Save the game and get back.
 |  |
Use the stairs on the right to get to chest guarded by two soldiers. After the fight take the Ferroeletric Film [1]. Now you may jump down and you will be attacked by powerful group of enemies. At the beginning kill all helpers and then their commanders. After the battle save the game. Then go left and turn right (after a while). On the left you will see a chest with 2x Librascopes [2] and another on the right with Phoenix Down.
 |  |
Few steps later a short cut scene will start. Then Garuda Interceptor [1] will attack you. At the beginning of the fight use Libra to strengthen DMG of your companions. As a result your enemy will be staggered without healing [2].
 |  |
After a short time your opponent will run away to start the second phase. Repeat your tactic. When you will kill him for the second time, some new roles will be available for your teammates. Sahz will be able to develop Synergist tree and Vanilla - Saboteur.
 |  |
After a film, you will have to fight with some soldiers. You do not need to defeat them. After the battle first Eidolon [1] will appear. He will kill all your enemies and then he will try to harm Snow. Just before the fight you will be able to read a guide of how to fight with these creatures [2].
 |  |
They have their own bra that you have to charge (impress the enemy). Just attack or use another abilities (you will full list after using Libra). You will be given a time to do this so you must be very quick. To defeat your opponent you will have to use Sentinel paradigm and the ability called Steelguard. When the bar will be charged press X. As a matter of fact you will gain your first summon and additional ATB bar.