Assembling the Satsuma car - the basics | My Summer Car My Summer Car guide, tips
Last update: 20 August 2019
On this page of our guide to My Summer Car, you will learn the most important information about the assembly of the Satsuma car which stands in front of the garage. We will show you how to use the tools and how to install the individual parts. You will also find a list of additional parts and tips for finding them.

Preparations
Assembling the Satsuma car is one of the main goals and one of the busiest activities in the game. Everything will take a good few days in the game world - you should start this process with the appropriate preparations and forming the right habits.
First, remember to monitor your needs all the time: fatigue, hunger, thirst, urine, stress. Buy a lot of food in the store, drink tap water, use the sauna to reduce stress, and go to sleep when the night comes - you won't use electricity. Also, you can see better during the daytime. Screwing and watching the car take shape is very exciting which means that it is easy to forget about everything else.
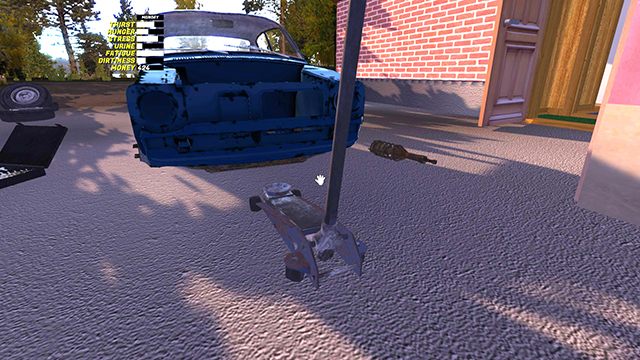
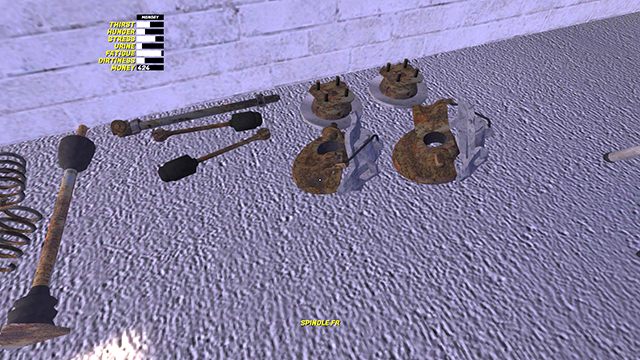
Collect all the necessary parts - the construction of the car will go smoother. Place the SPANNER SET in the right spot so that you always have it at hand. When installing the suspension and wheels, you can also raise the front or rear of the car using the CAR JACK. You will find it in the corner of the garage. Grab the bottom part to move the car jack. Press the left mouse button to raise it, a single click with the right button lowers everything down.
If you are sure what the individual parts are for, you can move them piece by piece in advance next to the car (e.g. suspension elements) and place them on the left and right to have faster access. If you are not sure, move them separately from the garage where most of them are grouped respectively.
Some parts are only for a specific place in the car: front or rear and left or right. They are described as follows:
- FR - Front Right
- FL - Front Left
- RR - Rear Right
- RL - Rear Left
Required parts
Before assembling the car, collect all the missing parts. Most of them are in your garage, but the rest must be bought at the store. Even though you have some of them in the garage, you should still purchase them and install new ones, because the ones you own are severely worn out. They will either not work properly after attaching or fall down instantly. You have to do this with the battery and the oil filter.
You also won't find any wheels in the house. A free set is hidden on the map and you can easily get it (see section: Where to find wheels?), but these wheels should be considered only as a temporary solution. The free wheels are heavily worn out and won't pass a vehicle inspection. Use them in the assembly process for moving the car with ease or in test drives. The good wheels have to be ordered in the workshop for the appropriate price.
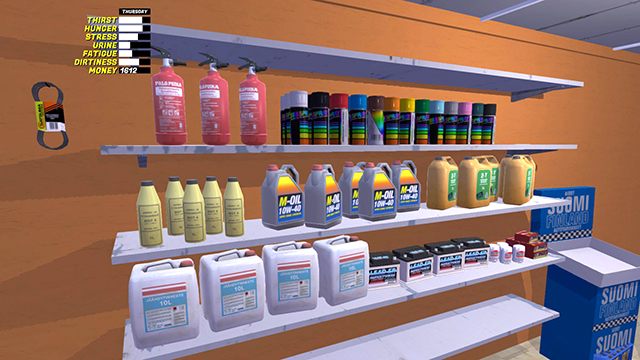
The rest of the necessary parts are in the store in the city (chapter: Shopping). Remember to have at least 2,500 mk to buy spare parts, fuel and food.
In general, you have to buy almost everything from the shelves on the left wall. Remember to bring the GASOLINE canister with you to the shop to fill it with the fuel necessary for the engine to start once the car is complete.
The shopping list will look like this:
Part's name | Number of units required |
Alternator belt | 1 |
Battery | 1 |
Spark plug box | 1 |
Brake/clutch fluid | 4 |
Coolant | 2 |
Motor oil | 2 |
Gasoline | 18 liters |
You can also buy a new upholstery (blue stand with the Suomi text), but its pattern is exactly the same as the entire rack. Decide if it is worth the price.
How to use the tools
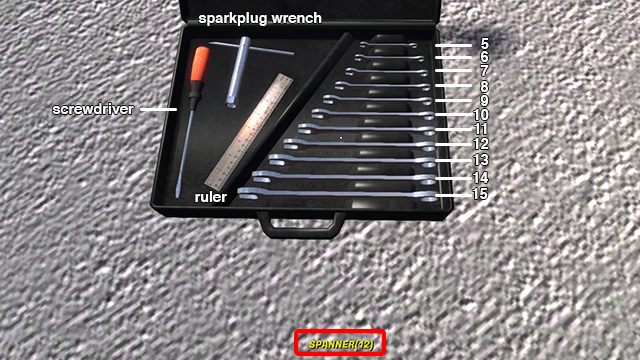
When using tools, the most cumbersome thing is the constant switching between wrenches. Each part requires a different size of bolts and you always have to choose the right one. Fortunately, you do not need to look for small nuts anywhere and make sure not to lose them - just use the wrench on the bolt to start the installation. Do not be afraid to use the Q key and go through the body and the texture - this is not a bug, but a very useful feature!
In the Spanner set, you will find size 5-15 wrenches, a screwdriver, a sparkplug wrench and a ruler.
During the assembly process, you will constantly switch between:
- Hand mode - to move parts and their assembly (key 1)
- Tools mode - to select the wrenches and tightening or loosening bolts (key 2)
The assembly blueprint of the parts is as follows:
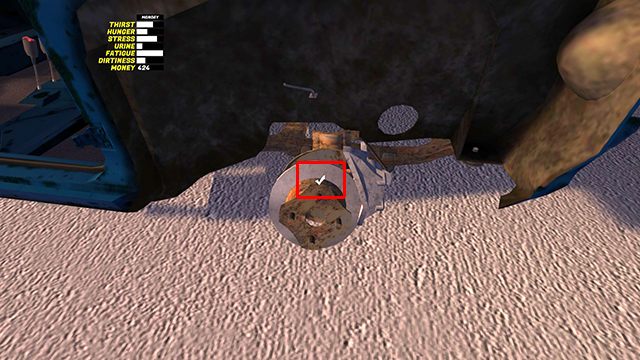
- Click on the desired part with the left mouse button to move it freely. Put it in the right place in the car. When the part is more or less in the right place, a white OK symbol will appear. Then, left-click to install the part. NOTE - this is not all. If you don't want the part to fall off, it must be screwed. If you have to do that, use the right mouse button on the installed part to remove it.
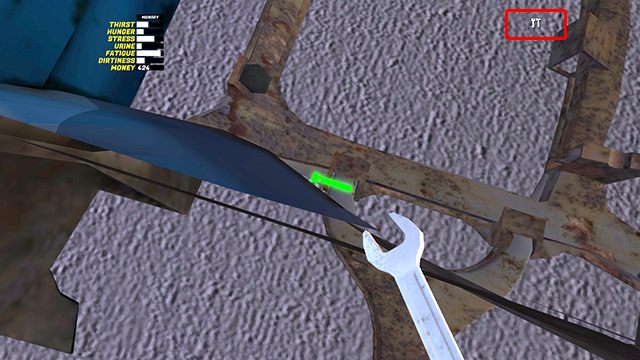
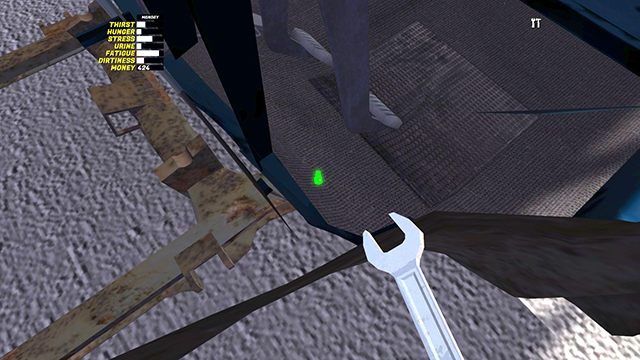
- Go to the tools mode by pressing key 2. Select the correct wrench size. Place the crosshair in the center of the screen on the bolts - if the wrench is correct, the bolt will glow green. Moving the mouse wheel up to tighten the bolt, move it down - to unscrew. Once all the bolts are screwed, the part is installed. To remove it, you must first unscrew all the bolts.
Remember that sometimes the screws will be completely invisible, for example, hidden under other elements. However, you don't need to look at them from the front to tighten them - the twisting works from any point of view, you only need to find the bolt. If you don't see any bolts, go around the car and keep Q (grab) and C (crouch) keys pressed down. At later stages, be careful not to accidentally unscrew a bolt from another part that is the same size.