Guides & Walkthroughs New Guides Popular RPG Action Strategy Adventure YouTube Guides Mobile App
Download Game Guide PDF, ePUB & iBooks

Hitman 3 Guide by gamepressure.com

Hitman 3 Guide

Table of Contents

Hitman 3: Puzzle with the hidden safe - Dartmoor, walkthrough Hitman 3 guide, walkthrough

Last update: 20 January 2021

On this page of the Hitman 3 guide, we explain how to solve the puzzle with the hidden safe in Dartmoor. You will learn where to find the hidden safe at Thornbridge Manor and how to enter the correct safe combination. We also inform you what is hidden in the safe.

The hidden safe at Dartmoor - where is it?

The safe is hidden in Alexa Carlisle's Office - Hitman 3: The puzzle with the hidden safe - Dartmoor, walkthrough - Death in the Family - Dartmoor - Hitman 3 Guide

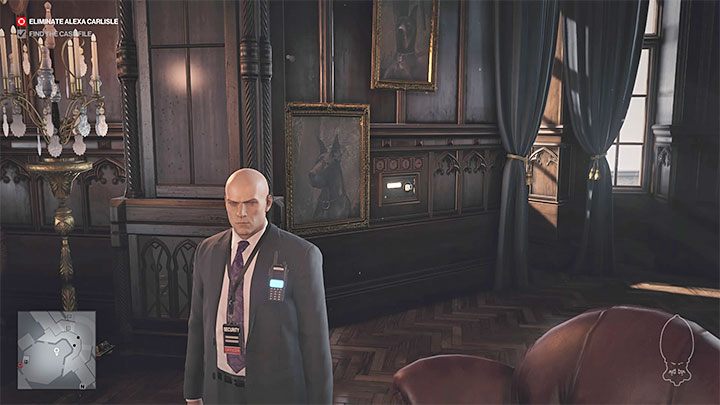
The safe is hidden in Alexa Carlisle's Office. It is located on level 2. The easiest way to get there is to disguise yourself as a security guard. You can also get to the office by climbing the building's facade and entering it through the balcony.

A single security guard is patrolling the office. If you have the right disguise on, you won't have to eliminate him. Otherwise, get rid of him to make it easier for you to solve the puzzle (if you're willing to follow all its steps, i.e. investigate all the clues).

Check out the desk in the north part of the room - Hitman 3: The puzzle with the hidden safe - Dartmoor, walkthrough - Death in the Family - Dartmoor - Hitman 3 Guide

Check out the desk in the north part of the room. Find a button on the big seat and push it.

This will reveal a safe hidden behind a picture of a dog - Hitman 3: The puzzle with the hidden safe - Dartmoor, walkthrough - Death in the Family - Dartmoor - Hitman 3 Guide

This will reveal a safe hidden behind a picture of a dog.

Solving the puzzle with the safe at Dartmoor

The safe requires a four-digit combination - Hitman 3: The puzzle with the hidden safe - Dartmoor, walkthrough - Death in the Family - Dartmoor - Hitman 3 Guide

The safe requires a four-digit combination. The four pictures above the safe have the right combination. Each picture has a clue on where to find one of the four digits for the code.

The first picture shows a small clock - Hitman 3: The puzzle with the hidden safe - Dartmoor, walkthrough - Death in the Family - Dartmoor - Hitman 3 Guide

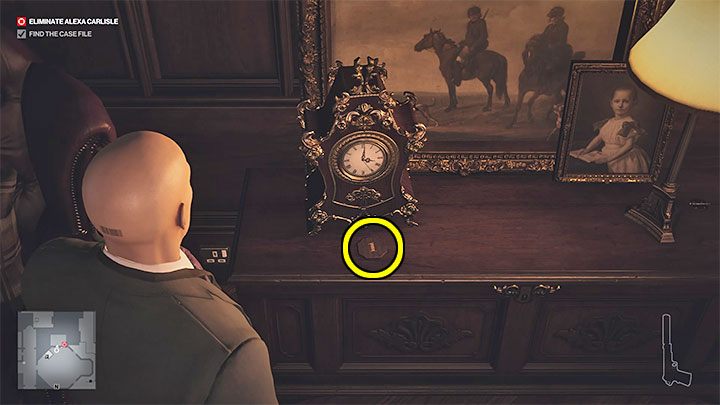
The first picture shows a small clock. It is located on the first floor of Alexa's office – notice the number 1 next to the clock.

The second image shows a telescope - Hitman 3: The puzzle with the hidden safe - Dartmoor, walkthrough - Death in the Family - Dartmoor - Hitman 3 Guide

The second image shows a telescope. You must use the stairs in the office to get to the upper floor. You will notice the number 9 next to the telescope.

The third image shows a campfire – find the fireplace located on the lower level of the office - Hitman 3: The puzzle with the hidden safe - Dartmoor, walkthrough - Death in the Family - Dartmoor - Hitman 3 Guide

The third image shows a campfire – find the fireplace located on the lower level of the office. Find the number 7.

The fourth picture shows an antler – you will find it above the exit door - Hitman 3: The puzzle with the hidden safe - Dartmoor, walkthrough - Death in the Family - Dartmoor - Hitman 3 Guide

The fourth picture shows an antler – you will find it above the exit door. Stand in a place where you can see the number 5.

You can now return to the safe and enter 1975 - Hitman 3: The puzzle with the hidden safe - Dartmoor, walkthrough - Death in the Family - Dartmoor - Hitman 3 Guide

You can now return to the safe and enter 1975. Finally, select the OK button to confirm the code.

Contents of the Dartmoor safe

1 - Hitman 3: The puzzle with the hidden safe - Dartmoor, walkthrough - Death in the Family - Dartmoor - Hitman 3 Guide
Inside, you will find a Case File on Arthur Edwards - Hitman 3: The puzzle with the hidden safe - Dartmoor, walkthrough - Death in the Family - Dartmoor - Hitman 3 Guide

Inside, you will find a Case File on Arthur Edwards. This is one of the two main objectives of the mission. You can also complete it in an alternative way - we described this on Getting case files on Arthur Edwards page.

See/Add Comments

You are not permitted to copy any image, text or info from this page.

This site is not associated with and/or endorsed by the IO Interactive or IO Interactive. All logos and images are copyrighted by their respective owners.

Copyright © 2000 - 2024 GRY-Online S.A. for gamepressure.com, unofficial game guides, walkthroughs, secrets, game tips, maps & strategies for top games.