
Hitman 3: Ripe for the Picking trophy/achievement - how to unlock? Hitman 3 guide, walkthrough
Last update: 16 April 2021
Key points of Hitman 3 - Mendoza - Important locations
Important locations
This page of the trophy guide to Hitman 3, contains a detailed description of the Ripe for the Picking trophy. You can get this achievement in the Mendoza map and it involves killing the mission targets in three different ways. Instructions on the steps needed to complete for each kill can be found below.
- Grape Crusher - Tamara Vidal (Pulp Friction)
- Lethal Poison in the Grand Paladin Wine - Don Yates (To Loyalty)
- Poison Gas - Don Yates and Tamara Vidal (Secondary Fermentation)
Grape Crusher - Tamara Vidal (Pulp Friction)

The Grape Crusher is located in the production room on level 0 of the winery (point 23 on the map) - as shown in the image, you can take a look inside the machine. This way you will discover that you can easily throw someone into the machine.

Unfortunately, Tamara does not show up in the production room by default. The only way to "bring" her to this location is to start a Mission Story called The Tour. As you play through this Mission Story, assume the identity of Corvo Black, one of the tour participants. Diana and Tamara will also be participating in the trip.

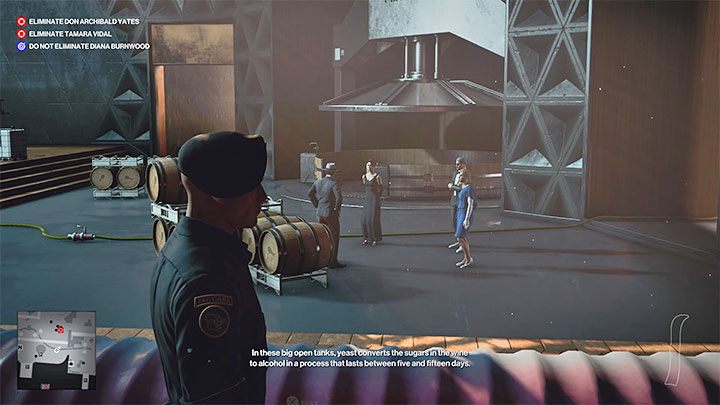
As the tour advances, you will reach the fermentation room (point 25 on the map) where you will be able to ask Vargas (the tour guide) about the surrounding machinery. Return to the previous room and reach the grape crusher. Ask him about it.
You can immediately push Tamara as soon as she stands in front of the crusher, or wait until the surrounding characters have turned away, so that the moment of the kill remains unnoticed.
Lethal Poison in the Grand Paladin Wine - Don Yates (To Loyalty)

To perform this assasination, you need to take some rather unusual steps at the beginning, namely obtain the lethal poison and pour it into an empty glass. You will no longer be able to do this after delivering the Grand Paladin wine to Yates, as Agent 47 would be compromised even in disguise.
You can either find the lethal poison on the map or take it with you on the mission. We have described where to get it on the Poison - how to get it? page. For example, you can find it on one of the floors of Yates' villa (point 50 on the map).

You have to sneak to the villa basement with the poison (point 43 on the map). Use it on the glass marked in the attached picture.

Now, you need to take care of two Mission Stories. First, beat the Mission Story called The Tour, which regards organizing a tour of the winery. Make sure that Tamara does not die during the tour and that all participants reach the barrel room (point 29 on the map). Don Yates will appear there and you will be able to start the hidden Mission Story, Closing Statement.

Agent 47 needs to get inside the Wine Fridge. Don't try to use one of the two main entrances to the refrigerator - they are both locked and on top of that, there are cameras above them.
Go to the adjacent Tech Room (point 27 on the map). If you're wearing a Corvo Black or mercenary disguise, then you don't need to sneak around here. Otherwise, sabotage the fuse box and use that to get rid of both people in the room. Throw their bodies in the ventilation tunnels so they won't be discovered later.

From the tech room, you need to take the Tier 1 Access Dongle from the picture above - you will need it for hacking.
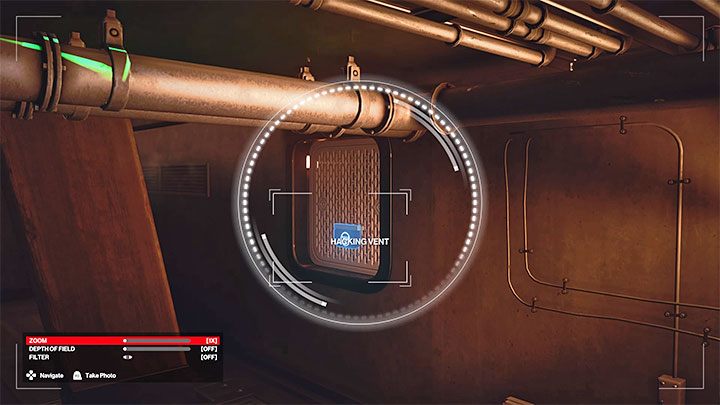
There is a hole in the corner of the room - jump into it to get to the ventilation tunnels (point 28 on the map). Follow them to the east. You will find two vents - you can open either of them, and you have to use the camera to do so. Agent 47 will use it to hack the vent's security.
Note - hacking won't work if you have not taken the flash drive from the tech room.

Carefully approach the wine fridge room (point 29 on the map) and climb in when it's safe. First, go to the terminal, which will activate the curtains on the windows again (note - due to game bugs, it won't always work correctly, and people in the main room could still be alerted).
Head then to the fuse box in the corner of the room. Sabotaging it will allow you to get rid of 2 NPCs from the fridge - the waiter and the sommelier. Hide their bodies in the ventilation tunnels and put on a sommelier disguise.

The Grand Paladin wine is located in a sort of a vault, the access to which is blocked by lasers. There is a simple puzzle to solve - interact with the panel on the wall and enter the code 1945. This is the date of production of the wine, which you could learn about in the final part of the tour. You can take the 1945 Grand Paladin wine now.

If you don't want to be recorded by the cameras, don't go to the barrel room by opening the refrigerator door, but by going through the ventilation tunnels. Talk to the head of security to follow him towards the location of the scheduled meeting of Providence members.

After you reach the secret tunnel (point 39 on the map), Agent 47 will undergo a mandatory frisking. Use the nearby trash can to dispose of your firearms and check your inventory for other "illegal" items (e.g. sharp melee weapons). Reach the villa basement (point 43 on the map) where the meeting will take place.

Place the wine on the table - it will automatically be picked up by the head of security, who will start pouring it among the meeting attendees. Additionally, interact with the table to give a speech about the Grand Paladin wine.
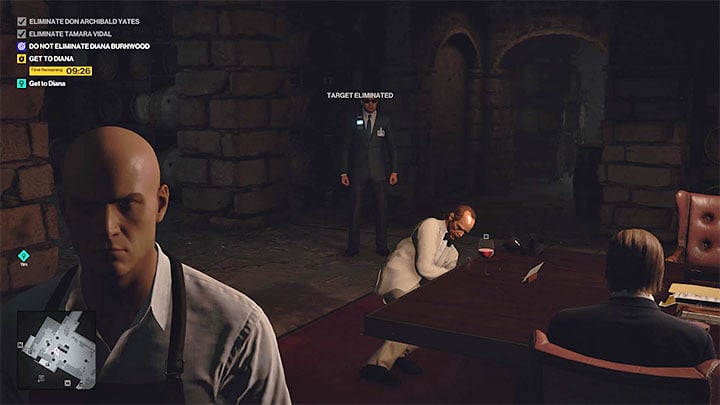
During the rest of the meeting, you don't need to perform any additional actions (unfortunately, it's also too late to poison Yates). In the final part of the meeting, Don Yates will order to kill Tamara and capture Diana, who will be taken by mercenaries to the upper level of the villa.
Don Yates will taste the wine shortly after Diana is brought out of the cellar. If you poured the poison into the glass correctly at the very beginning of the mission, the man will die after drinking the wine.
Poison Gas - Don Yates and Tamara Vidal (Secondary Fermentation)

This is the most troublesome assassination the ones associated with the described trophy. Its most important element is that you must use a lethally poisonous gas. It cannot be a gas that will only cause nausea or render Yates and Tamara unconscious.
You can either find the lethal poison on the map or take it with you on the mission. We have described where to get it on the Poison - how to get it? page. For example, you can find it on one of the floors of Yates' villa (point 50 on the map).

If possible, acquire a mercenary disguise, as it will allow you to quickly get to important locations related to the assassination.
With the deadly poison you need to reach the Tech Room (point 27 on the map). There are two people in the room that would be worth getting rid of. After "clearing" the room, interact with the ventilation system machine. Use the lethal poison on it.
Now, take care of the Mission Story The Tour. You need to get the tour started, but it is best to choose the option in which Agent 47 does not participate in the tour. You must do the following steps to do so:
- Eavesdrop on Corvo Black's conversation in the reception area (point 34 on the map).
- Eavesdrop on the conversation of the people waiting to start the tour next to the grape fields (point 18 on the map).
- Eavesdrop on Vargas's conversation in the fields (point 19 on the map) and deliver three bunches of Malbec grapes to him while wearing a winery worker disguise.
Your actions will result in all the tour participants being NPCs (Vargas, Black, Tamara, Diana). Vargas will guide them through the following rooms.
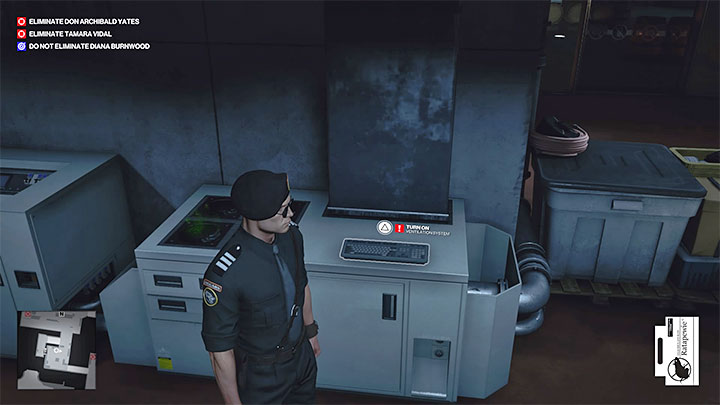
While the tour is underway, return to the Tech Room (point 27 on the map) and this time interact with the keyboard to the right of the ventilation system machine. By default, the poisonous fumes will escape only in the ventilation tunnels.

Use the nearby stairs to reach the security room (point 38 on the map). There is a touch panel inside, adjacent to the glass walls, behind which you can see the barrel room.
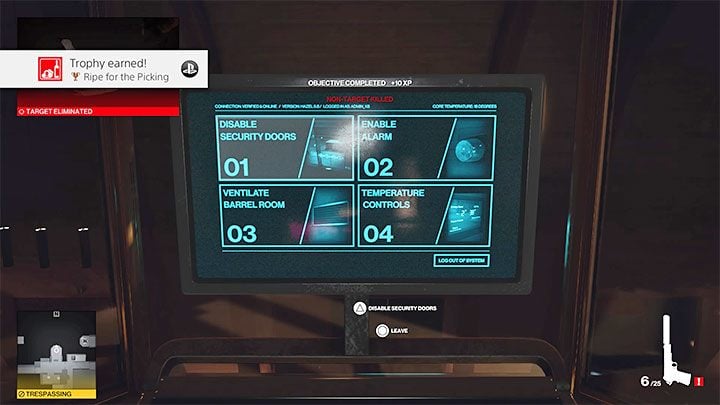
Wait until the tour participants reach the barrel room (point 29 on the map) and until Don Yates shows up too. Interact with the panel and select option 03 - Ventilate Barrel Room. This will cause the poisonous fumes to spread throughout the room and kill all the people in the barrel room.
Don't worry about the message that you've failed the mission, because you'll still pass the challenge and be able to get the trophy (if you've previously completed the two other assassination options). The mission failure screen pops up because Diana also died in the barrel room. The most important thing, however, is that you have completed one of the objectives of the trophy correctly.