Guides & Walkthroughs New Guides Popular RPG Action Strategy Adventure YouTube Guides Mobile App
Download Game Guide PDF, ePUB & iBooks

Hitman 3 Guide by gamepressure.com

Hitman 3 Guide

Table of Contents
Hitman 3 - Berlin - Important locations
Mission starting area. You begin the mission next to the bus stop and you must proceed towards the forest. You won't encounter any enemies at first.
Gas station. It's locked and you won't find any important items here - only a coin and a flyer. You can examine one of the vehicles behind the station (minor clue). You can unlock a secret exit here after completing the main mission objective.
Path to the forest. It's located next to a car with its lights turned on. You will encounter a corpse while following the forest path - you can collect a combat knife.
Radio tower. Its gate is locked - you can use a key (you can obtain several keys, including an unused one - 7 on the map), a lockpick or a crowbar. There are two laser traps here which can alert ICA agents - you can destroy them or avoid them using a ladder. The top of the tower is a perfect place to attack mission targets with a sniper rifle.
Area where you unlock the open world map. The ICA agent Price will show up nearby - you can eliminate him. Take his earpiece (it will allow you to overhear other agents conversations and uncover them) and his silenced pistol. Agent Price isn't counted as one of the main mission targets.
Poisonous mushroom. It offers identical effects to an emetic rat poison.
Radio tower key. You can use it to unlock the southern tower (4 on the map). There's a bicycle next to the road which can be used to leave the mission area.
Line to Club Holle. Agent 47 won't be allowed inside, however you can help Helfried Ziegler who's looking for a bag of pills in the parking lot - find the bicycle with the pills by the southern fence and hand them over to Ziegler. Alternatively you will be allowed inside while wearing a security disguise. Guests must be frisked (you can hide forbidden items in a container). You can end the mission in front of the club. There's also a ufo graffiti tied to the secret exit.
Club parking lot entrance - shortcut. The entrance is locked by default and you can't open the door even if you have lockpick / crowbar. You must get to the door from the inside of the club and open it permanently. There are stairs near the door leading to level 1.
Guards. They're guarding the northern area which isn't accessible for the guests of the club. You can climb over the wall to the east of them or go past them while using a proper disguise. You can easily distract a guard by throwing an object and obtain a club security disguise.
Water channels. This is a forbidden area where you must use stealth. You can easily obtain club crew and club security disguises here. You can throw people in the canals - they'll die instantly (you'll also unlock a minor challenge).
Side entrance to the club. It's locked. You can use a lockpick/crowbar or distract a crew member and collect the staff area key they've dropped. Alternatively you can get inside by going through a large hole in the wall - it leads to the wardrobe.
Passage to the Chill Out area. The doors are locked - you must use a key / lockpick / crowbar. Alternatively you can go east, drop down by the canal and move to the right in the hanging position.
Crowbar. It's useful in opening doors. You can easily obtain it even without a disguise (after avoiding the guards from the southern checkpoint - 10 on the map).
Crane and Agent Thames. You can use the crane to murder Agent Thames in an accident, however you need a Fuse Cell (it's in a nearby dumpster - 16 on the map). Start the crane, use the ladder to reach the operator's booth and drop the heavy cargo when Thames will be standing under it.
Passage to the back entrance. If you don't have a disguise you can sneak your way using the bushses. There's a Fuse Cell which you can use to power the crane (15 on the map).
Back entrance. You can open the scooter's container and take/poison the food - it's best to do it after getting the food delivery guy disguise (23 on the map). Use the garage's doorbell to unlock the entrance and to give the poisoned food to a biker. There's a camera above the rear entrance to the club. The eastern door is closed, but you can climb over the wall. You can start climbing towards the club's roof here (34 on the map). You can open the garage gate from the inside.
Red toilet. You can find wooden boards on the outside of the building which can be destroyed using a crowbar - it will allow you to sneak inside the club. The toilet booths are closed - it's best to open them by using a proper key. You can climb on top of the toilets using the exterior's gutter pipe and reach the scaffolding inside the club. There's emetic rat poison in the room to the south of the toilets.
Shortcut - Biker basement door. The door is locked by default and you can't open the door even if you have lockpick / crowbar. You must get to the door from the inside of the biker building and open it permanently.
Chill Out bar. Agent Swan (you can push him into the canal, sabotage the gas tank or drop a heavy object on him) and Agent Davenport (you can poison his drink or drop a bag of bricks on him) show up here. Check a small building at the back of the bar - you will find emetic rat poison and an unused bartender disguise. You can turn on the radio, attack the bartender and collect a staff locker key. Inside the locker you'll find the Juice Bar Ticket. Agent Swan leaves an electronic key hacker behind.
Side entrance to the club. A guard is here - you can use a proper disguise or walk through a container. You can also alternatively begin climbing to the lower roof of the building (31 on the map).
Club's staircase. You can reach it from the main area of the club or from the Chill Out bar (you must open a locked door). The staircase allows to travel between various floors and it also helps in reaching the harder to access -1 and -2 levels. A guard is here, however you can distract him by throwing an object.
Food delivery guy and a sewer manhole. You can take over the guy's identity and then use it to deliver a (poisoned) meal to the bikers (17 on the map). You'll find emetic rat poison here, as well a sewer grate (crowbar is needed) which can be used to leave the mission area. You can climb / go through the container to get closer to the Juice Bar (26 on the map).
Toi toi toilets. Nearby poisoned people may show up here - especially Agent Davenport (20 on the map).
Biker hangout. If you've delivered food to the bikers (17 on the map) then you can poison Agent Lowenthal. He can then go to the toilet where you can drown him. You can also find an unused biker disguise in the toilet and a motorcycle key in the hangout. There's a camera in the corridor near the hangout.
Juice Bar. You can obtain a bartender disguise, dismiss the guy working at the bar and then poison Agent Swan. The side passage is guarded by the bikers and there's also a camera here - you can show them the Juice Bar Ticket (20 on the map is a good place to get it) or by using a biker disguise.
Garage entrance. This is one of two main entrances to the biker building. You can reach it by going through the container in the delivery guy area (23 on the map) or by showing the bikers a Juice Bar Ticket / wearing a biker disguise (26 on the map).
Wardrobe. The easiest way to get here is by climbing through a hole in the eastern wall, however you can also open the door (using a key / lockpick / crowbar). You will find an unused club crew disguise and (in the next room) a staff room key.
Main corridors of the club. Only a part of the floor offers full access - other areas require to use stealth or a disguise. There are stairs to level -1 in the southern corridor. In the north-eastern corner you'll find the staircase (22 on the map). This location is being patrolled by Agent Davenport and occasionally he goes to the Chill Out bar (20 on the map).
Pope and scaffolding. There's a Fuse Cell here. You will find an alternative descent to lower levels of the club here (using a pipe). There's also a scaffolding nearby - passage to the toilet roof, a wrench and a bag of bricks which can be pushed. You can lower a ladder here from the roof (33 on the map) and unlock a shortcut - a quicker passage to the club's roof.
Stairs to the roof of the club. There's a guard next to them. You can find a crowbar nearby.
Club roof. It's patrolled by Agent Green and there are also 2 standard guards here. You can use the skylight to reach the balcony with the shortcut (33 on the map). There's also a bag of bricks here which can be dropped on Agent Davenport (20 on the map).
Shortcut - skylight ladder. You can reach the ladder from the club's roof (32 on the map). Crowbar is required to lower it. Once you've dropped it you will unlock a new shortcut to level 0 (30 on the map).
Ladder and stairs. You can use the main starcase of the club and also the stairs leading the overpass connecting the club with the biker building (35 on the map). The ladder allows to descend to the back entrance area (17 on the map). You can sabotage the fusebox on the roof and easily attack one of the standard guards and/or Agent Green.
Overpass. You can use it to travel between the club building and the biker building. The passage isn't guarded. You can find a bag of bricks here which can be pushed. You can attempt to kill Agent Thames using this method (15-16 on the map).
Main corrirors on level -1 of the club. Only a part of the floor offers full access - other areas require to use stealth or a disguise. You can find a Club Keycard near the southern stairs - it will come in handy on level -2. Agent Mongtomery is patrolling this level and level -2.
Light rig and Agent Banner. Agent Banner can always be found here and he's meeting with Agent Montgomery from time to time. You can sabotage and activate the light rig to kill 1 or 2 agents.
Projector and the northern corridor. You can turn on the projector to distract one of the bikers - this is a great opportunity to get a disguise. The northern corridor allows to travel between the club and the biker building. There's a camera above the corridor entrance (in the club). You can use the pipe in the corridor to descend to the level -2 office.
Light rig installation. You can distract the technician (sabotage the fuse box or use a throwable item) to obtain his disguise. You can sabotage the installation - screwdriver is required (the technician has one on him and there's also another to the north from here). After the sabotage go to the DJ booth on level -2. You can also find a crowbar nearby.
Pipe room. There's an alternative descent to level -2 here and Agent Montgomery shows up here from time to time.
Projection bar. At the back of the bar you can find a laptop (an opportunity to obtain a bartender disguise) and you'll find a Juice Bar ticket (it can be used in area 26 on the map). You can use the winch to drop a large hanging object. You can start serving drinks as a bartender, as well as poison existing drinks.
Dance floor. A large group of people are partying here and you have full access to the dance floor. Areas in the northern and eastern parts of level -2 are closed to public and some of them require a keycard (you can obtain one in area 36 on the map). Agent Chamberlin is patrolling this area and he has meetings with Agent Montgomery in the surveillance room.
Basement bar. You can serve drinks as a bartender. There's emetic rat poison in the room at the back.
Toilets. You will meet a drug dealer here - you can talk to him, follow him to a quiet spot, attack him and wear his disguise. The dealer had pills on him. There's a staff area key in one of the toilet booths.
Guarded passage. You can use a proper disguise, distract the guard, open the western door or reach this area from the pipe room (40 on the map).
Bikers and a camera. You can use a biker disguise or reach this area from the other side. The camera is observing the corridor.
Boiler room. All of the western doors require a keycard (it can be found in location 36 on the map), however you can also get here from the north. There' a container for hiding bodies here.
Surveillance room. All of the western doors require a keycard (it can be found in location 36 on the map), however you can also get here from the north. You can distract a biker with a thrown item, eliminate him (make sure to hide the body!) and sabotage the recordings easily. Montgomery and Chamberlin have meetings here. Club Keycard and an unused Club Security disguise can be found here.
Hirschmuller's office. He's the owner of Club Holle. You can turn on the gramophone to easily obtain his identity. You can also meet with Agent Montgomery, however the ICA agents will ambush Agent 47 by default. There are a Club Keycard and a Juice Bar Ticket here. Alternatively you can reach the office from the corridor on level -1 (38 on the map). There's a safe in the office - the code is 1989 - you'll get the idol and the cocaine brick.
Area behind the DJ booth. You can use a key to open the cabinet (it's next to the DJ) and to find a sedative (emetic) syringe. You can poison the food and easily obtain the DJ disguise. There are a staff area key and a ladder here. The ladder leads to the roof of the booth. You can find ventilation shafts passageways there. You can also climb to level -1 from the roof.
DJ booth. Once you've obtained the DJ disguise you can take over the show. It's best to sabotage the light rig on level -1 first (39 on the map). Wait for Agents Montgomery and Banner to meet on the upper balcony (37 on the map) to kill them in a light rig explosion.
Ground level of the bikers building. You'll find an emetic rat poison and a camera here. You can also use the stairs to level 1. You can activate the fork lift and obtain a biker disguise easily.
Garage. There are opportunities here for killing Agent Lowenthal in an accident - you can puncture a gasoline drum with a screwdriver and also puncture a water barrel combined with activating the car battery charger. You'll find a Fuse Cell here. There's a motorcycle in the northern part of the garage - you can use it to leave the mission area (keys from 25 on the map are required).
Furnace and drug packacking room. The furnace allows for easy body disposal. You can find a cocaine brick in the room (it's tied to one of the challenges).
Surveillance room. You can sabotage the recordings, however you must first distract at least one biker. Agent Rhodes shows up here regularly.
Grow house. Agent Rhodes shows up here from time to time - you can electrocute him (preparations with a screwdriver are required) and you can also distract him with a sprinkler unit machine. The machine can also be used to poison the people from the main room. You'll find emetic rat poison next to one of the bikers. You can find insecticide in a nearby room (it has similar effects to the rat poison).
Bag of bricks. You can drop it on Agent Rhodes (56 on the map) after making him check the sprinkler unit.
Sniper nest. Agent Tremaine is observing the area with his sniper rifle. He's accompanied by a biker, but you can distract him by sabotaging the generator (northern corner). Tremaine can shoot Agent 47 if he spots him earlier and if you trip the laser traps in the radio tower (4 on the map).
Roof of the bikers buildings. There are three different stairs leading here. You won't find any enemies, however you can have a great view at the entire club.
Scrap Sword. It's hidden between the Juice Car and the canals. It's tied to two different challenges (finding the sword and using the sword to kill any ICA agent).
Mission exit. You can use it without additional requirements.
Enlarge this map

Hitman 3: Berlin map & Agent Price - how to unlock? Hitman 3 guide, walkthrough

Last update: 05 February 2021

Key points of Hitman 3 - Berlin - Important locations

Important locations

On this page of the guide to Hitman 3 you will find out how to unlock the power plant map in the Berlin mission. You will also learn how to kill Agent Price and what does the task of eliminating the ICA agents involve. It is the main (and only) objective of the mission in Berlin.

Contacting Olivia and unlocking the map of the mission

The mission in Berlin features a few unusual elements - one of them is that Agent 47 starts the mission without any equipment - Hitman 3: How to unlock the map of Berlin and eliminate Agent Price? - Apex Predator - Berlin - Hitman 3 Guide

The mission in Berlin features a few unusual elements - one of them is that Agent 47 starts the mission without any equipment. You will not be equipped with a gun, coins, a fiber wire, or any other such items. Fortunately:

  1. You will be able to acquire replacement gear while advancing through the mission. Some useful items will be dropped by the mission targets you eliminate, and some you will find when exploring.
  2. When you repeat the mission, you will be allowed to choose your equipment. This will allow you to start the mission in Berlin "the old way".
The only item in Agent 47's inventory is a phone and you can try to use it to contact Olivia - it will be a failed attempt - Hitman 3: How to unlock the map of Berlin and eliminate Agent Price? - Apex Predator - Berlin - Hitman 3 Guide

The only item in Agent 47's inventory is a phone and you can try to use it to contact Olivia - it will be a failed attempt.

Take the main road. You can ignore the gas station because there are no enemies or valuable items there (except for the coin). Head down the path into the woods (point 3 on the map), which starts next to the car with the headlights on. A little further on, you'll find an "illuminated" body - it's worth taking the knife, which may soon come in handy for Agent 47.

You can return to the gas station if you want to see the secret ending to this mission. We have described the hidden exit on a separate page of our guide.

Along the way, you will pass a radio tower (point 4 on the map), but it is locked and useless to Agent 47 during the first attempt to this mission - Hitman 3: How to unlock the map of Berlin and eliminate Agent Price? - Apex Predator - Berlin - Hitman 3 Guide

Along the way, you will pass a radio tower (point 4 on the map), but it is locked and useless to Agent 47 during the first attempt to this mission.

When you reach the main part of the forest (point 5 on the map), a cutscene with the phone call with Olivia will play. The game will unlock access to the map and you will learn the main mission objectives.

Eliminating Agent Price

In the Berlin mission, there are no typical "big" targets to eliminate - Hitman 3: How to unlock the map of Berlin and eliminate Agent Price? - Apex Predator - Berlin - Hitman 3 Guide

In the Berlin mission, there are no typical "big" targets to eliminate. Agent 47's enemies are the ICA agents who are on the hunt for him. You will meet the first agent after walking a few steps into the forest - it will be Agent Price. There are challenges linked to his character, although eliminating him will get you closer to completing the mission and allow you to collect his equipment. The easiest way to kill Price is to use the knife you acquired earlier, or to sneak up on him from behind and snap his neck.

The agent will drop the following items:

  1. An ICA Earpiece - This will allow you to eavesdrop on the conversations of other enemies.
  2. Hackl 9S Covert silenced pistol.

Important note - Agent Price will not appear in the forest if you choose a different starting location during your next approach to the mission. This includes selecting the starting location where Agent 47 has his suit. You will then have to choose from 10 agents associated with the challenges.

The main objective of the mission - eliminating the ICA agents

In order to complete the mission, you must kill a total of 5 ICA agents (four, if you have already gotten rid of Price - he is not a mandatory target) - Hitman 3: How to unlock the map of Berlin and eliminate Agent Price? - Apex Predator - Berlin - Hitman 3 Guide

In order to complete the mission, you must kill a total of 5 ICA agents (four, if you have already gotten rid of Price - he is not a mandatory target). There are 11 agents on the Berlin map in total and this means that you can "choose" who you want to assassinate. Some targets are in more easily accessible locations, while others are in places that are more difficult to reach.

There is a separate challenge associated with each agent (except Price). It's worth beating the mission several times or using the save/load option in order to unlock all the challenges and gain as much XP as possible to reach mastery of the Berlin level.

Agent 47 initially does not know the identity or location of the ICA agents residing on the map - Hitman 3: How to unlock the map of Berlin and eliminate Agent Price? - Apex Predator - Berlin - Hitman 3 Guide

Agent 47 initially does not know the identity or location of the ICA agents residing on the map. You can find them more easily in two main ways:

  1. Agents often communicate via radio. This is the easiest way to locate them - they will be automatically marked by the game. Agents will be ordered to avoid using the radio (not completely, though) after you kill at least three of them. It is a good idea to explore the entire map first without attacking them to "expose" them all.
  2. Agents can recognize you even if you're wearing a disguise. This can help you locate them if they have already received orders to avoid using the radio. However, this does not guarantee that a given person is an agent, because there are other people on the map who can compromise Agent 47's disguise.

Pro tip - The ICA agents you have already compromised are marked with red icons on the map when you repeat the mission. This will allow you to beat the mission faster without having to find them again.

Most of the ICA agents roam around the area - Hitman 3: How to unlock the map of Berlin and eliminate Agent Price? - Apex Predator - Berlin - Hitman 3 Guide

Most of the ICA agents roam around the area. They can be in a single location (e.g. the roof of a building), or move around a larger area (e.g. different rooms and floors of Club Hölle). Some of them are not moving at all and therefore they may be easier to locate.

Each eliminated agent leaves unique loot behind. Aside from acquiring new weapons, this also allows you, for example, to get a lockpick, an electronic key hacker or a deadly poison. Always search the areas where you attacked the agents.

The ICA agents can meet which allows you to take out 2 people with a single attack in some locations.

You can "cheat" and only subdue the agents at first - Hitman 3: How to unlock the map of Berlin and eliminate Agent Price? - Apex Predator - Berlin - Hitman 3 Guide

You can "cheat" and only subdue the agents at first. This will keep them from being presumed dead and allow you to hunt others more easily.

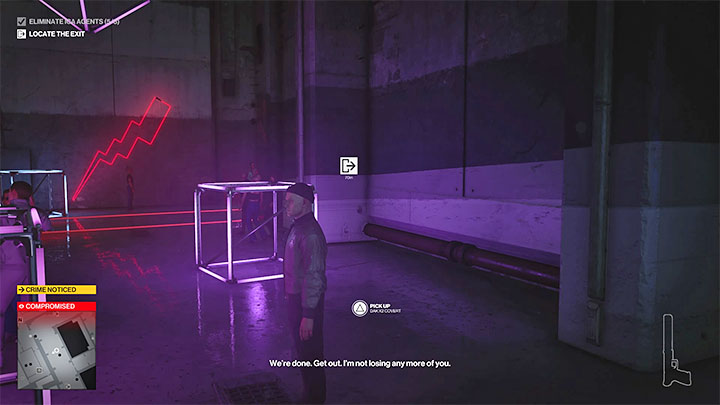
After you have killed 5 agents, others will be automatically ordered to evacuate. They will start sprinting to the nearest map exit. You don't have to eliminate them anymore and you can simply complete the mission, although one of the game's challenges involves getting rid of the ICA agents specifically during the evacuation (see the page about challenges for more information).

See/Add Comments

You are not permitted to copy any image, text or info from this page.

This site is not associated with and/or endorsed by the IO Interactive or IO Interactive. All logos and images are copyrighted by their respective owners.

Copyright © 2000 - 2024 GRY-Online S.A. for gamepressure.com, unofficial game guides, walkthroughs, secrets, game tips, maps & strategies for top games.