Turtle Rock | Link's Awakening Walkthrough Link's Awakening guide, walkthrough
Last update: 04 November 2019
In this part of the guide to The Legend of Zelda: Link's Awakening, you will find the location of the rest of the collector's items and read about rewards that await you in the Seashell Mansion for collected shells. We'll show you the way to Turtle Rock and tell you how to find the last instrument - Thunder Drum.

Level main goals:
- Collecting the rest of Secret Seashells and Pieces of Heart
- Travelling to the Turtle Rock
- Finding the Thunder Drum in the Turtle Rock
Collecting the rest of Secret Seashells and Pieces of Heart
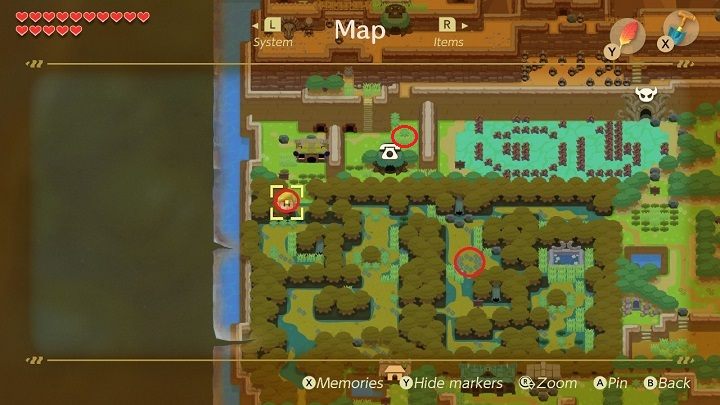
Teleport yourself near Mabe Village and descend to Goriya's Cave on the beach to repurchase your shovel for 300 rupees. Go to Mysterious Forest and dig up two Secret Seashells there. The first one is south of the cave with three stones covering the entrance. Dig it out from the ground between the blue flowers near the stairs. The second one is underground at the north-west exit of the forest by the tree on the left. Go east, jump over the holes near the Telephone Booth and dig a Secret Seashell under the grass by the wall.
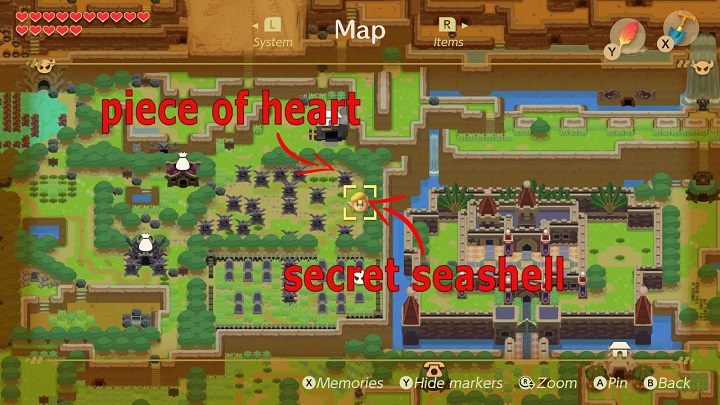
The next stop is Tabahl Wasteland. By the wall of trees, you will find a Piece of Heart, and to the east, a Secret Seashell is hidden underground.
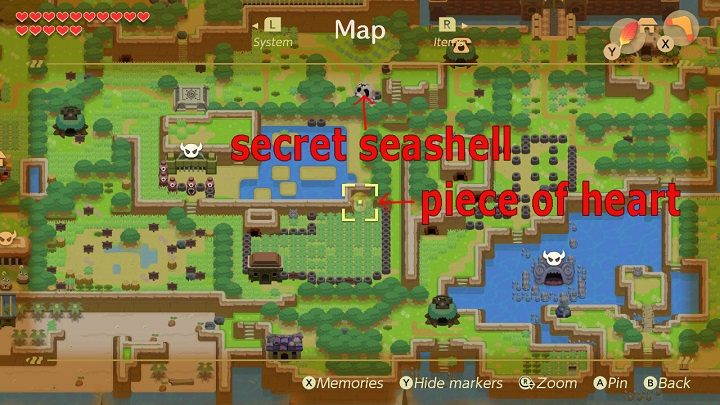
Next Secret Seashell can be found underground, in the place where you previously destroyed a large skull. A Piece of Heart is in the meadow behind the Richard's Mansion.
Go to the south of Seashell Mansion and find stairs between trees. Go down to the cave and dive into deep water and pick up a Piece of Heart. Then go to Animal Village and visit the Goat. In thanks for delivering the letter, she will reward you with a Secret Seashell. At the entrance to the desert, play a song that Marin taught you. The walrus will come out of the water and give you a Secret Seashell. Dig another Secret Seashell in the desert between the cactuses near the owl statue.
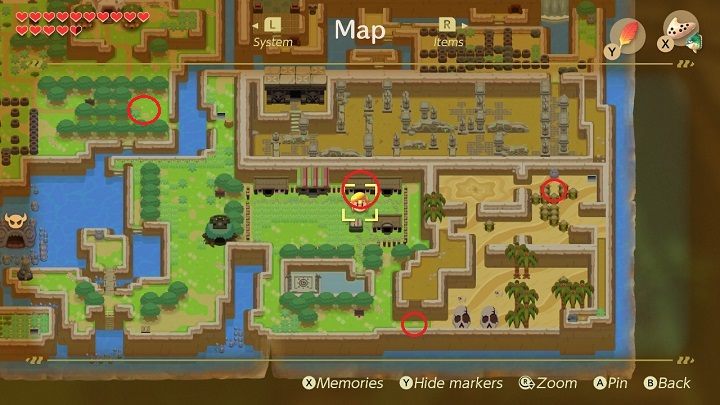
You can dig one of the Secret Seashells in the corner of an island above the Ancient Ruins.

You can find another Secret Seashell deep underwater near the waterfall behind Kanalet Castle.
One of the Secret Seashells is in the hole next to the Fast Travel Point on Tal Tal Heights. Throw a bomb there to make a shell fall out of it. You can find one Secret Seashell on a small islet and a Piece of Heart during the Raft Ride. You can also win one Secret Seashell and a Piece of Heart in the Raft Race. Two Secret Seashells and two Pieces of Heart can be caught from a fisherman's pond in Mabe Village. In Trendy Game, you can win another Secret Seashell and Piece of Heart. Dampe can also give you a Secret Seashell and two Pieces of Heart for completing his challenges.
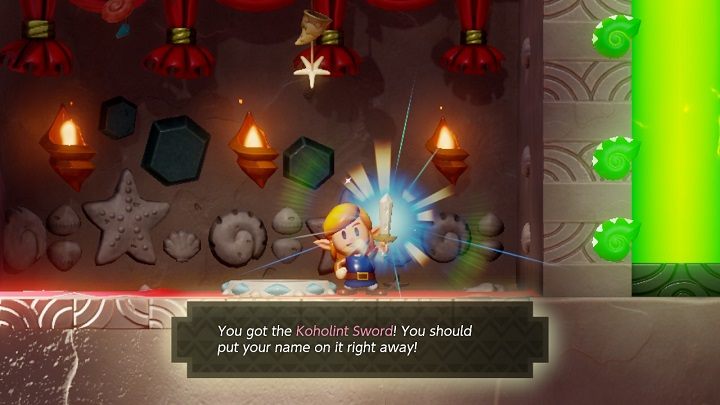
You can now go to the Seashell Mansion to collect the rewards. You will receive a Tile for Dampe's Dungeon Maker challenges for 30 seashells and a Koholint Sword for 40 seashells.
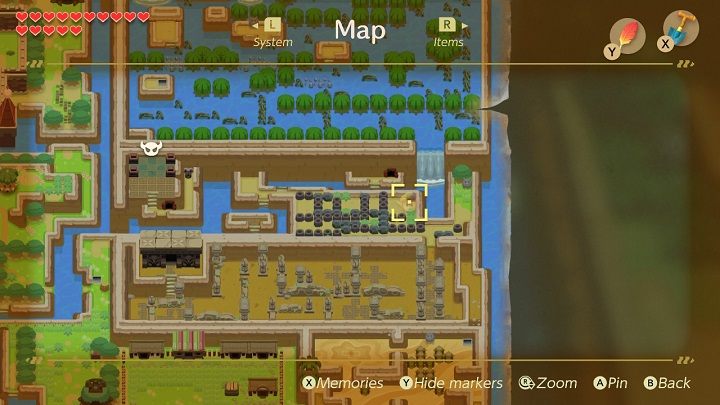
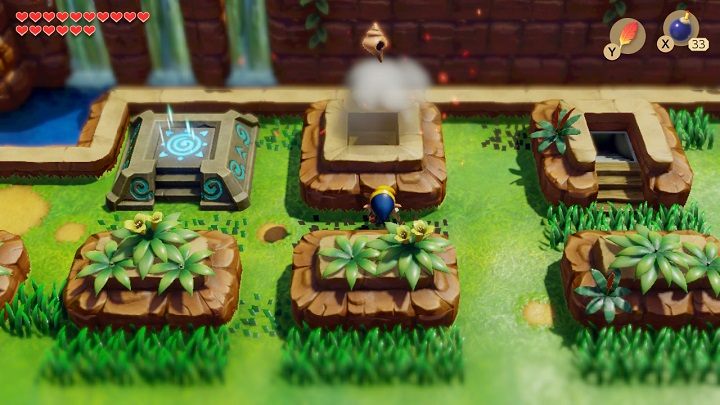
Come back to Tal Tal Mountain Range and go near the Henhouse. The picture shows the place from which to throw the bomb into the hole to gain another Secret Seashell.
One more Secret Seashell is under the stone east of the Henhouse.
Travelling to the Turtle Rock
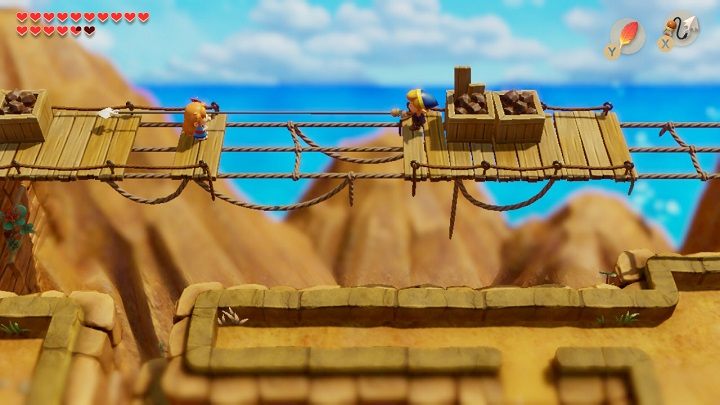
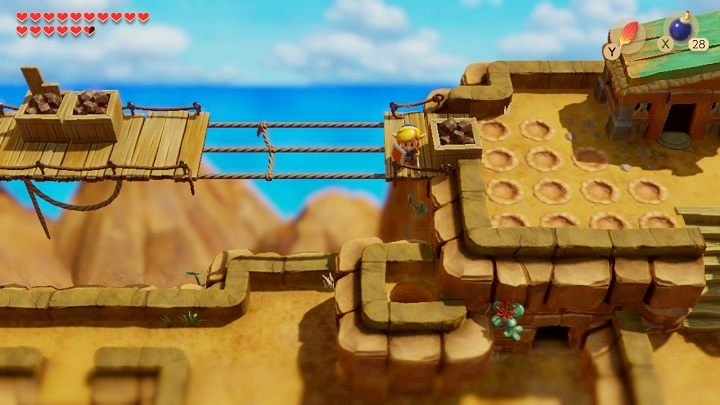
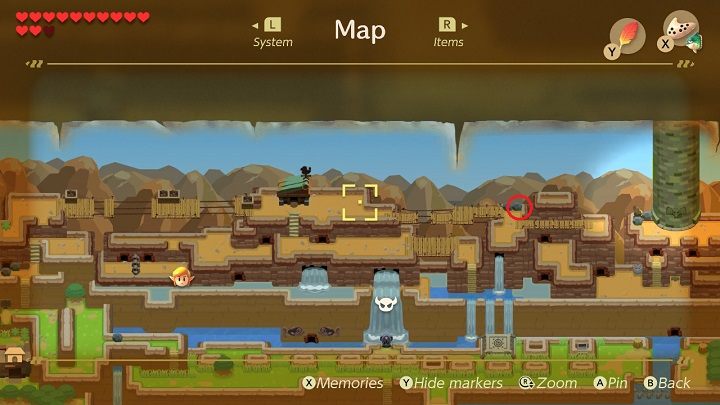
Go to the damaged bridge on the west side of the Mountains. Marin will be trapped in the middle of the bridge, to save her use the Hookshot to get to the other side of the bridge. After a short cutscene, an owl will fly over and say that the last instrument is in the west.
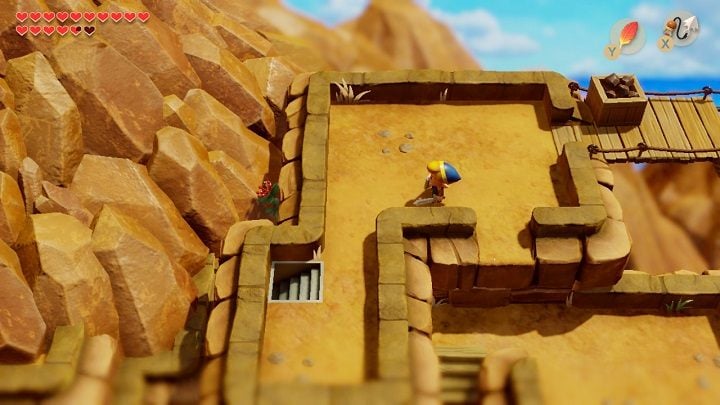
Go left to take the stairs to the underground passage. Go left and go down the stairs to the lower level. Use the hook to get to the other side of the cave and continue left until you find the exit. Watch out for falling boulders and climb the top of the hill.
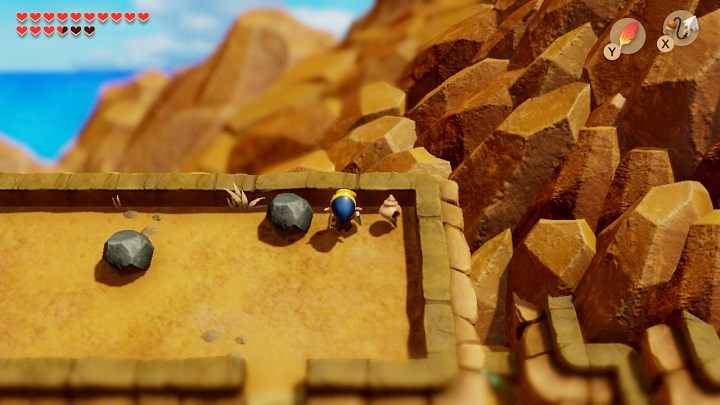
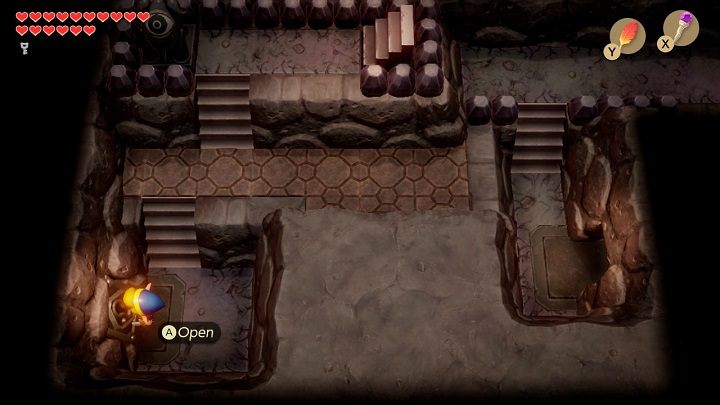
You will find a Secret Seashell under one of the stones. Go left and take 50 rupees from the chest. Pick up the stone near the chest, there will be a descent to the bat cave under it. Pour magic powder into the bowl. This time you'll get more arrows from the bat.
Return to the surface and go left over the bridge. Jump down from the hill and place a bomb under the cracked wall. Go inside and move forward. Use a shield to protect yourself from the fire trap and climb the stairs. After leaving the cave there will be another Fast Travel Point to activate.
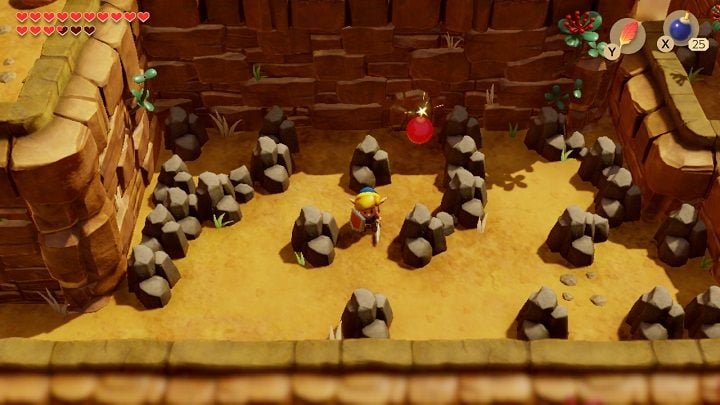
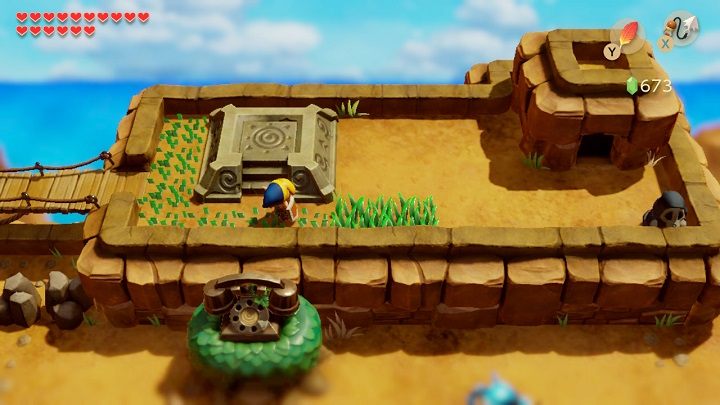
Keep going east. Dig a Secret Seashell from the spot between small stones. Continue east, you'll pass the Telephone Booth. When you'll finally get to the big stone statue of the crocodile play the third song on your Ocarina. The statue will come alive and attack you.
Plant bombs around its neck to smash the stone armor on the crocodile's head, then defeat the opponent using your sword. The entrance to the Turtle Rock will be open.
Finding the Thunder Drum in the Turtle Rock
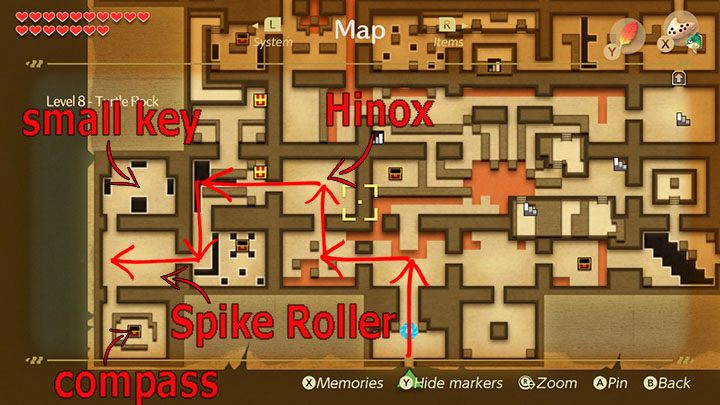
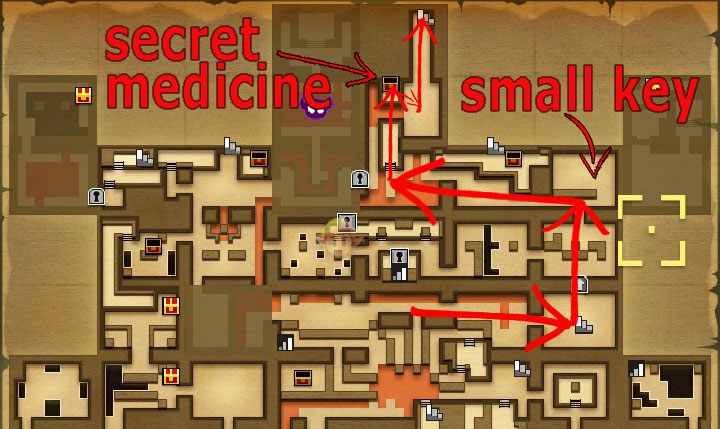
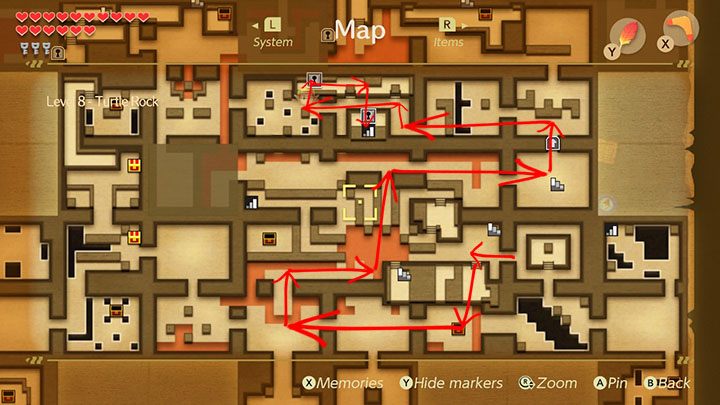
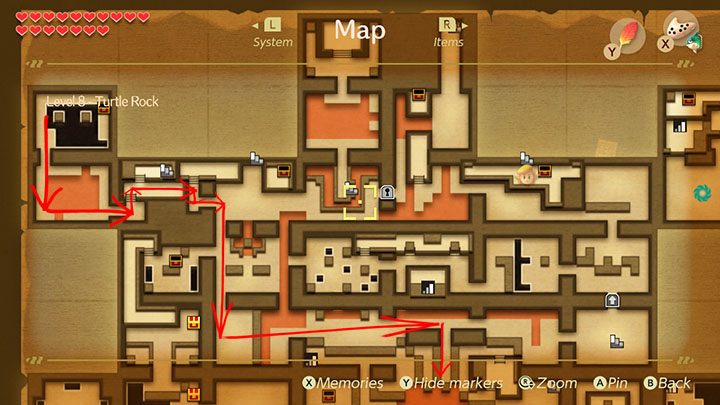
Go inside the Turtle Rock and go straight. Defeat the big bat and go through the door on the left. Kill all the monsters in the next chamber and go up. You'll have to fight Hinox there. Runaway from him and use your ranged weapon. Go to the next room and move the strange device to the left. When the device is in motion you can control it with the left stick on your Joycon. Create a path to get to the room in the south. Take 50 rupees from the chest and go left. In this room, you'll have to fight with the Spike Roller. Jump over the trap and attack him with a boomerang or bow. After the victory, go up. Defeat the monster and take a Small Key that will fall from the ceiling. Go back to the room where you fought with the Spike Roller and go down. Wait until the gravitational sphere stops pulling you in for a moment and quickly take a Compass from the chest. Play the second song on your Ocarina and transport yourself to the first chamber of the Turtle Rock.
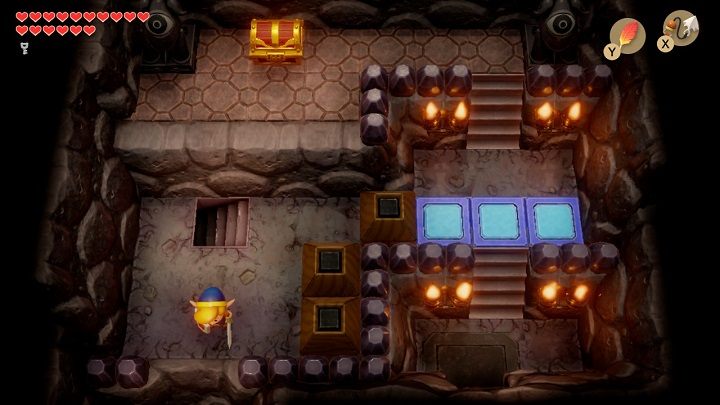
Go two rooms up and then turn right. Move the device to create a path to the left. Move the lower and upper bricks to the left and the middle brick down to get to the chest with a Map. Put a bomb under a cracked piece of wall and go through a newly created hole. Turn left and go down the stairs to the lower level.
Go through the tunnel and take the last ladder up. Kill all the monsters in the room and take a Stone Beak from the chest. Go up and defeat the Smasher by throwing his ball at him. Go up and press the button under the vase. Go back down and then go to the room on the left.
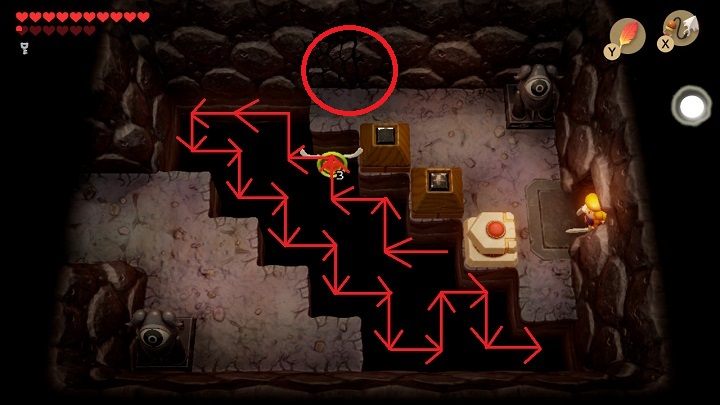
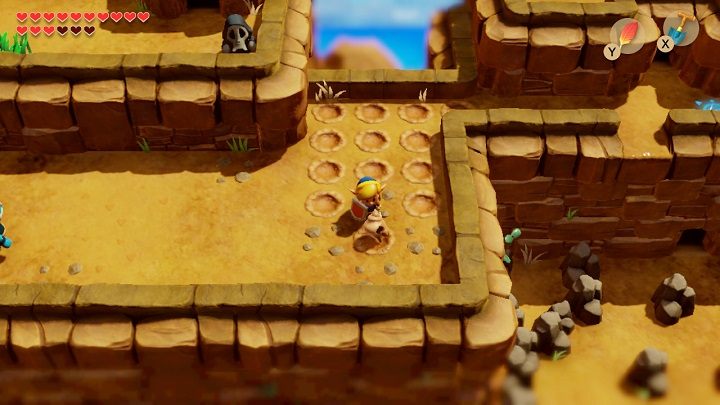
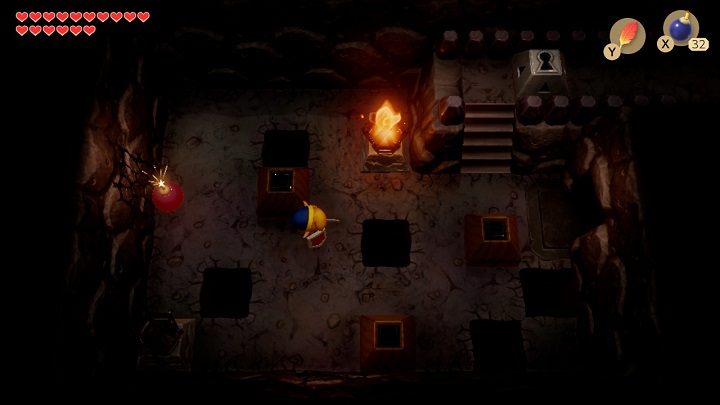
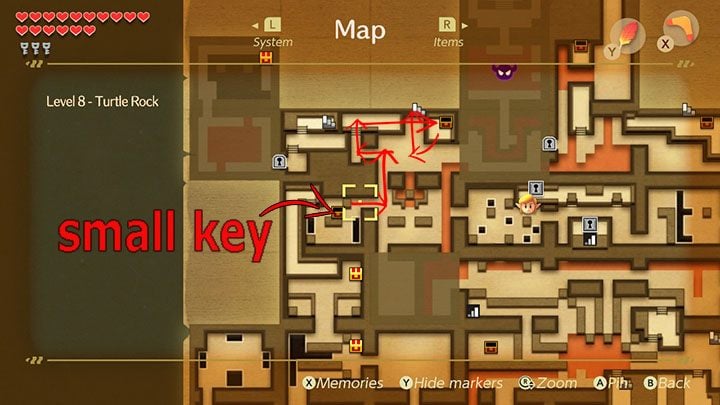
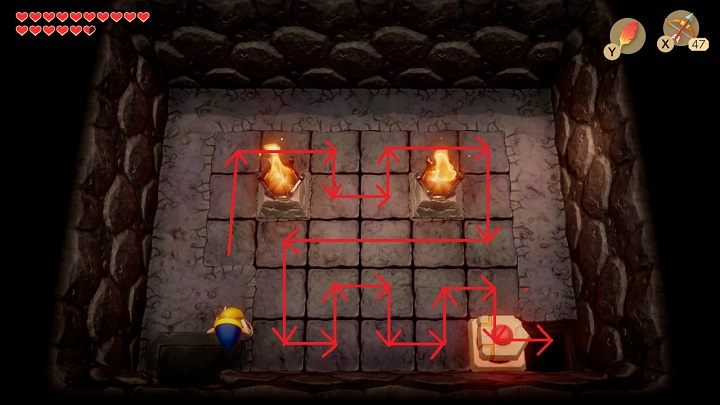
Move the device and fill the entire hole in the ground according to the pattern from the picture above. When you succeed, a Small Key will drop. Place a bomb under the cracked wall at the top and go through the newly created hole.
Place another bomb by the left cracked wall and go to the next chamber. Go down and jump next to the chest with a monster in it. Go through two rooms to the left and then turn up. Go right and this time move the device to create a path to the upper room. Move the brick that blocks your way and go up.
Use a Small Key on the grey stone and go right. Use the second Small Key on the door to move to the next room. Watch out for traps and go through the revolving door. Kill all monsters and go through the next door. Kill all monsters, but watch out for the cracked floor. If you stand in one place too long, it will collapse under you. Take a Small Key that fell from the ceiling and go left. Bypass Dodongo Snakes for now and keep going left. Jump over the lava to get to the stairs and follow the narrow corridor. Use the hook to get to the chest with a Secret Medicine and jump down to the right. Go forward until you reach the stairs.
Go through the tunnel and take the last ladder down. Go through the revolving door again and place a bomb against the cracked wall on the left. Go through the hole and light the torches. Use a Small Key on the brick to move to the next room on the left. Kill the worm and keep going left.
Smash the wall on the left to go to the next chamber. Get rid of the Sparks using the boomerang and stand in front of the statue. Jump and release an arrow to hit the eye. Pick up a Small Key and go left.
Move two bricks to get a Small Key from the chest and return to the previous room. Go up, then go left and follow the corridor. Hook to the chest to get to the other side and take 50 rupees from it. Jump down and go up the stairs.
Take a Piece of Heart that's in the grass and then go right over the bridge. Activate another Fast Travel Point and go back to the Turtle Rock.
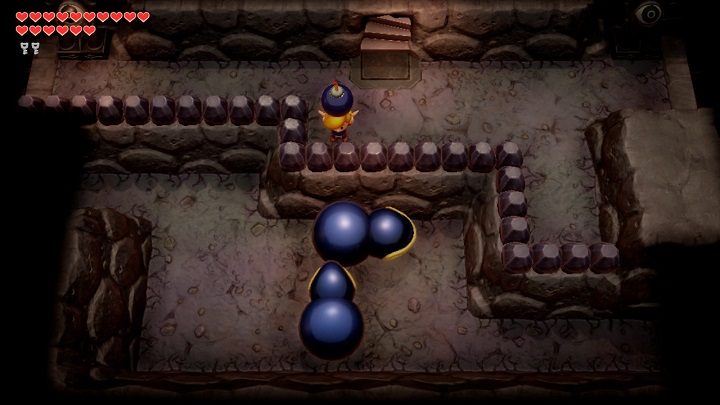
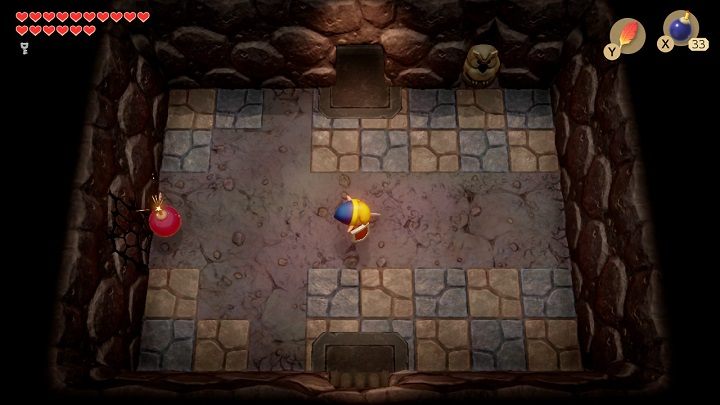
Standing at the railing, drop the bombs directly into the mouth of Dodongo snakes. After killing them, a chest with a Small Key will appear. Teleport yourself to the first chamber of the cave by playing the second song on your Ocarina.
Go up two rooms. Turn right and create a passage using the device to go to the room on the right. Tap the crystal to turn it orange and go back to the previous room.
Go up the stairs and go down a bit. Jump down next to a chest and go two rooms to the left. Go up, turn right, create a path to go up and go to the next room on the right. Go through the revolving door and go left through three rooms. Go up the stairs, use a Small Key on a brick and go to the right. Use a Hookshot to get to the other side of the room, use another Small Key to get to the stairs down.
Go through the tunnel and climb the last ladder. Jump down between the gap in the railing. You'll have to fight with Blaino there. Keep him on a distance and attack with a boomerang or a bow. Go through the door and take the Magic Rod from the chest. Return to the room where you defeated Blaino and enter the portal to the first room of the Turtle Rock.
Go up and this time create a path using the device to get to the stairs by the monuments.
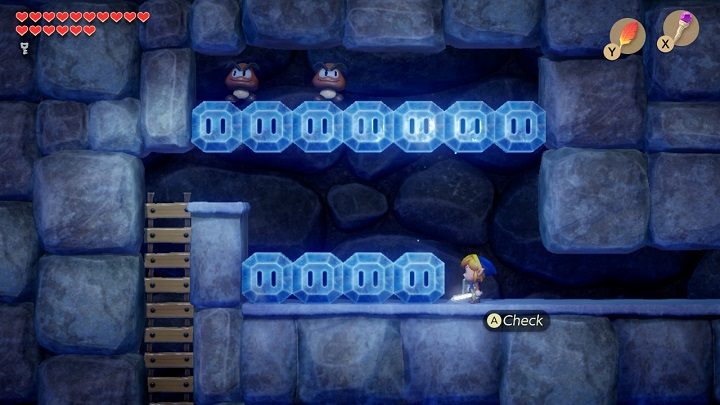
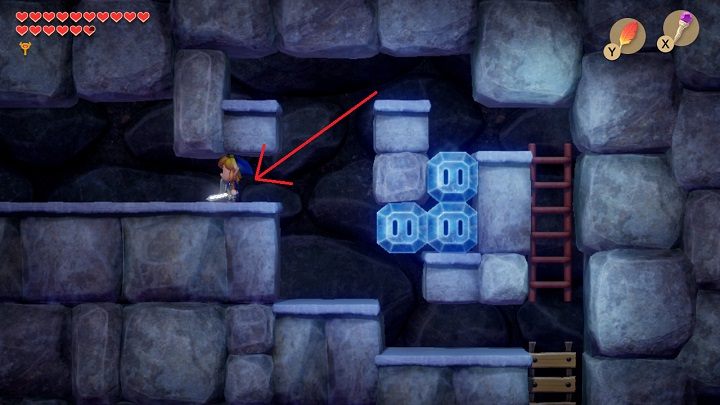
Use the Magic Rod to melt blocks of ice to move left. Jump and melt the upper part of blocks so that you can get to the ladder.
Go down and use a Small Key on the door on the left. In the next room, you'll fight the Cue Ball. Jump over him when he charges at you and attack him from behind. After the victory, go to the next chamber.
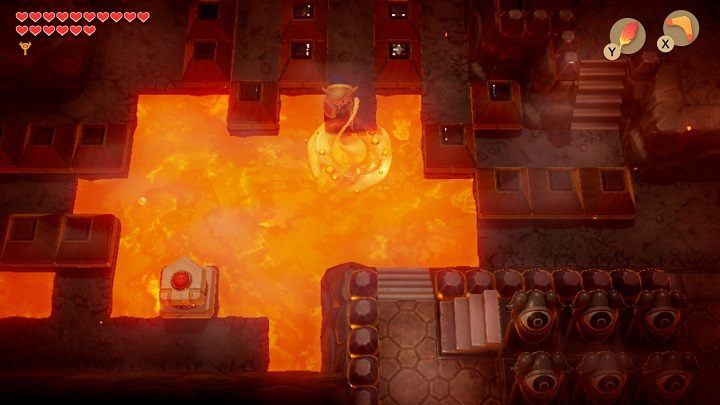
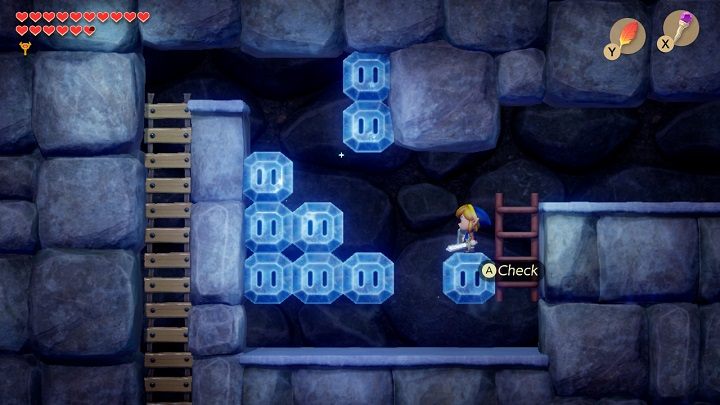
Fill the entire floor using the device according to the pattern on the picture above. A chest with the Nightmare's Key will appear.
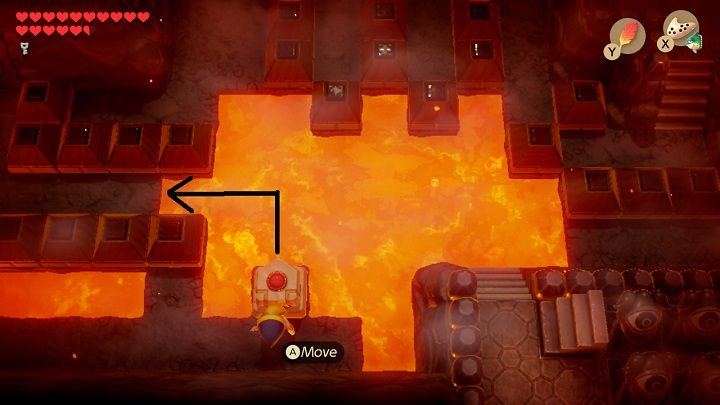
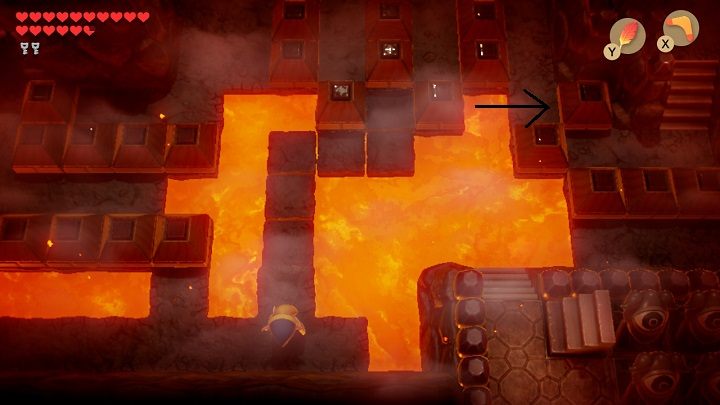
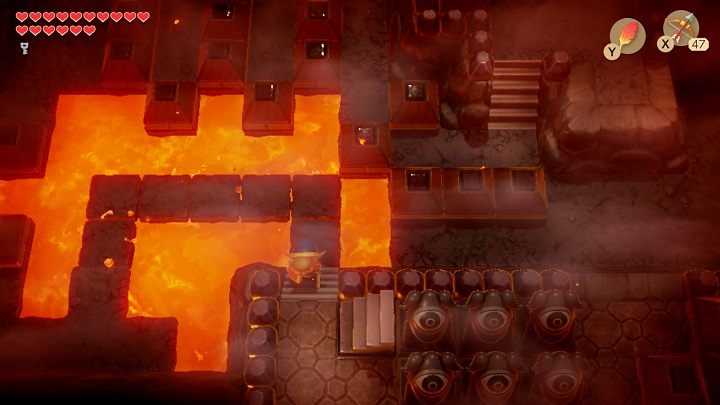
Go back to the previous chamber and go right. Go up the stairs down next to the door to get through it. Go through two rooms to the south. Throw bricks to the lava so that you can jump to the other side of the room. Keep going right and take the next turn down.
Throw the brick into the lava and jump to the right. Move the next brick to get to the stairs. Go up the stairs, jump down to the right and then go up the stairs by the wall.
Climb the ladder and use the Magic Rod to melt the blocks of ice and jump down into the corridor to the left.
Move left and melt the next ice cubes to reach the last ladder.
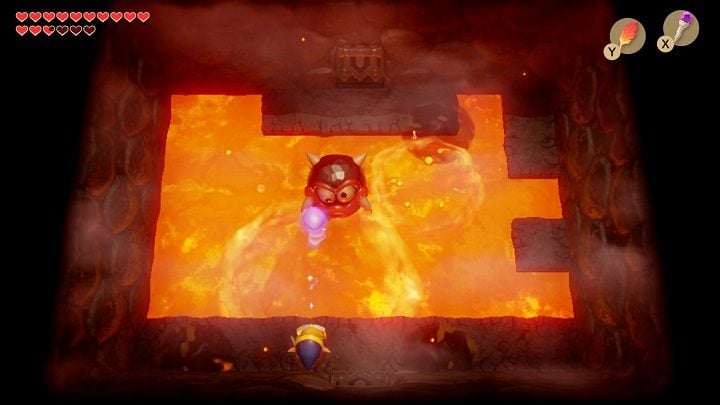
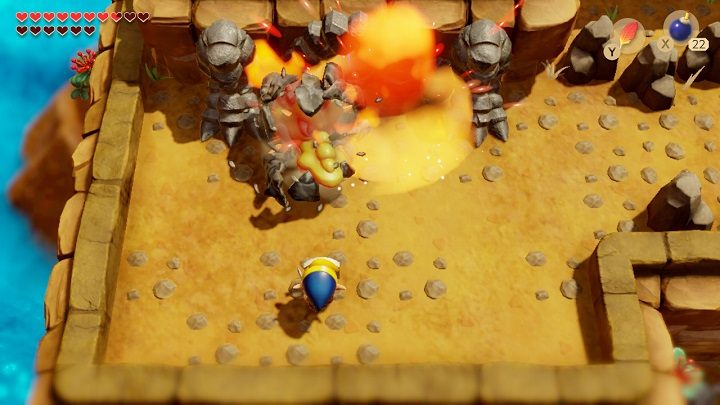
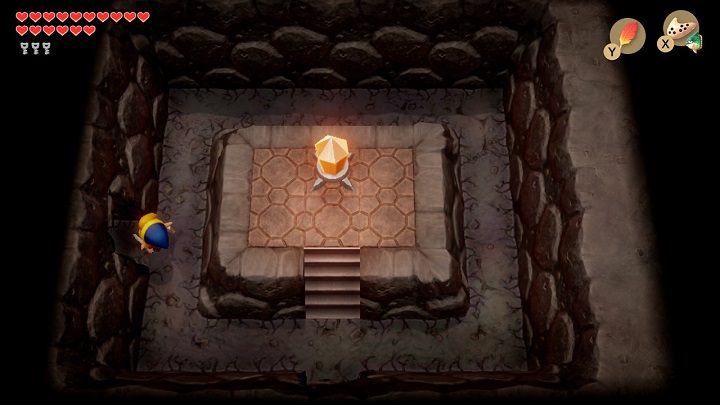
Use the Nightmare's Key on the door with the big golden lock and enter the room. A Boss fight with Hot Head awaits you there. Stand in the center of the bottom wall, use your shield to cover yourself and shoot the Hot Head with your Magic Rod. When you hit it, its fire will go out and it'll bounce around the room. Keep firing at it with your Magic Rod. After the victory, pick up a Piece of Heart and go to the next chamber to take the las instrument - Thunder Drum.