Angler's Tunnel | Link's Awakening Walkthrough Link's Awakening guide, walkthrough
Last update: 04 November 2019
In this section of the guide to The Legend of Zelda: Link's Awakening, you will find information about Ocarina located in the Dream Shrine. We will tell you how to get to the Animal Village and find the Angler's Key in the Yarna Desert. We will lead you through the Color Dungeon as well as the Angler's Tunnel in search of the Surf Harp.

Level main goals:
- Finding the Ocarina in the Dream Shrine and learning the Ballad of the Wind Fish
- Travelling to Animal Village and getting the Angler's Key in the Yarna Desert
- Trip to the Color Dungeon
- Finding the Surf Harp in the Angler's Tunnel
Finding the Ocarina in the Dream Shrine and learning the Ballad of the Wind Fish
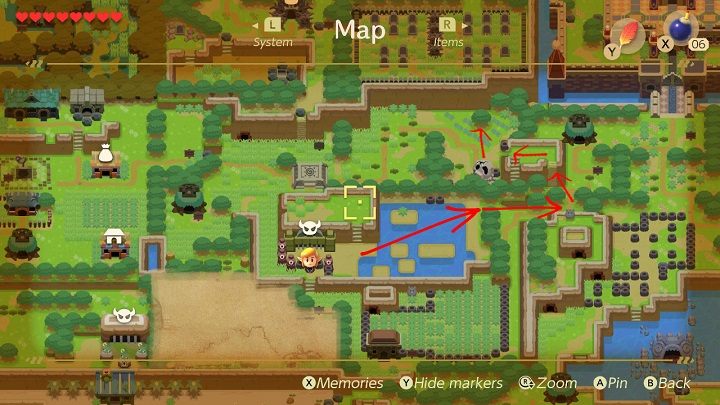
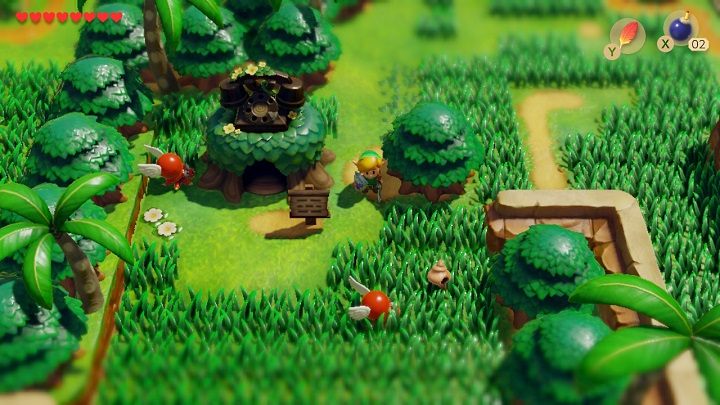
Ending your adventure in the Key Cavern you'll receive a message about going to the waterfall. Go right and an Owl will appear. She will prompt you to go to the Yarna Desert first. Go right and enter a path. After a while, turn up and climb the ladder up the hill. Jump off the hill from the left edge and place a bomb near the big skull. Go up the path and you will meet Tarin standing by the tree.
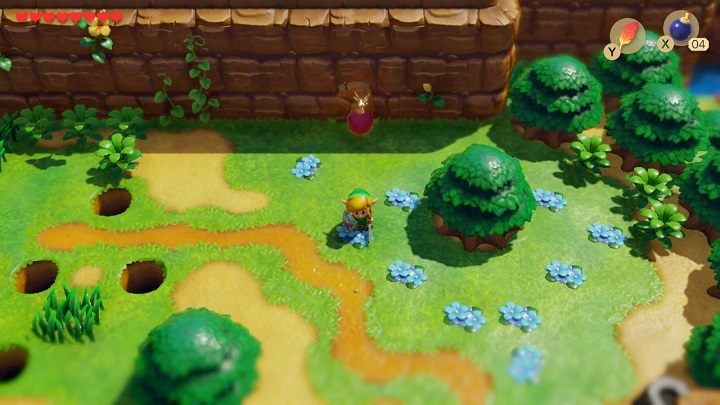
Give him the Stick and he'll poke the nest. Bees will chase him and Honeycomb will fall from the tree. Place a bomb next to a piece of cracked wall to the left of the tree. Enter through the newly created hole, there you will find a Fairy that can renew your life points.
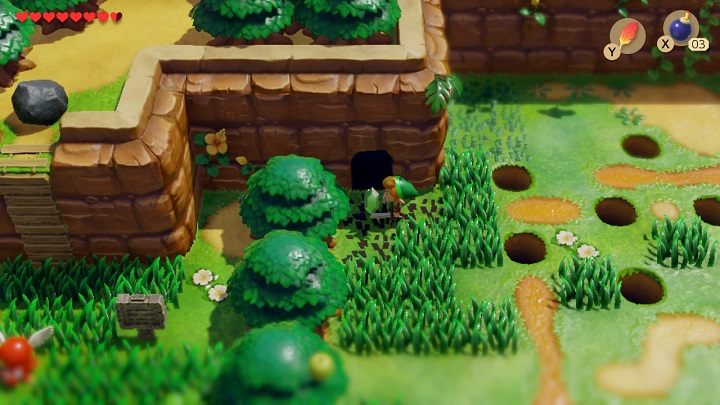
Move left a bit, avoid holes in the ground and place a bomb next to another cracked wall by the tree. Enter the cave, destroy the black crystals by holding the Left button and go higher. Circle a wall of stones and go down to the chest. Move to stone to the left to take 50 rupees from it.
Go back higher and place a bomb near the cracked wall on the right. Jump over the water and take a Piece of Heart. Exit the cave.
Go left ad go past the portal. Then head southeast until you see the Telephone Booth. Hit the nearby tree by dashing into it and a Secret Seashell will fall from it.
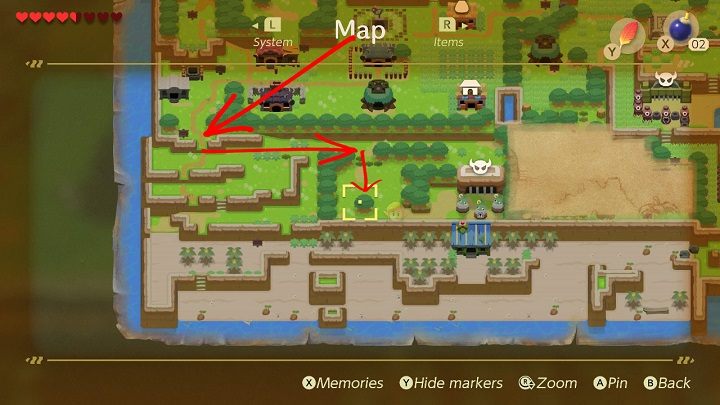
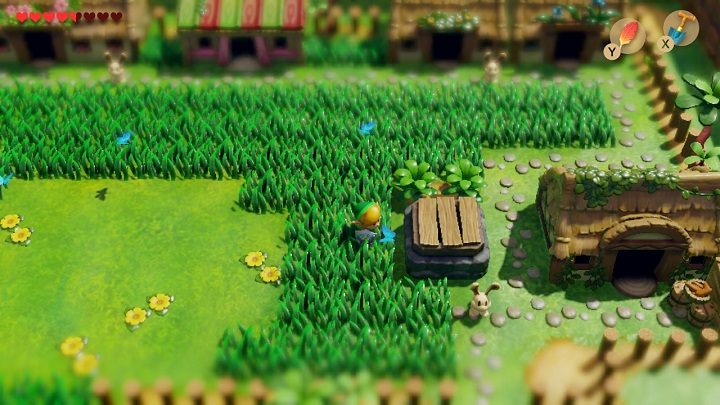
Go to the Mabe Village and climb to the hill behind the Shop. Talk to the child standing near the building with three stones covering its entrance. Remove one of the stones to get inside and lie on the bed. You will be teleported to the Dream Shrine.
Go along the corridor starting from the left. The easiest way to deal with monsters in the Dream Shrine is to dashing at them. Circle the wall until you reach the stairs. Go up and take 100 rupees from the chest. Return to the corridor and smash the black crystal. Go up the next stairs and take Ocarina from the chest. Exit the Dream Shrine the way you came from.
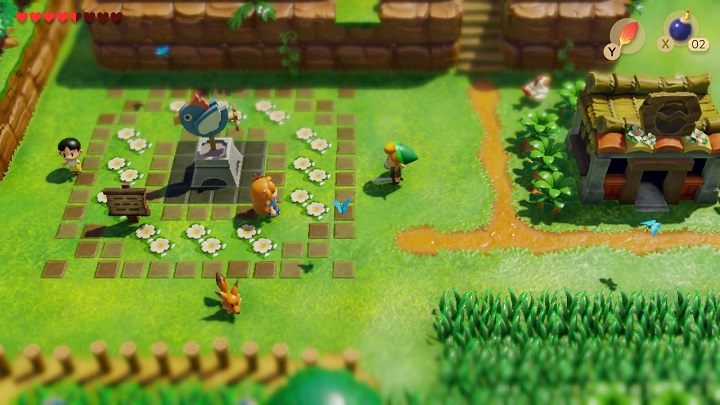
Take the stairs down the hill and go see Marin. She will be standing in the square next to the bird statue. She will teach you how to play Ballad of the Wind Fish on your Ocarina.
Travelling to Animal Village and getting the Angler's Key in the Yarna Desert
Head southwest and leave the village. Go right and turn down through the trees until you reach a single tree. Dash into it so that a Secret Seashell will fall out.
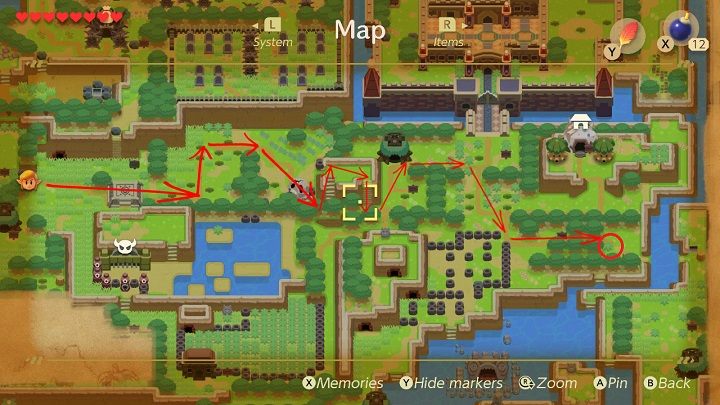
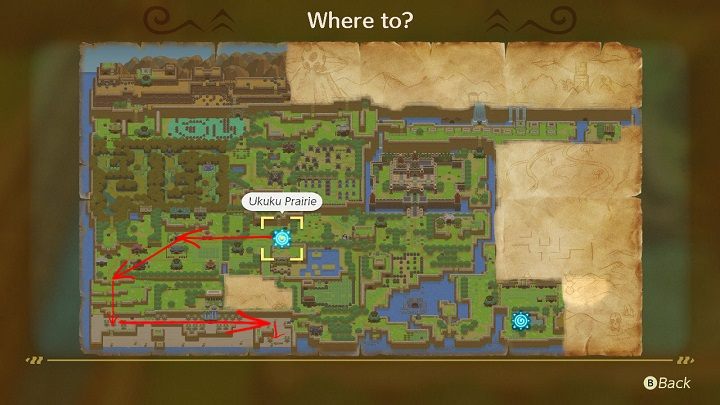
Return to the Mabe Village and exit from it on the north-east side. Follow the path east, go past the Fast Travel Point until you reach a place where there was a large skull. Climb the hill and then climb down it with a ladder. Follow the path up, then turn right and down. Turn right and down again until you walk along the path between the trees. There will be a plant at the end of the path. Under it, you'll find a staircase.
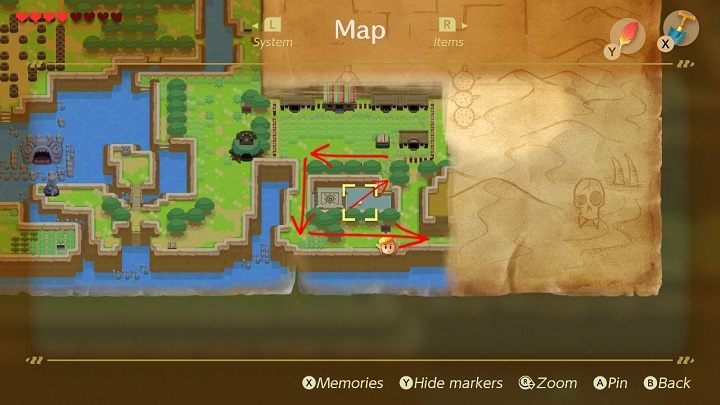
Go down the stairs, watch out for sharks and go through the secret passage to the other side of the island. Head down, pass the Telephone Booth and turn left next to the trees. Go up the bridge. Dig up a Secret Seashell next to the Owl Statue.
Go back to the Telephone Booth and go through the trees to the right to enter the Animal Village. On the north-east side of the village, you will find a house next to a boarded up well. Enter the house and exchange the Honeycomb for a Pineapple with the Bear. The Bear will also tell you that the path to the Yarna Desert is blocked by a huge walrus. Only Marin's singing can wake him up.
Leave the Bear's house and follow the stone path down to the Fast Travel Point. Use it to teleport yourself near Mabe Village. Follow the path to the left to enter the village. Marin won't be in the square anymore. You'll find her at the end of the right side of the beach. After a short cutscene, she will go with you.
Return through Mabe Village to the Fast Travel Point and teleport yourself and Marine near Animal Village. Follow the stone path to the village and turn left. Turn down to exit the village and then right until you reach a sleeping walrus in a narrow passage. Singing Marin will wake the animal up and it will jump into the water. Transition to the Yarna Desert will be open.
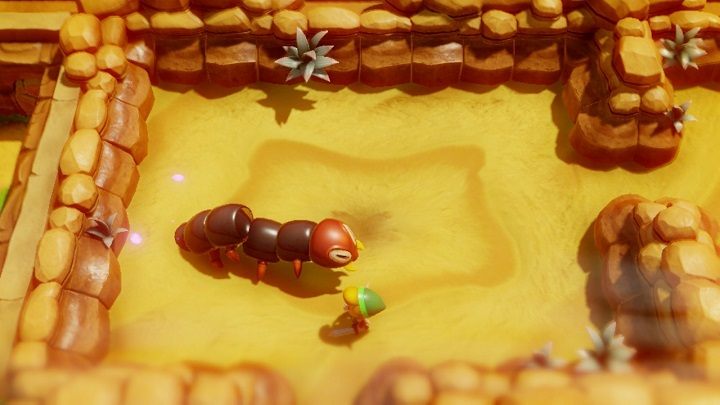
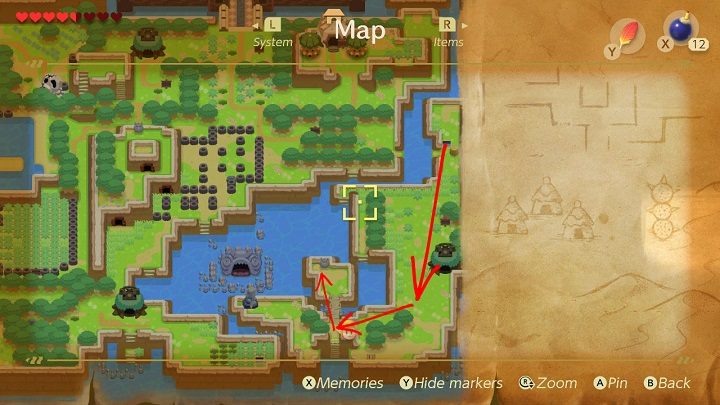
Enter the desert. Go up and go through the narrow passage. Keep going up all the time until you come across shifting sands. Kill the Lanmola worm to receive an Angler Key. Stay away from the middle of the moving sands and attack his head. After killing the Lanmola let the sands suck you in.
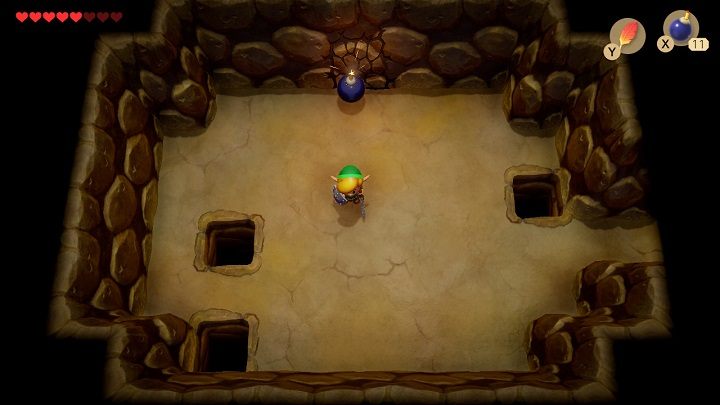
Place a bomb next to the cracked wall above to get to the room with a Piece of Heart. Get back to the first room and go right. Use the staircase to reach the surface.
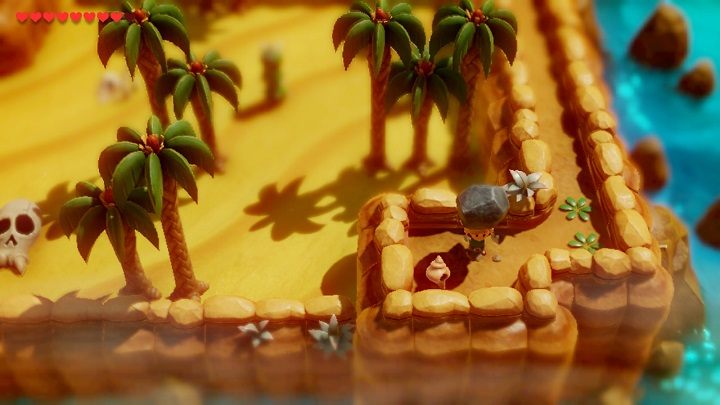
Get a hint from the Owl Statue and go down near the cacti. Go down the narrow passage until you reach boulders. Under one of them, you'll find a Secret Seashell.
Trip to the Color Dungeon
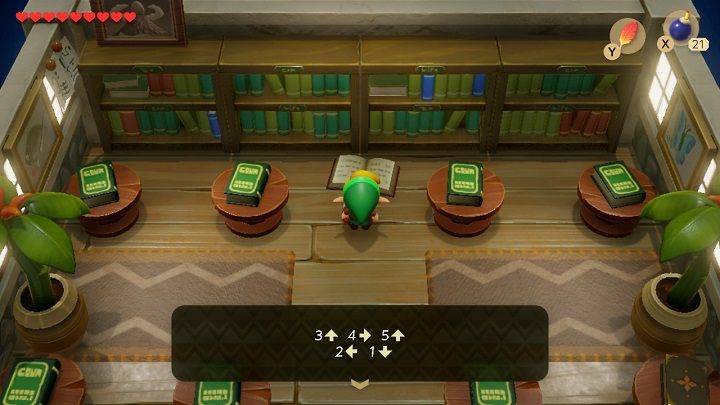
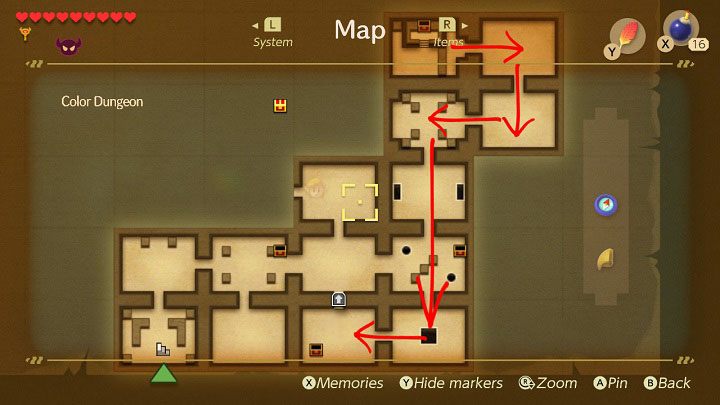
Go west and leave the Yarna Desert. An Owl will fly over and tell you to go to the mountain waterfall. Go through Animal Village to the Fast Travel Point and teleport yourself next to Mabe Village. Enter the village and head southwest to the house in front of which two children are playing. Speed up and hit the bookcase opposite the door and a book will fall. In it, you'll find a pattern of how to unlock the entrance to the Color Dungeon.
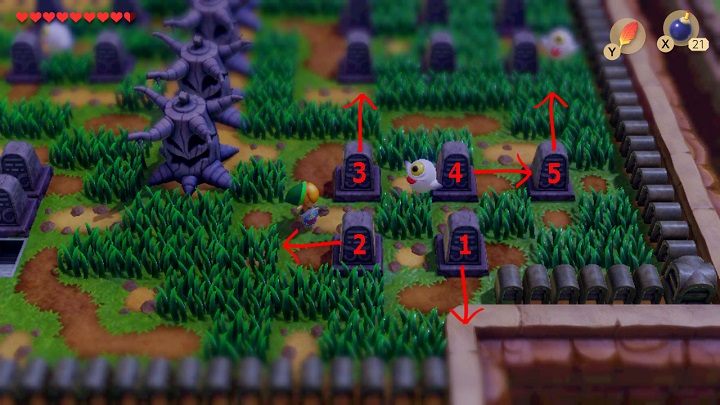
Go to the Cemetery and find five gravestones. Defeat all the ghosts that come out of them and move the tombstones according to the pattern found in the book. There will be stairs to the Color Dungeon under one of the gravestones.
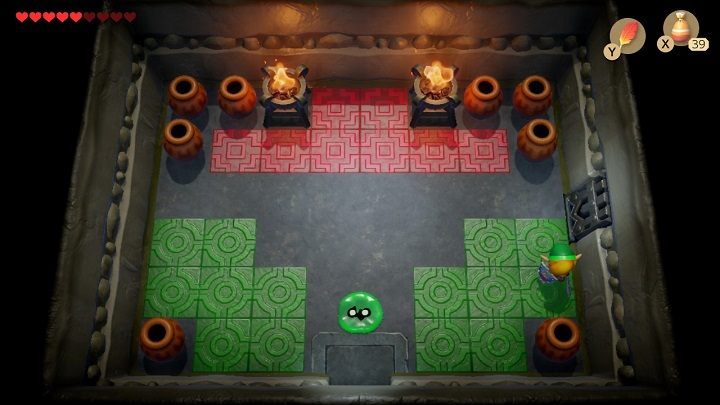
Go down the staircase and talk to the skeletons. They will tell you that you will need Magic Powder here and then they will let you through. Colorful ghosts are waiting in the next room. You have to wait until they come to the floor with the same color as they so you can defeat them there. Go through the door on the right when the door opens.
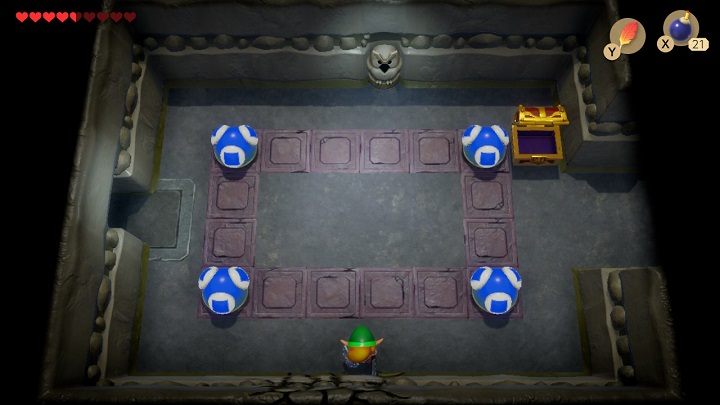
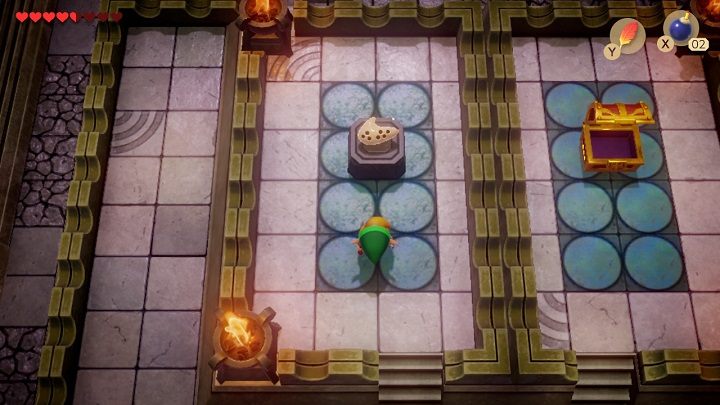
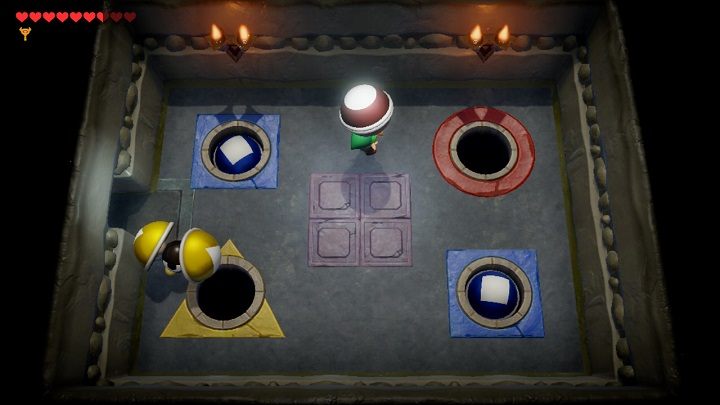
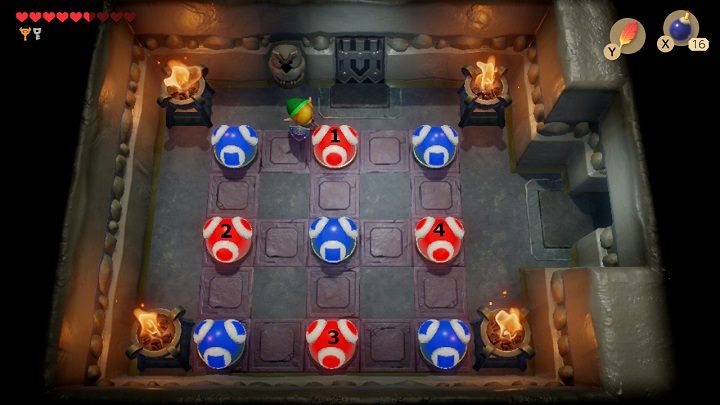
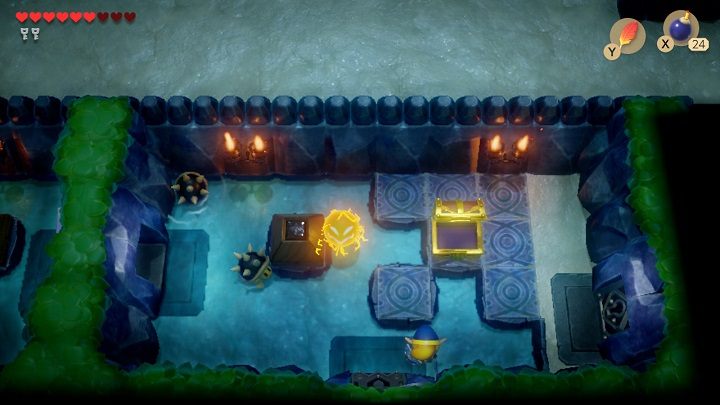
Approach the owl for a clue. Hit the top ball first on the left side and then the bottom one on the right. When all balls are blue the chest with Compass will fall. Place a bomb near the bottom wall where you can see the crack. Go through the hole and collect all the rupees. Go back to the previous room and go right.

Go quickly through the colorful floor and go right to the next room. There will be two monsters there. Hit them and they'll lock themselves in their shell. Then pick them up and throw them into a hole of the same color as their shell. A chest with the Stone Beak will appear.
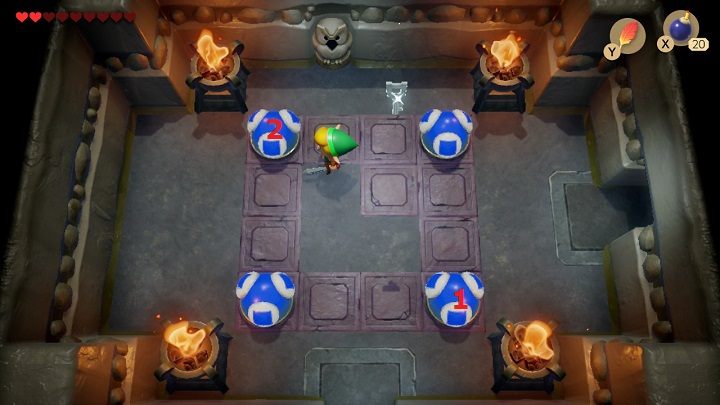
Move two rooms up. Get a hint from an owl. Hit the bottom-right ball first, then the top left one twice. When all the balls will be blue a Small Key will drop. Go through the door on the right. Get rid of the colorful ghosts by hitting them on the floor of the same color as they and go up.
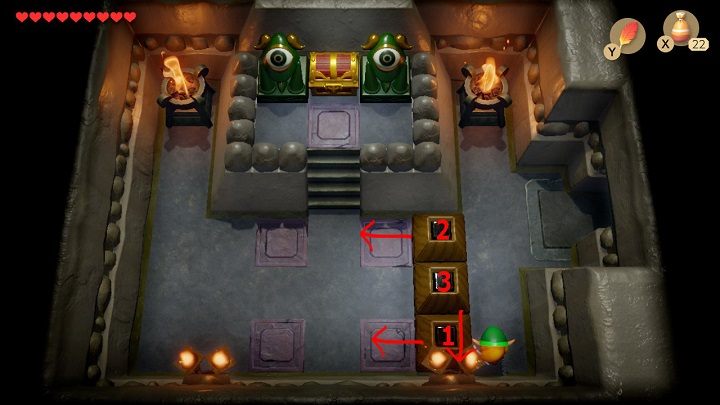
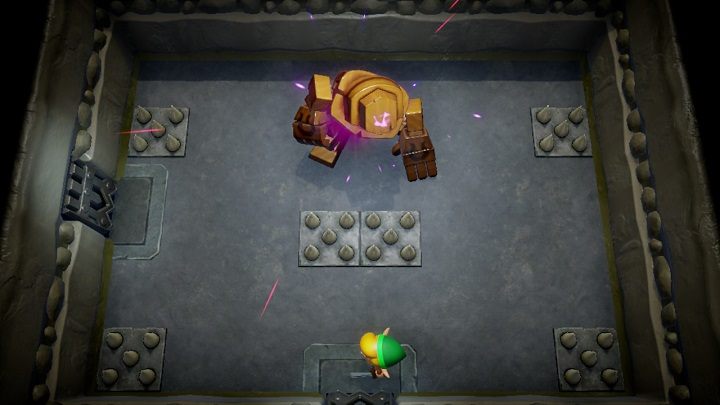
In the next room, you'll have to fight with the Giant Buzz Blob. When it's green watch out for lightning attacks. Try to approach it and sprinkle it with Magic Powder. It will turn blue and then you can attack it. After defeating the Giant Buzz Blob the door on the left will open. Go there and move the blocks to get to the chest with the Nightmare's Key.
Go right and then go down. Turn left and go three rooms down. Go left. Defeat colourful ghosts and go left. Take a Small Key from the chest and go through the revolving door upwards.
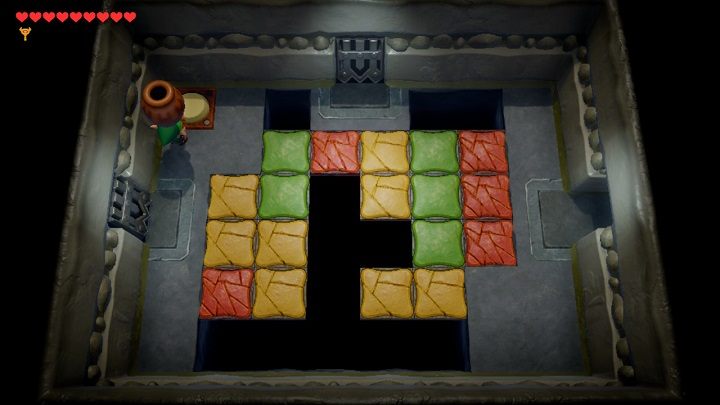
Jump over the colorful boards on the floor and go up to the next room to fight the Stone Hinox. Watch out for spiked floor and falling boulders. Plant bombs near the Stone Hinox to defeat him and go right.
Kill all monsters and be careful not to stand on the colorful floor for too long because it will collapse under you. Pick up the vase in the upper left corner and step on the button to open all doors. Go to the upper room.
Kill all monsters and a chest with a Map will appear. Go to the next room on the right. Throw each monster into the hole of the same color and a Small Key will drop.
Go back left and then go down. Go through the door on the left. First, hit the middle ball in the top row and then the left one in the middle row. Then hit the middle ball in the bottom row and finally the right ball in the middle row. The door at the top will open.
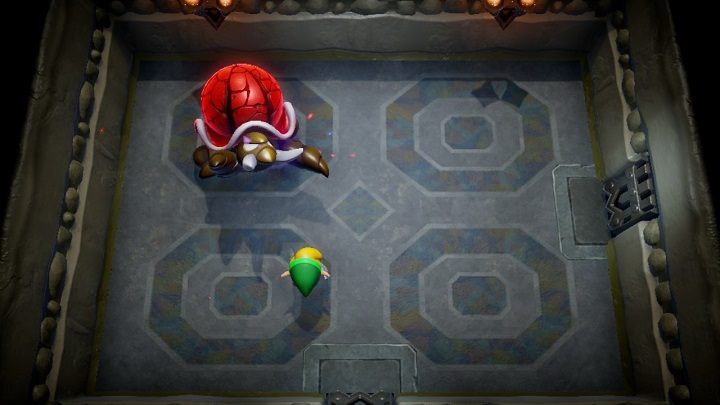
Defeat all the green monsters and open the door on the left. Approach the Crystal and hit it to lower the orange blocks near the door. Go to the door and open it with the Nightmare's Key. Behind them, you'll have to fight the Hardhit Beetle. Watch out for his attacks and hit him with your sword. When he finally turns his shell red it will be a sign that just a few more hits and he will die. After the victory go to the room on the right. Talk to the fairy and choose your price. Depending on whether you choose a boost for your attack or defense, the color of your clothes will change permanently. You will be teleported in front of the Color Dungeon.
Finding the Surf Harp in the Angler's Tunnel
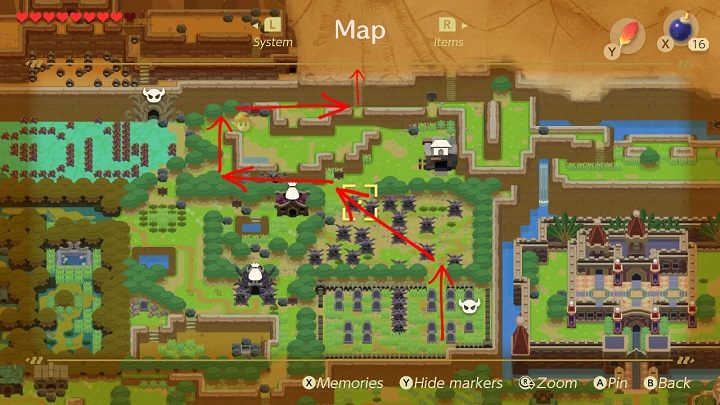
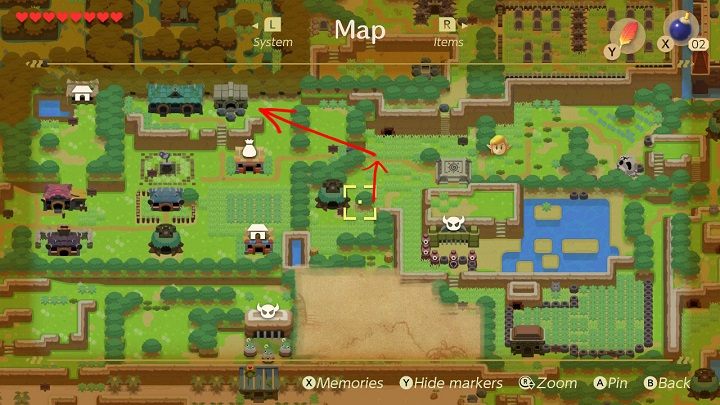
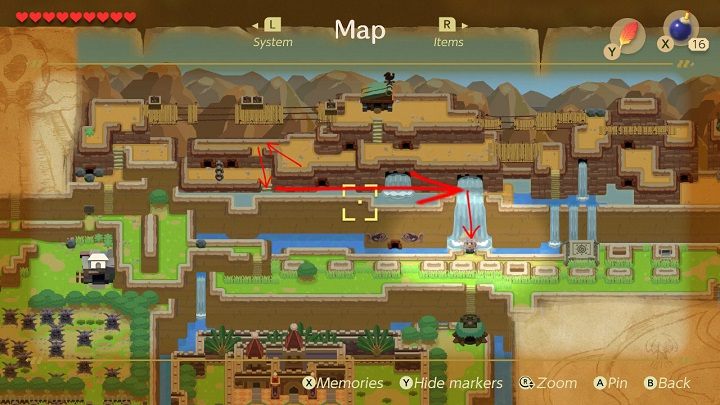
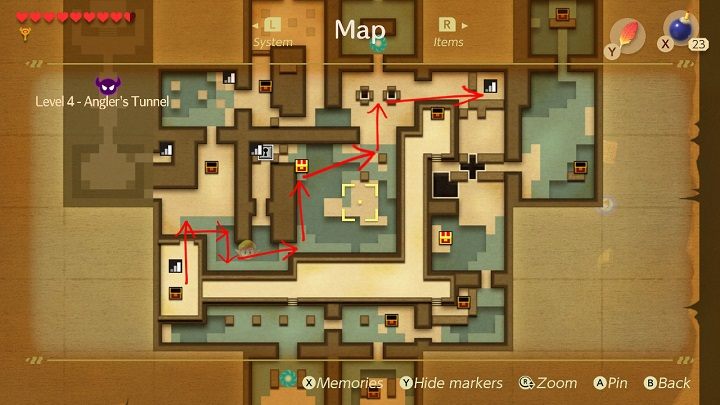
Go up and leave the Cemetery. Head northwest passing by dead trees with faces. Go left and turn up at the Owl Monument. Remove the stones to be able to go up and turn right. Climb the ladder up the hill. The Owl will fly over and say that there is an egg on top of the mountain with a Wind Fish inside. You have to come back to it with all the instruments.
Go down the ladder and go right. Turn down and then right. Go down the ladder and walk along the water until you reach the waterfall. Insert the Angler's Key into the statue and the water will stop flowing. The entrance to the Angler's Tunnel will appear.
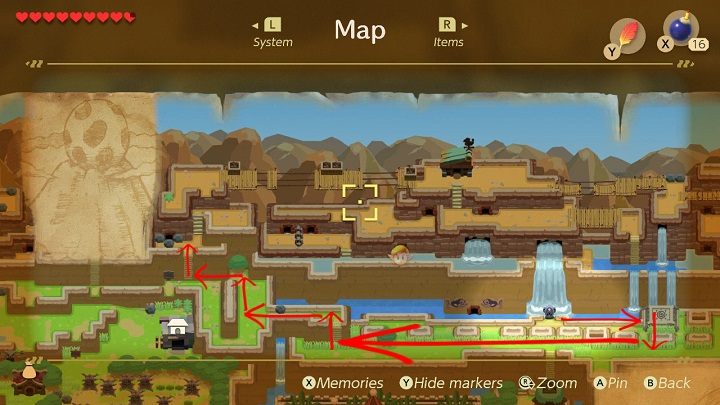
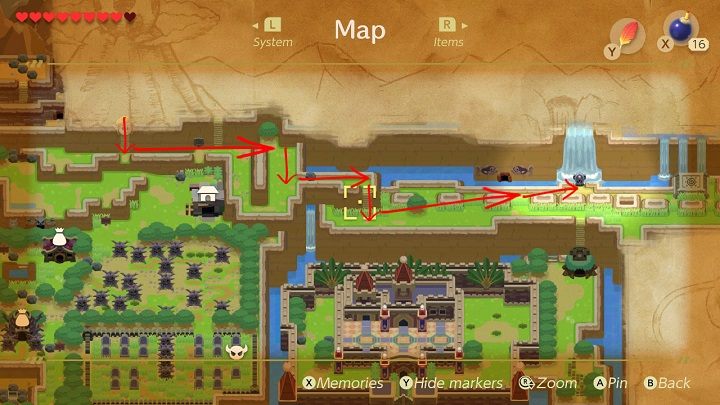
Go right and launch the Fast Travel Point. Go down a bit and turn left. Go forward until you reach the ladder, climb up and head northwest. Climb the ladder up the hill and remove a stone blocking your way to the cave.
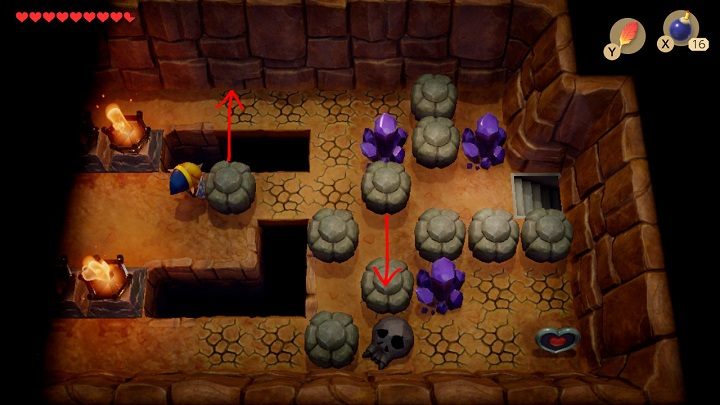
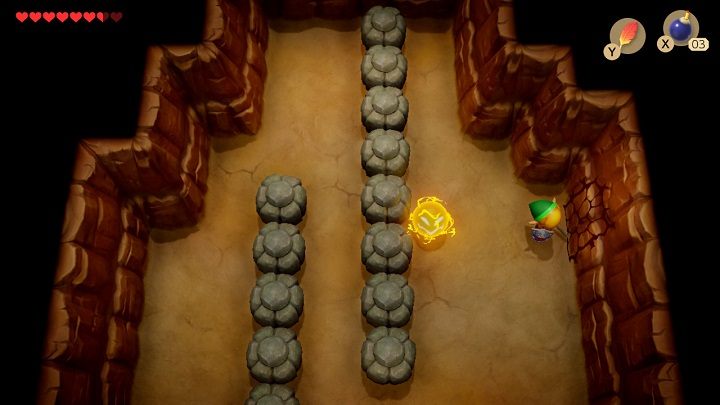
Enter the cave and go right. Move the first stone into a hole and destroy the purple crystal above another stone. Then move that stone down and use the staircase.
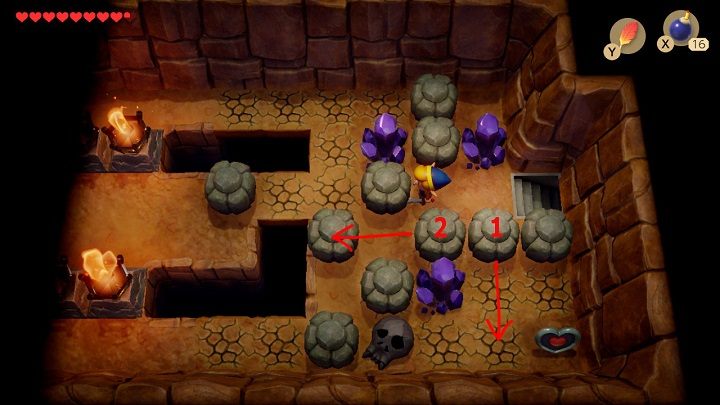
Go back up the staircase to the previous location. Move one stone down and the other to the left. Destroy a crystal and take a Piece of Heart. Use the staircase again and go outside through the door below. Take 50 rupees from the chest and return to the cave. Go right and get out of it through the next exit.
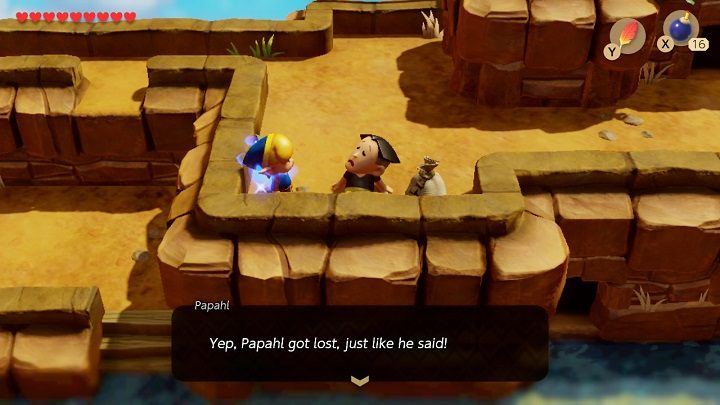
Go down to the water and go to the right. After a while, you will find the entrance to another cave. Keep going straight ahead until you find a staircase to a higher level. There will be a monster in the chest next to the stairs. Go down and exit the cave. Go left a bit and you'll find Papahl there. Exchange the Pineapple for a Hibiscus.
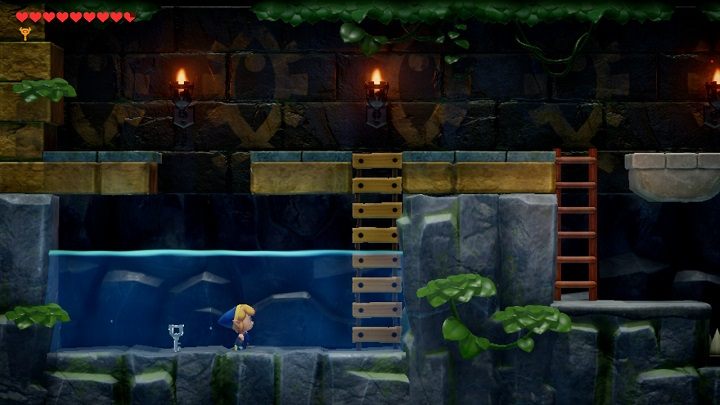
Go up and left a bit and jump down through the gap in the wall. Go down into the water and keep heading right until you reach the hole from which the waterfall flowed. Jump down and enter the Angler's Tunnel.
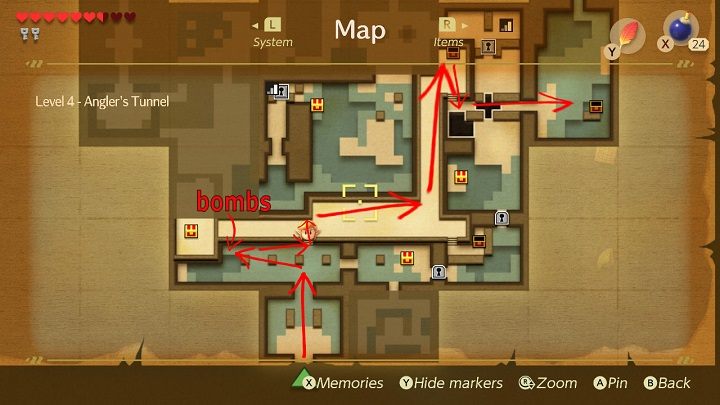
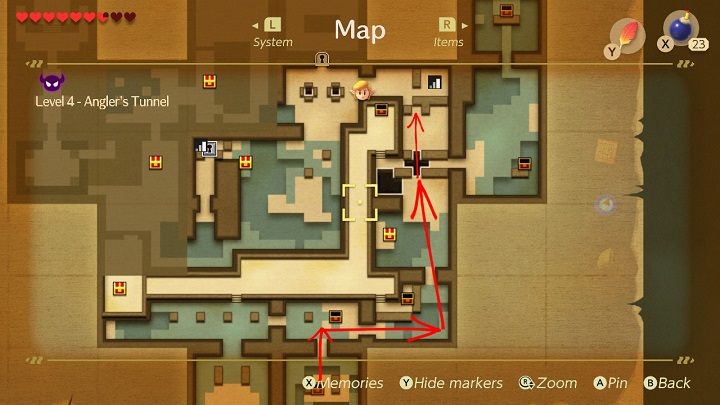
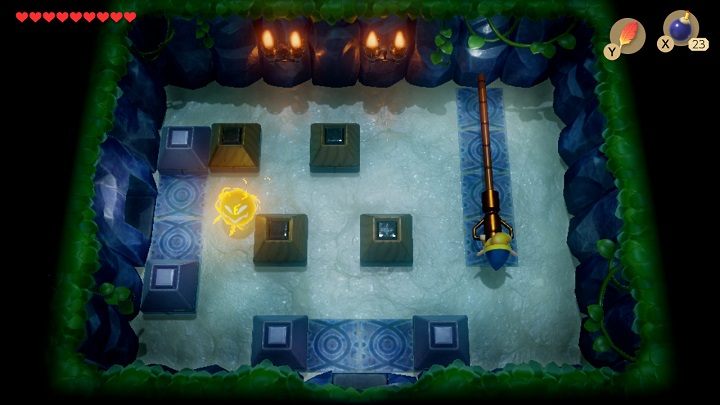
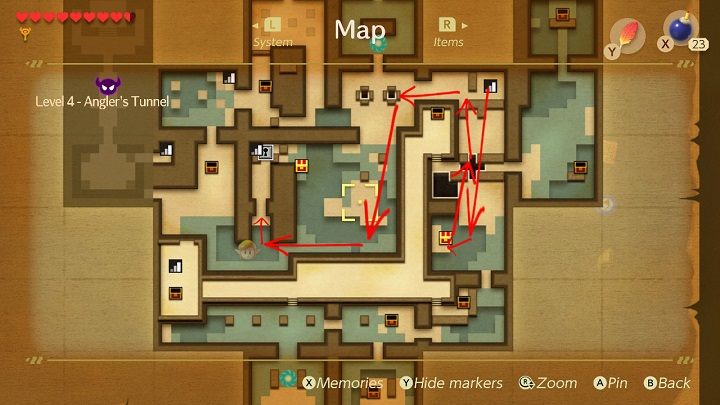
Go up and turn left. Take the bombs and go back to the right. Go up the stairs at the top and go right. Turn up and follow the narrow corridor until you reach a chest with a Map. Head down and use the stairs. Jump to the left and go to the next room.
Do not go into deep water because you will drown. Place a bomb by the left block and then move the right block to get to the chest with a Small Key. Then go through the shallow water up and go to the next room. Watch out for traps and remove the block by using a bomb to get to the chest with another Small Key.
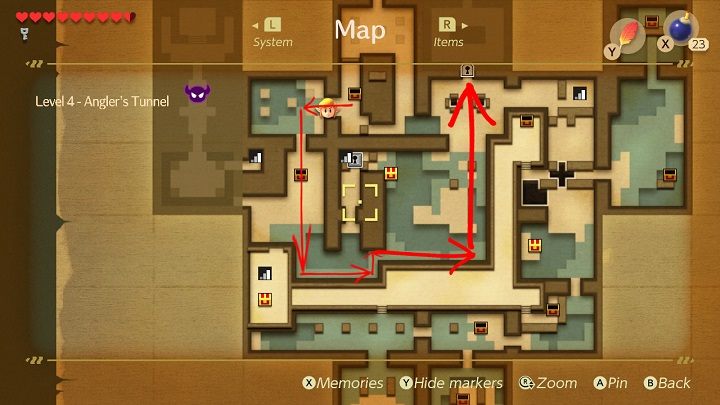
Go back down and return to the room on the left. Jump through a large hole and climb the stairs. Go down the corridor and turn right. Go down the stairs and take a Stone Beak from the chest.
Go back up the stairs to the corridor and go left. Go down the stairs, kill all the monsters and go to the room on the right. Take the Compass from the chest and kill all the monsters there to open the bottom door and go through them.
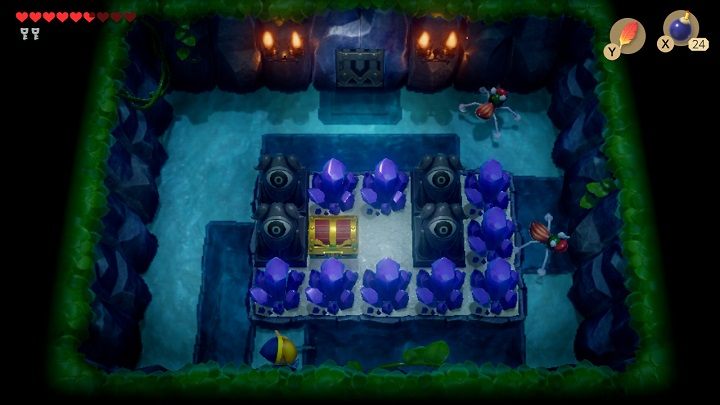
Jump over deep water and smash purple crystals to get to the chest with a Small Key. You must kill all monsters to be able to leave the room.
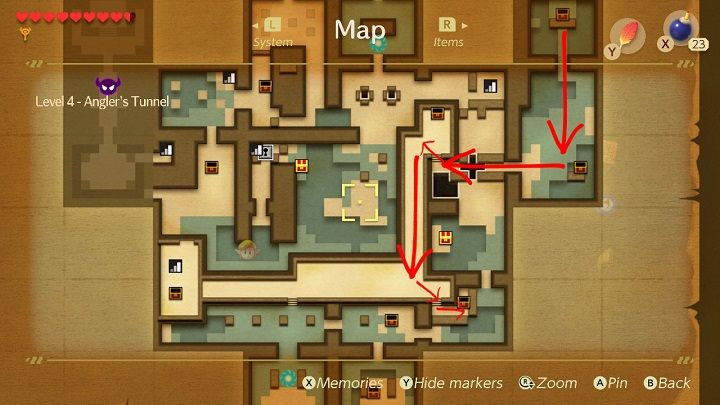
Go back up and go through the door on the right. Jump over deeper water and head up. Jump over a large hole and go up. Use a Small Key on the block with the keyhole and move one block up and go left.

Kill the red monsters and the key will fall from above into the hole in the floor. Head south all the time. Take a hint from an Owl Statue and go down. Jump over deep water and head left. Go to the next room and go along the narrow water corridor. Turn up and get out of the water. There will be a monster in the chest you encounter. Go up and turn right. Take a Small Key from the chest.
Go back the same way to the room where the key felt through a hole in the floor. Go through the upper door. You will have to fight with the Cue Ball there. When he charges at you, jump over him and attack from behind.
Go through the upper door. Grab the lever on the right and pull it down as much as possible. Release the lever and move quickly left to the next room.

Kill the monsters and get the Flippers from the chest. Go down and kill all the monsters. Step onto the gray platform with a small light above it. A light will appear above the next platform. Run all platforms like this and go down the right corridor.
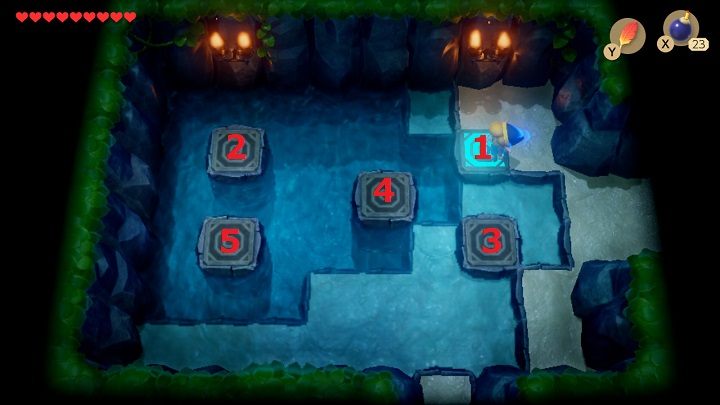
Go down the corridor and move the block to go to the room on the left. Kill the monsters and step onto the platforms in this order: upper right, upper left, lower right, the one in the middle of the water and lower left. A staircase will appear.
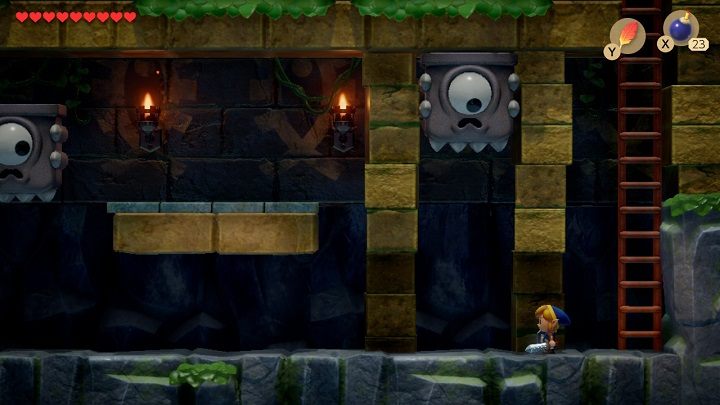
Go down the ladder and go left, watch out for the falling trap. Wait for it to come back up so that you can pass. Jump on the next trap when it comes back and climb the last ladder up.
Go down a bit and take the Nightmare's Key from the chest. Go back up, go down the stairs and dive into the deep water on the right. Swim right to the next room, then turn up and take 20 rupees from the chest. Swim to the northeast and get out of the water. Go up and go to the room on the left. Go down the stairs.
Go down the ladder, jump onto the platform to safely drive over the spiked floor and go left. Dive into the water and take the Key. Come back the same way to the upper level.
Move the block to be able to go down, jump over the big hole and keep going down. Dive in the water to get the 50 rupees from the chest. Go back to the room above, jump over the big hole and continue up. Go left, then go to the bottom of the room and turn left. Get out of the water and step on the floor button that opens the door.
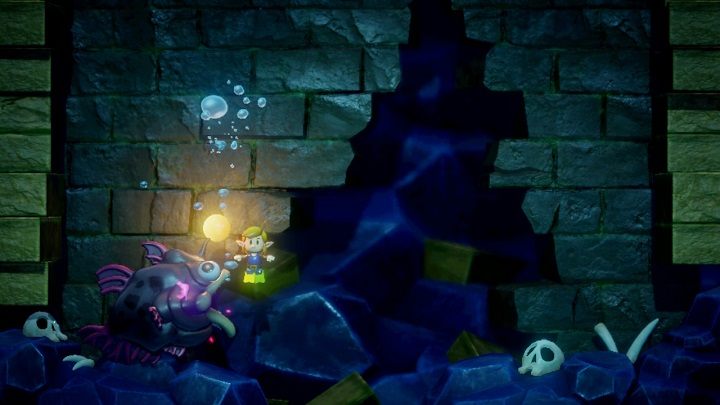
Go up, insert a Small Key to the block with a keyhole and go down the stairs. Go down the ladder, swim to the left and climb back to the upper level. Follow the corridor, move the block and use the Nightmare's Key on the upper door. Go down the stairs and dive into the water to fight the last boss in the Angler's Tunnel. Watch out for falling rocks, kill the smaller fish that appear and attack the Angler Fish from above. Go up the ladder and go to the upper room. Take the Surf Harp.