Key Cavern | Link's Awakening Walkthrough Link's Awakening guide, walkthrough
Last update: 04 November 2019
On this page of the guide to The Legend of Zelda: Link's Awakening, we will help you find the way to the Richard's Villa and provide you with the exact locations of all Golden Leaves. We'll show you how to get the Slime Key to the Key Cavern that contains the next instrument - Sea Lily's Bell.
Level main goals:
- Walking BowWow back home
- Journey to the Richard's Mansion
- Collecting leaves for Richard
- Acquiring the Slime Key and finding a way to the Key Cavern
- Searching the Key Cavern for the Sea Lily's Bell
Walking BowWow back home

Leave the Goponga Swamp and go back to the Telephone Booth. Ulrira will tell you to walk BowWow back home. Go outside, jump over the hole by the tree and go up. Enter through the hole on the right. Remove the obstacle in front of the chest and take 50 rupees from it. Go left and jump up to take 20 rupees from another chest. Exit the cave.
Go down and pass the house. Keep going down to enter the Mysterious Forest. Follow east until you reach a cave with three stones in front of the entrance. After that, you have to turn south. A boulder is on the right. Remove it and you'll find a secret staircase. Go underground and pour Magic Powder into the vessel between the two statues. A Purple Bat will appear. Agree to accept punishment for waking him from a nap. He will give you more Magic Powder.
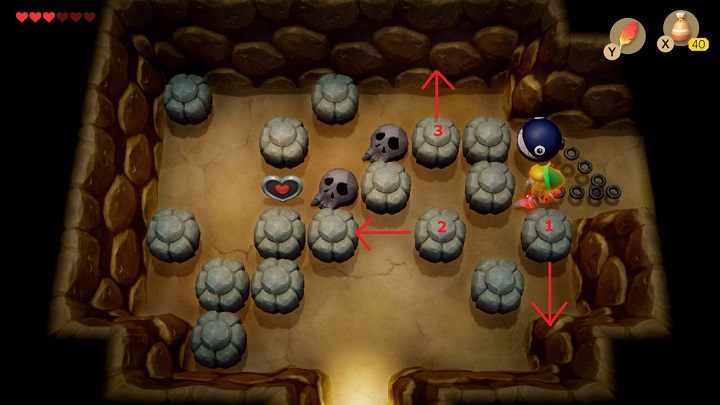
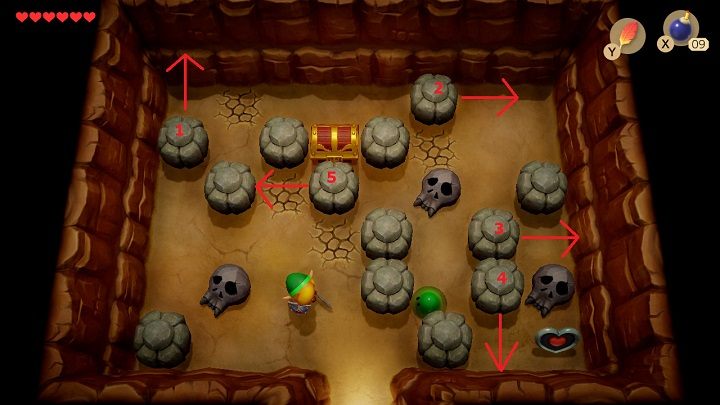
Come back to the surface and go down. Enter the cave on the right. Go up, turn left, move stones to get to the skulls. Remove them to get to the Piece of Heart. Walk the same way from the cave and go west.
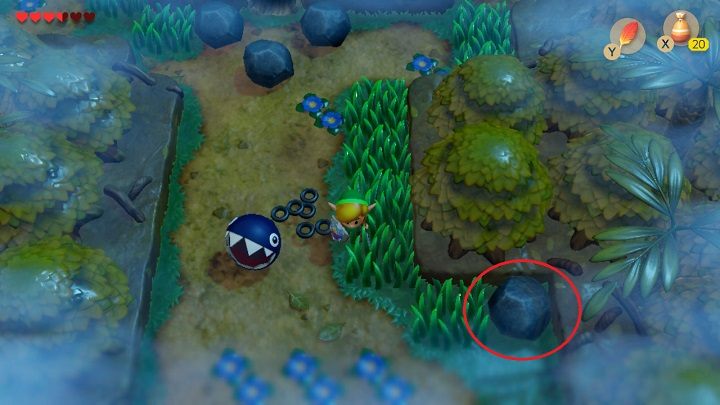
Go down and remove the stone between the threes to get to the chest with the Secret Seashell. Go back to Mabe Village and go to Madame MeowMeow's House to return BowWow. Dampe will be standing next to the well.
Journey to the Richard's Mansion
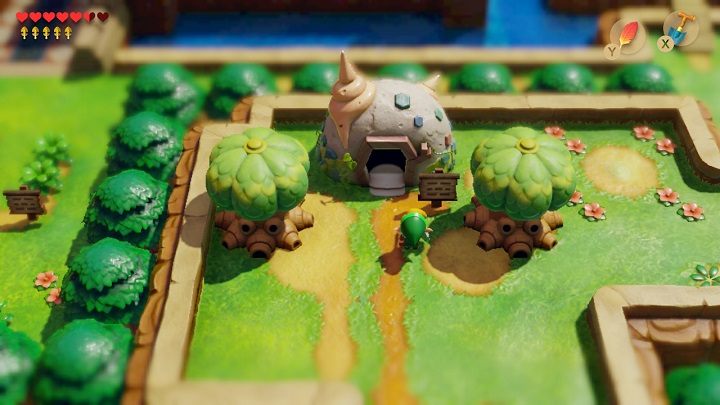
In the northeast of the Marin's House, you will find a Store. Go there and buy a Shovel and some Bombs. Go back to Madame MeowMeow's House and enter the doghouse. Keep digging until you find a Secret Seashell.
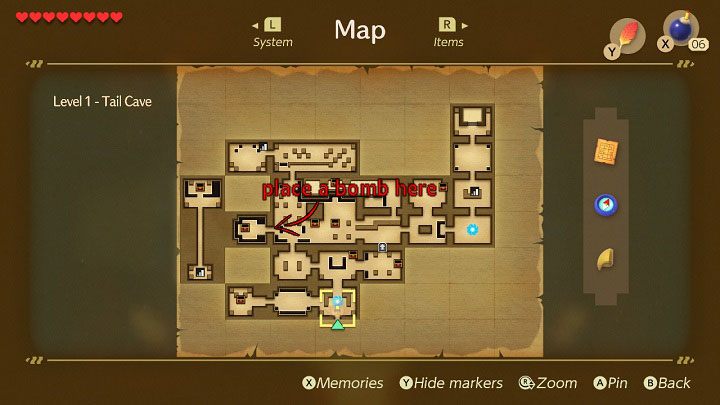
Leave the village and go to the Tail Cave. Go up, then turn left, kill all the monsters to open the upper door. Go up, kill the monster and place a bomb near the left wall, where you can see a crack. Behind the wall, you will find a room and the chest with a Secret Seashell.
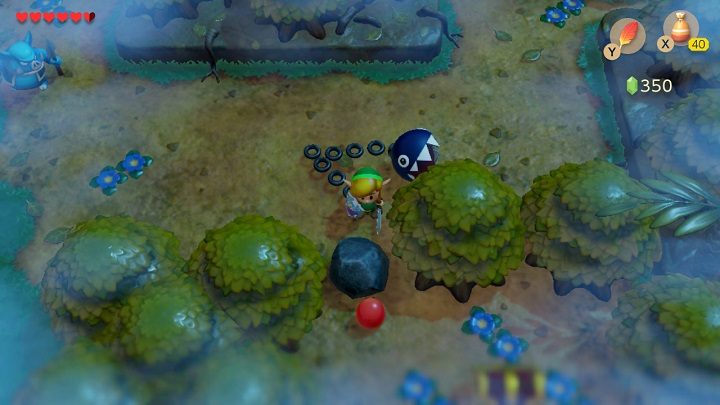
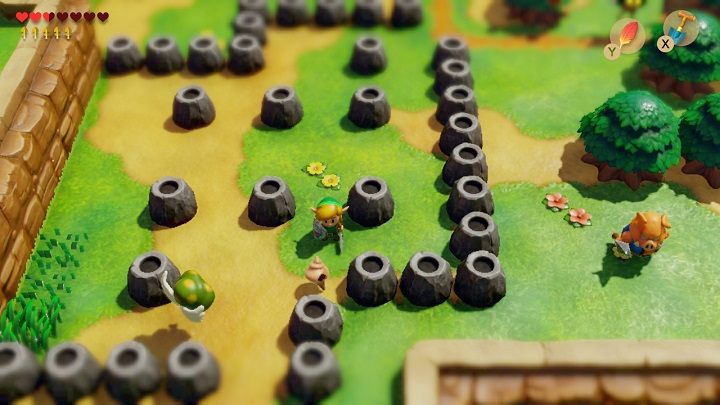
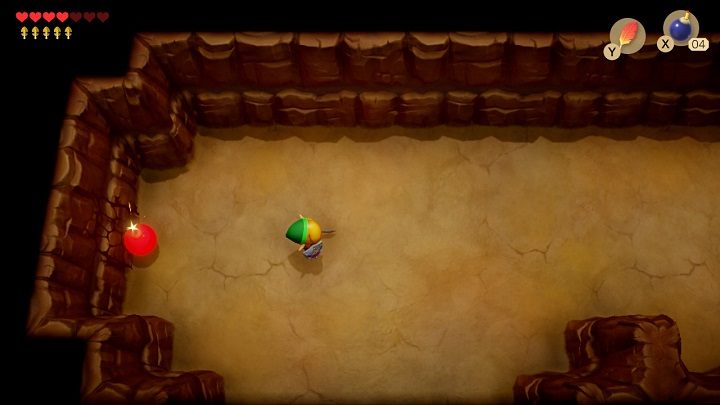
Exit the Tail Cave and come back to Mabe Village. Go near the Store and follow the road east. Remove the plant and stone in your path and enter the cave that will be at the top. Move the stones and destroy the skulls to get to the chest with 50 rupees and a Piece of Heart.

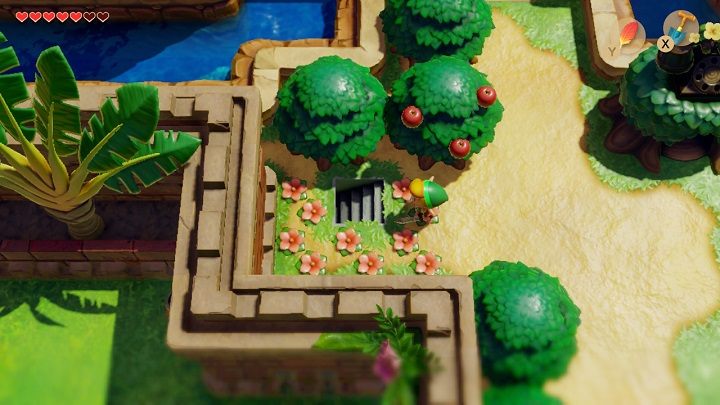
Leave the cave and climb the ladder on the right. Remove the stone on top of the hill and keep moving up until you reach the Witch's Hut. Jump over the holes to the left. Remove the stone and go down the stairs. There will be a small piece of green field. Dig out a Secret Seashell from the middle of that field.
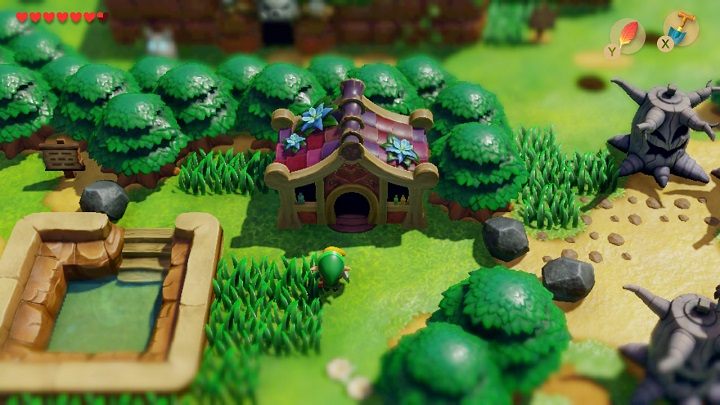
Come back to the Witch's Hut and go north. Keep moving until you reach a house with blue flowers on the roof. Crazy Tracy lives there. She will give you a Secret Medicine for 42 rupees.
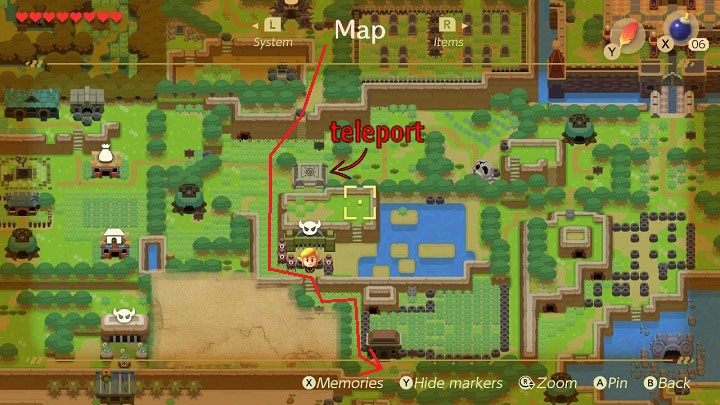
Keep moving south until you go down the ladder from the hill. You will find a Fast Travel Point. Step on it to activate it. Head down - you are walking in tall grass. Go down the stairs and keep moving down until you reach Richard's Villa. Go inside and talk to Richard. He can give you the Key to the Key Cavern if you collect five Golden Leaves that he lost when escaping from the Kanalet Castle.
Collecting leaves for Richard

Exit his villa and go right. Turn up and head north until you reach a path. Follow the path to Kanalet Castle. The gate will be closed so go along the moat to the right. Give the monkey Bananas and he'll fix the bridge behind him. He will also leave a Stick.
Cross the bridge and go up. When you reach the Telephone Booth, cut the plant by the trees on the left. You will find stairs under it. Go through the underground and you will come out via the stairs behind the Kanalet Castle.
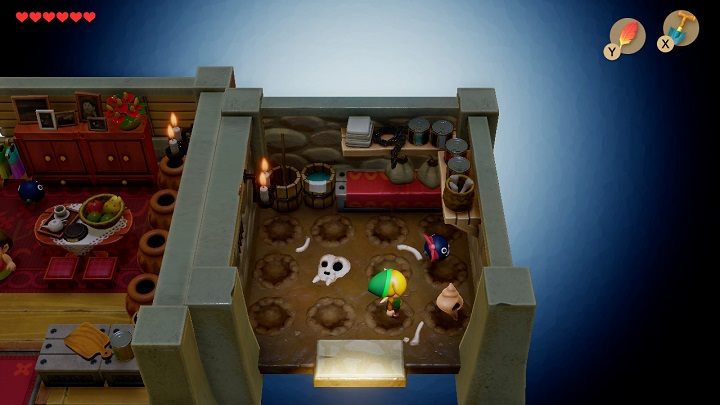
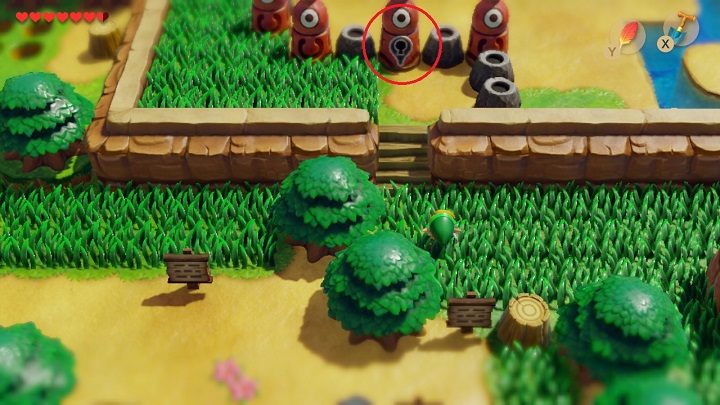
Go left and turn down. Pick up a stone and throw it at the tree on which the crow sits. Kill him and a Golden Leaf will fall out. Keep going down and turn right, go past the palace door and turn up. Kill the monster that emerges from one of the six holes and you will get another Golden Leaf.
Return to the palace door and enter inside. Go left, watch out for the trap and kill all monsters. A Golden Leaf will appear. Go up and turn right. At the end of the corridor, you will find a button that opens the gate.
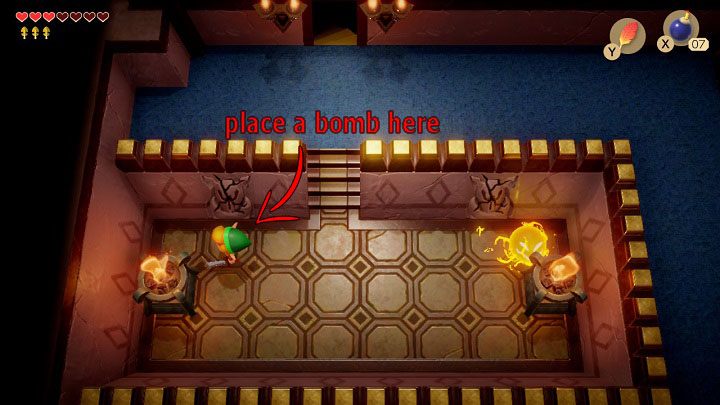
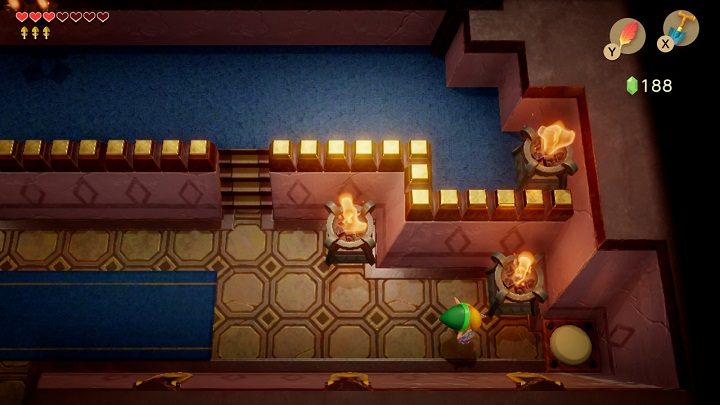
Go up and take the stairs to the upper floor. Watch out for the Spark and go down to the small space with two torches. Place a bomb under the left statue on the wall. The explosion will wake the monster. Kill him and he will drop a Golden Leaf.
Return to the navy-blue rug and go right. Follow the corridor and exit the Castle. Enter the door on the right, pick up the vase and throw it at the door. A guard will be waiting in the next room. Attack him when he is starting to swing a spiked ball on a chain. Jump back when he throws it at you. After a victory, take the last Golden Leaf.
Exit the Kanalet Castle, go through the gate and follow the path down. Follow the path to the right until it leads you to the hill on which the Seashell Mansion is located. Go inside and stand on the platform with shells. You will receive a Piece of Heart for collected Secret Seashells. Exit the mansion and go right. Under the plants, you will find another Secret Seashell.
Get off the hill along the path. Follow the path to the left and go down. Get in between the small volcano-like rocks and search for a stone that you can lift. You will find a Secret Seashell under it.
Go down a bit and on the left, you will find an entrance to the cave. Go inside, go left and place a bomb under the left piece of the cracked wall. Behind it you will find a passage to the next room. Take the stairs to the upper level of the cave. Move the stones so that you can get to the exit.
Go up and dig the ground near the Statue of Owl. You'll find another Secret Seashell. Go back to the cave, go down to its lower level and go outside by the left exit.
Go down and turn right by the Telephone Booth. Another Secret Seashell is under the plant by a small wall. Go back up to the cave. Turn right and leave the cave via another exit. You should be near the stones that look like volcanoes. Go up towards the castle, go left until you reach the Telephone Booth and then head southwest to Richard's Villa.
Acquiring the Slime Key and finding a way to the Key Cavern

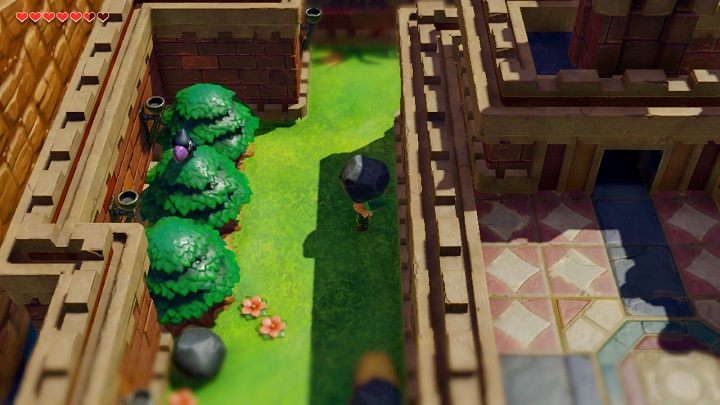
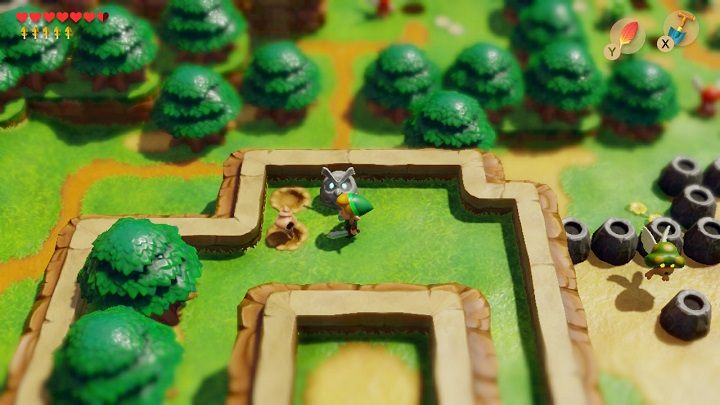
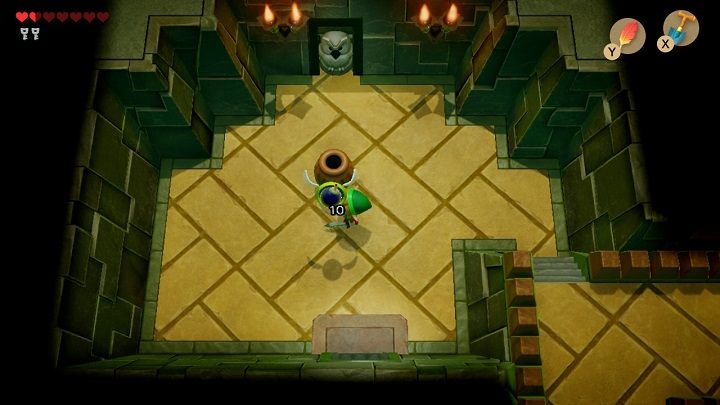
When you give him back his Golden Leaves, Richard will tell you to move the frog statue. There are stairs below it. Go through the corridor on the left, remove the stone and get to the chest with a Secret Seashell. Then, go through the corridor on the right and climb the stairs to the surface. Remove grass and plants on your way to get to the Owl Statue. Be careful not to fall into one of the many holes. Dig the Key to the Key Cavern by standing in front of the statue.
Come back to the Richard's Villa through the field with holes and the secret underground passage. Exit the villa, go left, turn up and then go to the nearby hill to insert the Slime Key into the statue.
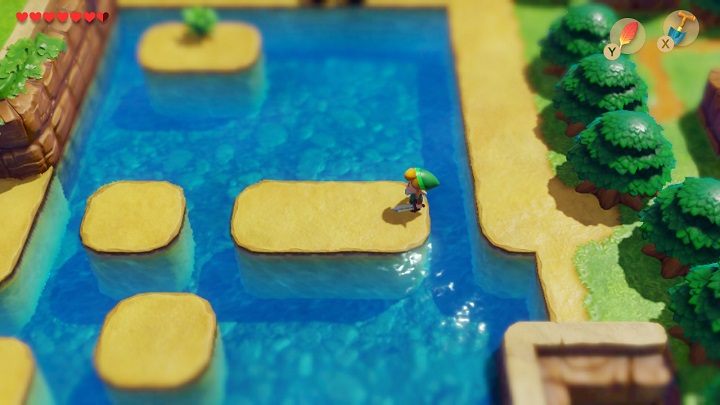
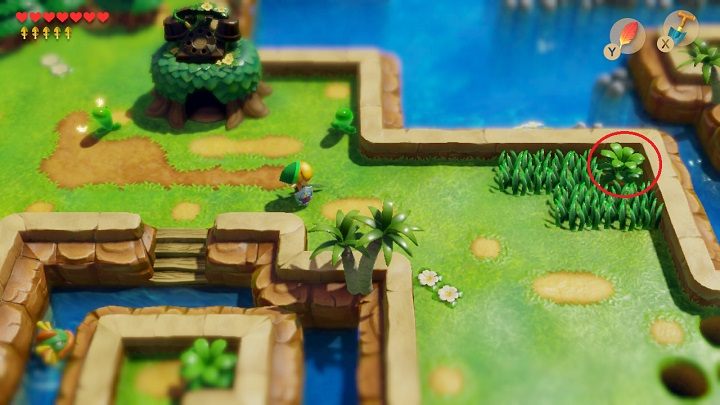
Go back to the Richard's Villa and go right. Go up and then turn left between the trees. Jump over the water to get to the Island where the Key Cavern is located. Go up to the hill and dig in the place between the grass. You'll find a Secret Seashell. Go down the hill and enter the Key Cavern.
Searching the Key Cavern for the Sea Lily's Bell
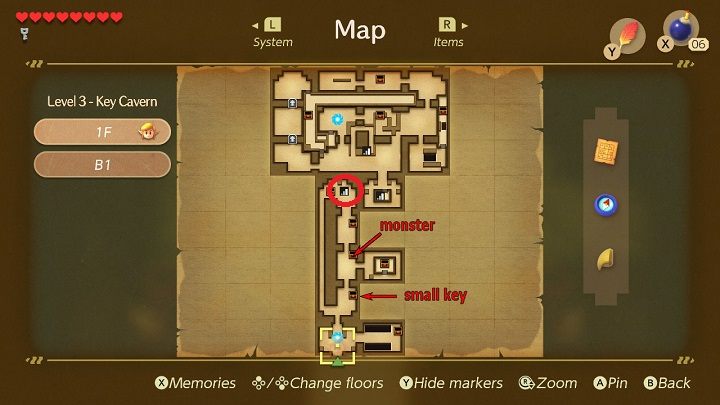
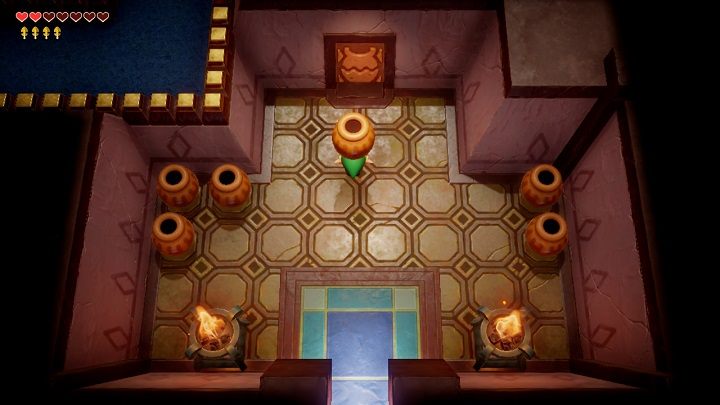
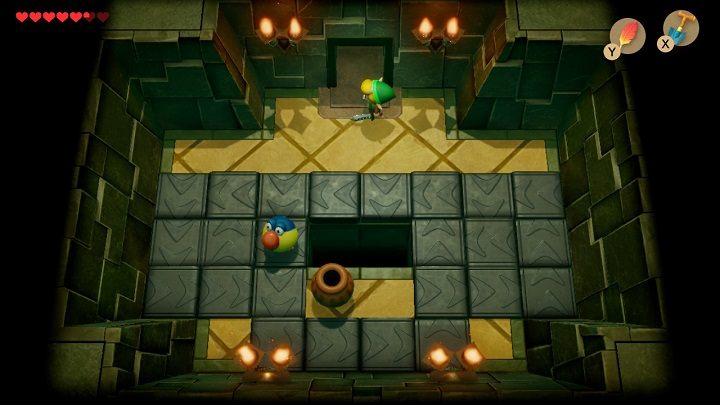
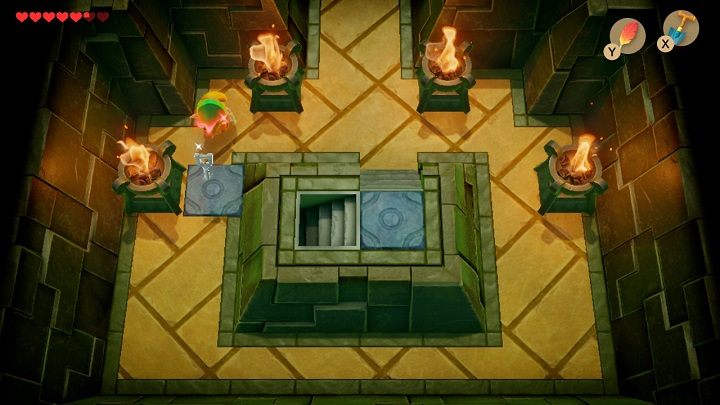
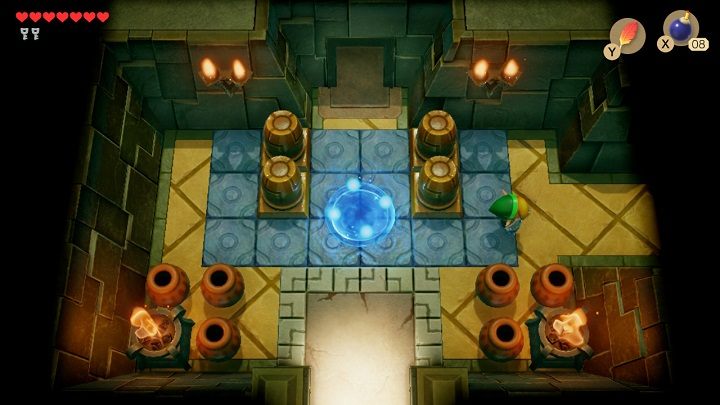
Pick up the vase and throw it at the door. Kill all the monsters in the next room so that a chest with the Small Key falls. Go through the door at the top. Kill all the monsters so that the door opens again. There'll be a monster in the chest. Go through the upper door and go straight until you find the stairs to the lower level.
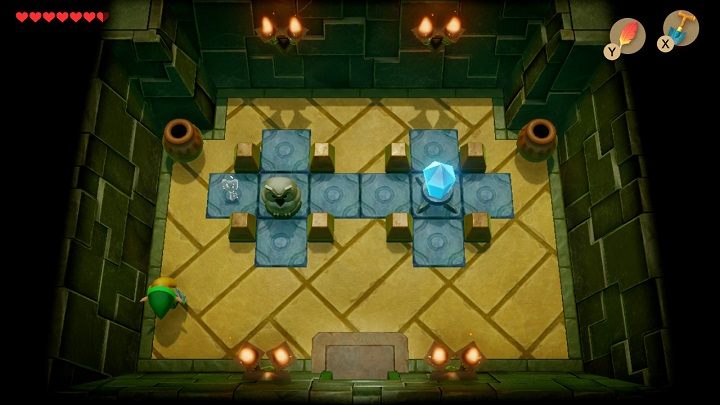
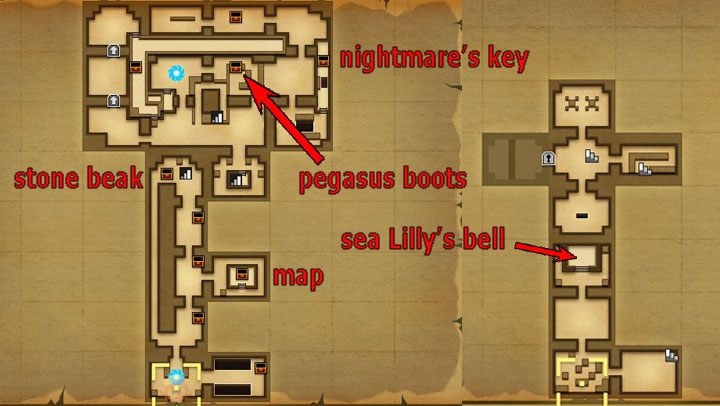
Open the upper door and kill all the monsters. A Small Key will drop, pick it up and tap the Crystal to turn it orange. Go back to the first floor and take the Stone Beak from the chest.
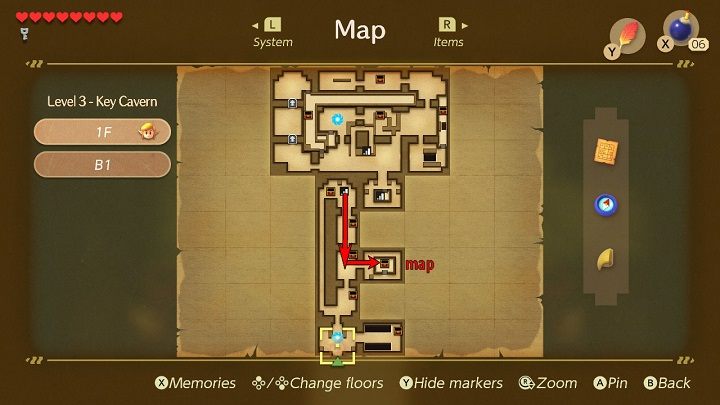
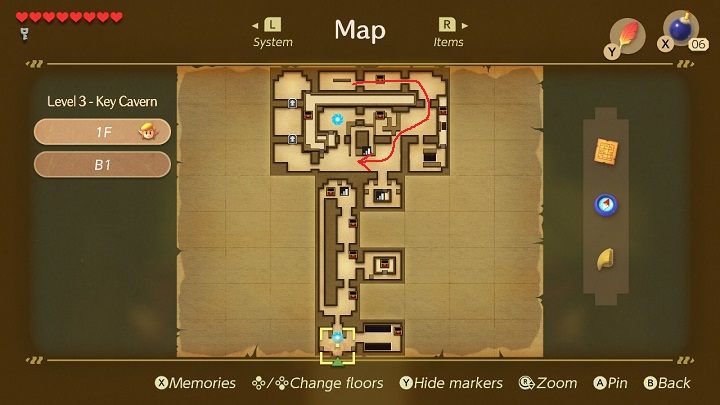
Go down the corridor on the right and go through the next two rooms Go through the door on the right. Kill all the monsters and take a Map from the chest.
Go back down the stairs to the lower level of the cavern and use the door on the south. Kill all the monsters to make a Small Key fall. One of the monsters can be difficult to defeat because he teleports as soon as you are next to him so just throw a vase at him. There's a bomb under one of the vases.
Go back to the upper room and open the door on the right. Use the stairs to go up and walk around the room. Kill all the monsters that will appear. Take a Small Key and go up the hall.
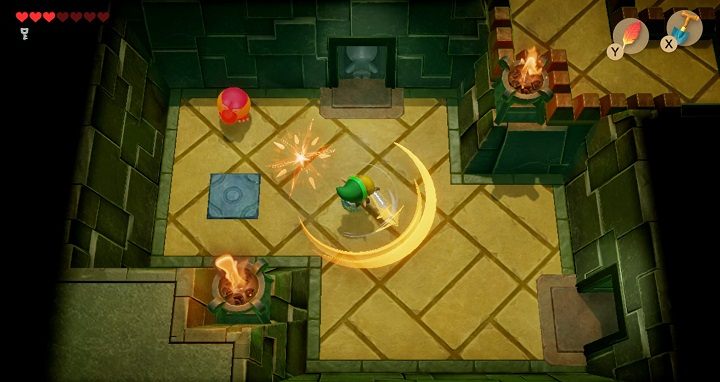
You will find a bomb under the vases on the right. Go left, kill all the monsters to make the door open and go to the room on the left. You'll encounter teleporting monsters again. To beat them, you need to use a powerful attack. Keep pressing the B button and try to approach the monster. Then, quickly release the B button. After defeating them a Small Key will drop.
Go through the revolving door to the upper room, defeat all monsters and use another revolving door. Jump to get the bombs and take a hint form the Owl. You learn that you need to feed the black monsters with bombs.
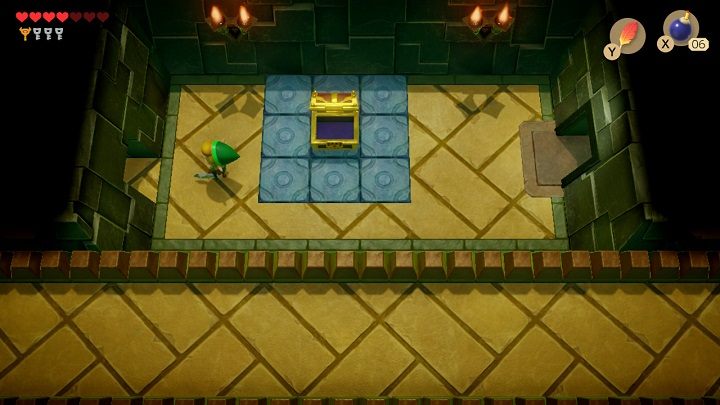
Take the stairs to the narrow corridor and go down. Take 50 rupees from the chest. Continue down the corridor until you go down the stairs. Move the stone blocking the path and go through the door to the upper room.
Place bombs in front of the Dodongo Snakes' mouths to defeat them. Go through the door on the right and move the stones to clear your path to the chest with the Pegasus Boots. Hold the Left button to use them. Stand in front of the black crystals and destroy them using the Pegasus Boots. Move the stone and go down the corridor.
Jump down and go back to the room where you killed Dodongo Snakes. Enter the portal and transport to the first room of the cavern. Follow the corridor to the right and kill the monster by dashing with your new boots. Take a Small Key from the chest.
Go right and skip the portal to go up. Go two doors up and kill the skeletons. The chest with 200 rupees will fall. Go back down to the first room of the cavern and use the portal. Go through the bottom door, turn right and go up the hall.
Kill the skeletons and take a hint from the Owl Statue. Place a bomb near the wall on the grey part of the floor. Go through the hole to the secret room. To jump through a vast hole, speed up by pressing the Left button. Go up the narrow corridor and take the Nightmare's Key from a chest.
Jump down left and go through the door near the Owl Statue. Kill the bomb monsters and go to the room on the left. There will be a chest with the Compass. Put a bomb against the wall on the left and go to the secret room. Take a Small Key after defeating all the monsters.
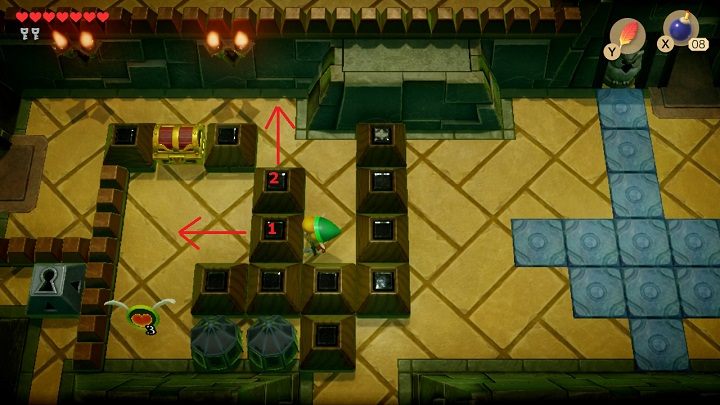
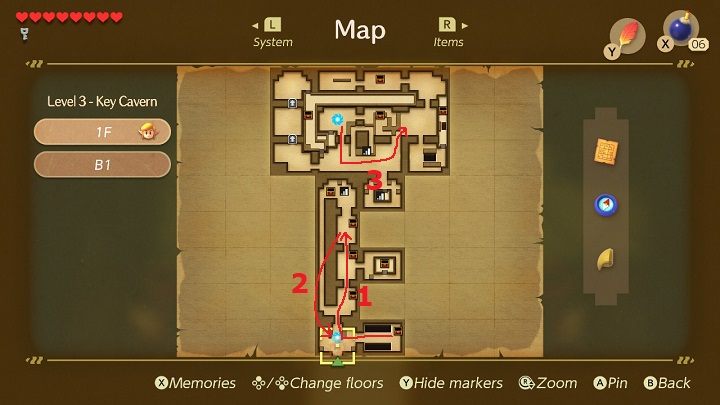
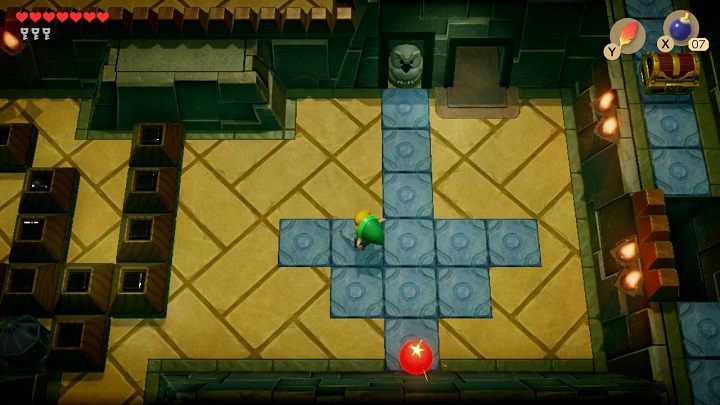
Return through the two rooms to the right and kill the bombs. The doors will open again. Go down. Go left and then down through the corridor. Turn left and use a Small Key on the stone between the small blocks of the wall. Go ahead, use a Small Key on the next stone and turn right. Go down, use the last Small Key on the stone and go down the stairs.

Dash onto the big boulder with a face. It will fall down and you can continue to head right. Speed up to take a big jump, use the ladder, watch out for the flower coming out of the pipe and take the last ladder down. Press the Left button to kill the monsters and go through the door on the right. Kill all the bats in the next room to get a Small Key. The last Key Cavern Boss fight awaits you there. First dash into the wall for the monster to drop down. To defeat the Slime Eye, you need to attack his eye with the sword. He'll start to divide into two parts. Keep attacking one of his eyes and when there is just a small connection between them, dash through it by pressing the Left button. He will split into two Slime Eye monsters. Watch out where they will land and keep attacking their eyes. After the victory, go to the upper room and take Sea Lily's Bell.