
Mission 4 - Amon's Reach | Campaign - Legacy of the Void SC II: Legacy of the Void Guide
Last update: 11 May 2016

Location: Shakuras
Main objectives:
- Clear 4 launch bays.
- Warp conduit must survive.
Side objectives:
- Retrieve 3 reserve solarite.
Reward for completing main objectives:
- 10 solarite.
- Unlocking dark templar and avenger units.
- Unlocking orbital strike, temporal field, solar lance skills.
Reward for completing side objectives:
- 15 solarite.
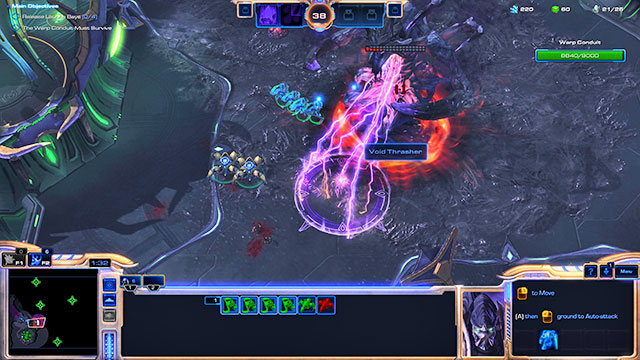
You start with a nicely developed base, small group of workers and four dark templars. There is a warp conduit [W] above the base. It will be attacked by the void thrasher [1] few seconds after the mission starts. After shooting at it from the orbit, attack it with dark templars. Void thrasher is a strong unit, but it will be showing you the place which it is going to attack. Keep attention to where are your units and immediately remove them from the dangerous area while attacking the thrasher. It should drop dead after a short battle.
If you're afraid that the dark templars alone might prove to be not enough, recruit few units immediately after the mission starts. They should be ready when the thrasher arrives.

Focus on developing the base once the threat is eliminated. Create more workers, increase your army size. Vary the unit types you use, creating dark templars, stalkers and zealots. Temporarily keep them all at the entrance to the base so that they will repel occasional enemy attacks. Once you gather around 20 units, go north. In the meantime you should receive information about solarite resources [S1-S3] available on the map. The closest one is near the base [S1]. Additional resources can be found nearby as well.
The second [2] and all other void thrashers will appear no matter whether you will be cleaning the launch bays or you leave them alone. Due to that, it might happen that you will fight the last thrasher while the main objective isn't even started. Don't worry about that, as the mission doesn't have any time limit. As long as the warp conduit survives, you can take as much time as you want.
The order in which you clean the launch bays [3-6] depends only on you, but it is a good idea to do it in the order in which the void thrashers appear. Thanks to that, you won't have to wander through the whole map in order to destroy them. Additionally, when going to [4] you can get rid of zerg base in the [Z1] point. The base isn't large or well protected, so you don't need to send large forces against it. 15 units of different type should be enough. The zerg base [Z1] is not the only on the map. A second, much larger and better protected can be found in the eastern part of the map [Z2], but you don't have to destroy it. In addition to that, there are single groups of units and fortifications on the map, with which a large army should have no trouble dealing.
![Once you destroy the smaller zerg base, you will have an easy access to the second stock of solarite [S2] and to the second launch bay [4] - Mission 4 - Amons Reach - Campaign - Legacy of the Void - StarCraft II: Legacy of the Void - Game Guide and Walkthrough](/starcraft2legacyofthevoid/gfx/word/421303101.jpg)
Once you destroy the smaller zerg base, you will have an easy access to the second stock of solarite [S2] and to the second launch bay [4]. If the thrasher hasn't appeared yet, leave most of your forces there and take the rest back to protect your base. Let the remaining forces get rid of the defense buildings and detectors whose presence might make the battle with the monster harder.
All that time, keep developing the base and creating new units. Enemy attacks will be rare and your building abilities limited, so just create melee and ranged units in similar numbers. When going at thrashers, remember about dividing your forces into smaller groups. The monsters have attacks with area of effect and it will be harder to evacuate large groups from the attack area. Going with too large army at once is an easy way to lose many units.
The strength of the thrashers and their support will be much greater in the eastern part of the map [8][9]. The last one [9] will be accompanied by a large group of zerg and defense buildings. You can avoid facing him if you will rush completing the mission - it will simply be late to appear. You can also send a large group of units there earlier, it will get rid of the zerg and wait for the thrasher. However, in that case it would be more practical to clean the launch bay and retreat. The mission ends once all four launch bays are working. It doesn't matter whether you kill all thrashers or not. You can ignore the two last monsters or clean the launch bays before they manage to appear.