
Mass Effect 3: Priority, Horizon - walkthrough Mass Effect 3 guide, walkthrough
Last update: 13 October 2022
On this page of the Mass Effect 3 guide you'll find the walkthrough for the main quest Priority - Horizon. This guide explains when to visit the Horizon, where to find the Miranda/Oriana recordings, how to defeat the two brutes, how to behave in the scene with Henry Lawson and what consequences your decision may have.
- Reaching the Sanctuary on the planet Horizon
- Battles in the Sanctuary and finding the Miranda / Oriana recordings
- Encounter with brutes
- Confrontation with Henrym Lawsonem - important joice
- Return to Normandy
Reaching the Sanctuary on the planet Horizon
Received from: Specialist Traynor [Normandy SR-2: Combat Information Center]
Unlocked by: Received automatically after completing Priority: Thessia.

Open the galaxy map and travel to the Shadow Sea. Once you're there (Iera system), fly to the planet Horizon (screen above) and confirm that you wish to land on its surface. Listen to a new conversation while still on board the shuttle which will about the refugees and about losing radio contact with the sanctuary. The second issue will be further explained when you'll listen to a broadcast, informing everyone about the Cerberus presence and ordering to stay away from the facility.
It's worth noting that the Lawson family will play an important role in this quest. It's good to have Miranda still alive and to take a minute to remind yourself what the previous interactions with her were about (Citadel: Miranda Lawson side quest - its description can be found in the Citadel quests chapter).
Wait until you're transported to [Horizon: Sanctuary].
Battles in the Sanctuary and finding the Miranda / Oriana recordings
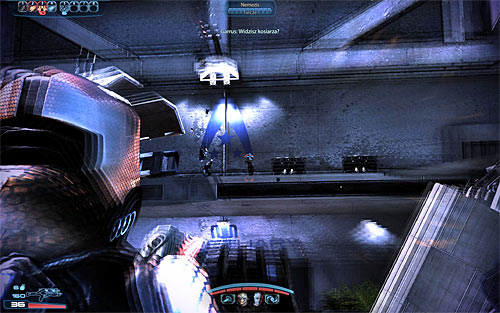
Start moving towards the entrance to the sanctuary. The second you notice Cerberus shuttle trying to land order your teammates to take cover behind some obstacles located to your left. You on the other hand should hide somewhere on the right. Observe the shuttle and as soon as Cerberus units have stepped out focus on attacking a single nemesis. It's very important that this enemy dies quickly, because otherwise he would take cover on the upper balcony and start using the sniper rifle to limit your team's actions.
That's not all, because two phantoms are also heading your way. Use the fact that the phantoms should be focused on reaching your teammates and attack them from the flank (don't forget that you need to destroy their biotic barriers in the first place!).
![Make sure that youve defeated all enemy units that have left the shuttle and then look around to find some parts [3500 credits] - Mass Effect 3: Priority, Horizon - walkthrough - Main Missions - Mass Effect 3 Guide](/masseffect3/gfx/word/10513750.jpg)
Make sure that you've defeated all enemy units that have left the shuttle and then look around to find some parts [3500 credits]. You may proceed towards the main entrance to the facility and you must use an omni-tool to bypass the defences [300 EXP]. Ignore new shuttles, because they're leaving and you won't encounter any new Cerberus units for quite some time.
Find a medical station [150 EXP] and an interactive viewpoint. There's a large terminal (screen above) nearby and you should interact with it in order to watch the first recording.
![Continue exploring this floor of the facility, finding three logs, a PDA and some letters [1500 credits] - Mass Effect 3: Priority, Horizon - walkthrough - Main Missions - Mass Effect 3 Guide](/masseffect3/gfx/word/10513765.jpg)
Continue exploring this floor of the facility, finding three logs, a PDA and some letters [1500 credits]. Once you've secured the floor find the stairs leading to a lower level. Check the wrecked shuttles seen on your left, because you can collect two new logs here.
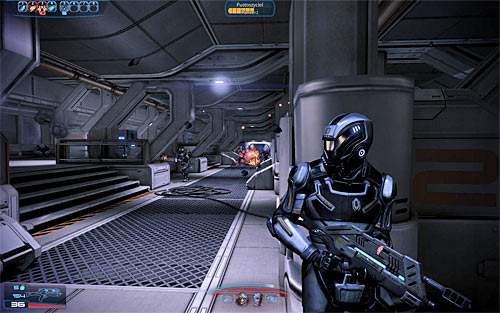
You may now choose the passageway located to the right of the stairs (screen above). Be careful, because a small group of Cerberus troopers is stationed nearby. They shouldn't be difficult to beat and once they're gone locate a new weapon mod [Pistol Scope].

Choose a small passageway leading to a nearby room and locate an interactive console in order to activate it. If Miranda is still alive you will watch the first part of her recording and if she's dead you'll watch a recording left by her sister Oriana.
Search the area to find a safe [1500 credits] and proceed to the next section of the facility. You'll soon enter a larger area and you must interact with a water pump [300 EXP]. Wait until all water is drained from the tanks and then use a ladder to get down to a lower level. Head towards a door seen in the distance.
![Resume the exploration of the sanctuary, finding a new safe with some equipment [1500 credits] and an armor fragment [Rosenkov Materials Shoulder Plate] - Mass Effect 3: Priority, Horizon - walkthrough - Main Missions - Mass Effect 3 Guide](/masseffect3/gfx/word/10513796.jpg)
Resume the exploration of the sanctuary, finding a new safe with some equipment [1500 credits] and an armor fragment [Rosenkov Materials Shoulder Plate].
Your current objective is to reach a small command center where you will have to interact with the main console (screen above). Doing this will allow you to uncover that refugees are being turned into husks. Continue your journey, finding a PDA in the next room, as well as a console with a fragment of Miranda's/Oriana's recording.

Order your team members to take cover by the balustrades on the upper floor. Proceed to the door on the lower level alone. Opening the door will start a fight with the husks. Winning this battle shouldn't be difficult as long as you remember about keeping a safe distance from the monsters.
Save your game after you've won and then proceed to the next area. Once again order your colleagues to take cover and head forward alone. You can find an ammo stash in this area, as well as two new logs.

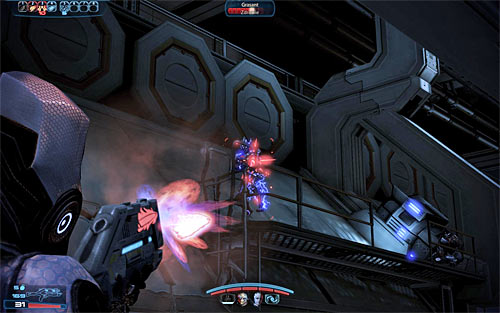
An attempt to enter a longer corridor or to open a door located to the right will trigger a second battle. I recommend that you immediately return to the area where your team is stationed, because a banshee is heading your way. Focus on attacking this monster, remember about all the tactical manuevers from the previous encounters with banshees. It's important to use cover while attacking the banshee, because a ravager will join the battle very soon. It would be good if you could attack the banshee without having to worry about the ravager, however you can also act differently and quickly kill the ravager with a help of grenades and best powers.
Once you've killed the banshee and the ravager you'll have the most difficult part of this battle behind you. Move closer to the unexplored area again and start attacking marauders. They should occupy upper balconies, however as the battle progresses they may land on the lower level and try a frontal assault. Prevent them from doing that, because you wouldn't want your team to find itself in a dangerous situation.

Resupply after you've won the battle and choose the only available passageway leading to the next part of the sanctuary. Look around to find two logs and a med-kit [100 EXP]. You may open a door leading to the next room [600 EXP]. The most important object here is a console with a new recording from Miranda or Oriana. Listen to the recording and to a conversation with the team members. Aside from the console you'll also come across a PDA and research data [1500 credits].
Save your progress before moving towards the stairs, because you're getting close to an area occupied by a large group of monsters.

The room with the monsters has two entrances. I would recommend that you place your teammates close to the lower entrance and proceed to the upper entrance alone (screen above). Destroy all barrier engines you find before proceeding with the main part of the battle. You'll be going against weaker monsters like cannibals and marauders, so winning shouldn't be a difficult achievement.

Obviously you should consider taking some time after the battle to explore the new area, especially since you'll come across several valuable objects. Here's a list of them: two logs, a submachine gun [M-12 Locust], a weapon mod [Shotgun Blade Attachment] and a PDA. Finish off by interacting with a new console (screen above). This will result in showing a new message from Miranda/Oriana. Save your game and then use a ladder that has appeared behind you.
Get ready, because immediately after you've made your way to a new area you'll begin a battle. Eliminate a marauder standing close to the ladder and then order your teammates to take cover near the main corridor. You'll have to be very careful here, because there are several ravagers at the other end of this hallway and you can receive severe injuries as a result of their attacks. I wouldn't recommend trying to storm enemy positions or try using alternative paths (upper one or lower one).
It's much better to fortify near the starting area in order to avoid unnecessary risks. Keep firing at enemy units and don't forget to destroy barrier engines at the beginning of the battle (it's not mandatory to dispose of them, so if an engine is in a dangerous spot you shouldn't try reaching it at all cost).
![Remain where you are until youve eliminated all monsters (or at least all ravagers) [600 EXP] - Mass Effect 3: Priority, Horizon - walkthrough - Main Missions - Mass Effect 3 Guide](/masseffect3/gfx/word/10513921.jpg)
Remain where you are until you've eliminated all monsters (or at least all ravagers) [600 EXP]. You may finally look around. Collect much needed ammunition, however watch out for new spore pods, destroying them from a safe distance.
Enter the next area, finding a medical station [100 EXP], two logs and some research data [3000 credits]. Finish off by choosing the passageway suggested by your allies (screen above).

Keep going until you've entered a new area. Perform a jump here and use a weapon to destroy a small metal cover (screen above). Doing this will reveal the crane's controls and of course you must start the machine [300 EXP]. Wait until you're transported to a new area and perform a second jump. SAVE your game here, because you're about to start the final and the most difficult battle of this mission.
Encounter with brutes

This battle will start as soon as you've entered the new area and landed on a destroyed ramp. Start attacking TWO brutes that will come after you at the same time. Use a shotgun if possible and it's also recommended to throw a lot of grenades and to rely on offensive powers which are effective against armored targets. It's best that you remain close to the start area during this battle, because otherwise you may cause new monsters to join the fights prematurely.
It's also worth trying to force the brutes to climb on the second part of the ramp (screen above) as often as possible, because it takes them a few seconds and they can't rely on their charge attack in these types of situations.

Make sure that you've killed both brutes before heading over to the second part of this area. You'll soon be attacked by a new brute and by a banshee. Start off by eliminating the brute, so that the creature won't interfere in the main duel with the banshee.
As for this monster, defeating the banshee should be easier than usual, because it's alone now and since this is a large area you'll be allowed to move around a lot in order to lower the risks of the banshee moving too close.

I strongly recommend that you take some time to explore the area you've just secured. Interact with a pod status terminal and choose the manual override option. Once this is done return to the starting area and find an interactive pod (screen above). Open the pod so that you will be allowed to pick up an assault rifle [M-99 Saber]. Aside from the new weapon you'll also come across a med-kit [100 EXP] and research data [4500 credits].
Once you're done looking around head over to the elevator. It would be a good idea to save the game before using the elevator [900 EXP], because you'll soon take part in the final confrontation.
Confrontation with Henrym Lawsonem - important joice

Wait until you're transported to a new floor and proceed towards the door located directly in front of you. The game will automatically trigger a cut-scene showing Henry Lawson holding his sister Oriana hostage.
If Miranda is dead, then she won't take part in this confrontation for obvious reasons. If Miranda is alive and if you've completed her personal mission in Mass Effect 2 (to gain her loyalty), then she will take part in the meeting and she'll be unharmed. If Miranda is alive and if you didn't complete her personal mission in Mass Effect 2 and/or if you didn't warn her about Kai Leng (more on that in the description of Citadel: Miranda Lawson side quest), then she will take part in the meeting, BUT she will be heavily injured.

The negotiations with Henry Lawson can go in one of two different ways:
- The first option is to use a special paragon (upper left) or special renegade (lower left) dialogue option, however they're only available if you've sufficiently raised your reputation. If you can choose a special dialogue options, then you will convince Henry to release his daughter Oriana.
- The second option is to use a standard dialogue option (middle right) and this will result in a failure in negotiations (Henry won't let go of Oriana).

Here are the possible results of the confrontation for Miranda and Oriana characters:
- If you've chosen one of the special dialogue options and if Miranda is still alive, then she will murder her father after he releases Oriana.
- If you've chosen a standard dialogue option and if Miranda is still alive, then you will be allowed to choose whether you want to shoot Oriana to injure her (renegade interrupt - left mouse button) or if Miranda should perform the attack herself.
- Oriana will be safe no matter what happens.
- As for Miranda, her fate depends on your previous decisions and actions. If Miranda was heavily injured right from the start (you didn't complete her personal missions or you didn't warn her about Kai Leng's presence), then she will die. Otherwise she'll stay alive and you'll even turn her into a valuable war asset.
Return to Normandy

Before you leave the sanctuary you'll find out that Kai Leng has a beacon on him and therefore a main headquarters for Cerberus was found. Once you're back on board of the Normandy listen to a conversation with admiral Hackett.
Notice! Theoretically you can start the next main quest, named Priority: Cerberus Headquarters, right now. I however wouldn't recommend doing this right away, because taking part in the next mission is equal to advancing to the final part of the campaign and it will result in blocking some of the features of the game. To be more specific - this is your last chance to explore the galaxy for resources/artifacts/intel data, to complete side quests and to visit the Citadel. You can find out more about these restrictions by reading the guide's page titled Finale - how should I prepare?.
Prizes for completing the mission:
- Mission unlocked: Priority: Cerberus Headquarters
- [15000 credits]
- War asset [Alliance Engineering Corps]
- War asset [Miranda Lawson] (only if she's still alive)