
Stage 13 (Looking for Proof) | Main Stages - Collectibles LEGO The Hobbit Guide
Last update: 11 May 2016
Unique treasure 1/4
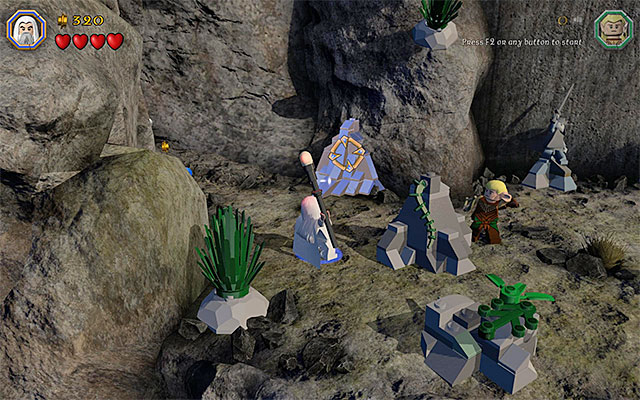
Requirements: Saruman's staff
Way to obtain: To the left of the thirteenth chapter's starting point, there are mithril objects. Switch to Saruman and smash them, using the Saruman's Staff.
Reward: Wraith Snorkle - grants to access to the underwater mithril objects and enhances vision.
Minikit 1/10
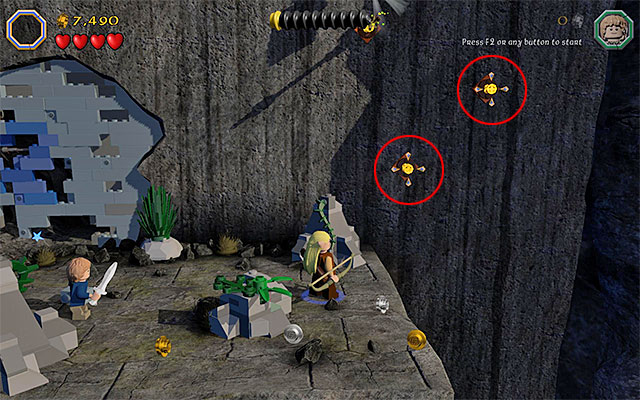
Requirements: bow (e.g. Kili or any other elf), long jumps (any elf)
Way to obtain: While following the mountain path, explore the area to the right of the spot where you smash the big blue wall. You need to use the bow on two interactive slots shown in the screenshot. Switch then to any of the elves and climb over the arrows stuck in the wall. The last jump you take allows you to grab the minikit in mid-air.
Unique treasure 2/4
Requirements: flail (e.g. Dori)
Way to obtain: While following the mountain path, keep an eye out for an interactive manhole. Walk through it, e.g. as a dwarf, and switch to a character with flail. Use the flail on the interactive catch and pick up the treasure.
Reward: Po-tay-to - the use of this item is identical to that of Saruman's staff (destroys mithril objects)
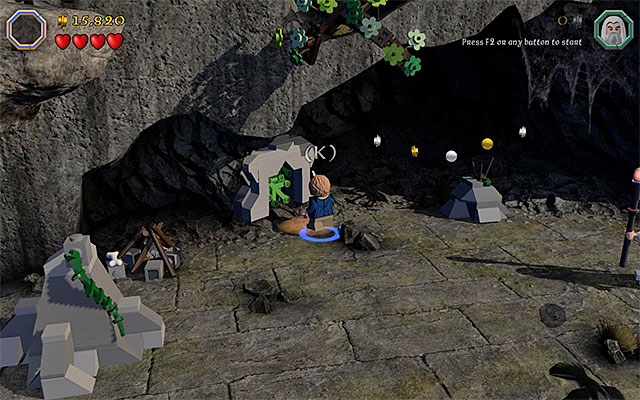
Minikit 2/10

Requirements: Warhammer (e.g. Dwalin)
Way to obtain: Stop after you reach the tomb's entrance and examine the area on the right. Start by holding down the appropriate key/button, thanks to which you will complete the path. Then, take the character with warhammer and use it to push over the huge block, to the right. You can now collect the minikit.
Schematic 1/1

Requirements: climbing walls (e.g. goblin)
Way to obtain: Right after you gain access to the tomb, climb down the stairs and stop in the corner with an interactive wall. You need to switch to the goblin here, thanks to which you will reach the schematic.
Reward: Mithril Giddy-up Staff Schematic
Minikit 3/10

Requirements: -
Way to obtain: Right after you access the tomb, climb down the stairs and, after you reach a blocked passage, jump to the edges on the left. Do not haste to reach the interactive lever. Instead, focus on reaching the left-most edge shown in the screenshot, which is quite well concealed. This is here that you find the minikit.
Minikit 4/10

Requirements: staff (any wizard)
Way to obtain: You need to reach the part of the tomb that resembles a labyrinth. In various locations of this, relatively, small location, there are blue spheres. You need to tire magic projectiles at them, fired from the staff. After you activate all three spheres, you will be rewarded with a minikit.
Minikit 5/10

Requirements: -
Way to obtain: You need to reach the part of the tomb that resembles a labyrinth. Explore the left side of the labyrinth and locate the interactive plate shown in the above screenshot. An important piece of information is that you need to approach the plate from the left, thanks to which you will avoid springing one of the traps.
Minikit 6/10

Requirements: -
Way to obtain: You need to reach the part of the tomb that resembles a labyrinth. Explore the right side of the labyrinth and locate the interactive objects, which you need to set on fire. You do not need to switch to the character that can do that, because there is a torch at the skeleton on the right. Wait for the minikit to jump out of the flames.
Unique treasure 3/4

Requirements: Morgul Blade (Sauron)
Way to obtain: You need to reach the part of the tomb that resembles a labyrinth. Explore the Northern side of the labyrinth, i.e. the one that you visit right after you smash the blue wall. You will find here an area, which may be approached by Sauron only. Use the Morgul Blade, destroy the elements in the area and pick up the collectible.
Reward: Troll's Bane - apart from its basic functions, this item can also freeze the other characters.
Minikit 7/10

Requirements: The Ring
Way to obtain: Stop right after you leave the labyrinth. Before you approach the sarcophagus that you can see in the distance, turn back and walk into the foreground. After you get to the place shown in the above screenshot, switch to Bilbo and put on the Ring. You can now collect the minikit.
Minikit 8/10

Requirements: Buddy-Up
Way to obtain: While exploring the tomb, you will encounter a larger cracked wall. Here, you need to Buddy-Up so, pair up two of the characters and smash the wall. Note - if the game does not allow you to pair up two playable characters, make sure that you choose two "standard ones", e.g. dwarves.
Minikit 9/10

Requirements: bow (e.g. Kili or any other elf), long jumps (any elf)
Way to obtain: Reach the cave with the big blue block hanging down. Explore the left side of the location, thanks to which you will locate an interactive target. Use the bow here.

After you use the bow and see a short cutscene, switch to any of the elves and reach the rope shown in the above screenshot. Jump from rope to rope, and grab the hovering minikit.
Unique treasure 4/4

Requirements: spade (e.g. Fili)
Way to obtain: Reach the cave with the big blue block hanging down. Examine the right side of this location and destroy all of the interactive elements, thanks to which you will locate the spot where you can use the spade. Using the spade will allow you to dig out a skeleton, which will return to life. Approach the dancing skeletons and attack them with any weapon. After you eliminate the skeletons, pick up the treasure dropped by one of them.
Reward: Glowstick - illuminates the area
Minikit 10/10

Requirements: flail (e.g. Dori)
Way to obtain: Towards the end of this stage, the characters follow very narrow paths. Stop right after you use the staff to smash the blockade and jump o the lower level. You should note an interactive catch here and you need to use flail to rip it off. Finally, hold down the building key/button and wait for the last, tenth, minikit to be constructed.
Master Burglar
In order to obtain the Master Burglar Status, you need to amass, at least, 85000 studs. Most probably, you will be able to reach this threshold only in the Free Play mode, because many of the more valuable studs are in the "bonus" areas. Remember also to smash the elements of the surrounding and about avoiding traps, and falling into voids (it is easy to fall into one, by accident, while climbing before you enter the tomb).