
Stage 11 (Barrels Out of Bond) | Main Stages - Collectibles LEGO The Hobbit Guide
Last update: 11 May 2016
Unique treasure 1/4

Requirements: staff (any wizard)
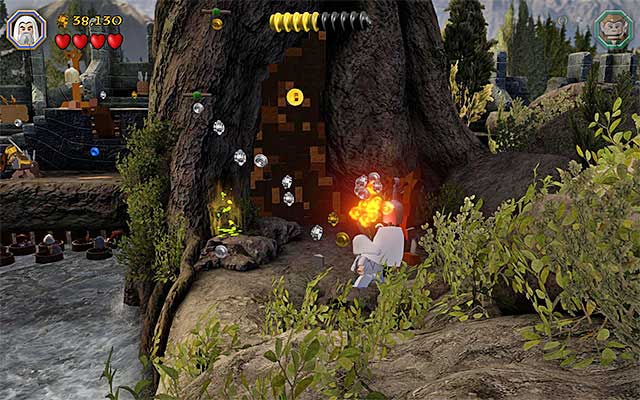
Way to obtain: During your stay in the cellar, you need to roll the barrel that appears in this location, after you pull the middle lever. After you do that, grab that lever again, thanks to which the load shown in the above screenshot will appear. Smash it, using the staff and collect the item.
Reward: Elk Mallet - the function of this mallet is identical as that of a standard warhammer
Schematic 1/1

Requirements: Saruman's staff
Way to obtain: Smash all of the objects in the left side of the cellar. Switch to Saruman and use Saruman's Staff to smash the mithril wall of the huge barrel. Thanks to this, the schematic will pop out of the barrel. Note - if you find it difficult to target the mithril wall of the barrel, remove the golden object first, which may be on the ground somewhere around.
Reward: Mithril Pickaxe Schematic
Minikit 1/10

Requirements: climbing walls (e.g. goblin)
Way to obtain: Examine the left side of the cellar, thanks to which you will find an interactive wall. You need to switch to the goblin here and climb up the wall, to the place where the minikit is hidden.
Unique treasure 2/4

Requirements: flail (e.g. Dori)
Way to obtain: Remain in the central part of the cellar and go into the background. Turn your attention to the golden catch and rip it off, using the flail. Along with the catch, a key will fall out, which you need to pick up. Use the key to open the nearby chest and collect the treasure.
Reward: Firefly Jar - lights up the area
Gain access to the ledge to the right of the river

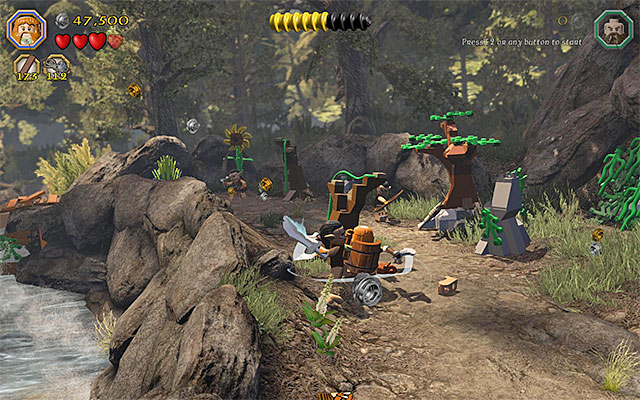
While completing the last, eleventh chapter of the game in the story mode, you have been unable to explore the stone ledge neighboring the first dam. While replaying the ninth mission in the Free Play mode, this is available and even required, because there are several collectibles around. Right after you complete the scene with the cellar and reach the dam, remain on the pier, where you get after you jump out of the barrel. Switch to Saruman here and use his staff to destroy the mithril objects shown in the above screenshot. Carefully, jump over to the rock (it is easy to fall into water here!) and over to the bigger ledge that you have just unlocked, on the right.
Minikit 2/10
Requirements: -
Way to obtain: In total, you need to destroy three bells near the first dam (each time, use any weapon) and a sort of a handicap is the fact that they are within a big distance of each other. The first bell is on the ledge to the right, where you get after using the above trick (using Saruman's staff).

The second bell is in the left part of the location with the dam, i.e. in the area where you fight the "elite" goblins.

The final, third bell is on the dam. You need to destroy it before you open the dam and start the next part of the stage.
Minikit 3/10

Requirements: flail (e.g. Dori)
Way to obtain: After you reach the bottom, right ledge, switch to the character with flail and use this item to rip off a big portion of the wall. Smash what remains of the wall (with any weapon you want to) and use the newly-unlocked stairs, which will take you to the minikit.
Unique treasure 3/4

Requirements: long jumps (any elf)
Way to obtain: After you reach the ledge on the right, switch to any of the elves and jump towards the successive ledges. Eventually, this will allow you to make it over to the nest on the tree and it is here that you find the treasure.
Reward: Eggapult - the use of this item is identical with that of a standard slingshot and the only difference is that it fires eggs, instead of pebbles
Minikit 4/10

Requirements: spade (e.g. Fili)
Way to obtain: You need to examine the left part of the location where you fight the waves of stronger and stronger goblins. You should notice a minikit buried in the ground here and you need to use the spade to obtain it.
Minikit 5/10

Requirements: staff (any wizard)
Way to obtain: After you have gained access to the first dam, examine its left side. Here, you need to use the staff to destroy the characteristic blue structure. Then, examine the rubble and collect the minikit.
Minikit 6/10

Requirements: axe (any dwarf)
Way to obtain: After you reach the second dam, switch to Bombur, who is using a barrel as his armor, and start demolishing the area. In the spot shown in the above screenshot, you need to cut through with the axe, through the cracked plate. Enter the cave and collect the minikit.
Minikit 7/10
Requirements: -
Way to obtain: In the location with the second dam, you need to defeat all of the goblins. It is best to use Bombur for that, because he will handle it very well.
Minikit 8/10

Requirements: -
Way to obtain: In the location with the second dam, there are four big flowers - two on each side of the dam. You need to destroy all of them (any weapon), for which you will be rewarded with a minikit.
Note - While exploring the area, try not to smash the second dam too early (slamming down on the plate), because you will then prevent yourself from accessing this particular collectible (as well as the one below).
Unique treasure 4/4

Requirements: flail (e.g. Dori)
Way to obtain: You need to reach the area on the left, which neighbors the second dam, i.e. walk over the dam without smashing it. Locate the interactive catch here, which you can reach using the flail.
Reward: Traveller's Tool - the use of this item is identical as that of the pickaxe
Minikit 9/10
Requirements: -
Way to obtain: while going down the river, keep to the right and you will reach the minikit in a while. You obtain it by coming into contact with it.
Minikit 10/10

Requirements: bow (e.g. Kili or any other elf)
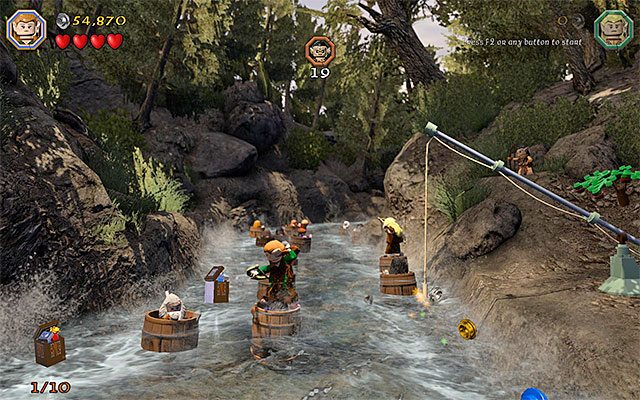
Way to obtain: While going down the river, use the bow to destroy the hives at the bank ( an example hive has been shown in the above screenshot). After you destroy five of these, you will be rewarded with a minikit.
Master Burglar
In order to obtain the Master Burglar Status, you need to amass, at least, 80000 studs, and it is best to attempt to achieve in the Free Play mode. Keep your eye out for the blue and the violet studs (around the first and the second dam), and also try to complete the building minigame with a perfect score (20000 studs). Apart from that,, avoid falling into the rushing river.