Guides & Walkthroughs New Guides Popular RPG Action Strategy Adventure YouTube Guides Mobile App

Sniper Elite 5 Guide, Walkthrough by gamepressure.com

Sniper Elite 5 Guide, Walkthrough

Table of Contents
Sniper Elite 5 - Mission 7
The forest in the sourthern part of the map is the default start area. You'll encounter first enemies after getting close to the train tracks and the asphalt road.
Each checkpoint is guarded by a group of soldiers standing on the wall or in front of it. The safest way is to kill them with long distance shots and you can also shoot the searchlights.
You can find interactive parts of the fence and cut through them using bolt cutters. It will allow you to crawl and get to the other side and you'll avoid the main checkpoints (orange 2's on the map).
There are 2 active tanks in the area in front of the southern checkpoint. Avoiding them is difficult. If you want to destroy them you can use Panzerfausts and Satchel Charges found in the area - destroy the exhausts and aim for the weak spot at the back of the tank.
You can complete a side objective here about collecting intel on the shipment and there's also a document with a clue on the location of the Kill List target (Christian Jungers). Watch out for an elite sniper who's observing the station.
You can complete the climb on the side of the building to unlock an alternative starting area. This is also the location where you can leave the map.
Enemies may be doing training here - a sniper from the observation tower and a tank (alternatively it can be stationed to the west of here).
He's the Kill List target and he's checkin on updates in the Weapons Lab (orange 8 on the map). You must sneak your way to the highest balconies of the building and shoot the hook when Jungers is standing under the V2 missile so that it lands on him.
You can complete a side mission objective here about finding 5 clues and also get rid of the Kill List target - Christian Jungers (red dot on the map). There are paths next to the Weapons Lab leading to the evacuation zone (and sniper hideout) and the Dome.
You can complete a side objective here about sabotaging the radio tower. The castle can be infiltrated using the sewers passage, main entrance or a zipline. You'll find 2 cables which can be damaged and a generator in the main tower. Watch out for a sniper to the south-east of the castle.
This is one of the mandatory locations to visit. You can get here from any side. The capsule hatch is floating on the lake and you have to shoot at it from the east. Get to the observation room afterwards and use the lever. There's an armory in the northern part of the facility and it contains a workbench table.
This is one of the mandatory locations to visit. Eliminate all of the nearby enemies and then climb the platform next to the V2 missile. Sabotage the rocket and get to the observation room to the north to launch it (use the ladder to get there).
This is one of the mandatory locations to visit. Enter the underground complex. You have to find 2 valves responsible for increasing pipeline pressure. You can also find a passageway to the Dome here (orange 13 on the map) - check the highest level.
This is the most important location on the map. Use the main entrance or the entrance from the laboratory (orange 8 on the map) or the entrance from the refuelling site (orange 12 on the map). You need to reach the war room in the north-western part of the building and examine Kraken's plans.
You can get here using a tunnel and the asphalt road or by interacting with a zip-line in the observation tower. One of the exits from the map is at the end of the dam.
The collectible is on the upper floor of the building in the trainyard.
The letter is inside the abandoned house. You must climb the gutter and the side of the building to get inside.
The letter is in the inventory of a soldier stationed in the tent to the west of the dam.
The collectible is in the upper observation room. Use the ladder and then unlock the passageway with a key or a Satchel Charge.
The collectible is in the room at the top of the Dome. Use the staircase to get there.
The collectible is in 2 different places in the trainyard - in the inventory of one of the enemies and inside the safe of the western building. You only need to collect 1 copy.
This collectible can be obtained in several places on the map, but you only need to visit one of them. An example of a location with the document is the south-eastern building of the train station.
The collection is inside the large office on the highest floor of the Weapons Lab.
This collectible can be obtained in several places on the map, but you only need to visit one of them. An example of a location with the document is the small southern building next to the train tracks. Eliminate a soldier and check his body.
The document is at the top of the main tower in the southern part of the castle.
The collectible is on the upper level of the V2 Refuelling Site (not inside the Dome!). After entering the side head north and use the stairs at the end of the main tunnel. Check the side rooms - the ID is under the table and you must crawl to it.
The cards are inside a small checkpoint next to the dam.
The plans are hidden under the bridge.
The eagle is hidden in one of the northern holes of the dam. Take the shot while standing at the eastern edge of the dam.
The eagle is by the western wall of the castle tower. Examine it from close range.
The eagle is hidden on the rocks - check the area from the eastern side.
The workbench is inside the armory building. You can get inside by uncovering a hole in the floor.
The collectible is on the upper level of the V2 Refuelling Site (not inside the Dome!). After entering the side head north and use the stairs at the end of the main tunnel. You'll reach a locked door - use the Master Dome Key or blow up the door with a Satchel Charge.
The workbench is in the resistance hideout in the caves. Find a barricaded passageway and destroy the wooden boards (watch out for a nearby sniper).
Each checkpoint is guarded by a group of soldiers standing on the wall or in front of it. The safest way is to kill them with long distance shots and you can also shoot the searchlights.
You can find interactive parts of the fence and cut through them using bolt cutters. It will allow you to crawl and get to the other side and you'll avoid the main checkpoints (orange 2's on the map).
The sniper is on the hill next to the trainyard.
The sniper is on the hill next to the lab and the Dome.
The sniper is in the observation tower.
The sniper is in the observation tower next to the fence.
The sniper can be stationed inside the observation tower or patrolling the area around it.
The sniper is in the observation tower.
The sniper can be stationed inside the observation tower or patrolling the area around it.
The sniper is patrolling the balconies inside the Dome.
Enlarge this map

Sniper Elite 5: Mission 7 (Secret Weapons) map and location description - walkthrough Sniper Elite 5 guide, walkthrough

The secret facility in Massif Central is the setting for mission 7 of Sniper Elite 5. Our guide compiles the key locations and all 19 secrets from the Secret Weapons stage.

Last update: 09 June 2022

Key points of Sniper Elite 5 - Mission 7

Main locations on the map

Kill List target

Secrets and collectibles

Enemy snipers

The seventh mission (Secret Weapons) in Sniper Elite 5 tasks you with infiltrating the Nazi V2 facility in Massif Central. Our guide features a world map with important locations (passages to the northern part of the map, tanks, entrances to the Dome and others), as well as all 19 secrets and collectibles marked.

The most important locations in Massif Central.

1 - Sniper Elite 5: Mission 7 (Secret Weapons) map and location description - walkthrough - Mission 7 - Secret weapons - Sniper Elite 5 Guide, Walkthrough
There are two checkpoints on the map - southern (picture 1) and eastern (picture 2) - Sniper Elite 5: Mission 7 (Secret Weapons) map and location description - walkthrough - Mission 7 - Secret weapons - Sniper Elite 5 Guide, Walkthrough
  1. Checkpoints - #2 on the map

There are two checkpoints on the map - southern (picture 1) and eastern (picture 2). They separate the southern part of the map, where you start off the mission, from the northern part of the map, where your main objectives are. You can use the holes in the fence (described below) or dispatch the enemies at the checkpoints. The eastern checkpoint is easier to pass through, as there aren't any tanks near it.

In three different parts of the map the fence is weakened and can be cut open with bolt cutters - Sniper Elite 5: Mission 7 (Secret Weapons) map and location description - walkthrough - Mission 7 - Secret weapons - Sniper Elite 5 Guide, Walkthrough
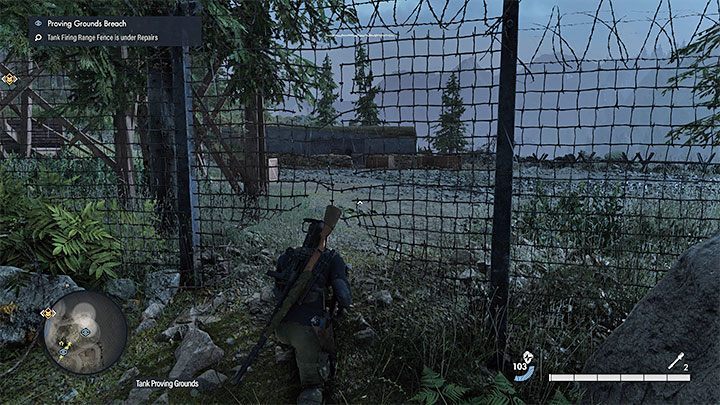
  1. Fence fragments you can cut with bolt cutters - #3 on the map

In three different parts of the map the fence is weakened and can be cut open with bolt cutters. Doing so unlocks access to the northern part of the map without the need to go through a checkpoint.

There are several reasons to visit the lab - to complete a side objective, murder a Kill List target and find an entrance to the Dome - Sniper Elite 5: Mission 7 (Secret Weapons) map and location description - walkthrough - Mission 7 - Secret weapons - Sniper Elite 5 Guide, Walkthrough
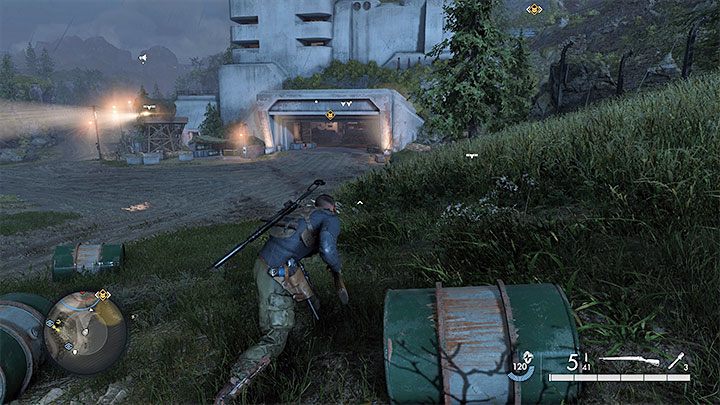
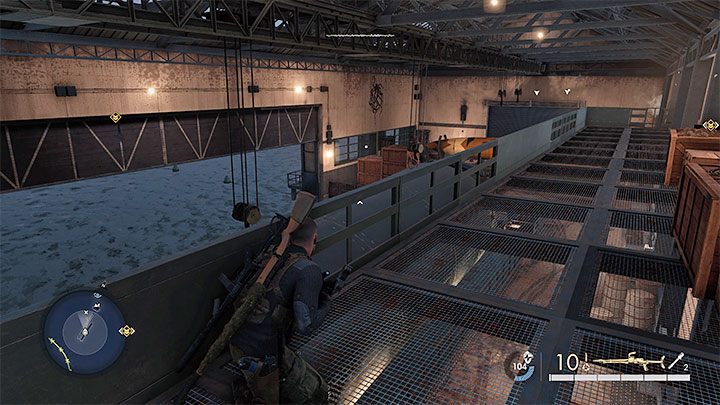
  1. Weapons lab - #8 on the map

There are several reasons to visit the lab - to complete a side objective, murder a Kill List target and find an entrance to the Dome. Infiltrating the lab via the eastern entrance is the safest way. Still, you should watch out for the snipers and an enemy tank.

This is one of the mandatory locations related to the V2 rocket project - Sniper Elite 5: Mission 7 (Secret Weapons) map and location description - walkthrough - Mission 7 - Secret weapons - Sniper Elite 5 Guide, Walkthrough
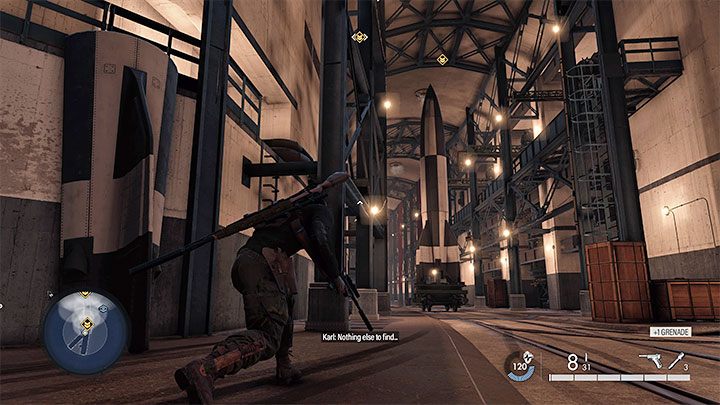
  1. V2 capsule test facility - #10 on the map

This is one of the mandatory locations related to the V2 rocket project. After reaching the facility you must shoot at the capsule floating on water and then launch the rocket to sabotage it. There's an armory here as well.

This is one of the mandatory locations related to the V2 rocket project - Sniper Elite 5: Mission 7 (Secret Weapons) map and location description - walkthrough - Mission 7 - Secret weapons - Sniper Elite 5 Guide, Walkthrough
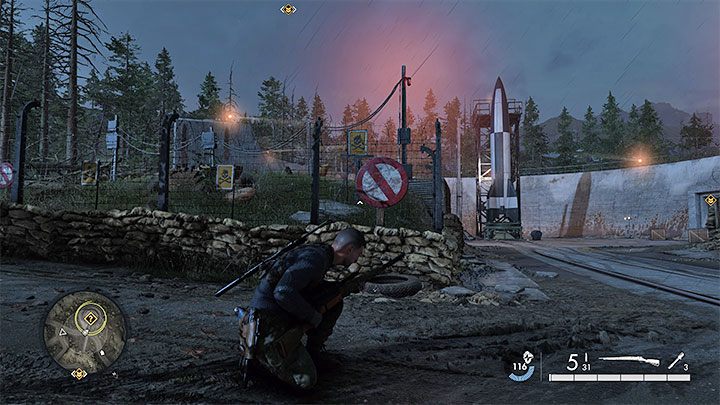
  1. V2 rocket launch pad - #11 on the map

This is one of the mandatory locations related to the V2 rocket project. You must reach the launch pad balcony, sabotage the rocket, then launch it from the building north of the platform. The rocket will explode in mid-air.

This is one of the mandatory locations related to the V2 rocket project - Sniper Elite 5: Mission 7 (Secret Weapons) map and location description - walkthrough - Mission 7 - Secret weapons - Sniper Elite 5 Guide, Walkthrough
  1. V2 rocket refueling station - #12 on the map

This is one of the mandatory locations related to the V2 rocket project. You must infiltrate the underground complex and find two valves which increase the pipeline pressure in order to cause an explosion. One of the entrances to the Dome is here as well.

This is the most important building in the mission - Sniper Elite 5: Mission 7 (Secret Weapons) map and location description - walkthrough - Mission 7 - Secret weapons - Sniper Elite 5 Guide, Walkthrough
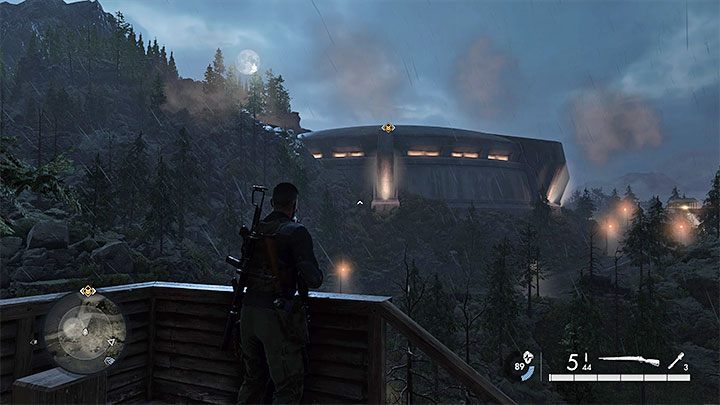
  1. The Dome - #13 on the map

This is the most important building in the mission. You can reach it via the main entrance, the weapons lab or the refueling station. The north-eastern part of the Dome holds the war room where you'll find the Kraken plans you're looking for.

Mission 7 – general information

The seventh mission of Sniper Elite 5's campaign tasks you with infiltrating a Nazi research facility in Massif Central in order to learn more about Operation Kraken - Sniper Elite 5: Mission 7 (Secret Weapons) map and location description - walkthrough - Mission 7 - Secret weapons - Sniper Elite 5 Guide, Walkthrough

The seventh mission of Sniper Elite 5's campaign tasks you with infiltrating a Nazi research facility in Massif Central in order to learn more about Operation Kraken. The map is divided into two parts - north and south. The parts are separated by a high wall and the checkpoints in the centre and the east. Fortunately there are still alternate paths you can use - the holes in the fences. Going through them lets you avoid combat at the checkpoints.

There are elite snipers scattered all around the map in various places that are difficult to locate - we've marked them on our map in red. Avoid staying in open space near the snipers and try to take them down from a long distance. Enemy vehicles, including a few tanks, also threaten you here. You can eliminate them if you want to (there are many Panzerfausts and explosives to be found here), but they can be avoided as well. Make sure you also watch out for the vehicles travelling via the main roads.

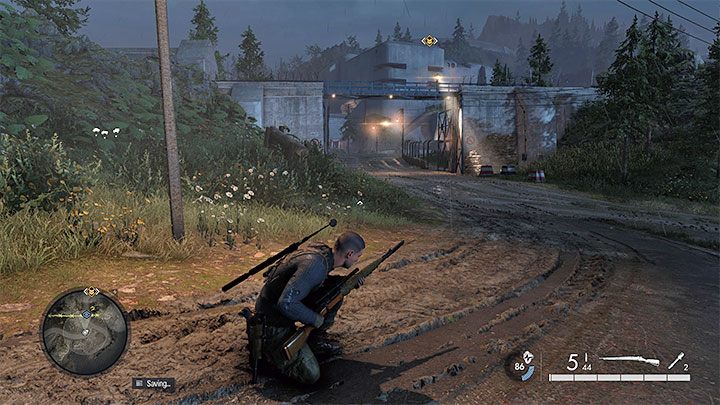
The default starting place is in the south of the map, which means you'll have to make a long trek to the mission objectives. Fortunately, you can also unlock alternative starting points and use them during subsequent playthroughs. Mission 7 has various main and side quests. We discussed them on the following pages:

  1. Bypass the checkpoints - The checkpoints separate the northern and southern parts of the map. Our guide explains why the outposts are dangerous and lists alternate paths to the northern constructions and main mission objectives.
  2. Sabotaging the V2 rocket installation - you must complete the main objectives regarding the V2 rockets production and testing. You can complete them in different areas in the northern part of the map.
  3. Infiltrating the Dome - The Dome is the largest building on the map, found in its northern part. Our walkthrough explains how to infiltrate the Dome and find info on Operation Kraken.
  4. Side missions - There are three side objectives in mission 7, all of them described here. You'll learn how to obtain intel about supply lines, investigate the Weapons Lab and destroy the castle radio tower.
  5. Kill List Target - Christian Jungers - our walkthrough explains where to find Christian Jungers and how to kill him by dropping the V2 rocket onto him (optional challenge).

There are 19 secrets and collectibles in total to be found in mission 7. These are 3 workbenches, and various types of notes or memorial items. They are marked on the map.

See/Add Comments

You are not permitted to copy any image, text or info from this page.

This site is not associated with and/or endorsed by the Rebellion or Rebellion. All logos and images are copyrighted by their respective owners.

Copyright © 2000 - 2024 GRY-Online S.A. for gamepressure.com, unofficial game guides, walkthroughs, secrets, game tips, maps & strategies for top games.