
Remnant From the Ashes: Ixillis XV boss - attacks, tactics, rewards, tips Remnant From the Ashes guide, walkthrough
Last update: 10 March 2021
This section of the guide to Remnant From the Ashes contains a detailed description of the Ixillis XV bossfight. You will find out what attacks the boss has, what battle tactics are suggested, and what secrets/rewards the defeated boss drops.
- Ixillis XV - Boss overview
- Attacks (phase 1)
- Attacks (phase 2)
- Attacks (phase 3)
- Tactics
- Possible rewards
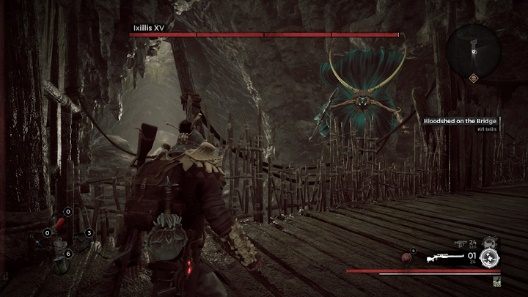
Ixillis XV - Boss overview
Ixillis XV is one of the main bosses and one of the few that has 3 phases. The fight against this boss is difficult, mainly due to the fact that the arena is very small and narrow since it takes place on the bridge. In addition, in the second stage of the fight, you have to fight with two Ixillis (XV and XVI) at the same time.
Attacks (phase 1)
- Horizontal slash - Ixillis performs a sweeping strike with great range.
- Vertical slash - Ixillis performs a vertical slash in the place where the player stands. Ixillis raises its weapon up - it will shine green.
- Corrosive Bomb - Ixillis throws one bomb, when the first falls, it throws the second. These bombs deal damage and cause a Corrosive status. When a bomb hits the ground, it leaves a cloud that also causes a Corrosive status.
- Lightning Orbs - Ixillis' weapon starts to glow when it lifts it up, holding the weapon like that for a while. Ixillis then creates a few lighting orbs that will slowly move towards the player, causing considerable damage.
Attacks (phase 2)
- Weapon beam - Ixillis moves away from the arena for a brief moment, and then flies towards one end of the bridge and begins to shoot a beam that deals big damage. The beam can also make you fall off the bridge - this kills you instantly.
- Banshee Scream - Ixillis stops, holding the weapon with both hands, making a loud scream, which causes great damage and stops the character in place.
Attacks (phase 3)
The third phase starts when one of the Ixillis is dead while the second one is still alive. Then the boss becomes enraged, using all attacks from the first and second phases as a separate unit.
Tactics
Take a Greenleaf (reduces Corrosive status) and Ammo Boxes, because the fight can be exhaustive. The bridge, which acts as the arena, is very narrow, so you need to be careful not to fall from it from dodging or being pushed back by the boss.
The boss from the beginning attacks the player with all sorts of attacks. Attacks such as vertical slash or lightning orbs are very similar to each other, however, the main difference is time. Ixillis telegraphs vertical slash by lifting the weapon, but this lasts only a short time. As for lightning orbs, Ixillis will keep the weapon up for some time. Avoid the vertical slash be dodging to the side. To avoid the orbs, you need to shoot them as quickly as possible. They have a small amount of HP, so you shouldn't have problems with that. The closer they get, the easier they are to shoot. You avoid the horizontal strike by also dodging to the side. Dodging forward or backward isn't a good idea - the bridge is very narrow which means that you can easily fall down and kill yourself. The 2 bombs can cause you problems. They leave behind a cloud that inflicts Corrosive status upon contact. When the status bar is filled, it will reduce the armor value. It is important to plan where we want Ixillis to throw the bombs. If Ixillis throws one bomb (it throws them where the player is standing) to the left, then to the right, we can have huge problems with moving on the bridge.
If you cause enough damage to Ixillis, the second Ixillis that appears on the other side of the bridge will come to the rescue. The player is then forced to fight two opponents at the same time. Fortunately, Ixillis XV moves away from the bridge for a while which means that you can focus on attacking Ixillis XVI. However, still have to watch out for XV. When it is going back to the bridge, the boss will shoot a beam that has large range. It starts at one end of the bridge, ending at the other. Ixillis XV shoots the beam in a straight line, gets closer to the middle of the bridge and then shoots another beam. This repeats until Ixillis reaches the other end of the bridge. In the meantime, Ixillis XVI will attack the player with phase one moves. You have to watch both sides of the bridge. Once we inflict some damage, and one of Ixillis finishes the beam attack, they will both stop for a while and begin to use Banshee Scream. This move makes them exposed. You need to attack them as quickly as possible by shooting in the face, their weak spot. After a few shots in the face, Ixillis loses balance and will no longer cast this attack. However, keep in mind that this attack is performed by both XV and XVI, so when we interrupt one boss, we immediately start shooting at the other. If you fail to get them both off balance, they will start screaming, causing loss of HP and making you unable to move. To avoid injuries, you need to avoid as often as possible until one of them stops screaming. You don't receive damage when you are dodging. Until we defeat one of them, they will keep switching roles.
Phase 3 begins when we defeat one of the bosses. Then, the remaining Ixillis gets enraged - this boss will use all attacks from phase 1 and 2. However, we can avoid this phase by defeating both Ixillis one after another. We will also get a different item for defeating the boss.
Possible rewards
- Guardian's Heart
- Hivestone (you must trigger the third phase)
- Guardian Tentacle (you have to kill both Ixillis at the same time or in rapid succession)
- 1,087 scarps