
Observation: The first space walk - walkthrough, level 3 Observation guide, walkthrough
Last update: 25 June 2020
In the third part of the walkthrough to Observation we will guide you through the mission with the first spacewalk. You will also find here information how to connect files you found in SAM's MEMORY CORE and how to unlock the HATCH CLAMPS.
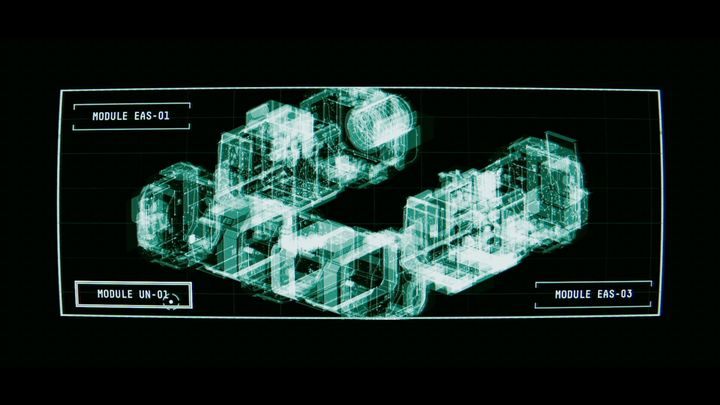
The station schematics will open. Enter the UN-01 module. Hold R and click on FALSE. Do the same in the EAS-03 module.
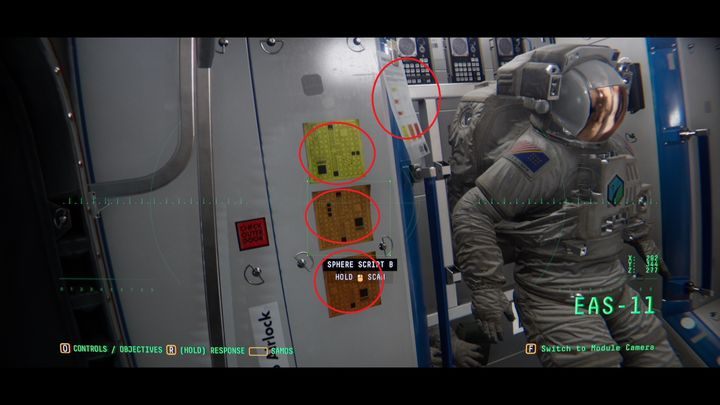
You will find yourself in module EAS-09. Use SPHERE to move to EAS-11. Scan all four documents located on the wall (SPHERE UPGRADE PROCEDURE, SPHERE UPGRADE HVC A, SPHERE UPGRADE HVC B, SCRIPT COMPILER HVC)
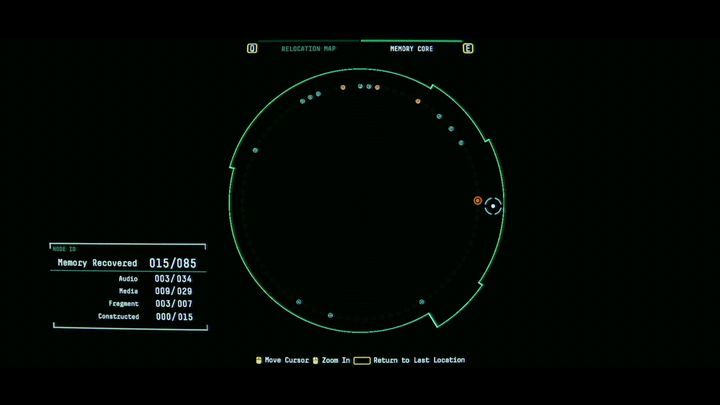
Press spacebar and then E. You will enter SAM's MEMORY CORE. Click on the circle highlighted by the red circle. Click on it again - this time with the right mouse button. You will combine damaged files.
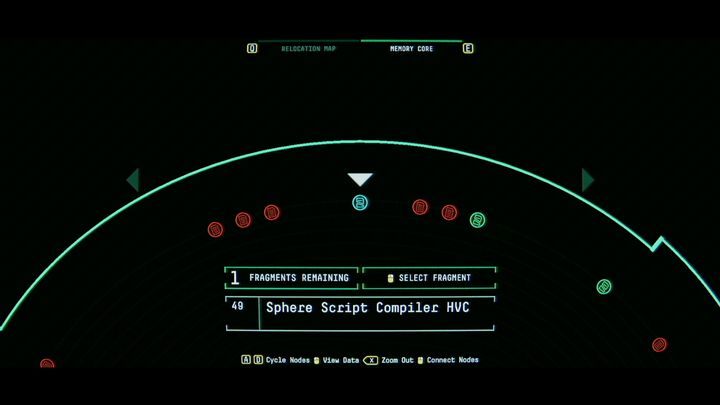
Use A and D to move the cursor to find them and use the right mouse button to connect three files named: SPHERE UPGRADE HVC B, SPHERE UPGRADE HVC A, SPHERE SCRIPT COMILER HVC.
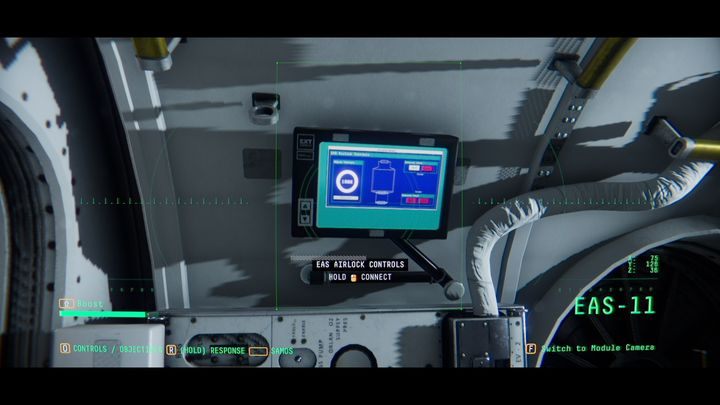
Once the files are connected with red lines, use space bar to go back to SPHERE. Find a device called EAS AIRLOCK CONTROL on the wall and connect to it.
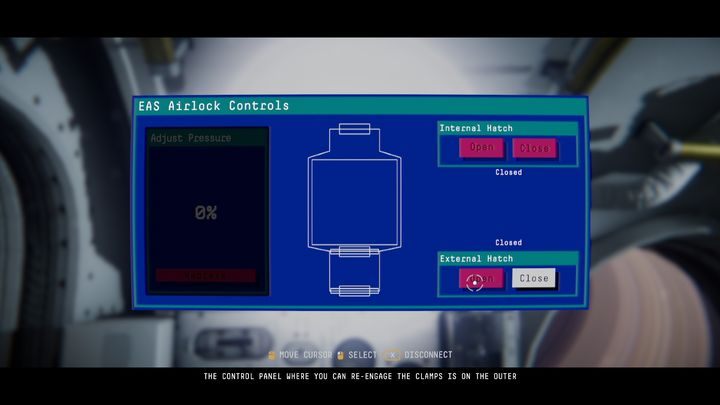
Click on Close in the upper right corner to close the hatch of the EAS-11 module. Then, click on DEPRESS to even the pressure and on Open in the lower right corner to open the hatch outside.
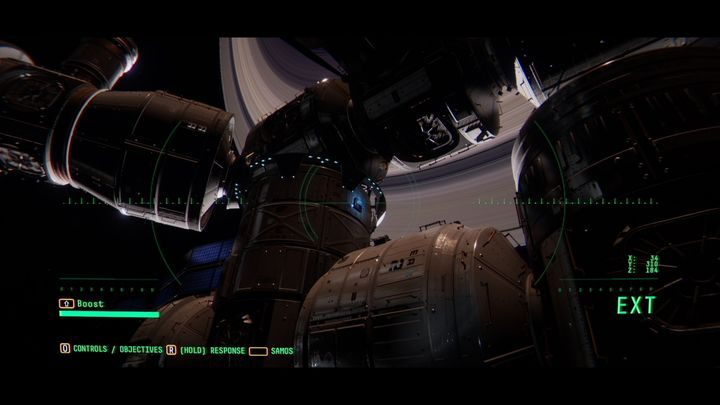
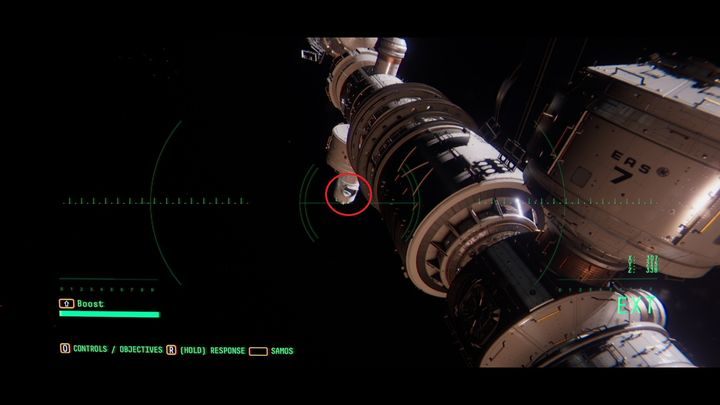
Go outside and find the Panel highlighted in blue called EAS-03 HATCH CLAMPS. It is located on module EAS-03. The exterior modules are numbered so you can't get lost.
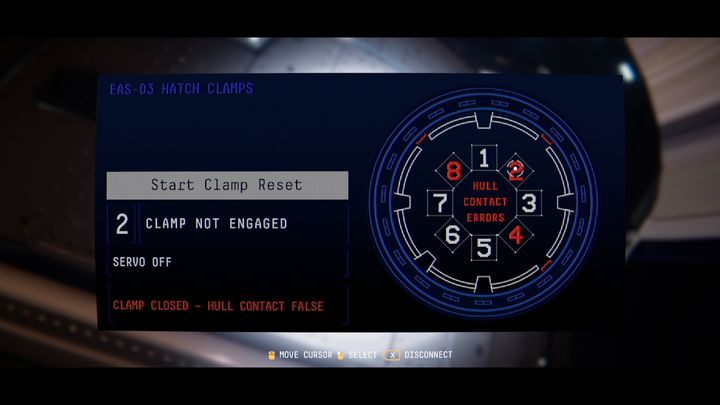
Connect to the panel. The numbers 2, 4, and 8 will be red. Click on 2, then on START CLAMP RESET. Keep holding S until the circle gets close to the numbers. Keep holding S and keep pressing W until the clamp at the red number moves out. Release W and then S. Do the same with the remaining clamps marked in red.
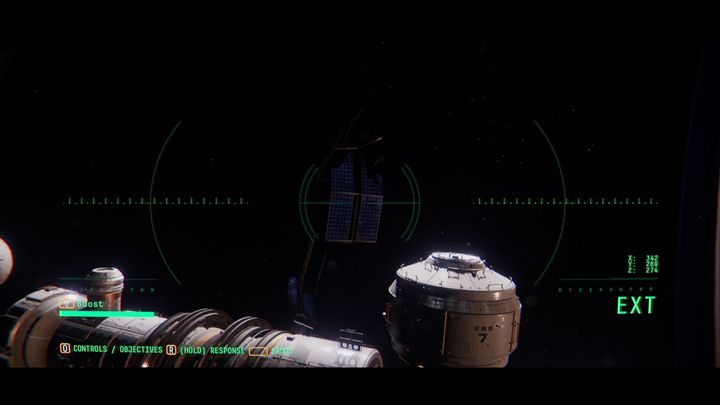
Once Emma informs you that everything is working again, leave the panel and examine the exterior damage that you previously found with the cameras. Drive up to the SOLAR ARRAY located behind module EAS-07 and inform Emma about the damage.
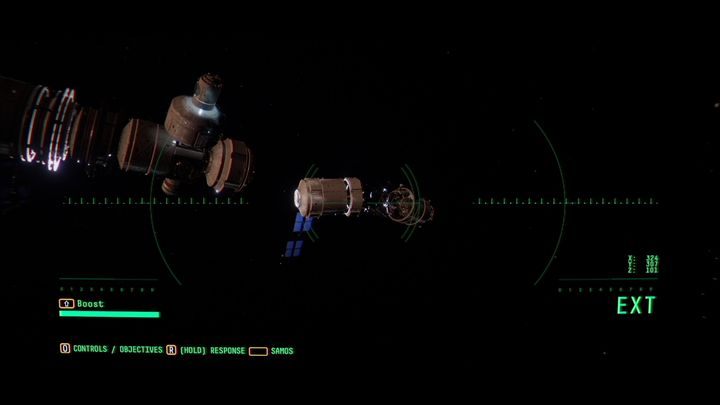
Find the detached station module (near EAS-10) and drive inside. The entrance will be narrow, so be careful not to damage yourself.
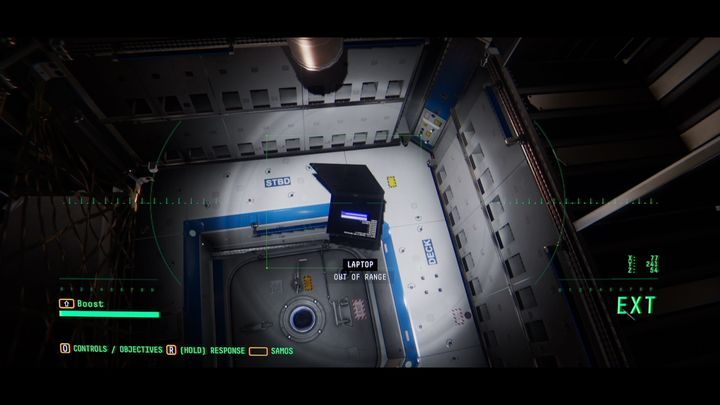
There is a laptop there. Connect to it and recover a message called IN MY SUIT, HEADING OUT.
Then, find the damaged item called RU-07. It will flash in red color if you hold R. Drive towards it and inform Emma.
Go back to the station, to module EAS-11. Connect to the panel in order to close the hatch. Click on Close in the lower right corner, restore the correct pressure (REPRESS) and click on the Open in the upper right corner.
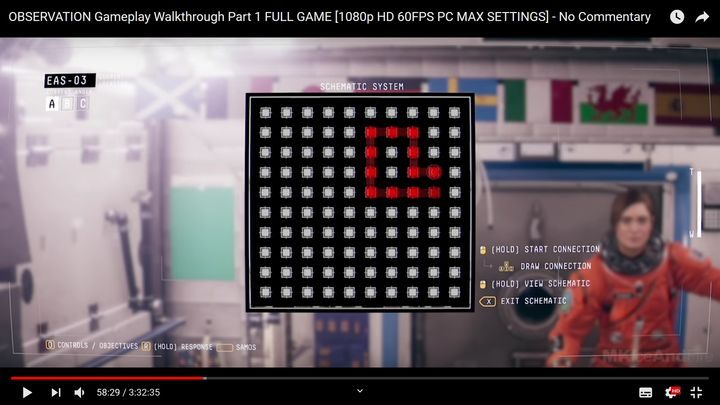
Exit the panel, press the space bar and connect to the cameras in the EAS-03 module. Connect to control light to open the hatch behind Emma. Go to SCHEMATIC SYSTEM while holding down the right mouse button. Click on the corresponding square and use AWSD to select the diagram (L3). Open the hatch to the central module.