NieR Automata: Chapter 2, Route A - walkthrough
NieR Automata: On this page you will find walkthrough for the 9th chapter of Route A - Return to the Abandoned Factory
This page of the NieR Automata game guide contains the walkthrough of Chapter 9 during Route A. It mainly concerns the second visit to the Abandoned Factory. This guide describes how to reach the factory, how to complete the escape scene from the factory, how to defeat the mechanical spider boss in the factory, and more.
- Mission Details - receiving an email from the command
- Olive Branch - meeting Pascal in the Abandoned Factory
- Twisted Religion - escaping from the factory
- Factory Boss - the mechanical spider
Mission Details - receiving an email from the command

The chapter starts by talking to Anemone in the Resistance Camp about the well-being of 9s.
Listen to the conversation with the Commander and interact with the Access Point to read the message titled Commander: Trends Among the Machines. Wait for 2B to contact Pascal and arrange a meeting.
Olive Branch - meeting Pascal in the Abandoned Factory


If you have previously visited the Abandoned Factory, you probably found the Factory: Entrance Access Point and unlocked the option to fast travel there.
If that's not the case, you will need to find the location pictured in the screenshots above in the City Ruins. You can double jump to first jump on the roof of the wrecked truck and then to reach the destroyed bridge. You will reach the factory by heading directly across the bridge.

There are stairs near the Access Point at the factory (we recommend saving your game here!). Use the stairs to arrive in the area where some big fights occurred during the prologue. Then head to the factory entrance shown in the screenshot. You will encounter Pascal here and you'll enter together.

Once in the factory, you can do one of two things:
- Unlock the hidden ending J - To do this, you must attack one of the neutral machines (example in the picture) and thus cancel the peace talks.
- Follow the Priest - They will lead the characters to a previously inaccessible elevator. Once you reach the new floor, head straight to the location where prayers are held. After some time passes, the machines will turn against the main characters.
Twisted Religion - escaping from the factory

You start surrounded by enemy machines and you can dispose of the closest ones (it's a good idea to use powerful offensive programs such as the A130 Bomb), but new machines will constantly appear to replace defeated ones. Don't let a larger group surround you, because then you might be unable to keep 2B healthy even if you dodge.

Wait until you get the message about the access to the elevator being unlocked and run to it, ignoring the other machines. This way, you will start the long escape from the Abandoned Factory.
After riding the elevator, listen to the conversation with 9S, who is controlling one of the machines. In the new room, you will meet the Scared Believer machines and you don't have to destroy them since they aren't hostile towards you. In the same room, there is also a trader selling Recovery items, but you do not have to worry about any especially difficult fights during this chapter.

When traveling through the factory, expect the camera to switch to the side view. It's safest to attack the encountered machines from a distance and you should only switch to melee combat when they manage to get close or if they are resistant to ranged attacks.
Along the way, you will be able to enter one of the larger silos and here you will find one of the two new Access Points in the factory. It's a good idea to dispose of the machines and unlock the Access Point so that you can save your progress.

Continue onward while eliminating machines (including the flying ones). In the location from the screenshot, you will need to avoid the crushers for the first time. Try to line up between them and use ranged attacks to eliminate the enemies behind the next crusher in order to ensure that you safely run under it. During melee battles, don't let enemies push 2B under the crusher and, if necessary, double jump over the machines.

Once you get past the crushers, enter the next silo. You don't have to fight the larger, spider-like machines, as you can immediately head for the exit on the opposite side instead.
After exiting the silo, watch out for the suicide machines. If possible, try to attack them (make sure to use pod programs) as soon as they appear on the screen. You can also try to retreat or jump over them just before they can run up to 2B.


When traveling on the outer balconies of the silo, you'll have the chance to explore the secret area of the factory. Look for the protruding part of the balcony from screenshot no. 1. Once you get there, the camera will change its position by 90 degrees and you will be able to jump on the same crushers you've just been avoiding.
Don't rush your jumps, instead always try to destroy any newly appearing machines first. Otherwise, you can easily fall down below. Eventually you will reach the left balcony and you will be able to explore the room from screenshot no. 2. There are several crates containing loot here and you will find the Engine Blade unique weapon in one of them.

Return to the previous (right) balconies and continue onwards. In the location from the attached screenshot, you need to go to the background in order to be able to go further to the right.
You must reach the new room and use the control console to unlock the next passage.

An area with lots of bars awaits you, where you have to keep jumping over higher and higher platforms, as well as a new section with crushers, where it's also a good idea to be careful and destroy the monsters before running under the crushers.
You will reach a room where neutral machines are being attacked by hostile ones. You can start helping them, though there won't be any negative consequences if you let them be destroyed or if you don't help them quickly enough.

In the next section, the spider-shaped machine will be attached to the wall and you can attack it from a distance or just quickly continue running.
Follow the linear path. It will eventually lead you to a room with the next new Access Point, which you should unlock and save the game, because moments later you will be fighting a boss. Use the nearby elevator and get to the big shaft where the mechanical spider boss will appear.
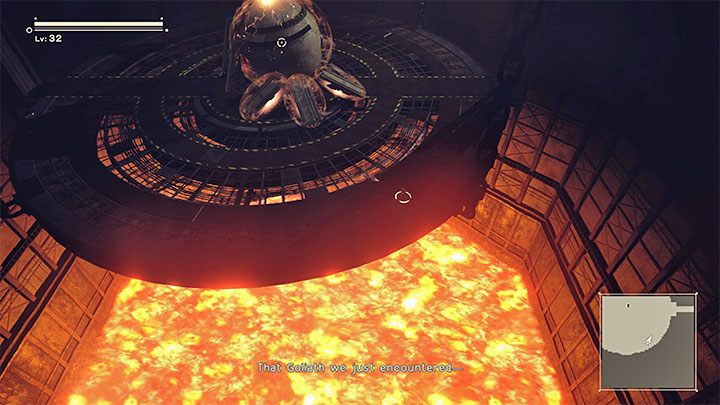
Factory Boss - the mechanical spider

Your task will be to defeat the giant spider - goliath. At the start of the fight, you will receive information that the boss is protected by a defensive shield. All attacks are initially ineffective. You need to avoid the attacks of the boss and run around the arena until 9S manages to hack in and remove the boss' shield. Only then will the spider become vulnerable to attacks.
The boss' strongest attacks include charging at you, to which you need to react quickly and run away from the boss' intended path (once the spider starts charging, it will mostly move in a straight line, but it's also able to turn slightly to the sides). The fact that the attack is usually signalled in red makes things a little easier, so you can choose to sprint before the big spider starts charging.
Another dangerous attack of the spider is jumping and again your priority should be to quickly dodge or sprint away from where the boss is planning to land.

One of the giant spider's long-range attacks is sending forward a shockwave. Depending on where you are, you can quickly jump to the side or try to double jump.

After the boss loses its shield thanks to 9S successfully hacking it, darkness will envelop the area and this is the time to attack. The safest thing to do is lock the camera on the spider and opt for ranged attacks combined with the use of offensive pod programs. Fighting in melee can be risky, because, for example, the boss is able to attack with its front legs and you might take significant damage if you fail to dodge.

There may be a situation where the boss will be temporarily stunned. This is the best opportunity to run up to them and launch more powerful melee attacks, to which the big spider will not react until it has recovered. This is a opportunity to deal significant damage to the boss in a short timespan.

During the next stage of the battle, the boss can, for example, send shock waves in all directions. Try to jump over them as often as possible or use the opportunity to attack the boss in mid-air.
During the final stage of the battle, the spider can turn into a big ball and start to roll around the arena. In this state, the boss is immune to ranged attacks and you have to look for opportunities to attack them with melee weapons. Continue attacking until the spider's health bar drops to zero and the boss explodes.

After the boss has been dispatched, you'll be able to continue your escape from the factory by reaching the new elevator first. Follow the familiar balconies and corridors to the place where you previously started exploring the Abandoned Factory. Finally, you need to go outside where a cutscene will play and then you will be given a quest objective to return to the Rebel Camp.

You are not permitted to copy any image, text or info from this page. This site is not associated with and/or endorsed by the Square-Enix / Eidos or PlatinumGames. All logos and images are copyrighted by their respective owners.
Copyright © 2000 - 2025 Webedia Polska SA for gamepressure.com, unofficial game guides, walkthroughs, secrets, game tips, maps & strategies for top games.