Walkthrough - Return to Ostagar | Walkthrough Dragon Age: Origins - RtO Guide
Last update: 11 May 2016
Received from: Elrik Maraigne [Bann Loren's lands]
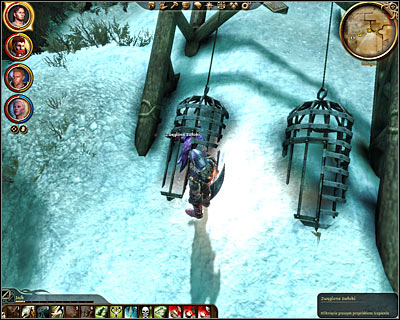
Description: You start the game in the western section of the map (M1, 1) and you're going to be attacked by several darkspawn right away. Winning here will be extremely easy. Take a look around once it's safe and click on a body found in a nearby cage (M1, 2). Collect a key to mage's chest which will come in handy in the near future.

Proceed to the north and then head east where you'll have to defeat a much larger group of monsters (M1, 3). I would strongly recommend taking cover behind a large table in order to avoid being attacked by enemy archers too often. One of the monsters is going to be a mini-boss (Hurlock wanderer) and you'll have to kill it quickly, because it's a mage. Once it's safe again make sure to click on wanderer's body and you'll be allowed to collect the first element of the set - Cailan's leggings. You should also inspect a small area to the east in order to collect a chalice which is going to be a gift (M1, 4).

You may now travel south. A good idea would be to stay somewhere near the stairs (M1, 5) and to encourage some of the monsters to get here by attacking them from the distance. Notice that it's going to be easy to hide behind a nearby wall in case enemy archers will show up. Get ready to deal with a new mini-boss soon - Genlock blacksmith. This creature is an archer so it should be easier to kill it. Once the first boss is gone a second will show up and in this case you'll have to deal with a Hurlock alpha (warrior).

Instead of heading south right away spend some time exploring the nearby area. Notice that you'll be allowed to use a recently collected key to open mage's chest (M1, 6). The chest will contain a very powerful staff of the corrupted chemist, as well as healing poultices and caps designed for your mages. Move to the south a little and find rubble with Eirik's hidden key (M1, 7). Collect the key to king's chest.

You must now travel south-west, passing by mabari pens along the way (M1, 8). Be careful here, because you're going to be attacked by several genlock rogues and you'll have to deal with them quickly if you want your team members to avoid massive injuries. Move to the south-east (M1, 9). You'll be attacked by a new mini-boss there (Hurlock foreman), as well as by a group of Plague wolves. I would strongly recommend dealing with the wolves in the first place, because otherwise they'll start knocking down members of your team and sooner or later someone may end up getting killed. Once you've defeated all the monsters take your time to look around. Notice corpses of two mabari - loot them to collect Fastrunner war kaddis and Harness of the fiery stone. Finish off by clicking on foreman's body to pick up a second item from the set - Cailan's shield.

Head east and it shouldn't take too long until you find an object marked as Cailan's chest (M1, 10). You already have a key from the rubble so accessing the contents of the chest won't be a problem. Inside you'll find secret correspondence (three new entries in your codex) and Maric's blade (third object from the main set). You can now explore the areas to your south if you want to (it's optional). Several groups of the darkspawn are stationed there and you would also have to watch out for a trap in one of the passageways (M1, 11). Aside from standard enemy units you have to watch out for a genlock operating a ballista.

You may now return to Cailan's chest and in order to move on with the mission you must go north-east. This means you'll be heading towards a bridge (M1, 12). Make a few steps forward and the game will trigger a new cut-scene, showing king Cailan's body (M1, 13) and an escaping necromancer. You'll also notice that you've been surrounded by two groups of monsters. During this battle you must watch out for slow skeletons, because their attacks are going to be deadly. One of the monsters will also be a mage (and a mini-boss) so don't forget to kill it quickly. Loot all the corpses once it's safe and continue moving east (M1, 14).

Travel south-east after you get to the other side. At first you'll encounter only weaker creatures, but it won't take long until you'll have to deal with more serious threats. Notice that there are two paths leading to the southern area of the map (M1, 15) and sadly in both cases you'll be dealing with a lot of traps. I would recommend choosing the western path so you won't have to worry about attacking a new boss right away. Deal with genlocks standing next to ballistae quickly and get ready to defend yourself against the Hurlock strategist. This creature will arrive from the south-east (M1, 16) and you should attack it as soon as you can. Secure this entire area. Once it's safe make sure to examine hurlock's body to collect a new item from the set - Cailan's gloves.

You may now proceed north until you get to the stairs leading to the area surrounding the tower of Ishal (M1, 17). Continue moving east, dealing with two new groups of monsters along the way. The first group is going to be smaller, but you'll still have to watch out for a Hurlock emissary. Don't forget to prevent this creature from casting too many spells. The second group will be much larger and you'll have to deal with a boss. This time it's going to be a Hurlock general (DlC6, 18). It would be a good idea to kill at least a few archers before attacking the general to make this fight a lot easier. Check general's body after the battle to collect the next object from the set - Cailan's breastplate.

Proceed towards the stairs found to the north. Here apart from standard darkspawn you'll also have to get ready to defend yourself against a couple of wretches. Remember that these creatures can take your allies by surprise! Eventually you'll have to make your way to a large gate (M1, 19) to travel to [Tower of Ishal] (M2, 1). Here you'll witness a new cut-scene and you're going to be welcomed by the first group of monsters.
The next room (M2, 2) is going to be guarded by a very large group of the darkspawn. Thankfully all the hurlocks and genlocks will die quickly, because they'll be on a much lower experience level than your team. The only creature you'll have to watch out will be a single ogre (mini-boss). Try to lure the beast to the first room so you won't have to fight any other units at the same time.

You may now proceed to the western passageway (M2, 3). There are going to be several monsters stationed behind the barricade, but you won't have to figure out how to kill them from here. Instead head south-west and enter a new room (M2, 4). Similar to the previous chamber, most of the creatures encountered here are going to be easy to kill. Watch out only for a bereskarn found inside a cage to the south.

After you've successfully secured this entire area make sure to examine nearby interactive objects to collect new treasures. Head north until you end up inside a small room with a hole in the ground (M2, 5). Click on the hole and confirm that you want to travel to [Darkspawn tunnels]. Just as before, you're going to be attacked by a small group of beasts as soon as you've arrived in the tunnels (M3, 1).

Be careful, because after you've eliminated the initial group you're also going to be attacked by a new mini-boss (Distorted spider). Check the surrounding area after you've defeated the creature, collecting a manuscript copy among other things. A new group of spiders will attack inside one of the southern rooms (M3, 2). Don't forget that distorted spiders can knock down your teammates to inflict additional damage so you'll have to protect your archers and mages as best as you can.
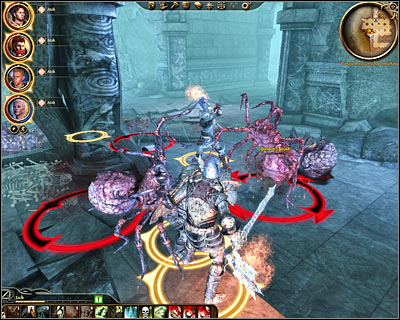
You may now proceed towards the southern corridor and it won't take long until you'll have to turn west (M3, 3). You should know that a large group of the darkspawn is stationed in the area and it would be a good idea to encourage them to follow you to the previous room. Watch out for a new emissary and kill this beast before it has a chance to cast powerful spells. Get to the last room of the tunnels (M3, 4) where you'll be forced to defeat two groups of distorted spiders. Be careful, because a boss will be among the second group! Just as before, you must focus on protecting weaker members of your team from the spiders. You may now choose a nearby passageway (M3, 5) leading to the [Battlefield] (this is still the main map of Ostagar).
![You'll find yourself standing in the southern area of [Ostagar] (DLC, 20) and you should definitely save your game, because you're about to encounter the main boss - Walkthrough - Return to Ostagar - Dragon Age: Origins - Return to Ostagar - Game Guide and Walkthrough](/dragonageoriginsreturntoostagar/gfx/word/1036394171.jpg)
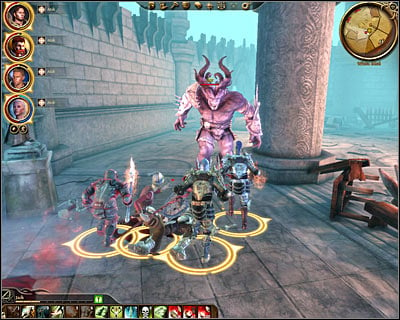
You'll find yourself standing in the southern area of [Ostagar] (DLC, 20) and you should definitely save your game, because you're about to encounter the main boss. Make a few steps forward and you'll notice that the necromancer has stopped running away from you. He will bring back the dead to life, as well as summon a very powerful boss creature - an animated ogre (M1, 21)!

DON'T FIGHT the ogre and instead focus on getting to your main target which is naturally going to be the genlock necromancer (M1, 22). The necromancer is a mage so killing this beast in direct combat shouldn't be a big problem. Eliminating this creature as soon as possible is crucial to your success, because the death of the necromancer will result in the spirits disappearing from the battlefield and in the ogre dying again. Make sure to examine necromancer's body to collect the last item from the set - Cailan's helm. You should also take your time to loot ogre's body. The monster was carrying two excellent weapons - Duncan's dagger and Duncan's sword.

Listen to what your teammates have to say and follow their advice by going back to king Cailan's body. Thankfully you won't have to go through the tunnels again. All you have to do is to approach the entrance to the tunnels (M1, 20) and you're going to be automatically transported to the bridge (M1, 13). You must choose here between having a ceremony, throwing king's body to the wolves or leaving it as it is. Either way this is where the quest will come to an end.