
Standing stones | Listings TES V: Skyrim Guide
Last update: 05 December 2019
This page of The Elder Scrolls V: Skyrim World Atlas includes the list of ancient stones. You can find out what ancient stones are, where to look for them and what bonuses they guarantee by interacting with them.
Basic information
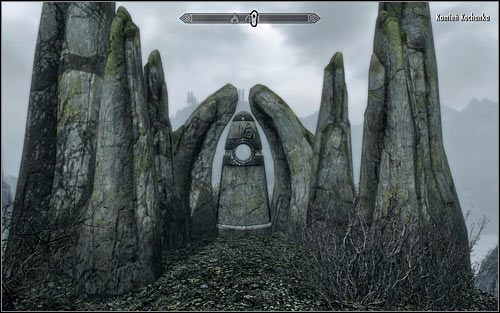
There are thirteen different magical standing stones in Skyrim and each stone grants a different blessing. A very important thing to know is that you can be receiving a blessing from only one standing stone at a time (once you interact with a new stone the bonus from the previous one disappears), so you must choose the best one based on your preferences and style of play. You should make the first interaction with a standing stone at the very beginning of the game, because while completing Before the Storm main quest you'll be passing by a location named The Guardian Stones (sector 8, number 16). This is important, because the stones found in that place can allow a warrior, a thief or a mage to develop their skills much faster.
List of standing stones
Important - Make sure to consult the World Maps chapter of this guide for additional help with finding the locations of the standing stones (you must first find the map of the correct sector and then the number mentioned in the text).
- THE ATRONACH STONE
- THE SHADOW STONE
- THE LADY STONE
- THE LOVER STONE
- THE LORD STONE
- THE MAGE STONE
- THE STEED STONE
- THE RITUAL STONE
- THE APPRENTICE STONE
- THE SERPENT STONE
- THE TOWER STONE
- THE WARRIOR STONE
- THE THIEF STONE
THE ATRONACH STONE
Location: Sector 6, number 31
Effects: Ability to absorb 50% of the mana from enemy spells and mana pool increased by 50 points at a cost of 50% slower mana regeneration.
Comments: Choosing this standing stone may be a good idea to a mage. Both bonuses are very helpful, even later in the game when your character becomes more powerful. The only disadvantage is that you have to deal with a slower mana regeneration, however there are many magical items which improve this process so if you find a good one you might be able to revert mana regeneration to normal state.
THE SHADOW STONE
Location: Sector 9, number 26
Effects: Ability to become invisible once a day for 60 seconds.
Comments: This isn't a useful bonus, because you can easily make yourself invisible thanks to certain potions and magical spells. The only difference in this case is that becoming invisible using the blessing is a completely silent process. Still, you should consider choosing a more interesting bonus.
THE LADY STONE
Location: Sector 7, number 9
Effects: Health and stamina regeneration improved by 25%.
Comments: This bonus can prove to be a very useful addition to a warrior character, not only because of the health but also because of the stamina needed to perform power attacks. The bonuses become less useful later in the game and that's when you should consider switching your affiliation to a better stone.
THE LOVER STONE
Location: Sector 6, number 12
Effects: All skills are learned 15% faster.
Comments: This is the best standing available in the game in my opinion, mostly because it helps with improving all of types skills. This makes it much better than the stones from The Guardian Stones location, because they offer only 5% more and cover only six categories of skills. Choosing this stone can really help you in advancing to higher experience levels.
THE LORD STONE
Location: Sector 2, number 23
Effects: Resistance to magic increased by 25% and resistance to physical damage increased by 50 points.
Comments: This is a very useful stone assuming you're not necessarily interested in choosing stones which improve the skill development. Both bonuses can be helpful, especially if you're playing as a person wearing a light armor or a mage's robe and with not too many health points at their disposal.
THE MAGE STONE
Location: Sector 8, number 16
Effects: Mage's skills are learned 20% faster.
Comments: This stone can be found in the exact same area where The Thief Stone and The Warrior Stone are located. If you're playing as a mage, then you should consider interacting with it at the beginning of the game (preferably while travelling to Riverwood for the first time). The stone works with six categories of skills - Conjuration, Restoration, Alteration, Illusion, Destruction and Enchanting.
THE STEED STONE
Location: Sector 1, number 7
Effects: Weight limit increased by 100 units and all penalties caused by wearing an armor removed.
Comments: This stone is a very interesting proposition for warrior characters, especially if they're wearing heavy armors. The increased weight limit allows to carry more items without having to worry about overloading the character and therefore being forced to leave some things behind. The penalty removal on the other hand has a pivotal meaning when it comes to performing fast attacks, because you won't have to sacrifice better armors to make that happen.
THE RITUAL STONE
Location: Sector 5, number 39
Effects: Ability to raise the dead in the area once a day so that they can start fighting alongside the main character.
Comments: You should consider choosing this stone if you're playing as a character that has a weak armor rating and likes to surround himself with allied units. The best thing about the bonus provided by this stone is that it resurrects more than one dead person and that it also works on stronger beings (including the ones that can be revived using standard spells).
THE APPRENTICE STONE
Location: Sector 1, number 47
Effects: Ability to regenerate mana twice as fast at a cost of being twice as vulnerable to magic attacks.
Comments: Choosing this stone is not a good decision, because you can improve mana regeneration using various methods and you'll almost immediately notice a huge difference caused by a reduced resistance to magic. You can consider making an exception only if your character is only a warrior-mage combo and therefore has a better defense rating.
THE SERPENT STONE
Location: Sector 3, number 8
Effects: Ability to paralyze a target for 5 seconds and to inflict 25 damage points once a day.
Comments: The bonus provided by this stone may to prove to be useful only in the early parts of the game and only when going against much stronger enemies. It's not that great later in the campaign, because by then you'll discover better ways of paralyzing and slowing down enemy units.
THE TOWER STONE
Location: Sector 2, number 10
Effects: Ability to automatically open an expert lock (or worse) once a day.
Comments: You may as well ignore this stone, because it won't be useful to you. The main reason is because you are allowed to open all locks you find in the game without any additional help, even if you didn't invest in any perks from the Lockpicking skill tree. Besides you still can't get your hands on the best treasures hidden in the containers with master locks.
THE WARRIOR STONE
Location: Sector 8, number 16
Effects: Warrior's skills are learned 20% faster.
Comments: This stone can be found in the exact same area where The Thief Stone and The Mage Stone are located. If you're playing as a warrior, then you should consider interacting with it at the beginning of the game (preferably while travelling to Riverwood for the first time). The stone works with six categories of skills - Smithing, Heavy Armor, Block, One-Handed, Two-Handed and Archery.
THE THIEF STONE
Location: Sector 8, number 16
Effects: Thief's skills are learned 20% faster.
Comments: This stone can be found in the exact same area where The Mage Stone and The Warrior Stone are located. If you're playing as a thief, then you should consider interacting with it at the beginning of the game (preferably while travelling to Riverwood for the first time). The stone works with six categories of skills - Light Armor, Sneak, Lockpicking, Pickpocket, Speech and Alchemy.