
Dragon shouts | Listings TES V: Skyrim Guide
Last update: 05 December 2019
This page of The Elder Scrolls V: Skyrim guide includes the most important information regarding Shouts. You will learn about how the rules of unlocking shouts and in what cases they are used. We also compiled a list of all the shouts and a list of power words locations.
Basic information
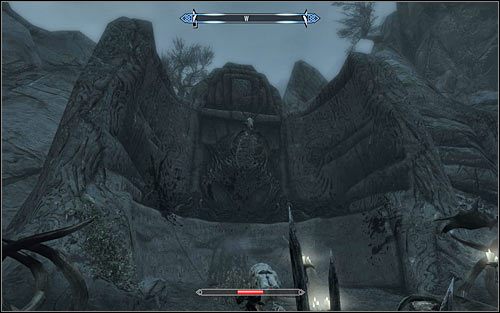
As I've mentioned many times before, dragon shouts are an extremely useful element of the game and you shouldn't forget about a possibility of using them. The best thing about dragon shout is that they're based on almost identical principles to active powers, so you don't have to drain health, mana or stamina bars to activate them. Once you've used a dragon shout you can't immediately use it again, because you must wait for it to recharge and depending on a shout this can take a few seconds or even a few minutes. A dragon shout becomes unlocked the second you've unlocked at least one Word of Power that is a part of it, however you should always try unlocking all three words, because that's when the shout becomes the strongest or is active for the longest period of time. The most important shouts are being taught to you while completing main quests (mostly by the Greybeards). Obviously you won't unlock all shouts and Words of Power that way, so you must obtain the rest on your own. New Words of Power can be learned by finding Word Walls similar to the one seen on the screen above. Once you've discovered a Word Wall you must approach it and wait for the learning process to come to an end.

Learning a Word of Power doesn't mean that you can automatically use it when triggering a dragon shout, because you also have to understand its meaning. When you're completing main quests you'll automatically receive that knowledge from the Greybeards or other "trainers", however you can't count on the same help with other words and therefore you'll have to finish the process on your own. A complete list of all dragon shouts and their Words of Power can be accessed by pressing the TAB key, choosing Magic and then Shouts. Understanding the meaning of the Words of Power is done by spending dragon souls. A current number of dragon souls is displayed in the bottom right corner of the screen and you can add new ones to the pool by slaying dragons (and staying long enough close to the remains to consume the soul). If you have at least one dragon soul then you may hover the mouse over an inactive Word of Power, press the R key and confirm that you want to spend the soul to unlock the word.
Important! Make sure that you always check all shouts which are displayed on the list, because the grey font marks only the shouts with zero unlocked words (this means they can't be used even in the simplest form). As you've probably suspected, a total of three souls is needed to fully develop a single dragon shout (one soul per word).

A detailed description of all dragon shouts and places where their Words of Power can be obtained is listed below. As for using them, I would recommend choosing two or three shouts that you find to be the most useful to you and your style of play. This will prevent you from having to spend too much time constantly switching between all of them and from remembering the best ones. My favorite dragon shout is definitely Unrelenting Force (screen above), mostly because it's extremely versatile. You can use this shout to push back enemies from the main character if he's about to die, to stagger or take down stronger opponents or to push down enemies from the ledges in hopes of them dying as a result of a high attitude fall. Another useful dragon shout is Fire Breath, especially if your character doesn't use any magic and therefore has to be more creative to inflict fire damage. As I've already said, it's best to test each shout in controlled environment to pick your favorites.
Remember that there are three ways of activating each shout and it's achieved by holding the Z key for different periods of time. This allows the main character to shout one, two or all three Words of power. I would recommend always using the strongest version of the shout for maximum effects. Consider the shorter versions only if they're only slightly less useful and at the same time need much less time to recharge.
List of dragon shouts
Important - Make sure to consult the World Maps chapter of this guide for additional help with finding the locations of Word Walls (you must first find the map of the correct sector and then the number mentioned in the text).
- THROW VOICE
- CLEAR SKIES
- BECOME ETHEREAL
- ELEMENTAL FURY
- ICE FORM
- FROST BREATH
- UNRELENTING FORCE
- FIRE BREATH
- KYNE'S PEACE
- DISARM
- MARKED FOR DEATH
- DRAGONREND
- SLOW TIME
- AURA WHISPER
- WHIRLWIND SPRINT
- STORM CALL
- CALL DRAGON
- CALL OF VALOR
- DISMAYING SHOUT
- ANIMAL ALLEGIANCE
THROW VOICE
Locations of the Word Walls:
- Shearpoint (sector 5; number 21) - All three Words of Power can be obtained by approaching a single Word Wall in this location. This is a dragon lair, so you must be very careful.
Shout effects: Sending out the main character's voice without revealing its origin.
Comments: This shout isn't too useful and it can only be used to distract opponents in order to avoid them or to send them into a trap.
CLEAR SKIES
Locations of the Word Walls:
- High Hrothgar (sector 5; number 46) - All three Words of Power are received from Arngeir while completing Throat of the World main quest.
- Sky Haven Temple (sector 6; number 15) or High Hrothgar (sector 5; number 46) or Throat of the World (sector 5; number 47) - All three Words of Power are learned at the same time and it happens automatically while completing Alduin's Bane main quest or Season Unending main quest. The teacher of the words can be Esbern or Paarthurnax depending on your decisions made during the quests mentioned above.
- Sovngard - All three Words of Power are obtained by talking to Tsun immediately after finishing the last main quest of the game - Dragonslayer.
- Labyrinthian (sector 5; number 06) - Don't go into the main dungeon, because you must find a different entrance to a smaller location called Shalidor's Maze. That's where the Word Wall is hidden.
- Dead Crone Rock (sector 6; number 29) - The Word Wall is being guarded by a powerful hagraven named Drascua, so you must be careful. The only way to get to the witch's tower is to travel through Hag Rock Redoubt (sector 6, number 30).
- Lost Tongue Overlook (sector 9; number 27) - The Word Wall is guarded by a dragon, so you must be very careful.
Shout effects: Getting rid of the fog and bad weather.
Comments: This shout is unique in a way, because you receive it while completing one of the main quests and already in the most powerful version. You won't have a lot of occasions to use it during normal journeys except for neutralizing gas traps. Holding the Z key improves the duration of this shout.
BECOME ETHEREAL
Locations of the Word Walls:
- Lost Valley Redoubt (sector 6; number 42)
- Ustengrav (sector 2; number 11) - The Word Wall can be found inside an enormous cavern with a waterfall (it's the same area where you must solve a puzzle involving the stones).
- Ironbind Barrow (sector 2; number 31)
Shout effects: Turning the main character into an ethereal being. This means he can't be injured, however he also can't injure anyone else.
Comments: You'll find this shout helpful while avoiding traps found in most of the dungeons. It's not too useful during battles, because not only you can't attack anyone while in ethereal state, but you also can't regenerate your health, mana and stamina bars. Holding the Z key improves the duration of this shout.
ELEMENTAL FURY
Locations of the Word Walls:
- Dragontooth Crater (sector 1; number 38) - The Word Wall is guarded by a dragon, so you must be very careful.
- Statue to Meridia (sector 1; number 23) - The Word Wall isn't hidden in the Kilkreath Ruins. It's above ground and you can find it by following a small path that leads from the statue.
- North Shriekwind Bastion (sector 8; number 9) or South Shriekwind Bastion (sector 8; number 10) - It doesn't matter which of these location you'll choose, because they're connected.
Shout effects: Performing faster attacks.
Comments: You might find this shout useful, but only if you like to defeat enemies in close combat encounters and using melee weapons. Holding the Z key increases the speed of the attacks even further.
ICE FORM
Locations of the Word Walls:
- Mount Anthor (sector 3; number 15) - The Word Wall is guarded by a dragon, so you must be very careful.
- Frostmere Crypt (sector 2; number 24) - The Word Wall can be found in the last room of the dungeon (the same one that's guarded by the Pale Lady).
- Saarthal (sector 3; number 10) - You can't visit the dig site until you've started Under Saarthal College of Winterhold quest. You should notice the Word Wall on your way back, after finding The Eye of Magnus.
Shout effects: Freezing the opponents.
Comments: This shout is very similar to Frost Breath, because it's also of an offensive type and it also deals frost damage. The main difference is that enemies that were attacked with the shout are frozen and they remain in that state until the ice shell has melted or until they've been attacked. As a result this shout should be used mostly to immobilize stronger opponents rather than to injure them. Holding the Z key improves the duration of this shout (up to 60 seconds).
FROST BREATH
Locations of the Word Walls:
- Folgunthur (sector 1; number 46) - The Word Wall is in the same area where you have to defeat Mikrul and his allies.
- Bonestrewn Crest (sector 4; number 21) - The Word Wall is guarded by a dragon, so you must be very careful.
- Skyborn Altar (sector 2; number 34) - The Word Wall is guarded by a dragon, so you must be very careful.
Shout effects: Inflicting frost damage.
Comments: This shout is in my opinion less useful than Fire Breath, because a lot of the opponents you'll meet are partially or completely immune to frost damage and they're vulnerable to fire damage at the same time. It's worth mentioning that affected targets not only receive frost damage, because they're also slowed down. Holding the Z key increases the amount of damage being dealt (up to 18 damage points per second).
UNRELENTING FORCE
Locations of the Word Walls:
- Bleak Falls Barrow (sector 5; number 45) - The Word Wall is in the last area of the dungeon where you have to defeat a powerful draugr. It's best to locate it while completing Bleak Falls Barrow main quest, because you'll have to visit this area to acquire a Dragon Stone.
- High Hrothgar (sector 5; number 46) - Two remaining Words of Power are received from the Greybeards while completing The Way of the Voice main quest and The Horn of Jurgen Windcaller main quest.
Shout effects: Pushing or throwing away people and objects.
Comments: This is by far the most useful dragon shout out of all available in the game and I recommend having it set as an active one. I've already mentioned what this shout is about earlier in the text, but here's a quick reminder - it can be used to push enemies away from the main character, to take down stronger opponents and to push down enemies from ledges. I recommend that you complete all main quests from the early part of the campaign in order to unlock the strongest version of this shout. Holding the Z key increases the effectiveness of the shout.
FIRE BREATH
Locations of the Word Walls:
- Throat of the World (sector 5; number 47) - The Word of Power is received from Paarthurnax and the meeting takes place while completing Throat of the World main quest.
- Dustman's Cairn (sector 5; number 9) - The Word Wall is in the last chamber of the crypt where you have to find a fragment of Wuuthrad for the Companions and take part in a huge battle with draugrs.
- Sunderstone Gorge (sector 5; number 41)
Shout effects: Inflicting fire damage.
Comments: This is one of the most useful dragon shouts available in the game, especially if you aren't capable of inflicting fire damage on your own. Remember not to use this shout when going against enemies that are partially or completely immune to fire damage (it's best to use Frost Breath to injure them). Holding the Z key increases the amount of damage being dealt (up to 90 points).
KYNE'S PEACE
Locations of the Word Walls:
- Shroud Hearth Barrow (sector 8; number 7)
- Rannveig's Fast (sector 5; number 4)
- Ragnvald (sector 6; number 1) - This dungeon is a home to one of the dragon priests, so you must be careful.
Shout effects: Calming down nearby wild animals in order to prevent them from attacking the main character or to force them to escape.
Comments: This isn't a useful dragon shout, especially since it works only in areas where you can encounter wild animals. The worst thing about this shout is that it influences the animals on level 20 or lower, so you can't use it on the strongest beasts. I recommend that you consider Animal Allegiance shout if you want something similar, because it's much better. Holding the Z key increases the range and improves the duration of this shout (up to 180 seconds).
DISARM
Locations of the Word Walls:
- Silverdrift Lair (sector 2; number 30)
- Eldersblood Peak (sector 5; number 1) - The Word Wall is guarded by a dragon, so you must be very careful.
- Snow Veil Sanctum (sector 3; number 17) - You can't explore the sanctuary until you've advanced to Speaking with Violence Thieves Guild quest. The Word Wall can be found before you open a large gate and lose consciousness.
Shout effects: Disarming an opponent.
Comments: This is a rather useful shout, especially if you're playing as a character that normally avoids any kind of melee combat. Using this shout can significantly lower the difficulty of battles with enemy warriors. Holding the Z key increases the effectiveness of this shout by allowing you to disarm high level opponents (up to level 30).
MARKED FOR DEATH
Locations of the Word Walls:
- Forsaken Cave (sector 3; number 19)
- Dark Brotherhood Sanctuary (sector 7; number 14) - You can't visit the sanctuary until you've officially joined the Dark Brotherhood and this takes place while completing With Friends Like These quest. The Word Wall is in the main chamber of the hideout.
- Autumnwatch Tower (sector 8; number 31) - The Word Wall is guarded by a dragon, so you must be very careful.
Shout effects: Lowering the opponent's health and armor rating.
Comments: This shout is useful only when you're going against very powerful enemies that are using armors. You shouldn't use in on weaker enemy units, because you'd be wasting its potential (remember that the "curse" is active for an entire minute). Holding the Z key allows to weaken the target's defenses even further (loss of health and lower armor rating).
DRAGONREND
Locations of the Word Walls:
- Throat of the World (sector 5; number 47) - All three Words of Power are received while watching a vision from the past and this takes place during Alduin's Bane main quest.
- Korvanjund (sector 5; number 18) - The Word Wall is in the main chamber where during civil war quests a battle with a powerful draugr in a crown takes place.
- Labyrinthian (sector 5; number 6) - The Word Wall can be found near the lair of one of the dragon priests. To be more specific - it's in a large corridor where you have to defeat a draugr deathlord.
- Hag's End (sector 1; number 29) - The only way to reach Hag's End is to travel through Deepwood Redoubt (sector 1, number 28). The Word Wall is the last chamber of the fort. This is the same area where one of the duels with a hagraven takes place (just before exiting the fort to get to a balcony).
Shout effects: Forcing an affected dragon to land.
Comments: This shout is unique in a way, because you receive it while completing one of the main quests (it's needed to make progress in the campaign) and already in the most powerful version. Using it is highly recommended, because once the dragon has been forced to land it'll be much easier for you to injure it (even if you're attacking the beast from a distance instead of relying on melee attacks). Holding the Z key forces the dragon to land for a longer period of time.
SLOW TIME
Locations of the Word Walls:
Shout effects: Slowing down time.
Comments: It's worth using this dragon shout on a regular basis, because it can increase the effectiveness of your attacks, help you in avoiding enemies and increase your chances of a successful escape from dangerous situations. Holding the Z key increase the effectiveness of the slowmotion and improves the duration of this shout (up to 16 seconds).
AURA WHISPER
Locations of the Word Walls:
- Valthume (sector 6; number 37) - This dungeon is a home to one of the dragon priests, so you must be careful. The Word Wall can be found just before entering the priest's lair, so you won't have to fight the boss.
- Volunruud (sector 5; number 13) - The Word Wall is in the last chamber of the crypt (the one which is occupied by Kvenel the Tongue).
- Northwind Summit (sector 4; number 43) - The Word Wall is guarded by a dragon, so you must be very careful.
Shout effects: Revealing the life force of all beings present in the area.
Comments: This is a rather useless shout unless your character likes to sneak a lot and wants to improve his chances of staying undetected. If this is the case then you should know that you can achieve similar results by casting spells. Holding the Z key improves the duration of this shout (up to 30 seconds).
WHIRLWIND SPRINT
Locations of the Word Walls:
- Volskygge (sector 1; number 19) - This dungeon is a home to one of the dragon priests, so you must be careful, because the Word Wall is in the priest's lair.
- High Hrothgar (sector 5; number 46) - You'll automatically receive this Word of Power from a Greybeard while completing The Way of the Voice main quest.
- Dead Men's Respite (sector 1; number 51) - The Word Wall is in the last chamber of the dungeon where you have to defeat King Olaf One-Eye.
Shout effects: Moving in a straight line with an enormous speed.
Comments: This shout is pretty much useless in battles, however it may come in handy while exploring the world. It's a great way to avoid the traps (especially swinging blades in tight corridors) and to reach new ledges that seem unaccessible if you try performing a standard jump. Holding the Z key increases the range of the sprint and of course this is important, so you should always use this version of the shout.
STORM CALL
Important! Make sure to interact with the Word Wall in Skuldfafn, because once you leave that location you won't be allowed to return to it!
Locations of the Word Walls:
- Forelhost (sector 9; number 28) - The Word Wall can be found on the outer balcony of the dungeon and you can get here only by collecting and using a key found on the body of the dragon priest Rahgot.
- High Gate Ruins (sector 2; number 2) - The ruins are a home to one of the dragon priests, so you must be careful, because the Word Wall is in the priest's lair.
- Skuldafn - The Word Wall can be found inside the Skuldafn temple, close to the exit leading to upper balconies and the portal. Don't leave this area until you've learned the Word of Power, because you can't return here later in the game!
Shout effects: Calling in a thunderstorm which attacks everyone in the area inflicting shock damage.
Comments: It's very important to think through a decision of activating this shout, because the thunderstorm doesn't separate allies from enemies and only the main character can feel completely safe. You can only use this shout when you're above ground for obvious reasons and you should do that at the beginning of each battle, because the thunderstorm lasts long and it takes an enormous amount of time to recharge. Holding the Z key improves the duration of this shout (up to 180 seconds).
CALL DRAGON
Locations of the Word Walls:
- High Hrothgar (sector 5; number 46) - All three Words of Power are received from Arngeir while completing Throat of the World main quest.
- Sky Haven Temple (sector 6; number 15) or High Hrothgar (sector 5; number 46) or Throat of the World (sector 5; number 47) - All three Words of Power are learned at the same time and it happens automatically while completing Alduin's Bane main quest or Season Unending main quest. The teacher of the words can be Esbern or Paarthurnax depending on your decisions made during the quests mentioned above.
- Sovngard - All three Words of Power are obtained by talking to Tsun immediately after finishing the last main quest of the game - Dragonslayer.
- Labyrinthian (sector 5; number 06) - Don't go into the main dungeon, because you must find a different entrance to a smaller location called Shalidor's Maze. That's where the Word Wall is hidden.
- Dead Crone Rock (sector 6; number 29) - The Word Wall is being guarded by a powerful hagraven named Drascua, so you must be careful. The only way to get to the witch's tower is to travel through Hag Rock Redoubt (sector 6, number 30).
- Lost Tongue Overlook (sector 9; number 27) - The Word Wall is guarded by a dragon, so you must be very careful.
Shout effects: Calling the dragon Odaahving to assist the main character in battles.
Comments: This shout is unique in a way, because you receive it while completing one of the main quests (it's needed to make progress in the campaign) and already in the most powerful version. You should consider calling Odaahving for help from time to time. Don't forget that you can use this shout only when your above ground and if Odaahving has a place to land.
CALL OF VALOR
Locations of the Word Walls:
Shout effects: Calling Sovngard heroes for help to assist the main character in battles.
Comments: This shout is unique in a way, because you receive it at a certain point of the game and already in the most powerful version. It's definitely worth calling one of the ancient heroes for help, especially if you're a thief or a mage and can't handle yourself fighting alone. A very important thing to know about this shout is the fact that how long the Z key is pressed determines which of the Sovngard heroes will be summoned. Short press calls for Gormlaith, medium press calls for Felldir and long press calls for Hakon.
DISMAYING SHOUT
Locations of the Word Walls:
Shout effects: Forcing enemies to flee.
Comments: This shout isn't too useful, especially since you can influence enemy units in a similar way thanks to simple spells. Holding the Z key increases the effectiveness of this shout and this means you can affect high level enemies. This is very important, because the basic version of this shout works only on very weak beings and by using the best version that limit is raised up to 24th experience level.
ANIMAL ALLEGIANCE
Locations of the Word Walls:
- Angarvunde (sector 9; number 7)
- Ysgramor's Tomb (sector 3; number 2) - You aren't allowed to explore the tomb until you've started the last primary quest for the Companions - Glory of the Dead. The Word Wall isn't inside the tomb. You can find it outside and you can reach it only by choosing a small corridor leading to the western exit from the tomb. Once you're back outside you must make your way to the top of a small mountain.
- Ancient's Ascent (sector 8; number 13) - The Word Wall is guarded by a dragon, so you must be very careful.
Shout effects: Calling wild animals for help so that they start fighting alongside the main character.
Comments: This shout isn't anything extraordinary and you can use it only in the areas where you encounter wild animals. Don't count on being able to control mammoths and other powerful creatures, because the shout affects the beings on 20th or lower experience level. Holding the Z key increases the range of the shout and its duration (up to 60 seconds).