
Discerning the Transmundane - p. 2 TES V: Skyrim Guide
Last update: 11 May 2016
You will once again have to use the ramp, heading onto the lower levels. Apart from Falmers, you will also have to eliminate a Frostbite Spider, but you shouldn't have trouble with it. After getting down, head to the north-east gate. Don't rush it to the exit, as there's yet another trap here (screen above). Disarm or avoid it and only afterwards head to the passage leading to the Alftand Cathedral.
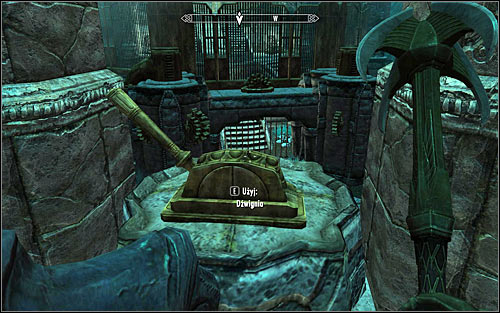
Head east, navigating through another set of pressure plates. You will also have to eliminate a couple more Falmers, with at least one of them capable of using magic. After entering the bigger room, deal with the monsters and use the stairs leading onto the upper balcony. Interact with the lever (screen above), therefore opening the passage in the distance.

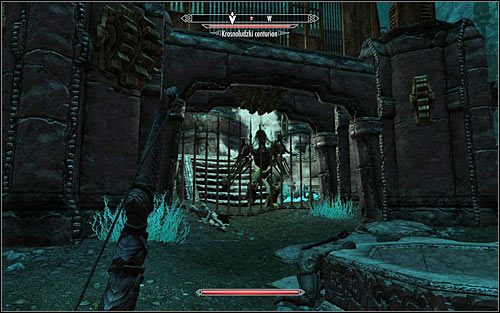
Go down and use the new passage, heading south-west. Check the contents of the chests, as there are precious treasures inside and afterwards go up the stairs. Here you will have to battle a Dwarven Centurion (screen above), serving as a mini-boss. If you prefer direct combat, remember to regenerate your health and stamina throughout the battle. If you have a shield, be sure to use it a lot.
If your character uses ranged attacks, you will be able to use a certain trick. Try to return to the lever on the upper balcony that you used recently. Make sure that your party member ran way as well and pull it, thanks to which the Centurion won't be able to get you (screen above). The boss still can attack your with range attacks, but they're far easier to avoid.
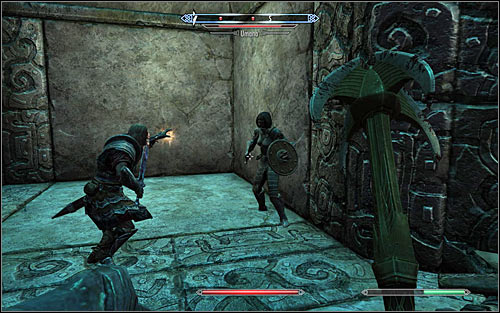
Regardless of the chosen tactic, examine the Centurion's remains after the battle to find the Key to Alftand Lift. Also note that there's a second Centurion lying beside and you should examine him as well. After reaching another room, you will witness a fight between Sulla Trebatius and Umana (screen above). As both characters are really powerful, you should just wait for one of them to die and enter afterwards. Otherwise, both of them would unite against you, making it really hard to survive. Examine their bodies to find multiple items, precious especially for the warrior class.
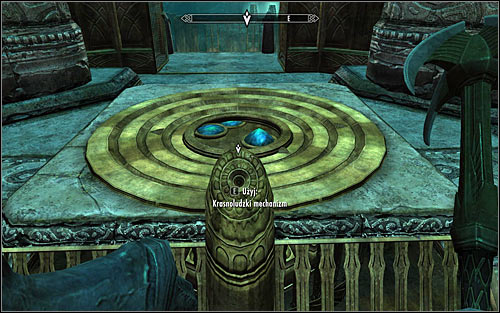
Take a look around the area, finding more locked chests. Afterwards approach the previously ignored construction in the middle of the room. Stand by the dwarven mechanism's console (screen above) and press E to use the Attunement Sphere received from Septimus Signus. Afterwards use the newly unlocked passage, going down the stairs. After reaching the lowest level, open the big gate to reach Blackreach.

It would be good to begin exploring Blackreach by approaching the large ballista south-west of the starting point (screen above). If you fire it fast enough, you can eliminate the Dwarven Sphere in the distance. If course you can try to beat it yourself if you want to gain experience, but take into consideration that the Sphere is much stronger than the ones you came across before.

Reaching the current destination point won't be easy, as Blackreach is just ENORMOUS. OF course nothing stand in the way of exploring it thoroughly, though this guide will focus on obtaining the Elder Scroll. Head west (screen above), more or less towards the waterfall in the distance.

I'd suggest heading towards the green sphere in the distance (screen above), so at first west and afterwards south-west. It's very important to be careful, as whole of Blackreach is swarming with enemies. Most of them will be Falmers and Frostbite Spiders, though you can also come across rather undemanding Chauruses. Don't however approach the clearly stronger enemies, like the Giants, unless you're looking for a challenge.

Go round the green sphere from the north and turn south after reaching the western edge of Blackreach. Keep heading in that direction, towards the very tall tower in the distance (screen above). Approach the door, open it and afterwards use the lever to get to the Tower of Mzark.

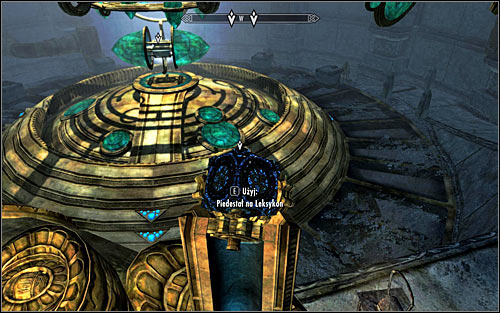
Thoroughly explore the first room of the Tower, as there are multiple precious artifacts hidden there. Afterwards head south-west, open the gate and turn left. Use the ramp to reach the top level of the construction. Start off by approaching the Lexicon Receptacle (screen above) and press E to put the Blank Lexicon received from Septimus Signus onto it.
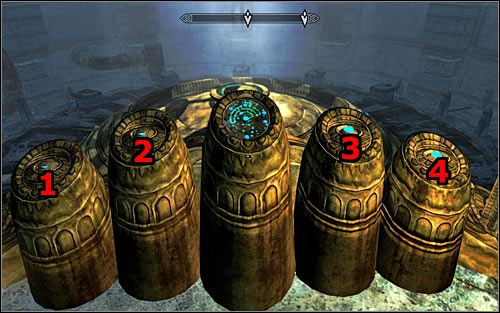
Now stand directly in front of the middle console (screen above) and be ready for a puzzle that will lead to the unveiling of the Elder Scroll and transcribing it onto the lexicon. You need to:
1) Approach button 3 and press it four times. Doing so should activate the Receptacle and button 2.
2) Approach button 2 and press it twice. Doing so should activate button 1.
3) Approach button 1 and press it once. Wait for the Elder Scroll to be unveiled.
The most important thing from the perspective of the Daedric quest is of course taking the "charged" Runed Lexicon (screen above). I'd also recommend heading down and taking the Elder Scroll, thanks to which you won't have to waste time in the future trying to get here again (it's required for the main storyline).