
Blindsighted TES V: Skyrim Guide
Last update: 11 May 2016
New main objective: Travel to Irkngthand
Irkngthand are ancient Dwemer ruins, found on one of the mountain slopes in the middle of Skyrim. In order to get there, start off at Whiterun and head east, where the Valtheim Towers are. From there, go north and climb the hill from which you should be able to see the fortress. IF this path seems inconvenient to you, you can start off at Fort Dunstad and head south-east - this option is even easier, as it doesn't imply climbing.

After reaching the destination, it will turn out that the whole place is overrun by thugs. You might try to sneak between them and reach the fortress door, though simply killing everyone is a much easier option. As they are just normal bandits, you should handle them without any problems (remember that surprise attacks deal more damage!).

At some point you will reach a grated passage to the further part of the fortress - you don't have to worry, as the gate can be easily avoided (road on the right). After getting to the other side, pull the lever to open the passage (screen above) - it will make getting out of the castle later on easier. In order to get inside Irkngthand, you need to get to the very top by following the footbridges - the only door can be found there.
New main objective: Speak to Karliah
After getting inside the dwarven fortress, you should note dead bandits laying on the floor. Corpses have been scattered throughout the whole room - there has surely been a terrible fight here. Inside the next room you will find piles of destroyed machines - they surely didn't break down on their own. Inside the third room you will have to focus - it's patrolled by five Dwarven Spheres, quite strong enemies. As avoiding them is rather impossible, you should probably stand in the corner of the room and send arrows at them. They will eventually come at you, but your strategic position will cause them to only be able to attack you one at a time, thanks to which you should be able to deal with them.

Head onwards and you will come across fire-spitting pillars - they move clockwise and avoiding them shouldn't be too hard. If you have any trouble, you can always use the Whirlwind Sprint Shout which will solve the problem instantly. At the same time you need to remember to stay quite - if you don't sneak, one of the Dwarven Spider Workers hiding throughout the room will probably notice you.

After leaving the fire room, head to the elevator which will take you to the Irkngthand Grand Cavern where Karliah and Brynjolf are waiting for you. Before heading there however, take a look into the corridor to the left of the elevator - apart from another Dwarven Spider you can also find a chest with some precious items inside.

After riding the elevator onto the lower level, speak to Karliah. She will tell you that the bandits that you came across in the first room have been killed by Mercer Frey. The elf will also warn you of traps that are probably waiting for you in the further part of the fortress.
New main objective: Locate Mercer Frey
Karliah was right - the whole underground has been covered with traps. Opening the very first door will cause a spiked ball to come falling at you - you need to be very careful. In the corridor before the trap, note the locked door (Expert level) - behind it you can find a few dwemer items and potions that will make this mission much easier.

Moving onwards, you should note Mercer fighting off some Falmers - in order to follow his footsteps, you will have to turn right and head further through the twisting corridors of Irkngthang. Look out for Falmers who will attack you at first sight. You won't however have to worry too much - Brynjolf and Karliah are quite good warriors, so going through the underground shouldn't be all that hard.

Deeper into the ruins you will come across a trap in the form of a propeller - while it won't be too much of a challenge for you, it certainly will be for your teammates - be ready for Brynjolf and Karliah going through this room in a very long and painful way. Luckily you might move this a bit further in time - inside the tower on the right you will find a dwarven ballista, thanks to which you can kill the Falmers below. That way you will at least have one problem less on your mind.

Afterwards open the gate leading to the further part of the underground - it can be done by pulling two levers found on opposite sides of the room (screen above). For the gate to open, both levers must be activated - each deactivates eventually after some time. That's why you should activate one of them and rush to the other one (the Whirlwind Sprint Shout will come in handy here).
After going through the gate you will reach a room with lots of dwarven towers. Most of them will be manned by Falmers who will try to shoot at you from bows - luckily they aren't very skilled at it and additionally they are easy to surprise. One of them is a Shaman, capable of casting a few spells - you have to look out for him especially. After he's defeated, search his body to find a shaman key, required in the further part of the underground.

Head onto the upper level of the fortress and afterwards look out for the snares. Take a look around the rooms to find two Detect Life Scrolls - even if you don't intend to use them, it's worth to take them as they're priced at 500 gold each. Inside the next cave you will have to fight a whole bunch of Falmers - you need to eliminate them quietly, as there's just too many of them for direct fight. There is however a very easy way of solving this problem - to the right of the entrance, right by the ground there's a button which activates the Centurion standing in the middle of the room. Press the button to activate the machine and cause it to attack everything around it. After the slaughter is over, kill the survivors and head onwards. Kill the rest of Falmers and Frostbite Spiders and afterwards enter the Irkngthand Slave Pens.

As you enter the next area, it will turn out it's a torture room. Pull the lever in the room on the left to kill two Falmers standing beside the table with a dead thief. Beside his corpse you will find information regarding the Eyes of the Falmer - the artifact which Mercer Frey is looking for. Keep going along the corridor and look out for the pressure plates (they activate a fire trap) and enemies in the next room - you can either avoid or kill them, depending on your liking. Head further and enter the small corridor behind the Falmers camp, killing two enemies inside.

Another camp awaits for you, this time inhabited now only by Falmers but also giant worms known as Chauruses. Luckily you don't have to fight the whole happy herd - if you get onto the pipes running below the ceiling, you will be able to avoid fighting or at least kill the enemies from a safe distance (screen above). Having dealt with them, head onwards and defeat two more enemies. Find a dwarven chest beside the tents - inside you will find some surprisingly powerful artifacts. Further on you will reach the Irkngthand Sanctuary, where Mercer is hiding.
New main objective: Slay Mercer Frey
New main objective: Retrieve the Skeleton Key
As you enter the Sanctuary, you will see the traitor poking out the Eyes of the Falmer from the statue in the middle of the room. Mercer will eventually notice your presence and cast a spell on Brynjolf, causing him to fight with Karliah. Therefore you will have to face the Guild Leader alone.

Mercer is a very good swordsman, fighting with two swords (one of them can drain life). What's worse, the enemy can also temporarily disappear, becoming nearly invisible. You can use the previously found Detect Life Scrolls or just set the enemy on fire (it will point to his location). If that isn't enough, use the compass at the top of the screen (it will always point Mercer's current position) or look for ripples in the water. Remember that the enemy can attack and receive damage eve then invisible - don't let him hit you from behind!

After plunging your sword into the traitor's throat, quickly search his body. Apart from some useful equipment you will also find the Eyes of the Falmer (for Delvin Mallory) and the Skeleton Key for which you came here.
New main objective: Escape from Irkngthand
As you kill Mercer, the room will become completely flooded. The door through which you came here are blocked, so you will have to wait for the water the level to raise and escape though the tunnel above the Falmer statue. There's nothing to worry about, just keep floating on the water.

After reaching the corridor, head onwards. Eventually you should reach a cave in which nothing will threat you anymore. At this point you should speak to your companions.
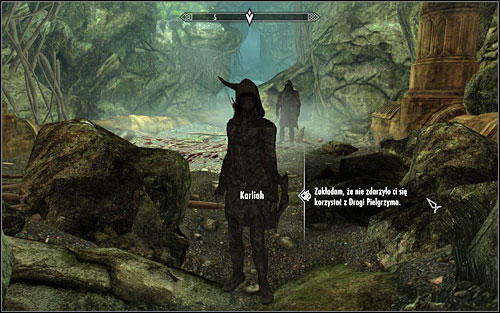
New main objective: Speak to Karliah
After escaping Irkngthand Sanctuary, it will finally be time to catch some breath. Use this moment to speak to Karliah. The elf will tell you that your mission isn't over yet - you still need to take the Skeleton Key to its proper place. It however won't be easy - in order to return it to Nocturnal, you will have to cross the dangerous Pilgrim's Path. Bidding the thieves farewell, you will receive the Nightingale Bow - the most precious item of such kind in the game (it's quality depends on the wielder's level).
Before heading out, visit The Ragged Flagon - sell the obtained artifacts, restock on supplies and raise your skills. It will all be necessary, as the last Guild mission awaits you now. Remember that using the Skeleton Key you can open any lock (it's pretty much like an indestructible lockpick). Before returning it to the goddess, you can use it for your own purposes.
Thieves Guild quest unlocked: Darkness Returns