
Hard Answers TES V: Skyrim Guide
Last update: 11 May 2016
New main objective: Speak with Enthir
Note! Despite the "misunderstanding" with Mercer Frey, you will still be able to visit the Thieves Guild headquarters, though you won't find the Leader there. Brynjolf has also gone missing and you will meet him in the further part of the story.
After getting out of Snow Veil Sanctum and speaking with Karliah, head to Winterhold - there you will find Enthir, to whom you should give Gallus's Encoded Journal. The town is best reached by heading north-west of the current location. After getting there, visit The Frozen Hearth tavern where you will find the Bosmer you're looking for.

Enthir will tell you that the journal was written in the language of Falmers and only the scholars of Markart are capable of understanding it. You should therefore head there.
New main objective: Speak with Calcelmo
Markart, to which you must now head, is a city at the far west of Skyrim. You can get there either by a carriage (most cities offer such services) or by foot - by heading west of Rorikstead. The further road is long and dangerous, so you should prepare yourself well before heading out.
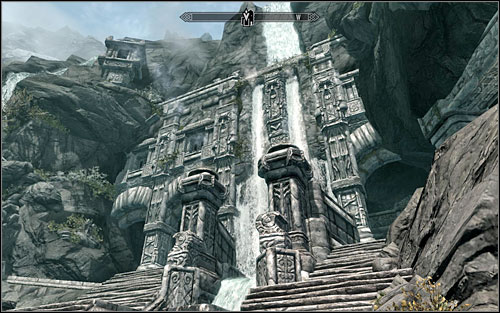
After getting there, head to the Understone Keep (screen above). Unfortunately, after a short conversation with Calcelmo it will become clear that he's not willing to help you. There are three options: you can use Persuasion (if you succeed, you will receive the Dwemer Museum Key), offer a bribe (pointless) or Intimidation (no use in trying as well). Also if your character doesn't have high enough Speech, all those attempts will lead to nothing.

You can have three options: steal the key from Calcelmo (see Obtain the key to Calcelmo's Museum), take it from his desk (screen above), picklock the door or complete the Miscellaneous: Kill Nimhe inside Nchuand-Zel.
New optional objective: Obtain the key to Calcelmo's Museum
If you fail to convince the mage to give you the Dwemer Museum Key and you don't intend to complete a mission for him, you can put trust in your fingers. Robbing Calcelmo isn't easy, though at the same time isn't necessary - the key can also be found on the mage's table and taking it is the easiest solution.

Regardless of which option you take, the door to the Dwemer Museum will now be wide open.
New main objective: Gain entry to Calcelmo's Museum
After approaching the door to the Dwemer Museum, you will be stopped by one of the museum guards. Luckily you don't have to worry about him too much - if you sneak by to the gate and open it, nothing should happen.

The Museum Key can be obtained from Calcelmo, who is at the other end of the corridor (see Speak with Calcelmo). If you don't feel the need of getting inside legally, you can always use lockpicks.
New main objective: Obtain Calcelmo's Falmer Translating Guide
The most interesting part of the mission begins now - if you were unable to convince Calcelmo to you rights with Persuasion, you will have to sneak to the museum and avoid the guards there. If you got the mage's permission, there's no problem - you can freely move through the room. However if you're not in his favour, each time you get caught you will be arrested and punished with a fine.

Even though the museum is protected by only three guards, you shouldn't fight them - it would result in a big prize for your head (3000 gold), one you certainly would rather avoid. Therefore it's much better to just quietly reach the door on the other side of the room. If you have developed Sneak enough and try to stay in shadow, you should be able to do it without any problem.

After getting past the guards you will reach Calcelmo's Laboratory. This area isn't protected by guards, but regular thugs - you won't get a bounty for killing them. Therefore you can either kill everyone in your way, sneak or... explore the room on the left to find the Spider Control Rod and use it to control the Dwemer Spider, who will be more than happy the tear to pieces anyone you tell it to.

Regardless of the method of reaching the Laboratory, you should take a look around the underground - you can find a few interesting items here, in addition to the key to the Laboratory itself (you can steal it from the guards or from the sleeping room). Get ready for a fight after heading to the Laboratory gate - you rather won't be able to avoid the mage and bandit sitting there. After dealing with them, read the book found on the table to increase your Alchemy. Inside the same room, on the pedestal on the left you will find the Dwemer Puzzle Box which will surely interest Delvin Mallory at The Ragged Flagon.

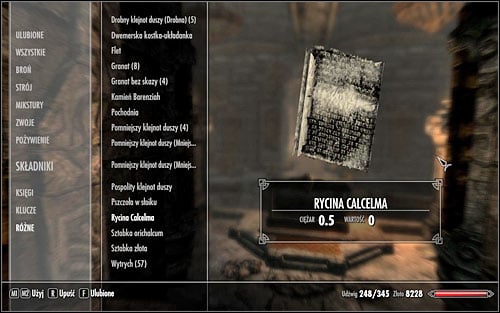
After defeating the guards, enter the balcony and head to Calcelmo's Tower. Inside, go into the corridor on the left and into the mage's room. There, on the desk, you will find the Chimarvamidium, Ancient Tales of the Dwemer Part VI, boosting your Heavy Armor skill. After increasing your knowledge, open the door behind which you will find Calcelmo's Guide. However you're in for a surprise, as the mage's notes don't have the form of a book, but were carved into a stone (screen below).

New main objective: Duplicate the writing on Calcelmo's Stone
Unfortunately, you aren't able to take the whole stone onto your back and use it to translate Gallus's Journal. There is however an easy way of solving this problem - just return to Calcelmo's office and take the Charcoal and the Roll of Paper, thanks to which you will copy the notes.
As you complete your work, a big group of Wizards' Guards will enter the room - fighting them isn't the best idea, so you would do best by avoiding them and running outside.
New main objective: Return to Enthir
After obtaining the needed information, get out of the room in which Calcelmo's Stone was - it might prove rather hard, with the army of guards that just came in. You shouldn't fight them - there's just too many of them and running out of the room isn't all the hard. After reaching the balcony, head right - you should therefore be able to reach a waterfall, using which you can easily get out of the Understone Keep.

After a daring escape, return to Winterhold. Enthir can be found in the basement of The Frozen Hearth tavern, where you will also meet Karliah.
New main objective: Speak to Enthir
Based on the notes, it can be clearly said that Gallus has been doubting Mercer Frey's loyalty for a long time. Moreover, the Thieves Guild Leader is now in even bigger trouble - he has desecrated The Twilight Sepulcher.

The information has clearly shocked Karliah - you should speak to her about your discovery. Meanwhile Enthir will become a Fence at whom you will be able to sell stolen items.
New main objective: Speak to Karliah
Approach Karliah and she will tell you of "The Nightingales" - a secret organization tasked with protecting The Twilight Sepulcher. She, Gallus and Mercer Frey were all members of the organization, though Mercer decided to break the oath given to Nocturnal - the Thieves patron - and desecrate her temple.

Karliah will in gratitude give you the very powerful Nightingale Blade and ask you to meet her at The Ragged Flagon.
Thieves Guild quest unlocked: The Pursuit