
Obtaining the Elder Scroll | Elder Knowledge TES V: Skyrim Guide
Last update: 02 December 2019
This page of the guide to TES V: Skyrim includes the first part of the walkthrough for the journey to obtain the Elder Scroll as part of the main quest Elder Knowledge. This will require you to get to the Alftand ruins to explore them. Numerous monsters will be roaming the location and will have to be defeated before you can freely explore the place.
New main objective: Recover the Elder Scroll
New main objective: Transcribe the Lexicon
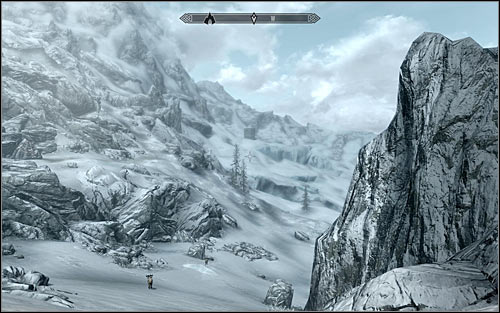
Head out of Septimus Signus's Outpost and open the world map. Your next destination will be Alftand and there's a high probability that you already discovered it. If you can't use fast travel, begin your journey in Winterhold. Leave the city, heading along the main path to the south. Turn west at the first chance. You must of course be very careful throughout the whole trip, as you might come across, inter alia, Horkers and Ice Wolves. You will be able to see your destination from afar (screen above), making it much easier to plan further moves.
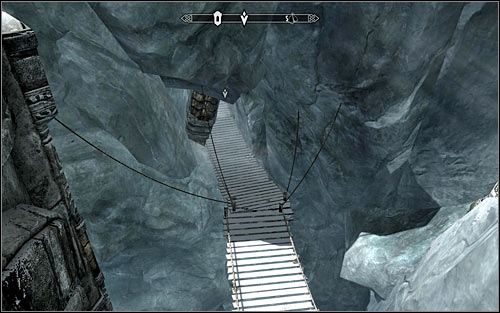
After reaching the destination, you might consider spending some time to examine the ruined buildings, though it's of course completely optional. Your objective is getting through the narrow and treacherous passages and line bridges to reach the Alftand Glacial Ruins entrance (screen above). Save your game and head onwards. In the first phase of the exploration you will mainly walk through linear corridors, so you shouldn't get lost. Ignore J'darr's voice, as you will come across him in a couple minutes.
I'd recommend keeping an eye open, especially for the Dwarven Spiders, as pretty much each of them will hold a soul gem. You will come across the first Dwarven Spider Worker very soon (screen above) and overall you shouldn't have any trouble eliminating him. You should just know that the Spiders can attack you both at close and long range. Continue exploring the ruins and be ready to eliminate two more spiders.

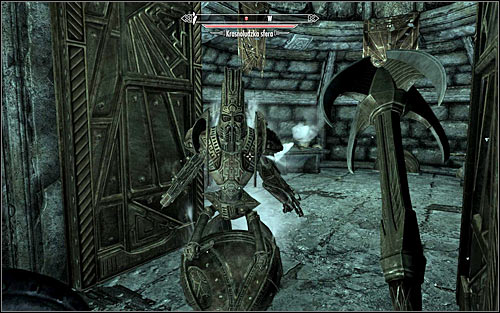
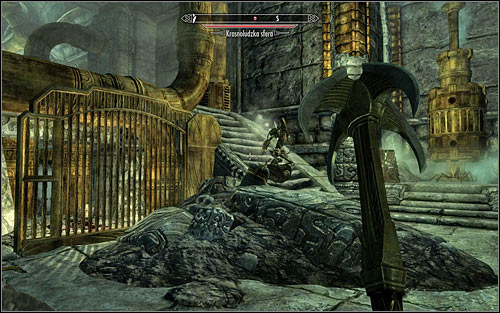
After reaching the northern part of the ruins you will come across J'darr, who will automatically be hostile towards you. After dealing with him, continue exploring the ruins. You will come across a stronger enemy soon enough, in the form of a Dwarven Sphere (screen above). As the machine is capable of dealing considerable damage, you have to be careful if your character has low defence. If you want to try close combat, be sure to avoid the Sphere's stronger attacks. It's a good idea to draw the machine's attention to a party member, so that you're able to plan your attack better. Don't forget to search its remains, as you can find even more valuable treasure than the Spiders left behind.

If you want, you can sacrifice some time to jump between the moving machine elements. You would therefore reach the upper ledge, containing a chest with some precious treasures. Otherwise, choose the northern passage (screen above). Be ready for destroying more Dwarven Spider Workers. On your way you should note a small room in the north with a locked gate. Pick the lock if you only can, as there are some precious artifacts to be found inside.
Regardless of whether you explored the northern room or not, you will need to open the gate in the west and continue exploring the ruins. Be ready to attack the two new Dwarven Spiders patrolling this area. The game will let you hack into the locked western room, but I'd recommend doing it only if you don't mind fighting another Dwarven Sphere (screen above).

Head south, eliminating a Dwarven Spider on your way and afterward go east. Note that you are now above the previously visited room and have to look out for the machinery (screen above), as you can get pushed down and have to go through the same location again. Eliminate two more Dwarven Spiders and reach the gate leading to the Alftand Animonculory.
Head east. On your way you should explore all the nooks and recesses, searching for valuable items and chests which you can picklock. Open the big gate and be ready for a difficult battle. Above all, you will be attacked by another Dwarven Sphere (screen above), so try to maintain any precautions. That's not the only problem however, as soon enough Dwarven Spiders will appear as well. After getting rid of them all, explore the area and go up the stairs onto the upper level.

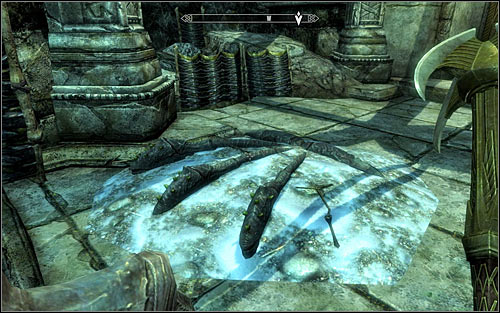
Continue going east and carefully approach the upward ramp (screen above), as touching any of the three pressure plates will activate a hard to avoid trap. Deal with the next Dwarven Spider and use the lever, thanks to which you will be able to enter the large, multilevel room. You can also explore the western corridor (Dwarven Spider and ac chest with precious treasures), or choose the path leading to the lower level.

After reaching the lower level and dealing with a Dwarven Spider, you will need to make a decision. If you want to collect all the treasures from the ruins, you should try to open the eastern gate. Eliminate the Spider and check one of the corners, picking another lock. Inside the new room you should find a few chests with precious artifacts and The Locked Room, boosting your Lockpicking skill. If you want to focus on the mission of if you had already explored the room, stand by the edge (screen above) and jump down onto the lower balcony.

Destroy the Dwarven Spider and head along the ramp onto the lower level. On your way to the next location you will encounter the monsters known as Falmers (screen above) for the first time. You need to be very careful, as they're far more resistant most humanoids that you encountered until now. Falmers can represent one of three professions (warrior, mage and archer), so you will have to modify your tactic depending on which you come across. Don't forget to check their bodies afterwards, as you can find some precious items in most cases. Also note that there's an easy way of eliminating the Falmers in this location, using the Unrelenting Force to knock them back, causing them to die from falling down. Just be sure not to use it on a member of your own party.

Get to the very top and be careful not to touch and line on your way, as it would activate a pretty nasty trap. Your objective is reaching the corridor with the fire trap (screen above). Wait for the trap to switch off and use the Whirlwind Sprint or quickly run to avoid damage. Afterwards you will have to get through multiple room, eliminating groups of Falmers. Remember to make use of the Shouts and attack the monsters one at a time. Also keep an eye on your party member, as he can easily die here. The second room also includes flames, but you can just head back to the previous corridor and don't worry about them.

Choose the south-west corridor and be ready for some more Falmers. Try to eliminate the Falmer Skulker (screen above) as fast as possible, as he can use magic and can deal more damage than the others. Ignore the lever and head south-east, reaching another big gate.
You will once again have to use the ramp, heading onto the lower levels. Apart from Falmers, you will also have to eliminate a Frostbite Spider, but you shouldn't have trouble with it. After getting down, head to the north-east gate. Don't rush it to the exit, as there's yet another trap here (screen above). Disarm or avoid it and only afterwards head to the passage leading to the Alftand Cathedral.
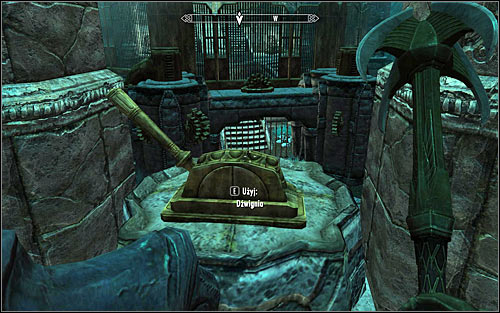
Head east, navigating through another set of pressure plates. You will also have to eliminate a couple more Falmers, with at least one of them capable of using magic. After entering the bigger room, deal with the monsters and use the stairs leading onto the upper balcony. Interact with the lever (screen above), therefore opening the passage in the distance.

Go down and use the new passage, heading south-west. Check the contents of the chests, as there are precious treasures inside and afterwards go up the stairs. Here you will have to battle a Dwarven Centurion (screen above), serving as a mini-boss. If you prefer direct combat, remember to regenerate your health and stamina throughout the battle. If you have a shield, be sure to use it a lot.

If your character uses ranged attacks, you will be able to use a certain trick. Try to return to the lever on the upper balcony that you used recently. Make sure that your party member ran way as well and pull it, thanks to which the Centurion won't be able to get you (screen above). The boss still can attack your with range attacks, but they're far easier to avoid.
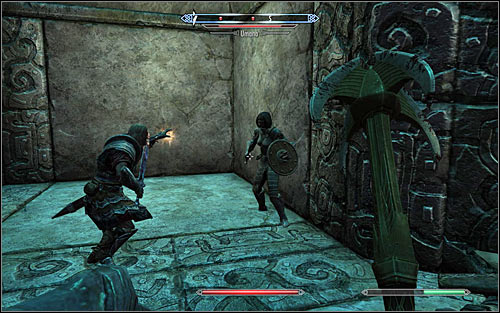
Regardless of the chosen tactic, examine the Centurion's remains after the battle to find the Key to Alftand Lift. Also note that there's a second Centurion lying beside and you should examine him as well. After reaching another room, you will witness a fight between Sulla Trebatius and Umana (screen above). As both characters are really powerful, you should just wait for one of them to die and enter afterwards. Otherwise, both of them would unite against you, making it really hard to survive. Examine their bodies to find multiple items, precious especially for the warrior class.
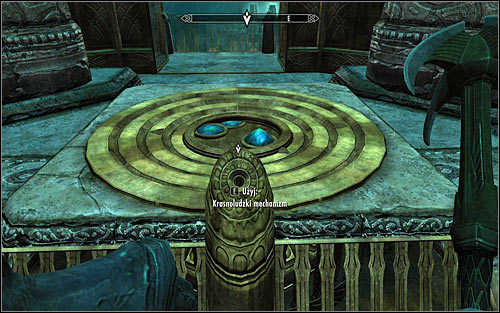
Take a look around the area, finding more locked chests. Afterwards approach the previously ignored construction in the middle of the room. Stand by the dwarven mechanism's console (screen above) and press E to use the Attunement Sphere received from Septimus Signus. Afterwards use the newly unlocked passage, going down the stairs. After reaching the lowest level, open the big gate to reach Blackreach.

It would be good to begin exploring Blackreach by approaching the large ballista south-west of the starting point (screen above). If you fire it fast enough, you can eliminate the Dwarven Sphere in the distance. If course you can try to beat it yourself if you want to gain experience, but take into consideration that the Sphere is much stronger than the ones you came across before.

Reaching the current destination point won't be easy, as Blackreach is just ENORMOUS. OF course nothing stand in the way of exploring it thoroughly, though this guide will focus on obtaining the Elder Scroll. Head west (screen above), more or less towards the waterfall in the distance.

I'd suggest heading towards the green sphere in the distance (screen above), so at first west and afterwards south-west. It's very important to be careful, as whole of Blackreach is swarming with enemies. Most of them will be Falmers and Frostbite Spiders, though you can also come across rather undemanding Chauruses. Don't however approach the clearly stronger enemies, like the Giants, unless you're looking for a challenge.

Go round the green sphere from the north and turn south after reaching the western edge of Blackreach. Keep heading in that direction, towards the very tall tower in the distance (screen above). Approach the door, open it and afterwards use the lever to get to the Tower of Mzark.

Thoroughly explore the first room of the Tower, as there are multiple precious artifacts hidden there. Afterwards head south-west, open the gate and turn left. Use the ramp to reach the top level of the construction. Start off by approaching the Lexicon Receptacle (screen above) and press E to put the Blank Lexicon received from Septimus Signus onto it.
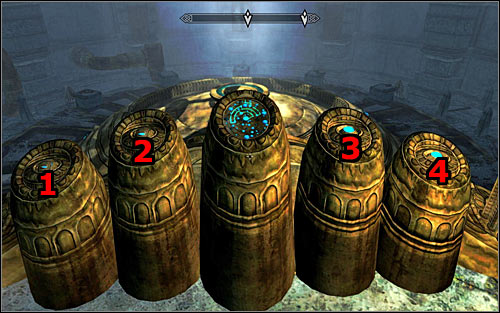
Now stand directly in front of the middle console (screen above) and be ready for a puzzle that will lead to the unveiling of the Elder Scroll and transcribing it onto the lexicon. You need to:
1) Approach button 3 and press it four times. Doing so should activate the Receptacle and button 2.
2) Approach button 2 and press it twice. Doing so should activate button 1.
3) Approach button 1 and press it once. Wait for the Elder Scroll to be unveiled.

Before you head for the Scroll, approach the Receptacle and pick up the "charged" Lexicon. You don't need to give the Lexicon to Septimus at once, as it's only connected with the previously mentioned Daedric quest, though it's good to have it with you. The most important is to approach the mechanism in the middle (screen above) and take the Elder Scroll.
Main quest unlocked: Alduin's Bane