Movement around the battlefield and succession of moves | Combat The Banner Saga 2 Guide
Last update: 11 May 2016
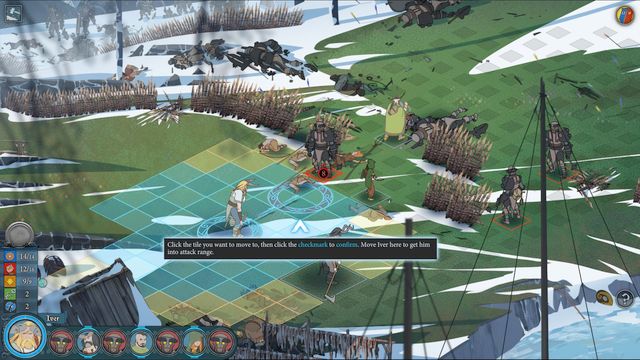
During the first battle, the game explains how to move around the active character. Blue fields represent the standard range of the active unit. This means that you do not use up any resources to cover the distance marked with blue squares. The yellow fields represent the extended range of the character where you use up willpower points. Therefore, whenever you move to one of the yellow-colored fields, keep in mind that you are using up your willpower that could be used for a better end. Such a better end is dealing additional damage that decides the battle. Of course, there are exceptions that you should keep in mind. In a situation, in which there is only one field between you and an opponent with a low number of health points you can move to a yellow field to kill him
While deploying your characters, consider which position a given character will prove best. For example, you may have a spearman that is better at a longer range. This means that it is best to deploy such a character on, or two, fields in front of the opponent and still have the opportunity to attack. It is even more forbearing if you have an archer. On a good position (e.g. behind the backs of giant warriors or behind barricades) he can remain there throughout the entire battle, have many opportunities to deal damage and remain out of reach of melee opponents.
During combat, you will notice that Varls take up as many as four active fields. This is both upside and downside, which you will quickly learn about. The upside is that they block a greater number of fields from opponents that would want to get to the archer in the back line. The downside is that you need to plan carefully on the route to the enemies. It may turn out that one of your characters has blocked the access and the other character cannot make it through. Therefore, leave two unoccupied fields next to the charging character to prevent other characters from standing next to him.
Key issues to remember about movement in the battlefield:
- Blue fields represent standard movement available to each unit.
- Yellow fields represent extended movement that you need to pay for in willpower.
- While planning on your moves, keep the character's range in mind. Spearmen can attack opponents at a longer range than melee characters.
- Try to deploy your archers outside of the opponents' range, preferably behind the backs of heavily-armored characters. Thanks to this, not only can you attack opponents at long range but you also avoid taking damage.
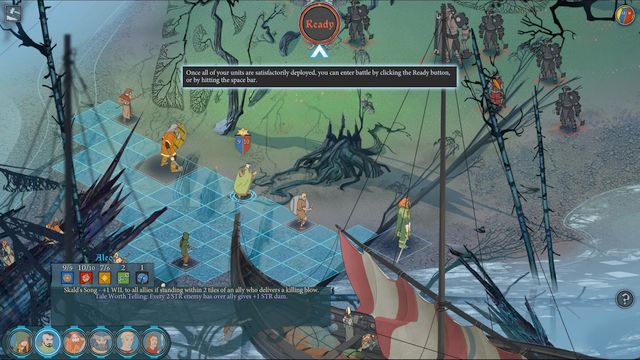
Before the battle begins, you will be allowed to re-position your units. It is a good idea to do this on a regular basis. Default deployment is usually faulty in that it exposes archers or deploys them in the first line of fire. You only have to click on a given character and place him on a blue field. Try to deploy giants and heavily-armored/fighter heroes in the first line. The important thing here is also succession of actions. Do not pick a character behind the backs of other heroes, in the first place, because you will only waste a move.
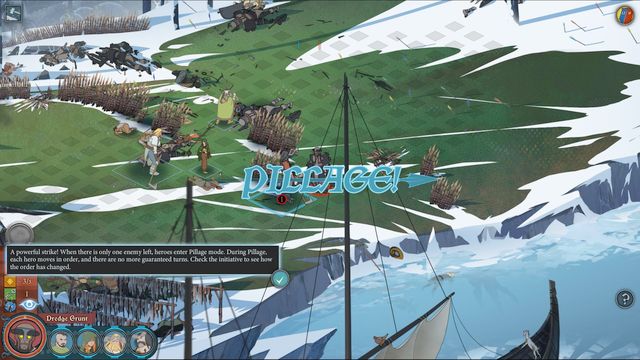
During the tutorial, you learn that you take your turns alternatively with the opponent. When there is still a greater number of characters in the battlefield, it does not matter who is fighting whom. Problems arise when there are only two opponents left in the battlefield. The game automatically assigns moves basing on the "player- computer" rule. Therefore, if you have four heroes against two opponents, the opponents will make their move two times before the turn is out. For this reason, it is better to kill the stronger opponents at the beginning of the battle. Otherwise, such an opponent will make two moves before your hero will be able to react.
After each battle, consider if you liked the movement queue in that battle. If, for example, this made you waste a character's move, consider sending the character to the end of the queue. It is a good idea to set Varls to the very beginning, because they can attack straight away, and to set archers to the end of the queue. Thanks to this, archers will remain behind the backs of the stronger heroes, who will attract the attention of the enemies. Also, they will not have to make any move to attack a given target.