Stray: The Flat, Chapter 3 - walkthrough
The Flat is the title of stage 3 of the Stray game. The walkthrough from our guide will help you pass the puzzles - launching the B-12 drone and getting out of the apartment after finding the combination to the door.
The third chapter of Stray is entitled The Flat and is set precisely in a residential block. Our guide contains a description of the passage of this stage, in which we discussed, among other things, the exploration of the apartment, finding and activating B-12, getting out of the apartment after finding the combination to the door, and reaching a safe zone in the slums.
Examine the apartment and starting B-12
You can explore the apartment (including the opportunity to scratch up the carpet and turn on the radio) or get right down to the mandatory activities.

Go to a computer with a large screen displaying a message asking for help.

Jump up on the desk and start running on the keyboard. You will send random strings of characters, but it will be enough to "establish communication". You will learn that you need to obtain a body for download (Body Required for Download message). An adjacent room will unlock.

In the new room, you need to find 4 power sources - these are small boxes that the cat can grab in its mouth and carry. You can reach them in any order.
The first object is at the top of one of the cabinets. First, jump on the chair and make a second jump up from it.

The second object is on the central desk and is used to power one of the computers. You can easily remove it from the slot.


The third object requires two steps. You must first pull the lever (picture 1). This will cause the machine to move to the left. Use it to climb up and reach the ledge with the power source (picture 2).

The fourth object is in the slot of the machine that you moved to obtain the third power source. Take it out of the slot.

Each power source must be placed in one of the available bottom slots - they are located under the wide device (picture above).

Delivering 4 items will unlock another room. You have to start climbing here near the inactive robot. Thanks to them, you will reach the top left shelves. There is a box that needs to be thrown down.


An inactive drone will fall out of the box. Grab it with the mouth and return to the room. You must place the drone in the device, which the arrows on the monitor screens indicate.
From the cut-scene, you will learn about the correct download of awareness and the activation of the B-12, which will be your companion for most of the game.
Getting out of the apartment
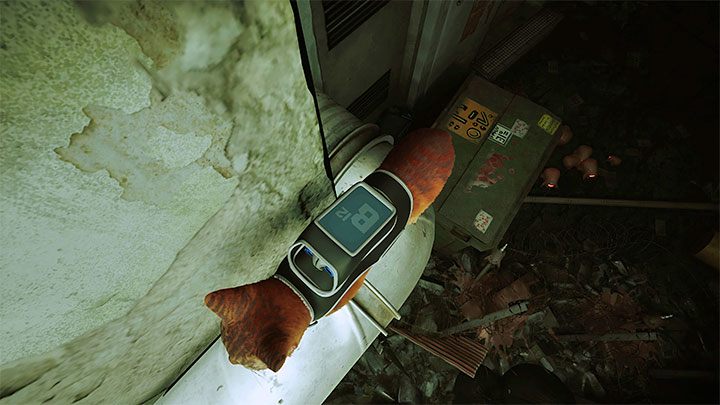
Go to the hanging keys - you can ask B-12 to take them.

You will unlock the backpack where digitized versions of the items and B-12 memories will be stored. Your cat will initially try to throw off the backpack, but after a short while he will get used to it and it will be a permanent fixture (for the time you travel together with B-12).
From then on, there will be new interactions with the environment. Among other things, you can optionally examine plaques and documents and chat with machines, asking B-12 to translate. Icons on the backpack screen inform about possible actions.

Reach the lock at the exit from the apartment. Activate the interaction. You must select keys from the inventory - pressing the top direction on the pad (PS4/PS5) activates the inventory preview. Select the item you have in it and choose to use it (Square).

You will find yourself in a dark corridor and you can optionally turn on the flashlight (the left direction on the D-pad PS4 / PS5).
You will come across a second locked door with an electronic lock. They require a four-digit combination to be entered.

Explore the first room on the right. You have to jump onto the ledge on the left with the board next to it.
Push the can covering the lower right corner of the board. This will reveal the combination for the door - 3748.

Return to the main corridor and reach the interactive numeric keypad (Digicode). Press the interaction button to send B-12 there.
You must enter the correct code 3748. You can now approach the door and push it open to go outside.
Reaching the safe zone

You will find a bucket, which allows a long descent. Jump into it and wait until you reach your destination.
In the new alley, you will automatically unlock the first memory of B-12. This is one of the game's categories of collectibles, which we described in the Secrets and collectibles chapter. You will unlock 5 memories automatically as you go through the game, and another 22 you must find on your own.
Resume the linear journey - find new interactive shelves to make jumps. You have to reach the second bucket and start another run.
A new chase including Zurks will begin. As before - you need to stay on the move and drop the Zurks off you (Circle on the PS4/PS5 pad). You can end the chase by jumping onto a container and from it onto a pipe. Zurks will not be able to get there. Soon you will reach the slums and Chapter 4 will begin.

You are not permitted to copy any image, text or info from this page. This site is not associated with and/or endorsed by the Annapurna Interactive or Blue Twelve Studio. All logos and images are copyrighted by their respective owners.
Copyright © 2000 - 2025 Webedia Polska SA for gamepressure.com, unofficial game guides, walkthroughs, secrets, game tips, maps & strategies for top games.