Guides & Walkthroughs New Guides Popular RPG Action Strategy Adventure YouTube Guides Mobile App
Free iOS App iPhone & Ipad
Download Game Guide PDF, ePUB & iBooks

The Amazing Spider-Man 2 Game Guide & Walkthrough by gamepressure.com

The Amazing Spider-Man 2 Game Guide & Walkthrough

Table of Contents

Raid on OSCORP | Walkthrough The Amazing Spider-Man 2 Guide

Last update: 11 May 2016

Level 1 - The building entrance

The rooftop on the OSCROP HQ - Raid on OSCORP - Walkthrough - The Amazing Spider-Man 2 - Game Guide and Walkthrough
The rooftop on the OSCROP HQ

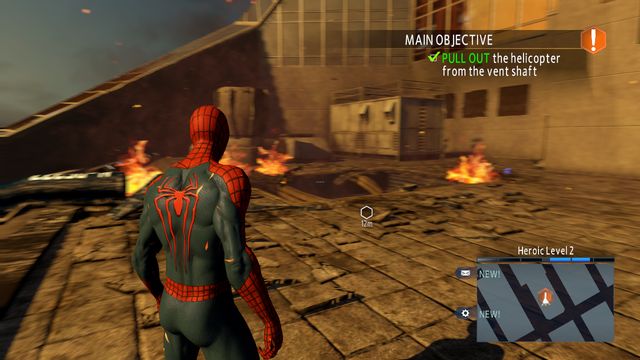
Reach the rooftop of the OSCORP HQ, where you will have to deal with four armed opponents. Then, using the web, get rid of the helicopter and enter the building, through the opening.

Rappel, using the web - Raid on OSCORP - Walkthrough - The Amazing Spider-Man 2 - Game Guide and Walkthrough
Rappel, using the web

Then, rappel using the web. Once you reach the very bottom, go right.

Upgrade crate #1 - Raid on OSCORP - Walkthrough - The Amazing Spider-Man 2 - Game Guide and Walkthrough
Upgrade crate #1

On the right, on the pipe, you will notice an upgrade crate, next to the wall.

Perform a takedown - Raid on OSCORP - Walkthrough - The Amazing Spider-Man 2 - Game Guide and Walkthrough
Perform a takedown

Climb up the wall. At the edge, you will notice a guard. Take him out silently, using the web.

You can stop the fan with the web - Raid on OSCORP - Walkthrough - The Amazing Spider-Man 2 - Game Guide and Walkthrough
You can stop the fan with the web

To proceed, you need to stop the fan. You can do that by using the Web-Shoot several times.

Upgrade crate #2 - Raid on OSCORP - Walkthrough - The Amazing Spider-Man 2 - Game Guide and Walkthrough
Upgrade crate #2

The second upgrade crate is to the left of the hole in the middle.

Upgrade crate #3 - Raid on OSCORP - Walkthrough - The Amazing Spider-Man 2 - Game Guide and Walkthrough
Upgrade crate #3

You can collect another crate, after you climb down the hole at the wall, at the end of the corridor.

Get rid of the opponent, from above - Raid on OSCORP - Walkthrough - The Amazing Spider-Man 2 - Game Guide and Walkthrough
Get rid of the opponent, from above

In the next room, eliminate five opponents, while moving along the pipe, for the whole time. First, get towards the windows and wait for the guard to walk over to the right. Then, pull him up with the web. Than, deal with the one in the doorway.

Get over onto the pipes at the other side of the wall - Raid on OSCORP - Walkthrough - The Amazing Spider-Man 2 - Game Guide and Walkthrough
Get over onto the pipes at the other side of the wall

The guard watching the hostages will approach you- deal with him then. After that, jump over onto the pipes behind the wall, across the hole in the structure. This way, get rid of the opponent at the terminals. The last guard is at the end of the corridor opposite.

Upgrade crate #4 - Raid on OSCORP - Walkthrough - The Amazing Spider-Man 2 - Game Guide and Walkthrough
Upgrade crate #4

After you have cleared the room, you can collect the upgrade crate at the windows, on the left side of the corridor.

Audiolog #2 - Raid on OSCORP - Walkthrough - The Amazing Spider-Man 2 - Game Guide and Walkthrough
Audiolog #2

On the right, in the corner, there is audiolog #2.

Jamesons Photo #1 - Raid on OSCORP - Walkthrough - The Amazing Spider-Man 2 - Game Guide and Walkthrough
Jameson's Photo #1

The first photo of the Jameson's Photos is the silver wings, behind the glass pane, opposite the fan. You need to use the camera to unlock this collectible.

Audiolog #3 - Raid on OSCORP - Walkthrough - The Amazing Spider-Man 2 - Game Guide and Walkthrough
Audiolog #3

Audiolog #3 is on the desk, next to the hostages. You can now free the prisoner separated from the rest - Max, who will open the elevator door for you.

Level 2 - The Reactor

Upgrade crate #1 - Raid on OSCORP - Walkthrough - The Amazing Spider-Man 2 - Game Guide and Walkthrough
Upgrade crate #1

In the second stage of the mission, you need to take the elevator to the bottom, climb back up the elevator shaft - on the very top, there is an upgrade crate.

Upgrade crate #2 - Raid on OSCORP - Walkthrough - The Amazing Spider-Man 2 - Game Guide and Walkthrough
Upgrade crate #2

The second upgrade crate is on one of the even taller reactor structures, to the left of the elevator.

Shoot the poles down with the web - Raid on OSCORP - Walkthrough - The Amazing Spider-Man 2 - Game Guide and Walkthrough
Shoot the poles down with the web

First of all, you need to shoot down the catches of the three structures marked in the room. Once you do that, there will arrive two groups of opponents, which are fighting each other. If you move higher than them, you will get the opportunity to take them down, without being spotted.

Mark the devices - Raid on OSCORP - Walkthrough - The Amazing Spider-Man 2 - Game Guide and Walkthrough
Mark the devices

Now, you need to mark the four marked OSCORP devices.

Upgrade crate #3 - Raid on OSCORP - Walkthrough - The Amazing Spider-Man 2 - Game Guide and Walkthrough
Upgrade crate #3

The third crate is at the second level, to the right of the elevator door, at the wall.

Upgrade crate #4 and audiolog #4 - Raid on OSCORP - Walkthrough - The Amazing Spider-Man 2 - Game Guide and Walkthrough
Upgrade crate #4 and audiolog #4

At the lowest level, you will notice two fans, on the left and on the right. Behind the one on the right, there is audiolog #4 and upgrade crate #4 above it.

Upgrade crate #5 - Raid on OSCORP - Walkthrough - The Amazing Spider-Man 2 - Game Guide and Walkthrough
Upgrade crate #5

Behind the one on the left, there is another upgrade crate #5.

Upgrade crate #6 - Raid on OSCORP - Walkthrough - The Amazing Spider-Man 2 - Game Guide and Walkthrough
Upgrade crate #6

The last, sixth, crate on this level is on the left side of the room, above the OSCORP device that you need to disable.

Jamesons Photo #2 - Raid on OSCORP - Walkthrough - The Amazing Spider-Man 2 - Game Guide and Walkthrough
Jameson's Photo #2

ON level three, on the right, you will notice tentacles with pincers. Stand in front of these and take another photo for the collection.

Boss - Shocker

Shocker - Raid on OSCORP - Walkthrough - The Amazing Spider-Man 2 - Game Guide and Walkthrough
Shocker

The first boss that you are going to fight is the Shocker. He lands three types of attacks: a melee attack, a shockwave and a small AoE wave, over the ground - you then need to move away from the opponent. The key here is dodging and launching quick counters. After you dash away from the opponent, you can dash towards him or pull him with the web, before he lands another attack.

Keep destroying the structures that appear - Raid on OSCORP - Walkthrough - The Amazing Spider-Man 2 - Game Guide and Walkthrough
Keep destroying the structures that appear

After Shocker's health drops to a half of the initial level, there start poles to appear. Once the boss jumps onto them, use the web to hide them back under the ground. The knocked-down opponent is an easy target now.

The final blow - Raid on OSCORP - Walkthrough - The Amazing Spider-Man 2 - Game Guide and Walkthrough
The final blow

At the moment at which Shocker's health drops to zero, you will have to tap the attack key, for three times, at the appropriate moment. After that, the fight ends.

Seismic Blast - Raid on OSCORP - Walkthrough - The Amazing Spider-Man 2 - Game Guide and Walkthrough
Seismic Blast

After the fight, you will gain a new skill, which is the Seismic Blast. It works like Shocker's blast wave.

See/Add Comments

You are not permitted to copy any image, text or info from this page.

This site is not associated with and/or endorsed by the Activision Blizzard or Beenox Inc.. All logos and images are copyrighted by their respective owners.

Copyright © 2000 - 2024 GRY-Online S.A. for gamepressure.com, unofficial game guides, walkthroughs, secrets, game tips, maps & strategies for top games.