
Sherlock Holmes The Awakened: Port of London Sherlock Holmes The Awakened walkthrough
In this guide to the 2nd chapter of Sherlock Holmes The Awakened you will find a walkthrough of the Port of London Port of London. We explain how to find Roy Solsby, how to get to the warehouse and how to solve the puzzles in the Mind Palace.
Last update: 14 April 2023
Chapter 2 in Sherlock Holmes The Awakened Remake begins with the search for Roy Solsby in the Port of London. Our walkthrough will help you in your further search for Kimihia, the confrontation with the barmaid and Roy. We explain how to get to the warehouse and private room in The Cursed Mermaid and how to solve the puzzles in the Mind Palace. On the map, we marked the foreigner's house and Pier Three.
- How to find clues in the Port of London?
- Character Portrait: Barmaid
- How to find the home of Daya the foreigner?
- How to find Roy Solsby?
- Providing evidence to Roy Solsby
- Providing evidence to the barmaid
- Solving the first puzzle in the Mind Palace
- Confrontation with Roy Solsby
- Confrontation with the barmaid
- A private room at The Cursed Mermaid
- How to get to the warehouse in Chapter 2?
- How to get to the warehouse's undergrounds in Chapter 2?
How to find clues in the Port of London?

Pin the Solsby's calling card clue and talk to the first person you meet at The Cursed Mermaid bar. You will learn that Solsby is usually seen at the docks.

Enter The Cursed Mermaid and read the notes on the wall. One of the flyers will have information about a missing boy named Girvesh.
Approach the barmaid and ask her about Roy Solsby. Observe of the barmaid.
Character Portrait: Barmaid

While observing the barmaid, examine:
- face,
- stains on the right side of the vest,
- abdomen,
- hips.
Choose the character portrait and continue the conversation with the barmaid. After selecting all the dialogue options, end the conversation. You don't have enough evidence for the barmaid.
How to find the home of Daya the foreigner?


Leave the pub and walk toward the Shanty Town. You will recognize the foreigner's house by the red rag hanging over the bridge.
On the way to Daya's house, continue to question the people you meet about Roy Solsby.

Enter the house and talk to the Nepali boy. On the altar examine:
- photo of Girvesh,
- tin medallion.
Leave the house and walk toward the docks.
How to find Roy Solsby?
To find Roy Solsby you need to get 2 clues. You should get your first information from the first person you talked to at The Cursed Mermaid pub. Walk towards the docks and question every person you meet. Don't forget to keep the evidence about Roy pinned at all times.
The people from whom you receive information will be random. You have to question a certain number of people to find out the whereabouts of Roy Solsby.

Once you talked with enough people, you will find out that Roy is standing by a dilapidated ship at Pier Three.

Talk to Roy and ask about all the details of the investigation. While observing Roy, investigate:
- hat,
- left hand,
- pocket watch,
- right shoulder.
Providing evidence to Roy Solsby

Once Roy Solsby's profile is established, provide him with evidence:
- Solsby's calling card,
- Nepali boy's testimony.
Providing evidence to the barmaid

Go back to the barmaid and ask her if she knows anyone with a metallic eye. Then provide her with evidence:
- Missing person poster,
- Solsby's calling card.
Solving the first puzzle in the Mind Palace

After questioning Roy and the barmaid, you will get all the clues to solve the first puzzle in the Mind Palace. When asking Who abducted Kimihia? choose the evidence:
- Character Portrait: Roy Solsby,
- Roy Solsby's testimony,
- Barmaid's testimony,
- Nepali boy's testimony.
Confrontation with Roy Solsby
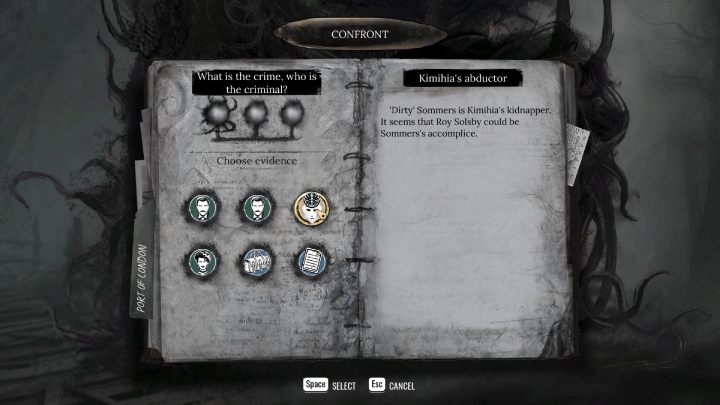
When you solve the first puzzle in the Mind Palace, return to Roy and select the Confrontation dialog option. Present the following evidence:
- (1) Kimihia's abductor,
- (2) Solsby's calling card,
- (3) Character Portrait: Roy Solsby.
During the confrontation, you must present the evidence in the correct order. Don't worry if you marked the wrong proof. The confrontation can be repeated as many times as you want.
Confrontation with the barmaid

After talking with Roy, the evidence in the Kimihia's abduction case will be updated. Return to the barmaid and during the confrontation provide her with evidence in the following order:
- (1) Kimihia's abductor,
- (2) Roy Solsby's testimony,
- (3) Character Portrait: Barmaid.
A private room at The Cursed Mermaid
When you confront the barmaid and present her evidence in the right order, she will give you a key to a private room in the pub. The door to the room is located by the bulletin board.


Approach the table in the private room at the back of the pub and examine:
- coins,
- note under the plate,
- text on the board,
- activate concentration mode abd examine the symbols on the table.
How to get to the warehouse in Chapter 2?

After collecting all the evidence in the Port of London and talking to the suspects, you will be able to solve the next puzzle in the Mind Palace. Where is Kimihia? select these clues:
- Hiring notice,
- Roy Solsby's testimony,
- Invoice for sailcloth.


Head to the warehouses in the northeastern part of the port. Find warehouse No. 12 marked with red paint.

Pin the Kimihia's whereabouts proof and open the lock of the warehouse door.
How to get to the warehouse's undergrounds in Chapter 2?
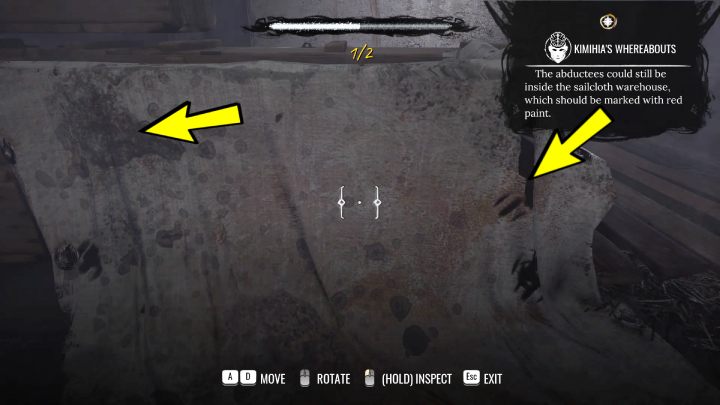
After entering the warehouse, approach the canvas by the window and examine:
- a stain on the left side,
- a tear on the right side.

At the window examine:
- activate concentration mode and examine mud marks on the wall,
- a tool lying on the ground,
- scratch marks at the window.

Go up the stairs and examine the mechanism on the left:
- gear,
- space for a crank.

You will find the crank in one of the wooden boxes at the bottom of the warehouse. Activate the mechanism to reveal a secret entrance to the underground.