
Nameless Isle puzzle | Puzzles and secrets Divinity Original Sin 2 Guide, walkthrough
Last update: 13 October 2017
In this chapter you will find solution to all key puzzles that can be encountered while traveling through the Nameless Isle.
- Removing the illusory wall in the cave
- Lunar Shrine
- Blocked door in the Academy
- The barrier in the Academy
- Impish Pocket Realm / Xantezza's Pocket Plane
Removing the illusory wall in the cave

When entering one of a few caves on Nameless Isle, you will encounter a wall that blocks progress. Interactions with the nearby altar won't help. The wall is an illusion and you can use two methods to remove it. You can place Alexandar's head on the altar or you can use Cowl of True Sight that can be received from Alexandar. There is the Dispel Illusion enchanted in the helmet and it will remove the illusory wall.
You will get the head if - during the quest "The Sallow Man" - you decide to kill Alexandar. The helmet can be obtained during the quest "An Unlikely Patron", if you decide to help Alexandar and kill Sallow Man. It is worth adding that both quests exclude each other - you can't complete both.
Lunar Shrine
In the central point of Nameless Isle you will find an object called the Lunar Shrine. In the center of it there is an unusual pillar and around it there are small altars for all races of the game's world. Your task is to set the symbols above the altars in a correct way. To do it, first you must discover which race favors moon symbols and which favors sun - you can do it by exploring the island and completing quests or by completing the quest An Unlikely Patron.

The correct position of the symbols is as follows:
- Imp - arrow icon;
- Elf - arrow icon;
- Orc - sun icon;
- Human - sun icon;
- Wizard - arrow icon;
- Dwarf - arrow icon;
- Lizard - sun icon.
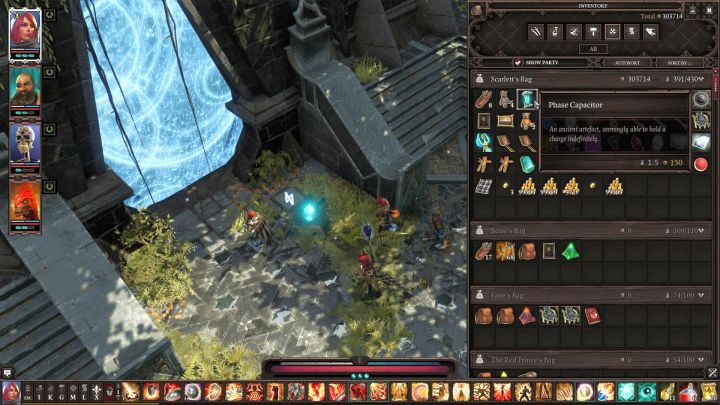
Then you must walk towards the gate protected with a barrier and place the Phase Capacitor on the button with a lightning icon. You can get a few Phase Capacitors while exploring the map and completing quests. Then you must pull the lever. The barrier will disappear and you will be able to enter a new location - the Academy.
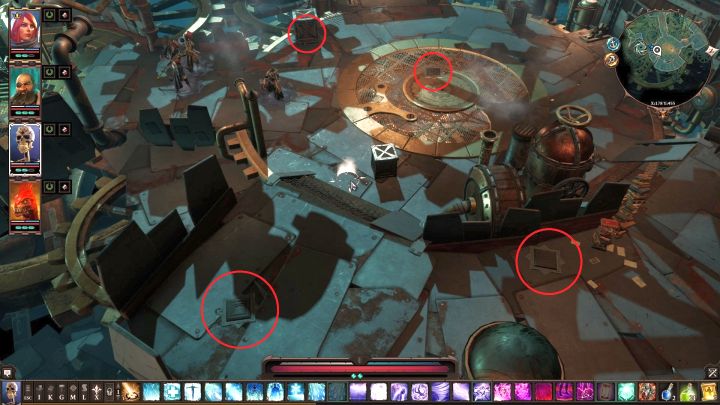
Blocked door in the Academy
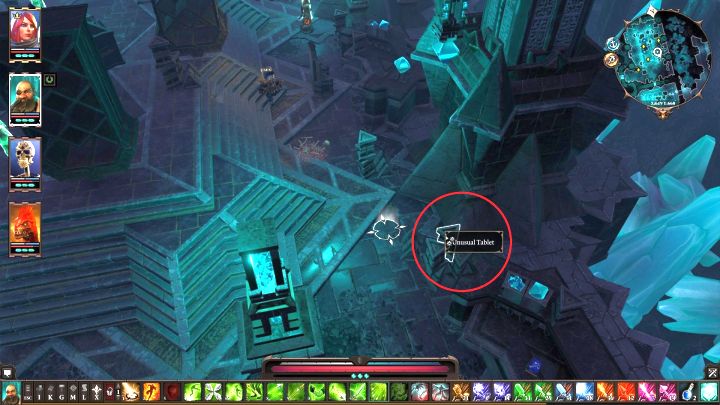
During the final phase of your visit in Nameless Isle you will enter the Academy. The door to one of the rooms in the northeastern part will be closed. In order to open it you should separate all of your party members and then send them to the following places (marked on the above pictures):
- Set one character on the button in the central part of the room;
- Send the second character to switch the button in the eastern part of the room;
- Send the third one to interact with the object called Unusual Tablet;
- Send the fourth character to pull the lever near the door that leads north - remember to pull the lever on the right side!
Once all is done, the door will open and you will be able to walk inside.
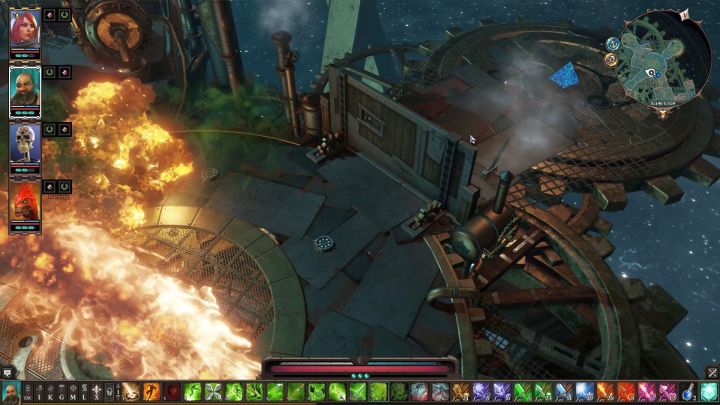
The barrier in the Academy
Once you reach the Academy, you will notice that the path to the quest objective is blocked by a force field. You will find three buttons-icons with a lightning drawing near the barrier. You must deliver electricity to these places. There are two ways to do it. First one, much less time consuming, is casting Rain spell on the lightning icons and then hitting them with Aerotheurge spell that causes Air damage. If you're not fast enough to activate all of them, cast Rain and repeat the attempt until all three objects are electrified.
The second way requires you to visit all rooms in the Academy and collect 3 pieces of Phase Capacitors. Once you do it, go to the room that looks like a banquet room. There, on the ground, you will see a lightning symbol (its location is shown on the above picture). Throw one of the found items on it and wait for a reaction. Now you must follow the energy beam and move the objects called Eternal Reflectors in such a way that they no longer block the beam. Instead they must send it further. You can't fail this action, simply move the object a few times and the beam will go on. Repeat the process until the beam reaches a barrier. Then throw two remaining Phase Capacitors on the lightning symbols on the ground near the barrier. Once you do it, you will be able to move further.
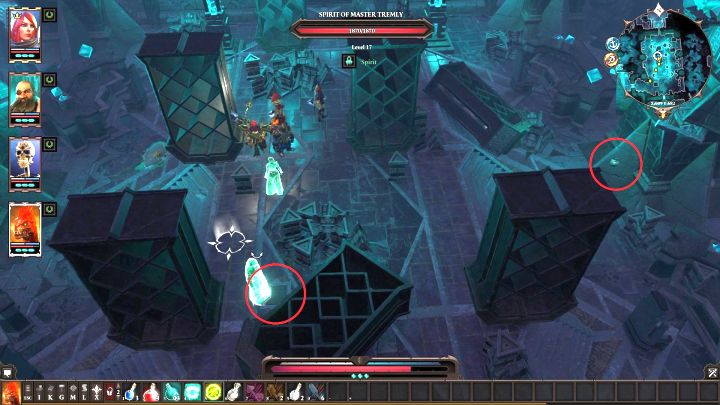
Impish Pocket Realm / Xantezza's Pocket Plane
![During the conversation you should select the option [MYSTIC]. - Nameless Isle puzzle | Puzzles and secrets - Puzzles and secrets - Divinity Original Sin 2 Guide](/originalsinii/gfx/word/82234632.jpg)
To the west from The Lunar Gate teleportation shrine there are a few wolves guarding an item called Large Ruby. Defeat the wolves and start the conversation with the rock as a character with Mystic tag (for example, The Red Prince or Fane). During the conversation you should select the dialogue option with [MYSTIC] twice. This will teleport the whole party to an alternative dimension. If you select a different dialogue line, the chance to enter the realm will be lost - you have only one chance!
Ignore the slowdown cast on the party and find all Heavy Metal Crates in the area. You need 4 to activate 4 switches. Position the chests on the switches and soon a gate to the north will open.
Keep going to north / northwest while avoiding the buttons on the ground until you reach a room with a giant crystal. Around the crystal there are traps - you can disarm or ignore them. Go north from the crystal, open the door with lock pick and in the new room turn the valve called HYPERDRIVE PROTOCOL. This will cast a Hasted spell on your team.
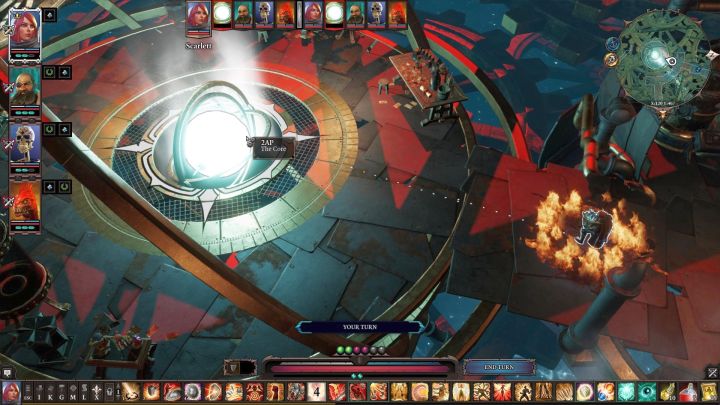
Go to the door on the opposite side, south from the crystal. Once you get through it, an unusual battle will start. Your objective is not to defeat the enemy, but to reach the core and interact with it. You have only one turn to do it - if you fail, all party members will die. To reach the core you should use one of the teleport or dash skills (like Phoenix Dive, Cloak & Dagger, Spread Your Wings) - a single character reaching the objective will be enough. Once all is done, a conversation will start and then you will be able to select a reward for completing the quest. Now you can freely explore the area and gather items from the ground.