Guides & Walkthroughs New Guides Popular RPG Action Strategy Adventure YouTube Guides Mobile App
Free iOS App iPhone & Ipad
Download Game Guide PDF, ePUB & iBooks

LEGO Star Wars II: The Original Trilogy Game Guide by gamepressure.com

LEGO Star Wars II: The Original Trilogy Game Guide

Table of Contents

Rescue the Princess | Freeplay Mode - Episode IV LEGO Star Wars 2 Guide

Last update: 11 May 2016

True Jedi Story - 60 000. It's one of the harder levels when it comes to Story Mode True Jedi. The most important stud source is the minigame that has you shooting TIE Fighters while manning a Death Star turret. In order to get to it, you have to enter one of the elevators that the stormies are using at the very end of the levels (near the cells).

Another good thing to find is a Double Score Zone that you access using the elevator near the one that takes you to the prison cells. You must have a stormie helmet to have it.

Don't miss a large amount of studs in the room where you start the level - you can smash almost everything in there. Also, keep destroying all the pipes and machines in every corridor.

True Jedi Freeplay - 85 000. This time it's easier. Just remember that sometimes you can choose between two different paths and it's good to go back and go through the second one to get the studs.

Power Brick. When you leave the cut-scene room, follow the same path that you did in the Story Mode and you'll see an R2 door. Behind it, hover to the left platform and grapple up for the brick.

Minikit - Rescue the Princess - Freeplay Mode - Episode IV - LEGO Star Wars II: The Original Trilogy - Game Guide and Walkthrough

Minikit

#1

When you leave the first room, take the first right and you'll see a crane - Rescue the Princess - Freeplay Mode - Episode IV - LEGO Star Wars II: The Original Trilogy - Game Guide and Walkthrough

When you leave the first room, take the first right and you'll see a crane. In this minigame your goal is to drop 10 stormies into the hole in the middle. When you do this, grab the minikit with the crane.

#2

Before you use the main computer as R2, look around the room to find a 3PO panel - use it - Rescue the Princess - Freeplay Mode - Episode IV - LEGO Star Wars II: The Original Trilogy - Game Guide and Walkthrough

Before you use the main computer as R2, look around the room to find a 3PO panel - use it.

#3

As R2 hover across the abyss just after the main computer room, then turn left - Rescue the Princess - Freeplay Mode - Episode IV - LEGO Star Wars II: The Original Trilogy - Game Guide and Walkthrough

As R2 hover across the abyss just after the main computer room, then turn left.

#4

Near where you found #3, hover to the right as R2 and then switch to a small character to use the tunnel - Rescue the Princess - Freeplay Mode - Episode IV - LEGO Star Wars II: The Original Trilogy - Game Guide and Walkthrough

Near where you found #3, hover to the right as R2 and then switch to a small character to use the tunnel.

#5

Following the path from #3 and #4, turn off Death Star's shield (the thing Ben did in the background in Story Mode) using the three levers near the generator - Rescue the Princess - Freeplay Mode - Episode IV - LEGO Star Wars II: The Original Trilogy - Game Guide and Walkthrough

Following the path from #3 and #4, turn off Death Star's shield (the thing Ben did in the background in Story Mode) using the three levers near the generator. A minikit will appear, you'll reach it using your grapple hook.

#6

Still following the same path as before, use the Force on the grid shown on the screenshot - Rescue the Princess - Freeplay Mode - Episode IV - LEGO Star Wars II: The Original Trilogy - Game Guide and Walkthrough

Still following the same path as before, use the Force on the grid shown on the screenshot. It will form stairs that you can use to reach another minikit.

#7

In the area shown on the screenshot hover to the right as R2 - Rescue the Princess - Freeplay Mode - Episode IV - LEGO Star Wars II: The Original Trilogy - Game Guide and Walkthrough

In the area shown on the screenshot hover to the right as R2.

#8

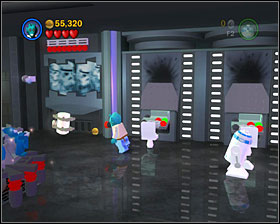
In the room shown on the screenshot destroy all the computers - Rescue the Princess - Freeplay Mode - Episode IV - LEGO Star Wars II: The Original Trilogy - Game Guide and Walkthrough

In the room shown on the screenshot destroy all the computers.

#9

Just before you enter the elevator to reach the prison, use the Force on the crates so you can jump on the shelf shown on the screenshot - Rescue the Princess - Freeplay Mode - Episode IV - LEGO Star Wars II: The Original Trilogy - Game Guide and Walkthrough

Just before you enter the elevator to reach the prison, use the Force on the crates so you can jump on the shelf shown on the screenshot. Push the device to the right, and it will blow up the shield that kept you off the minikit.

#10

At the end of the level there's a door that can be opened by R2 - Rescue the Princess - Freeplay Mode - Episode IV - LEGO Star Wars II: The Original Trilogy - Game Guide and Walkthrough

At the end of the level there's a door that can be opened by R2. Behind it there's a minikit.


See/Add Comments

You are not permitted to copy any image, text or info from this page.

This site is not associated with and/or endorsed by the Lucasarts or Travellers Tales. All logos and images are copyrighted by their respective owners.

Copyright © 2000 - 2024 GRY-Online S.A. for gamepressure.com, unofficial game guides, walkthroughs, secrets, game tips, maps & strategies for top games.