
DLC - The Stone Prisoner - The Golem in Honnleath Dragon Age: Origins Guide
Last update: 11 May 2016
Received from: Felix [Sulcher's pass]
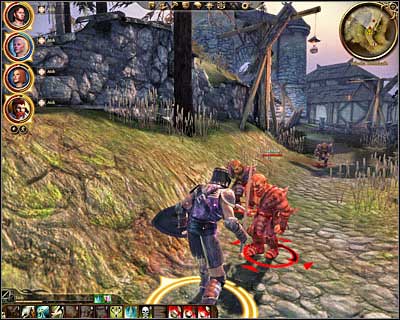
Description: You'll start the game outside the village (DLC3, 1). Head forward, ignoring dead bodies and a small group of peasants. Eventually you'll start encountering group of genlocks and hurlocks (DLC3, 2). Each time you've spotted a new group attract it to your position and wait for the monsters to come to you in order to avoid fighting several groups at the same time. Naturally this method won't work with enemy archers, however you won't encounter a lot of them and you'll have a chance to use your mages or archers to kill them from a distance.
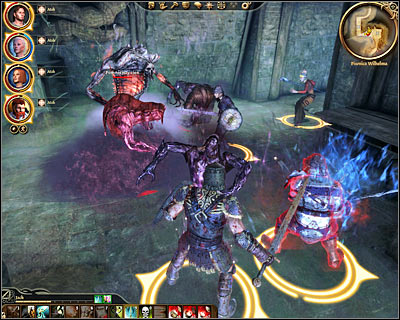
Continue eliminating monsters encountered inside the village and don't forget to inspect their bodies after each battle. You'll have to be moving south-west, towards a large working windmill seen in the distance. Notice a new group of monsters near the center of the village (DLC3, 3). Encourage them to chase after you instead of fighting them on their turf. Watch out, because aside from standard beasts you'll also have to defeat a mini-boss (hurlock alpha).
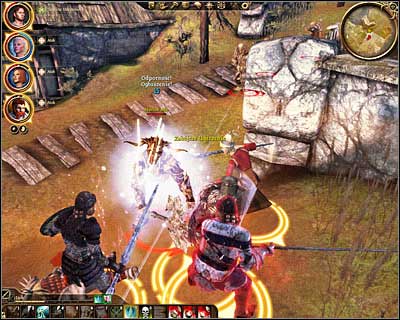
Once you've defeated the mini-boss move towards new archers seen in the distance (DLC3, 4). Be careful, because once you get closer you're going to be surprised by the last group of hurlocks and genlocks. Deal with all the beasts and don't forget to kill the archers mentioned above.
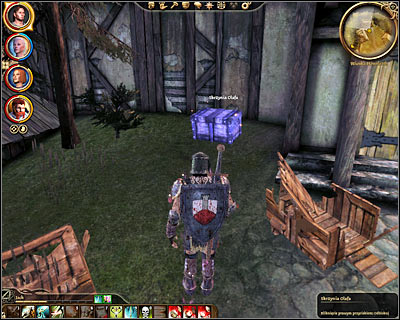
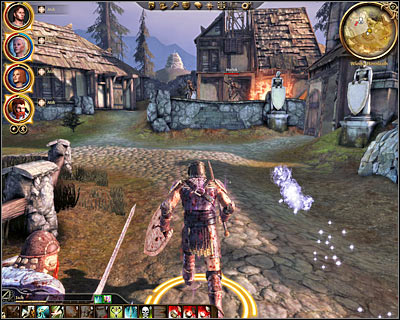
Before you decide to interact with the golem you should first spend some time exploring the village. Make sure to check bodies of all fallen enemies, as well as two crates (one in a good shape and one partially destroyed) and a body of a peasant (DLC3, 5). Collect a key from the corpse and return to the northern section of the village where you'll have a chance to use the key to open a new chest (DLC3, 6). Collect treasures, including Olaf's prized cheese knife and a small lightning crystal. You can also examine a letter found near the golem and read it in your journal.
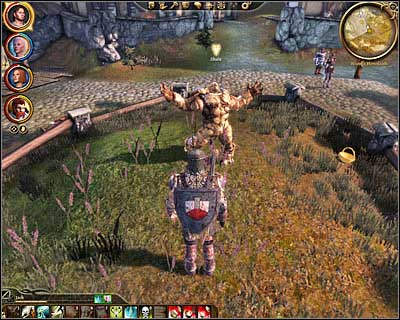
Finish your exploration of the village by clicking on the golem found in the center of a small field (DLC3, 7). Sadly you'll fail in your attempt of awakening the beast using the newly acquired rod. As a result you'll have to find a door in one of the nearby buildings leading to [Wilhelm's cellar] (DLC3, 8).
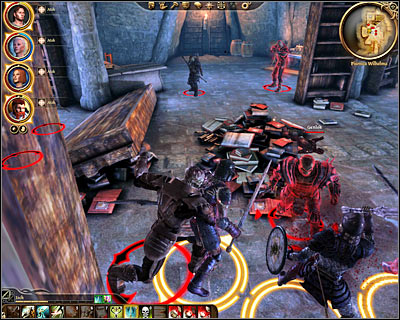
Start off by exploring a small warehouse area (DLC4, 1). Interact with two objects here - with a chest and with strange crystals. Head towards the library (DLC4, 2) where you'll have to defeat a large group of genlocks and hurlocks. You can't encourage the beasts to come to you, so you'll have to come to them by dealing with archers first and then with enemy warriors. You may now explore the room (make sure to click on the corpse and to open a new chest).
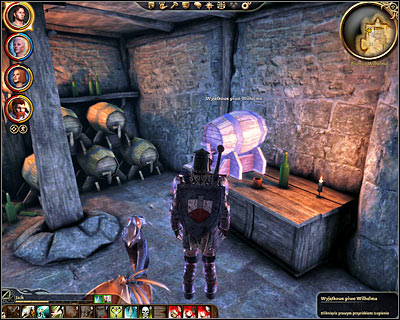
Head on to a small distillery and you should definitely consider clicking on a barrel here (DLC4, 3). Doing this will allow you to acquire a gift (Wilhelm's special brew). This is an ideal present for Oghren so make sure to store this item in your inventory if he's not a part of your team. Save your game before heading towards a nearby room.

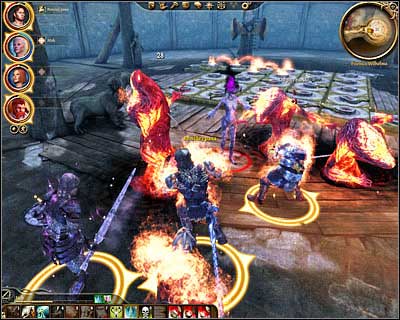
The next area (DLC4, 4) is being occupied by a very large group of monsters and it would be a good idea to encourage at least some of them to follow you to the previous corridor. Sadly sooner or later you'll have to take on the rest in direct combat and you should focus primarily on defeating a new mini-boss (Genlock emissary). Once the creature is dead deal with enemy archers and warriors.
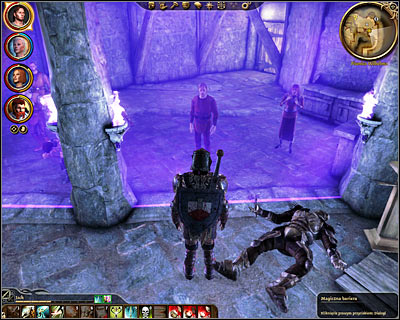
Look around a little after the battle, clicking on a shining crystal and on an old letter. Approach a magical barrier (DLC4, 5) when you're ready to move on with the mission and talk to Wilhelm seen on the other side. It won't take long until you agree to finding his daughter in exchange for him giving you the password. Sadly you can't convince him (even with high intimidation) to tell you the password right now. Instead you'll have to travel to a new part of the cellar.
Keep heading south (DLC4, 6). Click on a fractured stone found nearby and then proceed directly to Wilhelm's office (DLC4, 7). Here you'll have to defeat a group of lesser shades and a mini-boss (Dust wraith). Eliminating standard creatures shouldn't be a problem, but you'll have to be more careful with the boss (I would recommend eliminating it at the end). After you've won check wraith's remains to find a harvest festival ring, click on a book found on the table and open a chest located in a corner of the room (large flawless fire crystal). You may now head south (DLC4, 8). Don't forget to collect new crystals found near the abyss.
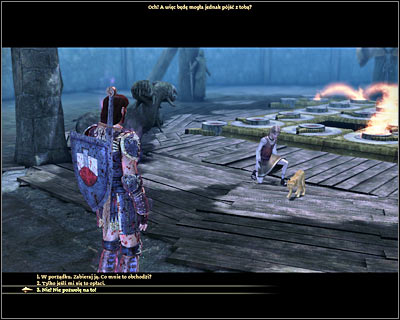
It shouldn't take too long until you reach the last chamber of the cellar. Step through the yellow barrier (DLC4, 9) and SAVE YOUR GAME, because you'll now have to make a choice how to resolve the situation with the missing daughter. Once you're inside you'll meet Amelia and Kitty (DLC4, 10). You should be able to recognize almost right away that the cat is in fact a desire demon and that it doesn't want to part ways with the girl.
After choosing an ending from the list seen below you'll have to return to Wilhelm (DLC4, 5) and don't be surprised to be attacked by two groups of shades. They will attack near the abyss and inside a small corridor close to Wilhelm's position.
List of endings:
Endings 1-2 - killing the girl
Endings 3-5 - returning to the father after talking to Kitty
Endings 6-8 - solving the riddle after talking to Kitty
ENDING NUMBER 1: Killing the possessed girl. Telling Wilhelm the truth about her death.
This is the most obvious way to end the quest which doesn't necessarily mean that it's a good one. If you refuse to negotiate with the demon Kitty will take control over Amelia's body and you'll start a fight with the possessed girl. It also means that defeating the demon will result in Amelia's death. As soon as the battle has started focus on killing lesser rage demons and attack Kitty only when there aren't any other creatures nearby. Don't forget to examine demon's body after the battle to collect Helm of Honnleath and a Cord of shattered dreams. You may now return to Wilhelm to tell him the truth about the demon possessing the girl and you having to kill her. He'll then tell you the correct password needed to activate the golem.
ENDING NUMBER 2: Killing the possessed girl. Lying to Wilhelm about the circumstances surrounding his death.
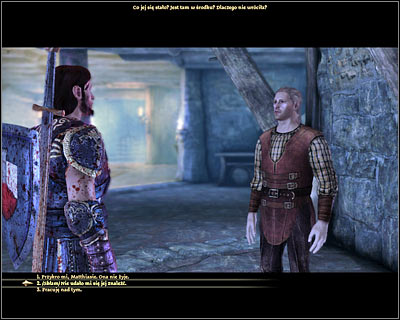
This is a very similar solution to Ending number 1 and the only change involves your final conversation with Wilhelm. After you've killed Kitty in Amelia's body report back to him and lie by telling him that you weren't able to find his daughter. He will believe in your story and therefore you'll find out the correct password.
ENDING NUMBER 3: Negotiating with the demon. Lying to Wilhelm that his daughter is dead.

This is a very interesting ending for an evil character. Talk to Kitty in the last chamber of the basement and promise to offer your help. You would then have to ignore the riddle and report back to Wilhelm. Use PERSUASION (you can't choose a lie from the list of actions!) and say that you're sorry. Doing this will convince Wilhelm that his daughter is dead. Notice that if you're unsuccessful in convincing him you'll be forced to choose between endings 4 and 5.
ENDING NUMBER 4: Negotiating with the demon. Allowing the demon to take control over Wilhelm's body.

This version has an identical beginning to Ending number 3, so you'll have to agree to help the demon and instead of solving the riddle report back to Wilhelm. There are a few ways to encourage him to go to his daughter. You can lie (he won't believe you) or you can tell him the truth about what has happened to Amelia. Wait for Wilhelm to go to the last chamber and follow him there. After your return you'll notice that the demon has been successful in taking control over Wilhelm's body and you'll find out the correct password. You may now allow possessed Wilhelm to leave the basement along with Amelia.
ENDING NUMBER 5: Negotiating with the demon. Defeating the demon after it has taken control over Wilhelm's body.

This version has an identical beginning to Ending number 3, so you'll have to agree to help the demon and instead of solving the riddle report back to Wilhelm. There are a few ways to encourage him to go to his daughter. You can lie (he won't believe you) or you can tell him the truth about what has happened to Amelia. Wait for Wilhelm to go to the last chamber and follow him there. After your return you'll notice that the demon has been successful in taking control over Wilhelm's body and you'll find out the correct password. This is where it gets different from Ending number 4, because instead of allowing possessed Wilhelm to leave you'll have to attack him. Notice that the girl has run away and you'll be forced to defeat Kitty. Don't forget to check demon's body after the battle to collect Helm of Honnleath and a Cord of shattered dreams.
ENDING NUMBER 6: Negotiating with the demon. Solving the fire riddle and allowing the demon to leave the basement in Amelia's body.

This is one of free endings where you decide to assist the demon in leaving the cellar. Check Solving the riddle section to find out how to disable the magical barrier. You'll now initiate a new conversation with Kitty and you can allow the demon to take control over Amelia's body and to leave the cellar. Notice that you ask Kitty for some kind of a reward and you would receive Wilhelm's magus staff. Report back to Wilhelm. He will notice that his daughter is acting a little strange, but he'll still tell you the password.
ENDING NUMBER 7: Negotiating with the demon. Solving the fire riddle and killing the demon in Amelia's body.

This is one of free endings where you decide to assist the demon in leaving the cellar. Check Solving the riddle section to find out how to disable the magical barrier. You'll now initiate a new conversation with Kitty and you must decide NOT to agree to the demon taking control over Amelia's body. I wouldn't recommend choosing this solution, because the outcome would be identical to Ending number 1 (don't forget to examine demon's body) and you would only lose precious time trying to solve the fire riddle.
ENDING NUMBER 8: Negotiating with the demon. Solving the fire riddle and rescuing the girl.
This is by far THE BEST ENDING, however it's also going to be the most difficult one to unlock. Start a conversation with the demon and before you agree to solve the riddle you'll have to force Kitty to agree to your plan of letting Amelia go in exchange for disabling the magical barrier. You may now finish the puzzle described in Solving the riddle section. You'll now initiate a new conversation with Kitty and start by reminding the demon of your agreement. Follow this statement by saying that you won't allow Kitty to take control over Amelia's body. If you've done everything according to the plan Amelia will run away to her father, so she won't die and she won't become possessed. You must now defeat Kitty in her true form which shouldn't be a big deal. Don't forget to check demon's body after the battle to collect Helm of Honnleath and a Cord of shattered dreams. Return to Wilhelm to receive the password.
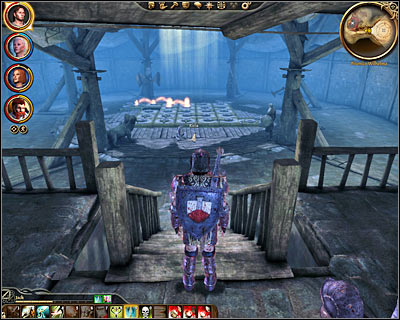
SOLVING THE RIDDLE:
This section contains a description of the fire riddle. Solving it is mandatory if you plan on unlocking ending 6, 7 or 8.
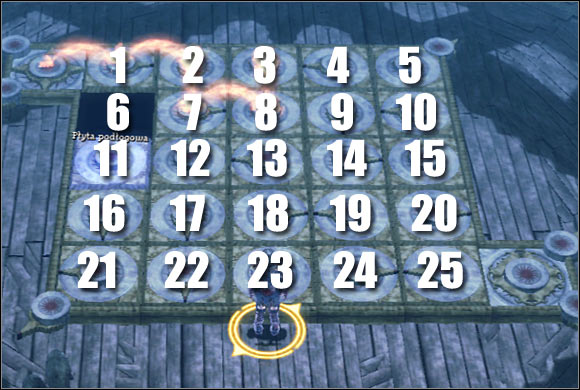
In order to solve this riddle you must start clicking on interactive tiles to guide the flame to the other side of the board. Each tile can be moved in only one direction but to make things easier to read I've also added information on the directions in which these objects will be moved.
Here's a complete solution to this riddle: 11 (up), 16 (up), 17 (left), 22 (up), 23 (left), 18 (down), 19 (left), 20 (left), 25 (up), 24 (right), 19 (down), 18 (right), 13 (down), 8 (down), 9 (left), 14 (up), 13 (right), 18 (up), 17 (right), 16 (right), 11 (down), 12 (left), 13 (left), 18 (up), 17 (right).
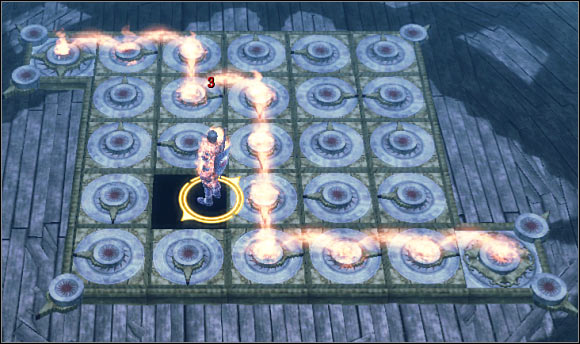
Check the picture and compare it to your result.
ACTIVATING THE GOLEM:
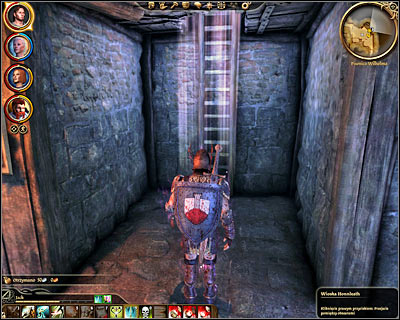
Since you know the password you can exit the cellar. Thankfully you won't have to go back through the entire basement, because a ladder (DLC4, 11) can be found in the same room where you talked to Wilhelm.
![After your return to [Honnleath] (DLC3, 9) go to the small field again and click on the golem (DLC3, 7) - DLC - The Stone Prisoner - The Golem in Honnleath - DLC - The Stone Prisoner - Dragon Age: Origins Game Guide](/dragonageorigins/gfx/word/599150125.jpg)
After your return to [Honnleath] (DLC3, 9) go to the small field again and click on the golem (DLC3, 7). Since you know the correct password you'll be successful in awakening the beast and it would be a good idea to be polite during your initial conversation with the golem. Notice that you'll be allowed to modify your team right now and you can use this a chance to have Shale switching places with someone or you can stick with your old squad for the time being. Leave the village.
Make sure to read the description of A Golem's Memories mission (Shale's personal quest) and to find out more about the golem from the section titled New follower - Shale.