
Darkest Dungeon The Crimson Court: How to beat Garden Guardian? Darkest Dungeon Guide
Last update: 20 April 2023
Garden Guardian is an optional boss introduced in the Crimson Court DLC and fought in the Courtyard. You can encounter him after completing the main storyline - defeating three major bosses (Baron, Viscount and Countess). Once you complete it, a new objective - always called "Defeat the Fallen Guardian" - will appear in the Courtyard. The mission can be repeated unlimited amount of times, doesn't require an invitation and each time requires you to defeat the Garden Guardian. Defeating him will reward you with two of the set trinkets you still haven't collected, making "farming" him the best method to acquire all of them. The dungeon you fight him in is just like the ones you've cleared in the previous area - you need to go to the farthest room to find the boss.
An optional boss, unlocked after completing the main storyline - Garden Guardian.
Keep in mind that you can't leave the Courtyard like you did with the previous missions and re-enter it with a new party. Once you do this, the mission will be failed, your party will receive a stress penalty and another party will start inside a new dungeon.
Statistics of the boss
The following table presents the boss' stats during each encounter. The table shows all three parts of the boss. The enemy doesn't have three different variants (like, for instance, Crocodilian) - you will encounter him only once.
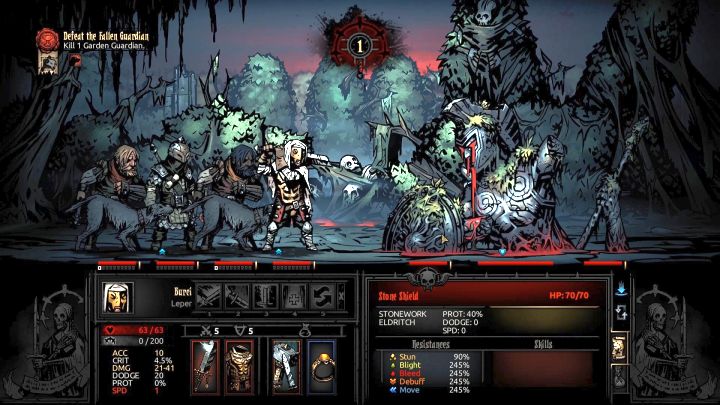
Name | Garden Guardian | Blood Fount | Stone Shield |
Health | 246 | 75 | 84 |
Dodge | 0 | 0 | 0 |
Protection | 35% | 25% | 40% |
Speed | 3 | 0 | 0 |
Resistance to Stun | 245% | 245% | 90% |
Resistance to Blight | 245% | 245% | 245% |
Resistance to Bleed | 245% | 245% | 245% |
Resistance to Debuff | 245% | 245% | 245% |
Resistance to Move | 245% | 245% | 245% |
Note - the "main" part of the boss, Garden Guardian, won't move unless you destroy the Stone Shield. Blood Fount and Stone Shield can move once a round.
How to defeat the boss
Once the encounter starts, you will notice three different targets - Garden Guardian, Blood Fount and Stone Shield. You only need to defeat one of them (Garden Guardian) to finish the battle, but you need to deal with all of them during it. They behave different as the battle progresses:
- Garden Guardian won't move during the entire encounter as long as you won't destroy his shield (Stone Shield). Garden Guardian is always protected by the Stone Shield.
- Stone Shield moves once a round. Normally the shield is protecting the Guardian, taking all of the damage onto itself, but at the end of the round it will use its only attack to rise above the battlefield, disabling the protect mark. At the end of the next round the shield will crash into the ground, dealing high damage to 2 of your characters and re-apply protect on the Garden Guardian.
- Blood Fount moves once a round, deals moderate damage and applies Bleed to your 2 random heroes.
There is dangerous connection between the Stone Shield and the Garden Guardian. Normally the guardian won't do anything, but once you destroy the shield it will awake and will start using two attacks. One of them will buff its accuracy, damage and critical chance and the other will allow the guardian to attack your entire party. Each round the boss will buff himself again and deal more damage - after two-three rounds your entire party will either be dead or low on health. This is why you SHOULDN'T destroy the shield at all - you can disable the protection mark with different methods.
As you probably saw in the above table, all three enemies are basically immune to all status effects. The only exception is the Stun resistance of the Stone Shield - 90% should allow you to easily stun it with most characters. Once stunned, the shield will stop protecting the Garden Guardian, allowing you to attack it without fear of destroying the shield. Additionally, once the shield uses Skyward Shield to ascent above the battlefield, the protection will also be disabled. The whole encounter should be either about stunning the shield and attacking the Stone Guardian, waiting for the shield to ascent and then attacking the guardian, or by using both methods simultaneously. What's more, if you can't stand the damage and Bleed of the Blood Fount, you can take it out - destroying it won't wake the Garden Guardian.
Your task here is to focus all of your attention on the Garden Guardian. As it's normally protected, you need to either wait for the Stone Shield to ascend above the battlefield to attack the guardian, or stun it to break the protection on the main target. Once that's done, launch all attacks on the boss, marking it before for extra damage.
There's a number of things you should keep in mind while preparing to fight and/or fighting the boss. Those are:
- There's no point in bringing heroes that apply any status effects - all three targets are basically immune (245%) to them.
- Abilities applying Stun are crucial here, as they will allow you to disable the protection offered by the Stone Shield and directly attack the Garden Guardian. Higher chance (with trinkets) is also a good idea, as it will allow you to stun the shield multiple times in a row.
- Pure damage is not really a good idea against the Garden Guardian, as he has 40% PROT, decreasing all received damage by 35%. This, however, can be countered by one of the newly introduced trinkets - Sculptor's Tools. It decreases the speed of the hero by 5, but increased damage dealt against STONEWORK (all of the enemies are of that type) by 40%.
- Marking is immensely powerful against the Garden Guardian. He won't be able to move, so the mark won't fade away and it will increase the damage of the heroes that can benefit from it. The type of the mark doesn't matter, as you won't be able to debuff (decreasing DODGE or PROT) the enemy thanks to 245% Debuff Resistance.
- If you don't want to take out the Blood Fount first, bring a large quantity of Holy Waters and Bandages. Holy Water allows you to increase Bleed Resistance whereas Bandages will get rid of Bleeding.
- DON'T even think about eliminating the Stone Shield. If you do that, the Garden Guardian will awake, using two attacks. One buffs him, increasing his offensive capabilities and the other deals damage to your entire party. Those attacks are extremely powerful (reaching over 20 damage in 2-3 turns) and almost impossible to dodge thanks to the buff to ACC. If you want to take the shield first, be prepared to take out the Garden Guardian in 2-3 turns - otherwise you will lose.
Recommended team composition for the encounter
The best team composition for this encounter is one that can make use of Marking and occasionally stun the Stone Shield. This will allow you to significantly increase the damage output of your party and disable the protection of the Stone Shield, allowing you to directly target the Garden Guardian. Heroes capable of applying Bleed and Blight are useless here, as the enemies are immune to those effects. Bringing one pure damage hero is not a bad idea either - you can equip the Sculptor's Tools to negate the 35% PROT of the enemy.
The team that will do well against this boss consists of:
- Man-at-Arms in the 1st rank. He can use Bolster if you need additional DODGE (to dodge attacks from the shield and the spear), can protect an ally with Defender and, most importantly, can stun the Stone Shield with Rampart, disabling the protection effect.
- Bounty Hunter in the 2nd rank. He can stun the Stone Shield if needed and benefits greatly from Marking. He can also use his own Mark if you don't want to waste the turn of other characters.
- Hound Master in the 3rd rank. Similarly to the Bounty Hunter, the Hound Master can mark the enemy and deal large damage against marked foes. He can also protect one of the vulnerable allies with the Guard Dog and stun the Stone Shield with Blackjack - this, however, requires him to move to rank 1 or 2.
- Arbalest in the 4th rank. She can mark the Stone Guardian and deal insane damage against marked targets with the Sniper Shot.
As far as the trinkets go, you should use those that boost the damage and critical chances of the heroes. Class-restricted trinkets that increase damage against Marked targets are also extremely effective here. Additionally, you can equip Sculptor's Tools to one of your heroes - this will increase the damage against any of the targets by 40%!
There are several heroes that shouldn't be used here, such as:
- Plague Doctor and Antiquarian - they both rely on Blight damage (they can deal "normal" damage as well, but it's way lower than that of other classes), making them useless.
- Flagellant, Jester and Hellion - all of them can deal Bleed damage which the boss is immune to.