
Control: The Nail, Canyon Rim and Research Site Gamma - walkthrough Control guide, walkthrough
Last update: 09 February 2021
On this page of the guide to Control - The Foundation DLC - you will find the second part of the walkthrough for The Nail story mission. The following walkthrough will help you, among others, with reaching the Research Site Gamma, performing the ritual in the Deep Cavern, and completing the journey through the Astral Collision.
The Nail quest is divided into two large parts and during each of them, you'll make use of a different power. Locations visited after unlocking Shape are described on the previous page - The Nail - Warehouse and Collapsed Department
- Basic information
- Reach the Research Site Gamma
- Complete the ritual in the Deep Cavern
- Reach the Canyon Rim
- Complete the ritual in the Astral Plane
Basic information
- There are two locations to visit - Research Site Gamma and the Canyon Rim (instead of the canyon, you will encounter a vast Astral Plane area) You can access them in any order. Just move to the part of our walkthrough which interests you most.
- If you unlocked Fracture first, then after completing the two rituals, the game will allow you to get the second power. Then you have to explore the next two locations that involve using Shape.
Reach the Research Site Gamma

The Research Site Gamma is located in the southern part of the Foundation, not far from where you started your exploration. To access it, best use the Cave System control point. Head south and then turn north-east.
On the way to the research area, you'll encounter a few opponents, but you should deal with them easily.
Complete the ritual in the Deep Cavern

In the Research Site Gamma, locate the northern passage shown in the image above - the plaque correctly suggests that this path leads to the Deep Cavern, which is your current destination.
Use any weapon to destroy the crystals blocking the passage. Note - if you are going to use explosives, then shoot the crystals from a greater distance to avoid taking damage.

You'll reach a cavern which houses an indestructible sphere. More enemies will appear here after a while. When fighting them do not forget about avoiding the moving sphere. Use Levitate more often and travel to other parts of the cavern from time to time.
As for the enemies themselves, watch out for snipers - eliminating them is a priority, especially since you cannot safely hide behind covers. If you can not find a good place to hide from the snipers, then use dodges and Shield to avoid being hit.

You've activated two additional exits from the cavern, but in order to advance the quest on hand, destroy the crystals blocking the northern pathway. You should reach the place shown in the picture, that is, shelves and platforms located on a higher level. Start by walking straight ahead - you'll reach a control point.
Use Levitate to reach the neighboring bridge and turn left. You will find another plaque showing the way to the Deep Cavern. Destroy the crystals so you can enter a new cavern.

At the very beginning of the new location, you will find a terminal for summoning allies. Make use of it, because a big battle ensues after entering the cavern.
During battles, you can help your ally eliminate enemies or focus on chosen enemies and take advantage of the fact that they are currently not targeting Jesse. Watch out, among others, for snipers, airborne, or shielded enemies - in case of shields, you can, as always, use telekinesis. The cavern is quite large - remember that you have room to dodge or avoid enemies. Don't forget the geysers, which can seriously injure your hero.

After winning the battle, proceed to the northern part of the cavern and destroy new crystals blocking the passage. Watch out when making your way across the geysers - get across slowly.
You'll reach a cavern with a monolith - touch it to continue.

If, in addition to Fracture, you have also unlocked Shape (i.e. if you unlocked the powers in the same order as in our walkthrough), then the globe puzzle will now be a little more difficult. You must simultaneously:
- Use Shape to rebuild damaged globe fragments
- Shoot the crystals attached to the globe (with Fracture).
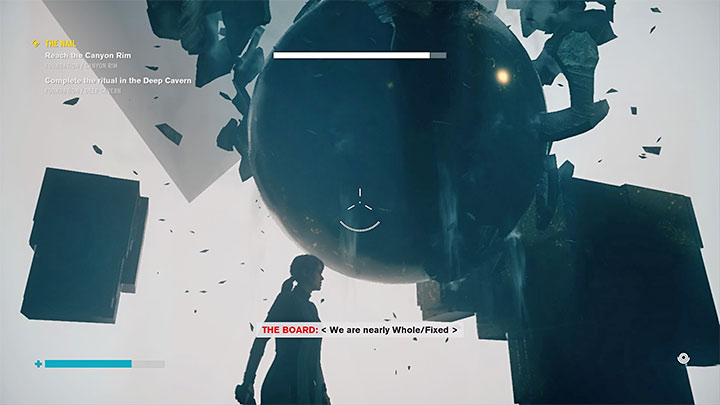
The main problem is that after a while, the globe reverts to its original state - crystals and damaged fragments appear again. You need to act quickly and levitate around the globe to discover new areas to rebuild/destroy.
The globe will light up after you complete it. Use the switch to return to the Deep Cavern. You will receive the following rewards - 4 ability points, a mod, and materials.
Reach the Canyon Rim

Start at the Crossroads control point. The path to the Canyon Rim leads through the south-eastern part of the area. A plaque will indicate that you are going the right way. Use your weapon to destroy the crystals and unlock the passage temporarily.

Levitate above the abyss and watch the message from Marshall. You need to reach the area shown in the image above. The floor is going to collapse under Jesse, and it can't be prevented because it's a part of the mission. The heroine will enter Astral Collision location. The further part of the mission takes place in an Astral Plane.
Complete the ritual in the Astral Plane
Start by reading these three tips:
- The Astral Collision location is unique because unlike other visits to the Astral Plane, this time you can freely return to it later in the game. While exploring this place, you will come across control points that allow you to return to this location.
- In Astral Collision, you will find collectibles/secrets, including documents, recordings, loot boxes, and hidden locations. As the game allows you to come back to the location, you don't have to search every area thoroughly. You can return and search for missing collectibles any time during the game.
- Unfortunately, Astral Plane doesn't offer a map, and reaching the junction described here means going through two linear paths.

When you begin to explore the Astral Plane, look primarily for opportunities to destroy black crystals using Fracture. The destruction of crystals have different effects, and in most cases, it is about lowering large platforms that were supported by them. This will allow you to reach the lowered shelves using Levitate.
Be prepared to deal with hiss that have managed to infiltrate the astral plane. Initially, you'll encounter rather weak enemies. On the way, you will come across the first control point, called Astral Collision.
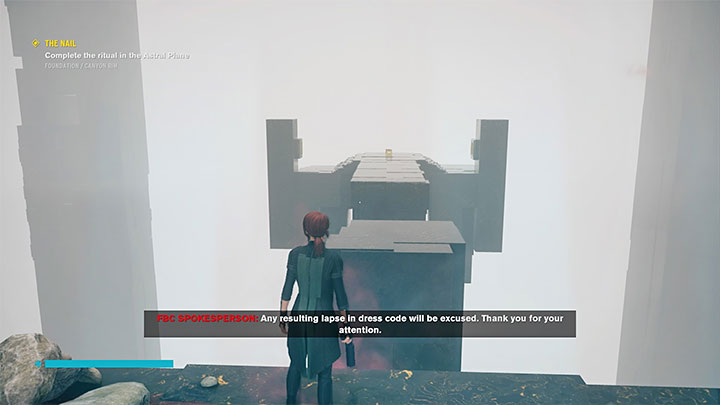
In the place shown in the image above, you must choose between the left (western) and right (eastern) path. After choosing a path, new platforms and locations will begin to appear, and the destination will be one of the two towers visible in the distance. The choice doesn't affect the game in any way, because in the end, you'll have to explore both paths.
The choice is made by lifting the yellow cube with the help of telekinesis and placing it in the left or right slot.

Once you start exploring the left path, be ready for combat - on most of the large platforms, you'll encounter opponents. Do not forget about the possibility of using Shape (if you already have it) to activate traps or using Fracture to destroy fragments of the platforms.
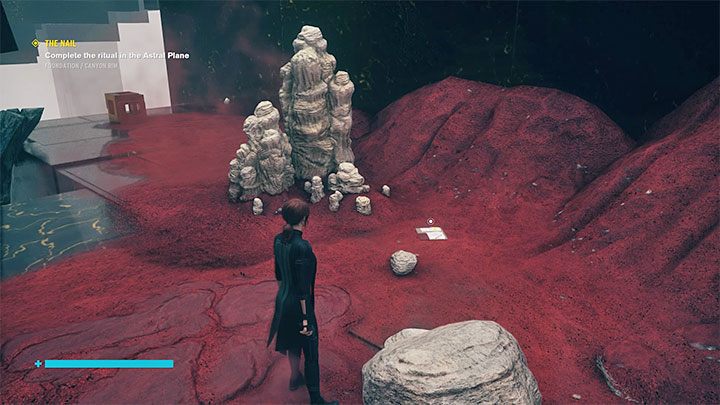
Already in the initial phase of exploring the left path, you will encounter the first puzzle. You must destroy the crystals shown in the picture, and then quickly grab the yellow cube and place it in the newly unlocked slot. Fortunately, the second slot is still available.

In the following locations, in addition to further combat, look for more cubes and place them into small towers.
The puzzle from the above picture, which you will come across a little later, is a little more complicated. You must first destroy the crystals inside the tower and only then throw the cube into it.

Continue climbing and destroy crystals in order to lower the platforms. Along the way, you will reach the first of two control points (Astral Platform PW)
At the top level, you'll take part in a large battle, during which an elite opponent appears. If necessary, levitate to nearby platforms and look for opportunities to conduct attacks. Once the enemies are defeated, head towards the second control point (Astral Tower PW) Activating the control point will start a cut-scene depicting the appearance of new platforms below.

The best thing to do now is to use fast travel and return to the Astral Collision control point - the first one encountered after entering this location. Reach the fork again, but this time choose the right path.
Same as before, you'll have to place cubes into slots and destroy crystals to unlock platforms.

Same as with the right path, you'll encounter opponents on larger platforms. During combat on the platforms, an elite opponent armed with a shield will appear - remember to destroy it using telekinesis and finish him with normal weapons.
Continue to solve similar environmental puzzles until you reach the first control point of the right path (Astral Platform PE).

Continue moving forward. While traveling through the right path, you'll take part in another major battle. After defeating the opponents, approach and take control of the second control point (Astral Tower PE)

Again, a cut-scene will begin which depicts a middle platform that was just unlocked. If you wish, you can immediately levitate towards it from here, although you can also use fast travel and return to the first control point encountered in the Astral Plane. In case of the latter, you have to go forward.

Immediately after reaching the central platform, a larger battle will begin. In addition to using well-known tricks, look for an opportunity to hide behind small pillars and destroy crystal fragments of the floor if necessary. In the case of flying enemies, hide behind cover every time they start to perform suicide attacks.
After winning the battle, go to the monolith and touch it.

Once again, you'll be taken to the location with the globe and the tactics remain unchanged - levitate around the sphere destroying crystals and restore the missing fragments with the help of Shape.
Completing the puzzle will unlock a switch, but activating it will not immediately take you back to the Foundation. Instead, locate the interactive point from the image above. Activating it will create a path for Jesse to cross.

Follow it to reach the next switch. Using it will end the quest. As a reward for completing the entire quest, you will receive 4 ability points, a mod, and materials.
Use the switch to return to the Crossroads. After a moment, a new story quest will appear.