
Control: Expeditions - guide and walkthrough Control guide, walkthrough
Last update: 08 February 2021
This page of the Control guide has the most important information about the Expedition mode which was added for free some time after the game's release. Learn how to unlock expeditions, complete them, and see what rewards you get by completing them.
- Expeditions - what are they?
- Expeditions - how to unlock?
- Jukebox tokens
- Placing tokens in the jukebox and expedition tiers
- Expeditions - general information
- Expeditions - the 4 islands and boss fight
- Rewards for completing expeditions
Expeditions - what are they?
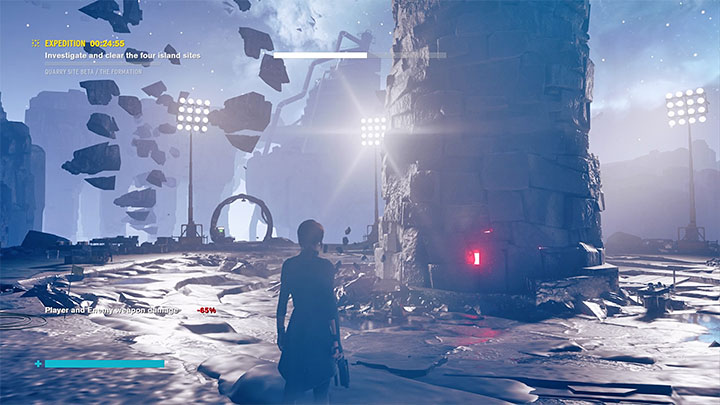
Expeditions are optional activities during which you go to Quarry Site Beta and face incredibly strong opponents. These expeditions can be compared to raids - Jesse moves to a location with strong enemies and has to complete all the objectives within a time limit.
Expeditions weren't available at launch. They were added to Control in December 2019. If you want to participate in expeditions, you need to update your game.
Expeditions are extremally challenging meaning that you should do them after beating the game, that is after completing the main and side missions. You should also try to get as many skill points as possible to buy better abilities. Your Jesse should have a lot of health and energy points, be able to use powerful and skills, have fully upgraded weapons and use good personal mods.
They reward players with valuable rewards. You can get very rare modifications, large amounts of source, and a unique outfit. More information about the rewards later on this page.
Expeditions - how to unlock?
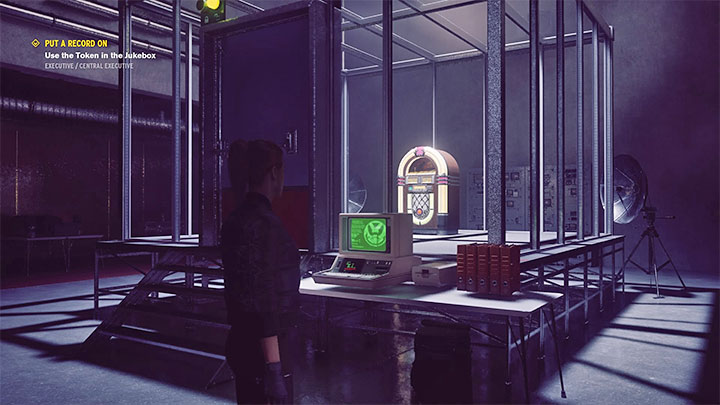

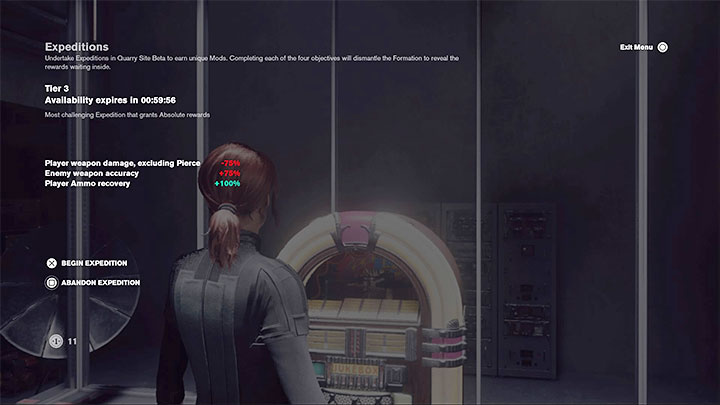
You unlock Expeditions mode by starting Put A Record On side mission - its walkthrough can be found in this guide. After finding a token in the Central Executive, Jesse can talk to Arish and then examine the jukebox presented in the picture above. Put a token inside it to move to the Quarry Site Beta - a unique location related to the expeditions.
Complete Put A Record On side mission to gain access to expeditions. Find more tokens to visit the Quarry and fight for the rewards.
Jukebox tokens
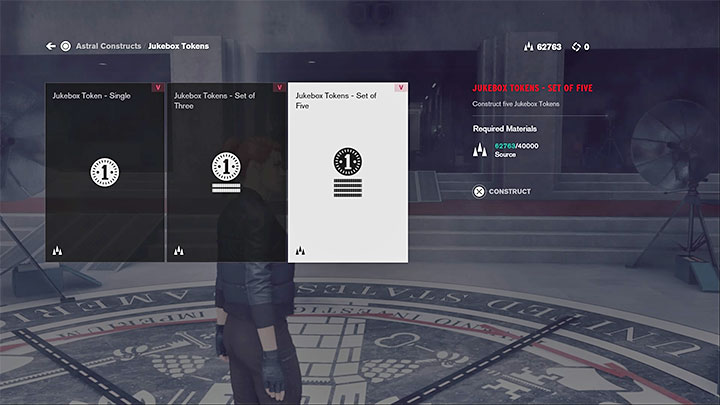
You need Jukebox Tokens to start an expedition. You get a few of them by completing Put A Record On side mission. Other tokens have to be found in the world. Here are its main sources:
- Crafting tokens - Visit any checkpoint and select Astral Constructs. You can craft 1, 3, or 5 tokens. You need Source to craft them. 5 tokens is the best value - they cost 40,000 Source.
- Completing expeditions - You get tokens by successfully completing expeditions, that is when you fulfill all the main objectives within the time limit.
- Completing Bureau Alerts - Tokens are among the rewards.
- Completing Board Countermeasures - You can get tokens for completing these challenges.
- Defeating elite enemies - Some of them can drop tokens.
Placing tokens in the jukebox and expedition tiers
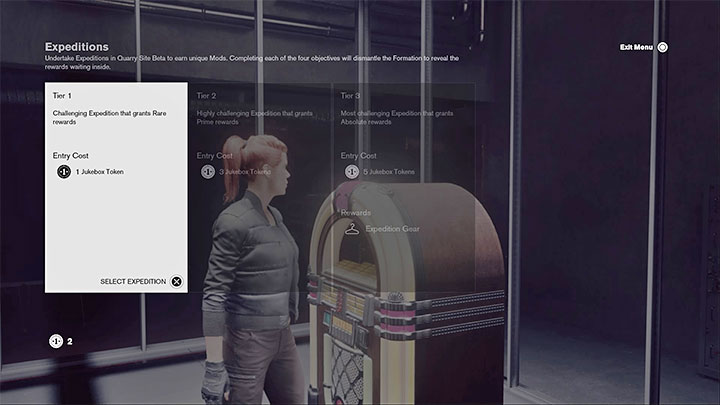
Interact with the jukebox to see a selection window. You can choose from three Tiers, but initially the only available one is Tier 1. You need to complete at least one expedition from that tier to unlock Tier 2. Complete at least one Tier 2 expedition to unlock Tier 3.
Each tier is increasingly more difficult - you will encounter more elite and powerful enemies. This means that keeping Jesse alive and fulfilling the objectives will be more difficult. Better tiers offer more valuable rewards. More information about them later in this chapter.
Expeditions - general information
All expeditions are very similar, regardless of their tier:
- You have 25 minutes to complete an expedition. This isn't much time even for the Tier 1 expeditions. Your task is to complete all the objectives within this time limit. If you exceed this limit, you will fail the expedition and return to the jukebox. However, you will keep the loot you found, e.g. Source or modifications.
- Death during an expedition doesn't end it. Jesse respawns at the starting point. However, this also means that you will have even less time to complete the objectives.
- The game picks a modifier or modifiers before starting an expedition - From one to three, depending on the Tier. These modifiers can make an expedition easier (e.g. faster ammo recharge) or make it an even bigger challenge (e.g. weaker weapons, increased enemy accuracy).
- Each expedition requires you to visit 4 islands and defeat a boss. Each of the islands have different mission objectives. You may have to, e.g. capture an area or find a corpse. After fulfilling the objective, go back to the central area and then move to the next island. The last visit to the central area triggers a boss fight. The clock stops ticking after you defeat this creature.
- Use levitation to move between the islands. You can also dodge mid-air to move faster towards the platforms.
Expeditions - the 4 islands and boss fight
Each expedition takes place on four islands. You always get the same objectives. The only difference can be the locations of the objects related to the objective. We have described the islands starting with the one on the left.
Island 1
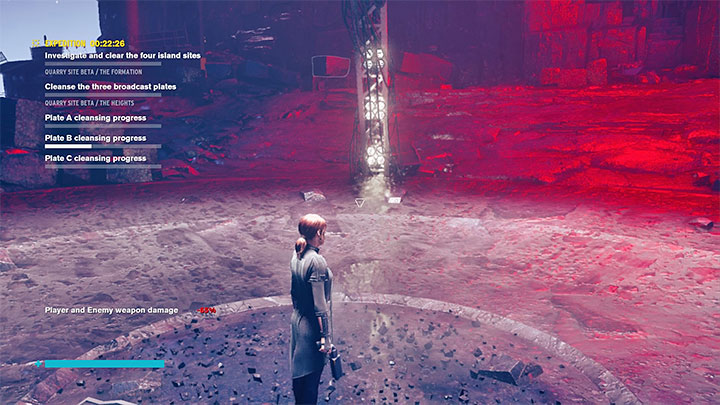
This island requires you to perform cleansing in 3 different locations. You have to reach the red circle and stay inside it until the progress bar is full. The circles are on the bottom, middle, and upper floor. Use levitation to reach the upper ones faster.
Enemies start appearing right after you start the expedition and when you are performing the cleansing. Try not to abort this process. Each circle is rather large, meaning you have enough space to dodge attacks (or you can use the Shield).
Remember that you don't have to kill all the enemies. Fight with only those who are causing you problems with cleansing. This will save you a lot of time.
Additional hint - Remember to use Seize Heavy Enemies when exploring this and the other islands. You can use Seize on all enemy types. This helps you distract other opponents. Also, controlling a more powerful enemy will help you a lot in battle.
Island 2
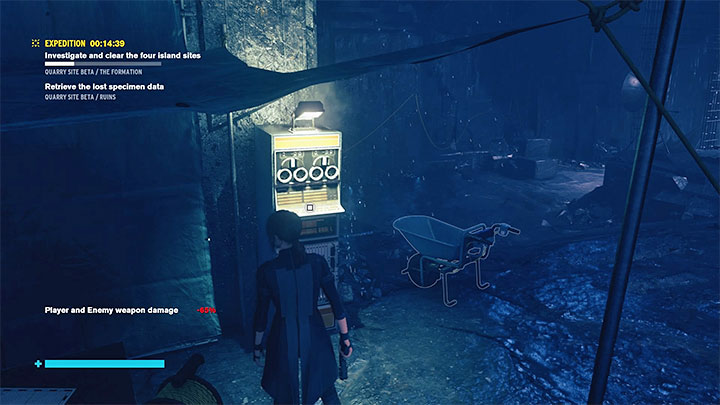
Here, your first objective is to find a computer with data. It always spawns in the same place - in the central part of the island. The computer is presented in the picture above.
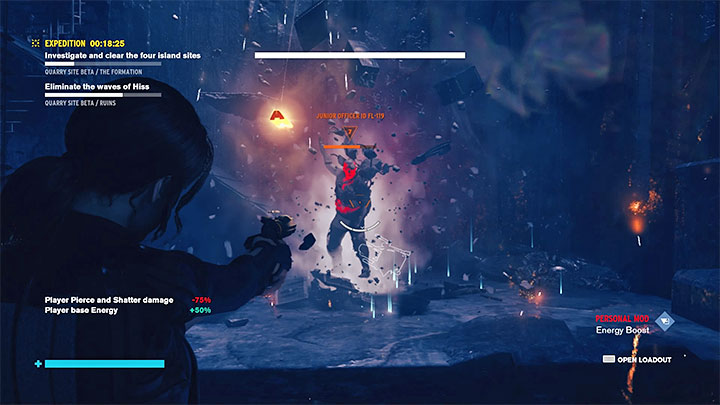
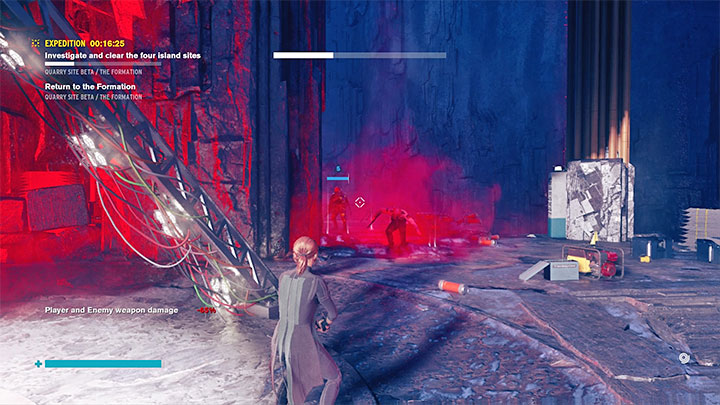
Interact with the computer to spawn enemies infected with Hiss. They will spawn in three waves. Each new wave should appear after all enemies from the current one are dead.
This is the only island where you have to eliminate all enemies. Because of that, completing it will probably take you a long time. Besides the regular enemies, you will also face an elite opponent - it spawns regardless of the Tier. This enemy likes using telekinesis so hide a lot behind covers and lean out of them only to shoot a few bullets.
Island 3

The easiest island where your objective is to find dead Rangers and get their biometric logs. These corpses spawn in random locations. Follow the sounds and visual hints to find them faster.
Try to fight as few enemies as possible. If you aren't attacked by someone in the air, you should have enough time to scan the corpses before the enemies catch up with Jesse.
Island 4

Here, your objective is to find and burn Hiss-corrupted materials. You need to throw large red blocks into a furnace. These blocks spawn in random locations. Pick them up with telekinesis and move to the furnace.
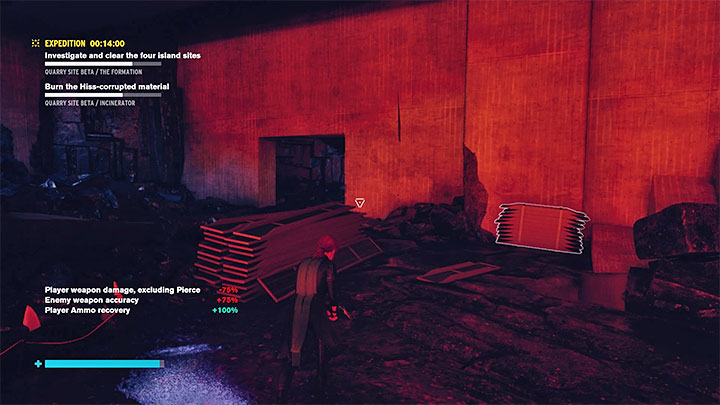
If you have problems with finding a corrupted block, check out the small passage on the right of the furnace - see the picture. One of the materials can spawn here, but the place is easy to overlook.
Attack only those enemies who are a direct threat to Jesse and are an obstacle in transporting the blocks.
Boss - Distorted Tourist
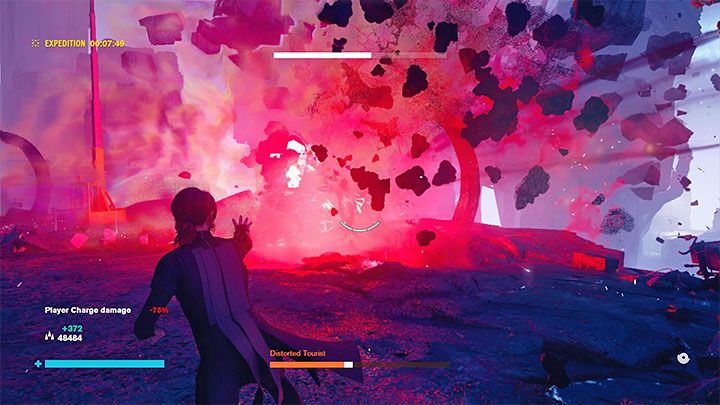
This boss spawns in the starting area after completing all activities on the 4 islands. Its unique characteristic is that it hides in the ground and then performs a surprise attack. Try to be on the move at all Times and be ready to attack the boss. You can do that by using telekinesis or one of the more powerful weapons. You can also move with activated Shield to reduce the risk of getting attacked by the boss. Don't make the fight last longer than it is necessary, especially when you are close to the time limit.
Rewards for completing expeditions
Chests with rewards spawn in the central part of the Formation after the boss is dead. Token/tokens and weapon/personal mods are guaranteed rewards.
Expeditions also have unique rewards. You can get purple Infinite mods, that is new tier VI upgrades.

Another unique reward is the Expedition Gear. You can wear this outfit by visiting the Central Executive. You get Expedition Gear by completing a Tier 3 expedition.