Guides & Walkthroughs New Guides Popular RPG Action Strategy Adventure YouTube Guides Mobile App
Free iOS App iPhone & Ipad
Download Game Guide PDF, ePUB & iBooks

Tom Clancy's Splinter Cell: Conviction Game Guide & Walkthrough by gamepressure.com

Tom Clancy's Splinter Cell: Conviction Game Guide & Walkthrough

Table of Contents

Walkthrough - White Box Laboratories - part 1 | Walkthrough Splinter Cell Conviction Guide

Last update: 11 May 2016

1 - Walkthrough - White Box Laboratories - part 1 - Walkthrough - Tom Clancys Splinter Cell: Conviction - Game Guide and Walkthrough
Walkthrough: Start off by interacting with an equipment crate found in the trunk of your car #1 - Walkthrough - White Box Laboratories - part 1 - Walkthrough - Tom Clancys Splinter Cell: Conviction - Game Guide and Walkthrough

Walkthrough: Start off by interacting with an equipment crate found in the trunk of your car #1. You can now start moving towards an asphalt road leading to the building complex. A single guard can be seen in the distance #2 - I wouldn't recommend killing him, because you'll have a chance to avoid him.

2 - Walkthrough - White Box Laboratories - part 1 - Walkthrough - Tom Clancys Splinter Cell: Conviction - Game Guide and Walkthrough
Proceed to your left where you'll have a chance to use the bushes for a perfect cover #1 - Walkthrough - White Box Laboratories - part 1 - Walkthrough - Tom Clancys Splinter Cell: Conviction - Game Guide and Walkthrough

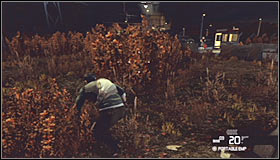
Proceed to your left where you'll have a chance to use the bushes for a perfect cover #1. Keep heading forward until you've reached a fence and then head right. Take cover behind a large concrete barrier found close to the guard post #2.

3 - Walkthrough - White Box Laboratories - part 1 - Walkthrough - Tom Clancys Splinter Cell: Conviction - Game Guide and Walkthrough
Wait until the guard finishes his sweep and starts moving back to his booth #1 - Walkthrough - White Box Laboratories - part 1 - Walkthrough - Tom Clancys Splinter Cell: Conviction - Game Guide and Walkthrough

Wait until the guard finishes his sweep and starts moving back to his booth #1. Quickly jump over the concrete barrier and then over a barrier #2. He won't notice you if you're quick enough and you won't have to worry about him anymore.

4 - Walkthrough - White Box Laboratories - part 1 - Walkthrough - Tom Clancys Splinter Cell: Conviction - Game Guide and Walkthrough
Start heading forward here and then proceed to your left #1 - Walkthrough - White Box Laboratories - part 1 - Walkthrough - Tom Clancys Splinter Cell: Conviction - Game Guide and Walkthrough

Start heading forward here and then proceed to your left #1. You won't have to act carefully here, because you won't encounter any hostiles in the next few minutes. Keep moving forward until you've found a pipe #2. Use it to make your way to a lower section of the roof.

5 - Walkthrough - White Box Laboratories - part 1 - Walkthrough - Tom Clancys Splinter Cell: Conviction - Game Guide and Walkthrough
Turn right after you've used the pipe - Walkthrough - White Box Laboratories - part 1 - Walkthrough - Tom Clancys Splinter Cell: Conviction - Game Guide and Walkthrough

Turn right after you've used the pipe. Get on top of the small fans and from there you should be able to make a jump towards the upper section of the roof #1. Make a few steps forward and then continue heading upwards #2.

6 - Walkthrough - White Box Laboratories - part 1 - Walkthrough - Tom Clancys Splinter Cell: Conviction - Game Guide and Walkthrough
Approach a new pipe #1 and use it to make your way to an upper ledge - Walkthrough - White Box Laboratories - part 1 - Walkthrough - Tom Clancys Splinter Cell: Conviction - Game Guide and Walkthrough

Approach a new pipe #1 and use it to make your way to an upper ledge. Move to your right here #2 so that you'll have a chance to interact with a new pipe.

7 - Walkthrough - White Box Laboratories - part 1 - Walkthrough - Tom Clancys Splinter Cell: Conviction - Game Guide and Walkthrough
This time you'll want to move to your left (after reaching a new ledge) #1 - Walkthrough - White Box Laboratories - part 1 - Walkthrough - Tom Clancys Splinter Cell: Conviction - Game Guide and Walkthrough

This time you'll want to move to your left (after reaching a new ledge) #1. Once again, you'll have to get to a new pipe and use it to continue heading upwards. Make your way to the top level and start moving right #2.

8 - Walkthrough - White Box Laboratories - part 1 - Walkthrough - Tom Clancys Splinter Cell: Conviction - Game Guide and Walkthrough
Keep heading right until you're under a balustrade #1 - Walkthrough - White Box Laboratories - part 1 - Walkthrough - Tom Clancys Splinter Cell: Conviction - Game Guide and Walkthrough

Keep heading right until you're under a balustrade #1. Climb up and jump over the railing. You may now proceed to your right. Approach a larger fan and use a pipe found here #2.

9 - Walkthrough - White Box Laboratories - part 1 - Walkthrough - Tom Clancys Splinter Cell: Conviction - Game Guide and Walkthrough
You should be able to grab one of yellow objects after using the pipe and you must proceed to your right #1 - Walkthrough - White Box Laboratories - part 1 - Walkthrough - Tom Clancys Splinter Cell: Conviction - Game Guide and Walkthrough

You should be able to grab one of yellow objects after using the pipe and you must proceed to your right #1. Eventually you'll have a chance to get to a new pipe #2 and you need to use it to proceed to the upper level.

10 - Walkthrough - White Box Laboratories - part 1 - Walkthrough - Tom Clancys Splinter Cell: Conviction - Game Guide and Walkthrough
This time you'll be moving left #1 - Walkthrough - White Box Laboratories - part 1 - Walkthrough - Tom Clancys Splinter Cell: Conviction - Game Guide and Walkthrough

This time you'll be moving left #1. Keep heading in that direction until you've found yet another pipe. Grab the pipe and head upwards to get to the horizontal section #2.

11 - Walkthrough - White Box Laboratories - part 1 - Walkthrough - Tom Clancys Splinter Cell: Conviction - Game Guide and Walkthrough
Use this pipe to make your way to the other side and then slide down #1 - Walkthrough - White Box Laboratories - part 1 - Walkthrough - Tom Clancys Splinter Cell: Conviction - Game Guide and Walkthrough

Use this pipe to make your way to the other side and then slide down #1. Head left here without any delays, because you still don't have to worry about encountering enemies. Jump over two large pipes #2 and duck under a single one.

12 - Walkthrough - White Box Laboratories - part 1 - Walkthrough - Tom Clancys Splinter Cell: Conviction - Game Guide and Walkthrough
Make your way to the upper platform, get closer to its edge #1 and confirm that you want to head down - Walkthrough - White Box Laboratories - part 1 - Walkthrough - Tom Clancys Splinter Cell: Conviction - Game Guide and Walkthrough

Make your way to the upper platform, get closer to its edge #1 and confirm that you want to head down. You'll start using staircases here #2. Ignore scientists and guards seen to your left, because they won't see you.

13 - Walkthrough - White Box Laboratories - part 1 - Walkthrough - Tom Clancys Splinter Cell: Conviction - Game Guide and Walkthrough
Keep heading forward until you get to a new balustrade - Walkthrough - White Box Laboratories - part 1 - Walkthrough - Tom Clancys Splinter Cell: Conviction - Game Guide and Walkthrough

Keep heading forward until you get to a new balustrade. Jump over the railing and move to your left so that you'll have a chance to grab a pipe and slide down #1. Head forward and then proceed to a lower balcony #2.

14 - Walkthrough - White Box Laboratories - part 1 - Walkthrough - Tom Clancys Splinter Cell: Conviction - Game Guide and Walkthrough
Ignore an observation point found along the way #1 and instead keep heading forward - Walkthrough - White Box Laboratories - part 1 - Walkthrough - Tom Clancys Splinter Cell: Conviction - Game Guide and Walkthrough

Ignore an observation point found along the way #1 and instead keep heading forward. Use the stairs to proceed to lower levels. You should soon end up close to a security room which is your current destination #2.

15 - Walkthrough - White Box Laboratories - part 1 - Walkthrough - Tom Clancys Splinter Cell: Conviction - Game Guide and Walkthrough
Approach a new pipe located to your right #1 and use it to make your way to a horizontal pipe - Walkthrough - White Box Laboratories - part 1 - Walkthrough - Tom Clancys Splinter Cell: Conviction - Game Guide and Walkthrough

Approach a new pipe located to your right #1 and use it to make your way to a horizontal pipe. Keep moving towards a glass roof of the security room #2. You'll have to decide here how you want to get rid of three guards seen inside the room.

16 - Walkthrough - White Box Laboratories - part 1 - Walkthrough - Tom Clancys Splinter Cell: Conviction - Game Guide and Walkthrough
If you don't mind taking risks you can activate an EMP device #1, drop down on one of your opponents and quickly deal with the remaining two #2 - Walkthrough - White Box Laboratories - part 1 - Walkthrough - Tom Clancys Splinter Cell: Conviction - Game Guide and Walkthrough

If you don't mind taking risks you can activate an EMP device #1, drop down on one of your opponents and quickly deal with the remaining two #2. I wouldn't recommend this method, because there's a chance they may start shooting at random targets. I also wouldn't recommend using a flashbang here, because it'll stun them only for a few seconds.

17 - Walkthrough - White Box Laboratories - part 1 - Walkthrough - Tom Clancys Splinter Cell: Conviction - Game Guide and Walkthrough
The best way to clear out this room would be to use a standard grenade #1 or a mine - Walkthrough - White Box Laboratories - part 1 - Walkthrough - Tom Clancys Splinter Cell: Conviction - Game Guide and Walkthrough

The best way to clear out this room would be to use a standard grenade #1 or a mine. The explosion can kill only two of your opponents, because you can always drop on the last one without taking any additional risks #2.

18 - Walkthrough - White Box Laboratories - part 1 - Walkthrough - Tom Clancys Splinter Cell: Conviction - Game Guide and Walkthrough
Deal with all three guards and then approach the main computer found inside this room #1 - Walkthrough - White Box Laboratories - part 1 - Walkthrough - Tom Clancys Splinter Cell: Conviction - Game Guide and Walkthrough

Deal with all three guards and then approach the main computer found inside this room #1. You'll now have a chance to look at several security feeds, listening to interesting conversations. The most important feed will show a group of scientists and mercenaries #2. All you have to do is to observe how this scene plays out (you can zoom in the view). You'll soon be given a new primary objective.

19 - Walkthrough - White Box Laboratories - part 1 - Walkthrough - Tom Clancys Splinter Cell: Conviction - Game Guide and Walkthrough
Proceed towards a newly unlocked passageway found to your left #1 - Walkthrough - White Box Laboratories - part 1 - Walkthrough - Tom Clancys Splinter Cell: Conviction - Game Guide and Walkthrough

Proceed towards a newly unlocked passageway found to your left #1. You'll end up a short corridor here and you'll have to climb through a nearby hole #2 to enter a large warehouse.

You must now decide how you want to rescue the scientist:

OPTION A - using the Mark and Execute system

OPTION B - surprising enemy units from the upper pipes

20 - Walkthrough - White Box Laboratories - part 1 - Walkthrough - Tom Clancys Splinter Cell: Conviction - Game Guide and Walkthrough
Option A: Choosing this option will allow you to resolve the situation quickly - Walkthrough - White Box Laboratories - part 1 - Walkthrough - Tom Clancys Splinter Cell: Conviction - Game Guide and Walkthrough

Option A: Choosing this option will allow you to resolve the situation quickly. Head left as soon as you've entered the warehouse #1. You'll have to get to the elevator where you'll notice a single guard #2.

21 - Walkthrough - White Box Laboratories - part 1 - Walkthrough - Tom Clancys Splinter Cell: Conviction - Game Guide and Walkthrough
Neutralize the guard in hand to hand combat #1 - Walkthrough - White Box Laboratories - part 1 - Walkthrough - Tom Clancys Splinter Cell: Conviction - Game Guide and Walkthrough

Neutralize the guard in hand to hand combat #1. Notice that doing this didn't alarm his colleagues. Move closer to them, wait for them to gather around and then use Mark and Execute system to get rid of all of them at the same time #2.

22 - Walkthrough - White Box Laboratories - part 1 - Walkthrough - Tom Clancys Splinter Cell: Conviction - Game Guide and Walkthrough
Option B: Choosing this option will allow you to secure the warehouse without having to use Mark and Execute system - Walkthrough - White Box Laboratories - part 1 - Walkthrough - Tom Clancys Splinter Cell: Conviction - Game Guide and Walkthrough

Option B: Choosing this option will allow you to secure the warehouse without having to use Mark and Execute system. Start off by using your silenced pistol to kill the first opponent seen directly in front of you #1 (you couldn't kill him in melee combat, because the rest would see you). Quickly head forward and interact with one of the pipes #2.

23 - Walkthrough - White Box Laboratories - part 1 - Walkthrough - Tom Clancys Splinter Cell: Conviction - Game Guide and Walkthrough
Use this first pipe to get to a set of horizontal pipes - Walkthrough - White Box Laboratories - part 1 - Walkthrough - Tom Clancys Splinter Cell: Conviction - Game Guide and Walkthrough

Use this first pipe to get to a set of horizontal pipes. A second guard should appear in the area in the meantime and I would recommend killing him with a headshot #1. You may now start moving towards other opponents #2.

24 - Walkthrough - White Box Laboratories - part 1 - Walkthrough - Tom Clancys Splinter Cell: Conviction - Game Guide and Walkthrough
Wait until one of the guards standing next to the scientists moves back and starts talking to his colleague #1 - Walkthrough - White Box Laboratories - part 1 - Walkthrough - Tom Clancys Splinter Cell: Conviction - Game Guide and Walkthrough

Wait until one of the guards standing next to the scientists moves back and starts talking to his colleague #1. You should now eliminate the other guard (the one who remained close to the hostage) using a pistol #2.

25 - Walkthrough - White Box Laboratories - part 1 - Walkthrough - Tom Clancys Splinter Cell: Conviction - Game Guide and Walkthrough
If you've done everything according to the plan there should be only two guards left #1 - Walkthrough - White Box Laboratories - part 1 - Walkthrough - Tom Clancys Splinter Cell: Conviction - Game Guide and Walkthrough

If you've done everything according to the plan there should be only two guards left #1. Throw a flashbang grenade at them, land on one of them and quickly deal with his colleague #2.

26 - Walkthrough - White Box Laboratories - part 1 - Walkthrough - Tom Clancys Splinter Cell: Conviction - Game Guide and Walkthrough
Walkthrough (continued): You may now find the rescued scientist - he should be crouching next to the elevator #1 - Walkthrough - White Box Laboratories - part 1 - Walkthrough - Tom Clancys Splinter Cell: Conviction - Game Guide and Walkthrough

Walkthrough (continued): You may now find the rescued scientist - he should be crouching next to the elevator #1. Listen to a new conversation and then enter the elevator. Interact with the left panel #2 and wait you're transported to a new level.

27 - Walkthrough - White Box Laboratories - part 1 - Walkthrough - Tom Clancys Splinter Cell: Conviction - Game Guide and Walkthrough
Press the crouch key upon your arrival and head to your left - Walkthrough - White Box Laboratories - part 1 - Walkthrough - Tom Clancys Splinter Cell: Conviction - Game Guide and Walkthrough

Press the crouch key upon your arrival and head to your left. There's an equipment crate here #1 and naturally you should interact with it (notice that you've been awarded with a new gadget - sticky cameras). Proceed towards the door located next to the crate #2.

28 - Walkthrough - White Box Laboratories - part 1 - Walkthrough - Tom Clancys Splinter Cell: Conviction - Game Guide and Walkthrough
Proceed towards one of the windows #1 and jump through it to find yourself hanging outside - Walkthrough - White Box Laboratories - part 1 - Walkthrough - Tom Clancys Splinter Cell: Conviction - Game Guide and Walkthrough

Proceed towards one of the windows #1 and jump through it to find yourself hanging outside. You'll have to start moving left here #2.

29 - Walkthrough - White Box Laboratories - part 1 - Walkthrough - Tom Clancys Splinter Cell: Conviction - Game Guide and Walkthrough
Keep going left until you've made your way to a window with a guard standing next to it #1 - Walkthrough - White Box Laboratories - part 1 - Walkthrough - Tom Clancys Splinter Cell: Conviction - Game Guide and Walkthrough

Keep going left until you've made your way to a window with a guard standing next to it #1. Open the window, activate one of your EMP devices #2 and grab the opponent to throw him out. You wouldn't be allowed to do this without setting off the EMP, because your action would have been noticed by other guards.

30 - Walkthrough - White Box Laboratories - part 1 - Walkthrough - Tom Clancys Splinter Cell: Conviction - Game Guide and Walkthrough
Notice that grabbing the guard and throwing him out the window has unlocked Mark and Execute system - Walkthrough - White Box Laboratories - part 1 - Walkthrough - Tom Clancys Splinter Cell: Conviction - Game Guide and Walkthrough

Notice that grabbing the guard and throwing him out the window has unlocked Mark and Execute system. Use it right now by targeting and eliminating four other hostiles present in the room #1. Make sure they're all gone before climbing through the window. Go back to the equipment crate and once you've resupplied again proceed towards the only available corridor #2.

31 - Walkthrough - White Box Laboratories - part 1 - Walkthrough - Tom Clancys Splinter Cell: Conviction - Game Guide and Walkthrough
You'll have to be careful here, because two upper floors are being occupied by enemy forces - Walkthrough - White Box Laboratories - part 1 - Walkthrough - Tom Clancys Splinter Cell: Conviction - Game Guide and Walkthrough

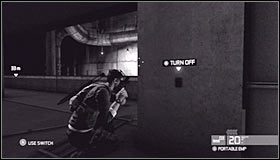
You'll have to be careful here, because two upper floors are being occupied by enemy forces. Proceed to the left of the staircase leading to the first floor #1. Locate two light switches here #2 and interact with both of them to turn off all nearby lights.

32 - Walkthrough - White Box Laboratories - part 1 - Walkthrough - Tom Clancys Splinter Cell: Conviction - Game Guide and Walkthrough
Turning off the lights in this area should catch the attention of the guard standing close to the staircase - Walkthrough - White Box Laboratories - part 1 - Walkthrough - Tom Clancys Splinter Cell: Conviction - Game Guide and Walkthrough

Turning off the lights in this area should catch the attention of the guard standing close to the staircase. Wait for him to get down here and quietly eliminate him #1. Don't worry if he doesn't show up, because killing him is not mandatory. Check the area near the stairs to find a vertical pipe #2 and start climbing towards the first floor.

33 - Walkthrough - White Box Laboratories - part 1 - Walkthrough - Tom Clancys Splinter Cell: Conviction - Game Guide and Walkthrough
You'll soon make your way to a horizontal pipe #1 - Walkthrough - White Box Laboratories - part 1 - Walkthrough - Tom Clancys Splinter Cell: Conviction - Game Guide and Walkthrough

You'll soon make your way to a horizontal pipe #1. Be careful, because it's bright here and the entire first floor is being patrolled by enemy units. Proceed to your left. If you didn't kill the guard after turning off the lights #2 you'll now have to wait for him to turn around.

34 - Walkthrough - White Box Laboratories - part 1 - Walkthrough - Tom Clancys Splinter Cell: Conviction - Game Guide and Walkthrough
Drop down from the pipe when it's safe #1 - Walkthrough - White Box Laboratories - part 1 - Walkthrough - Tom Clancys Splinter Cell: Conviction - Game Guide and Walkthrough

Drop down from the pipe when it's safe #1. Immediately proceed towards the nearest window #2 and jump through it to find yourself hanging outside. Start moving left here.

35 - Walkthrough - White Box Laboratories - part 1 - Walkthrough - Tom Clancys Splinter Cell: Conviction - Game Guide and Walkthrough
Stop after reaching a balcony with two guards #1 - Walkthrough - White Box Laboratories - part 1 - Walkthrough - Tom Clancys Splinter Cell: Conviction - Game Guide and Walkthrough

Stop after reaching a balcony with two guards #1. Make sure that you're in the shadows, jump over the balustrade and grab a new vertical pipe found to your right #2. Using this pipe will allow you to get to the second floor safely.

36 - Walkthrough - White Box Laboratories - part 1 - Walkthrough - Tom Clancys Splinter Cell: Conviction - Game Guide and Walkthrough
Start moving left again after reaching a new balustrade #1 - Walkthrough - White Box Laboratories - part 1 - Walkthrough - Tom Clancys Splinter Cell: Conviction - Game Guide and Walkthrough

Start moving left again after reaching a new balustrade #1. Ignore all enemies seen in the area, as well as a new pipe. Keep heading left #2.

37 - Walkthrough - White Box Laboratories - part 1 - Walkthrough - Tom Clancys Splinter Cell: Conviction - Game Guide and Walkthrough
You'll have to continue moving left #1 until you've reached the last window #2 - Walkthrough - White Box Laboratories - part 1 - Walkthrough - Tom Clancys Splinter Cell: Conviction - Game Guide and Walkthrough

You'll have to continue moving left #1 until you've reached the last window #2. Open the window and wait here until it's safe to climb up. You can use a sticky camera to monitor enemy movements, however it shouldn't be necessary.

38 - Walkthrough - White Box Laboratories - part 1 - Walkthrough - Tom Clancys Splinter Cell: Conviction - Game Guide and Walkthrough
Take cover behind the nearest desk as soon as you're inside the building again #1, because otherwise you may be seen by one of two guards patrolling this floor (the third one is standing in one place) - Walkthrough - White Box Laboratories - part 1 - Walkthrough - Tom Clancys Splinter Cell: Conviction - Game Guide and Walkthrough

Take cover behind the nearest desk as soon as you're inside the building again #1, because otherwise you may be seen by one of two guards patrolling this floor (the third one is standing in one place). Wait for a right moment to leave cover and open the door located to your left #2.

See/Add Comments

You are not permitted to copy any image, text or info from this page.

This site is not associated with and/or endorsed by the Ubisoft or Ubisoft Studios. All logos and images are copyrighted by their respective owners.

Copyright © 2000 - 2024 GRY-Online S.A. for gamepressure.com, unofficial game guides, walkthroughs, secrets, game tips, maps & strategies for top games.