Guides & Walkthroughs New Guides Popular RPG Action Strategy Adventure YouTube Guides Mobile App
Free iOS App iPhone & Ipad
Download Game Guide PDF, ePUB & iBooks

Red Faction: Guerrilla Game Guide & Walkthrough by gamepressure.com

Red Faction: Guerrilla Game Guide & Walkthrough

Table of Contents

Additional info - Demolition Master - part 1 Red Faction: Guerrilla Guide

Last update: 11 May 2016

Apart from the quests mentioned in the previous chapters, we will be able to deal with 16 tasks from Demolition Master set. These quests are time limited and we will be given a weapon that we have to use. Below you can find some descriptions, maps and advices that will be helpful during the game.
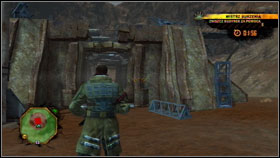
01

Sector: Parker - Demolition Master - part 1 - Additional info - Red Faction: Guerrilla - Game Guide and Walkthrough

Sector: Parker

Armament: hydrogen tanks (13), pistol (64)

Time: 03:00

The best time: 01:00

Reward: 25 scrap

1 - Demolition Master - part 1 - Additional info - Red Faction: Guerrilla - Game Guide and Walkthrough
Take hydrogen tank #1 and now you will have two choices - Demolition Master - part 1 - Additional info - Red Faction: Guerrilla - Game Guide and Walkthrough

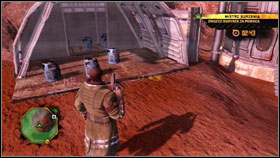
Take hydrogen tank #1 and now you will have two choices. The first one is to throw the barrel, but is not very accurate. The second one is to move tanks to the marked area and shoot them with your pistol from the secure distance #2.

02

Sector: Parker - Demolition Master - part 1 - Additional info - Red Faction: Guerrilla - Game Guide and Walkthrough

Sector: Parker

Armament: Rocket launcher

Time: 00:55

The best time: 00:16

Reward: 25 scrap


2 - Demolition Master - part 1 - Additional info - Red Faction: Guerrilla - Game Guide and Walkthrough
We can see many of the transmission towers on the horizon #1 - Demolition Master - part 1 - Additional info - Red Faction: Guerrilla - Game Guide and Walkthrough

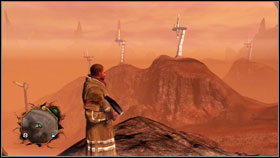
We can see many of the transmission towers on the horizon #1. We have to destroy them #2. There is no difference if you will blow up the whole construction or just scratch the transmitter. Look very carefully because they are very wide spread and you have to destroy all of them.
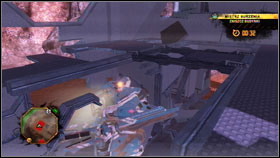
03

Sector: Free Fire Zone - Demolition Master - part 1 - Additional info - Red Faction: Guerrilla - Game Guide and Walkthrough

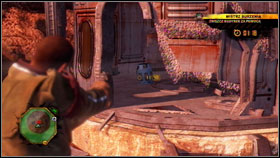
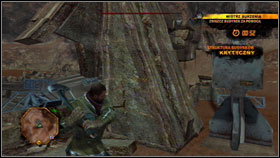
Sector: Free Fire Zone

Armament: Hammer, Remote Charges (12)

Time: 01:20

The best time: 00:20

Reward: 50 scrap


3 - Demolition Master - part 1 - Additional info - Red Faction: Guerrilla - Game Guide and Walkthrough
Our target is a small building #1 - Demolition Master - part 1 - Additional info - Red Faction: Guerrilla - Game Guide and Walkthrough

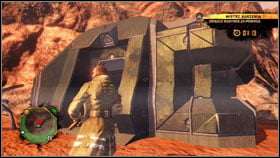
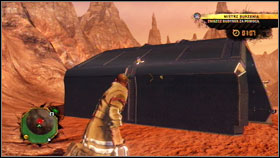
Our target is a small building #1. We can use some remote charges #2 but they are not so effective in this situation.

4 - Demolition Master - part 1 - Additional info - Red Faction: Guerrilla - Game Guide and Walkthrough
Thats why the best weapon in this mission is hammer - Demolition Master - part 1 - Additional info - Red Faction: Guerrilla - Game Guide and Walkthrough

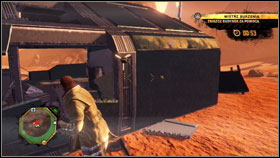
That's why the best weapon in this mission is hammer. Try to destroy walls and leave everything that is inside #1. After few second you should see that the building is almost destroyed #2. Few more hits and the quest will be completed.

04

Sector: Free Fire Zone - Demolition Master - part 1 - Additional info - Red Faction: Guerrilla - Game Guide and Walkthrough

Sector: Free Fire Zone

Armament: Hammer, Mech

Time: 01:45

The best time: 01:00

Reward: 50 scrap


5 - Demolition Master - part 1 - Additional info - Red Faction: Guerrilla - Game Guide and Walkthrough
This is our first contact with mechs #1 - Demolition Master - part 1 - Additional info - Red Faction: Guerrilla - Game Guide and Walkthrough

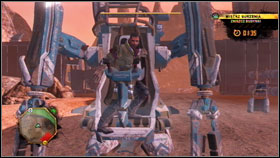
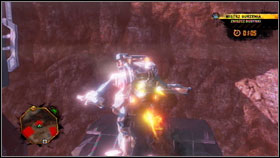
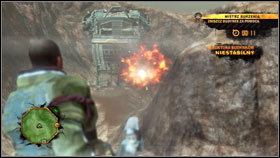
This is our first contact with mechs #1. We have four targets (marked with red). To move between them you can use flying ability of your robot #2.

6 - Demolition Master - part 1 - Additional info - Red Faction: Guerrilla - Game Guide and Walkthrough
I must admit that this is not a very complicated quest - Demolition Master - part 1 - Additional info - Red Faction: Guerrilla - Game Guide and Walkthrough

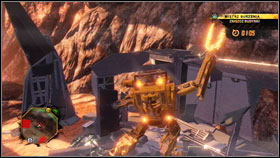
I must admit that this is not a very complicated quest. We are walking and destroying everything that we can see #1. Destroy buildings (using our robot weigh) by walking through them #2.

05

Sector: Dust - Demolition Master - part 1 - Additional info - Red Faction: Guerrilla - Game Guide and Walkthrough

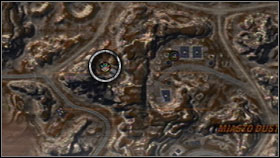
Sector: Dust

Armament: Hammer

Time: 02:00

The best time: 00:55

Reward: 50 scrap


7 - Demolition Master - part 1 - Additional info - Red Faction: Guerrilla - Game Guide and Walkthrough
Another mighty construction #1 that we have to destroy - Demolition Master - part 1 - Additional info - Red Faction: Guerrilla - Game Guide and Walkthrough

Another mighty construction #1 that we have to destroy. Our weapon is not so strong. We have to run all over the building and hit the walls #2 with hammer.

06

Sector: Dust - Demolition Master - part 1 - Additional info - Red Faction: Guerrilla - Game Guide and Walkthrough

Sector: Dust

Armament: Rocket Launcher (9)

Time: 00:50

The best time: 00:25

Reward: 50 scrap


8 - Demolition Master - part 1 - Additional info - Red Faction: Guerrilla - Game Guide and Walkthrough
This is an easy and funny quest - Demolition Master - part 1 - Additional info - Red Faction: Guerrilla - Game Guide and Walkthrough

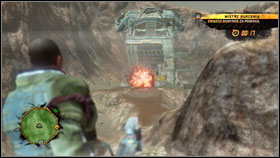
This is an easy and funny quest. We have to destroy the tower. The best option is to hit the base and the rest of the construction will simply fall down. That's why, first of all we are hitting the left side of the building #1 and then right side of the tower #2.

See/Add Comments

You are not permitted to copy any image, text or info from this page.

This site is not associated with and/or endorsed by the THQ or Volition. All logos and images are copyrighted by their respective owners.

Copyright © 2000 - 2024 GRY-Online S.A. for gamepressure.com, unofficial game guides, walkthroughs, secrets, game tips, maps & strategies for top games.