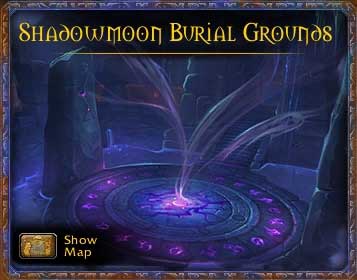
Shadowmoon Burial Grounds WoW: Warlords of Draenor Guide
Last update: 11 May 2016
One of the most difficult dungeons, after you reach level 100, is the Shadowmoon Burial Grounds. What is challenging here is, first of all, the fights against the four main bosses. Each one requires knowledge of his attacks, of you, and of the way to react to them.
For the duration of this instance, you will be taken over to the underground catacombs of the Shadowmoon clan. It is a dark place full of magic and the ancestral souls. Currently, the catacombs are the site of the rites performed by Ner'zhul and his followers. Your task is to restore peace to this place and free the souls of the ancestors, from black magic.
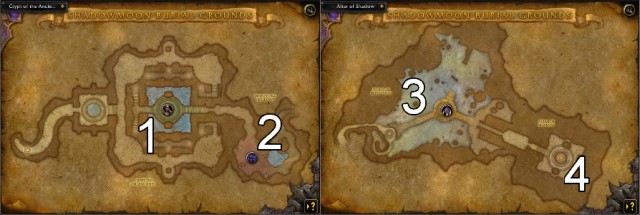
1. Sadana Bloodfury

After you defeat several groups of opponents, you fill enter a huge arena, in the center of which, there is your opponent - Sadana Bloodfury. You need to prepare for the battle, best by learning the types of attacks used by the enemy. Without this knowledge, the battle may be as short as several seconds, to your disadvantage, of course.
From where you stand, the most important ability is [Dark Communion], by which the boss summons the Defiled Spirit, which heads towards Sadana starting from the center of the arena. Your priority should be destroying those spirits. If one reaches its destination, Sadana regains quite a portion of his health and receives a temporary buff to damage, which may prove lethal to your tank.
There are a lot of things going on in the arena. First of all, there are two things to avoid. Firstly, Sadana uses [Daggerfall], which drives a large dagger into the ground. You need to keep clear of it, because it may cost you around 20k health a second, if you stay close to it. For the majority of time, there will be several such daggers in the battlefield so, it may prove difficult to avoid them. Secondly, under no circumstances, can you step on one of the glowing runes, arranged into a circle, on the ground. Such an action may cost you almost 80k health points, may proves lethal in the middle of the battle.
Occasionally, Sadana also attacks with [Dark Eclipse], which deals 100k damage to each of the players. You can protect yourself from that, however. Directly before the attack, the glowing circle of runes is activated. You then need to step on such a rune, thanks to which you receive [Lunar Purity], which decreases the damage you take, by 80%.
Sadana Bloodfury may be a difficult opponent, if you do not know what to avoid. At the same time, he is a sheer challenge to your healer, who constantly needs to control, not only the health of the tank, but of the entire party. Ninety percent of the time, it is him that of success depends on.
2. Nhallish

Your next opponent is Nhallish. Himself, he should not be too much trouble to you. You need to watch out for two things, though. Firstly, avoid the symbols on the ground that deal lots of damage.
Occasionally, Nhallish uses the ability to possess your souls. You are then transferred to a different reality, where each player needs to defeat his own possessed soul. You need to do that within 20 seconds. It would be best if you managed to do that within that time, because you then receive a buff to attack and you heal 40% of your health. Fortunately, even if you fail, this will not have any negative effects.
3. Bonemaw

Your third opponent is in the arena across the bridge. However, to reach him, you will have to defeat two of his followers surfacing from under the water, first one the right side of the bridge, then on the left. They are not too demanding and the most important thing is to avoid being crushed. The attack is signaled with a black and violet stripe that shows you where the enemy will strike. You simply need to walk away to a safe distance.

Your main opponent - Bonemaw - uses three main abilities. The simplest and the easiest to avoid is the body slam. It is identical with the attacks of the previous two opponents so, it is easy to avoid it.
The second, most frequent, attack is [Necrotic Pitch], which forms, in random spots, fields of hands that try to grab you. Staying within that fields slows you down considerably and deals 6k of damage a second. For the majority of the battle, you simply need to avoid these fields.
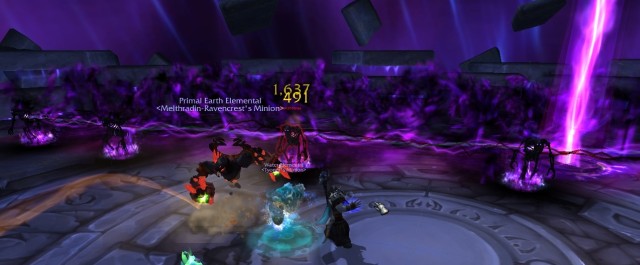
![As soon as you spot Bonemaw starting the attack [Inhale] you need to react. - Shadowmoon Burial Grounds - Detailed guide - World of Warcraft: Warlords of Draenor Game Guide](/wowwarlordsofdraenor/gfx/word/14271408.jpg)
The most dangerous of Bonemaw's attacks is [Inhale]. In this attack, he sucks you in, into his maw, and disposes you through the other end, as a result of which you land in water. While in the water, you need to reach the fountain, as quickly as possible, which takes you back into the battlefield. This attack does not deal too much damage, but it eliminates you from the battle for several tens of seconds.
There are two ways, in which you can avoid being sucked in. The easiest one is escaping to the other end of the arena. Unfortunately, it is possible only in the case of ranged characters and not always will you succeed, because there is quite a distance to cover. The other option is to use the fields formed by the [Necrotic Pitch]. The hands sticking out of the fields will effectively prevent you from being sucked in by Bonemaw. Unfortunately, you need to keep in mind that you will be taking some damage for several seconds.
4. Ner'zhul

Now, you only need to fight the final battle against Ner'zhul. The battle itself is not too complicated, the opponent uses only three main abilities. Two of them are dangerous, but easy to avoid, whereas the third is lethal and impossible to avoid, if you are late with your reaction.
Ner'zhul's less dangerous attacks are [Omen of Death] and [Malevolence]. The former forms a circle in the battlefield, which deals serious damage if you do not walk away early enough. [Malevolece], on the other hand, is an AoE attack. Ner'zhul discharges dark energy that forms a triangle and, if you are caught within range, you take around 80k of damage. Fortunately, the attack is signaled beforehand and you can escape it.
The most dangerous attack is [Ritual of Bones]. It summons several skeletons to the other end of the arena. The skeletons are bound together with beams of energy. They start closing in on you and stop at the other end of the arena. You cannot touch neither to a skeleton, nor to the beam of energy, because this will result in around 110k damage that you take. Your task is to destroy one of the skeletons, which forms a gap in the energy beam. Destroying a skeleton is an absolute priority, you stand little chance of winning, because each of the players takes over 110k damage. It is best to agree on which skeleton you will be attacking, so that the each party focuses on one skeleton only. In my opinion, it is best to pick the skeleton in the middle and attack it as soon as it appears in the battlefield, without waiting for it to approach you. This forces you to watch your back at all times, to find out when the skeletons appear.