

Weapons Trade | Maps of smaller activities Watch Dogs Guide
Last update: 02 February 2017
Key points of Watch_Dogs - Weapons trade
Special mission available after scanning every weapons trade boxes on map.
Weapons trade
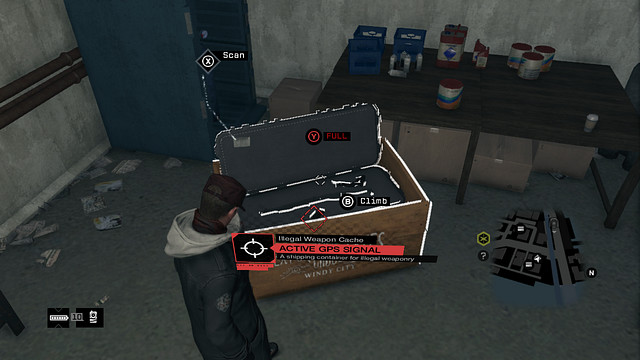
In the Weapons Trade missions, you need to locate the marked garage and get access to it. The door is always locked with one switch, which you can find at a certain distance from the entrance. After you get inside, you will notice a big crate - your task is to scan it. Inside, there always is a firearm and some ammo. In the room, there also is an audiolog, on the floor or on the basic unit or on the shelf. More and more scans will, eventually, end up in an additional mission - they lead you to the place where the illegal transaction is taking place.
It is a good idea to complete this kind of missions early into the game, because they supply you with some useful pieces and, above all, after you scan all of the crates, you receive Spec Ops Goblin which is an interesting weapon and is the only suppressed automatic weapon. For those players, who like operating from shadows, this is an invaluable tool. The Weapon Trade collectibles are required to complete the game in 100% and the appear on the map, as reticules, after you have unlocked ctOS towers for a given region. There is a total of 9 crates to scan, plus an special mission, where you need to deal with quite a number of enemies, at the provided location.
#1

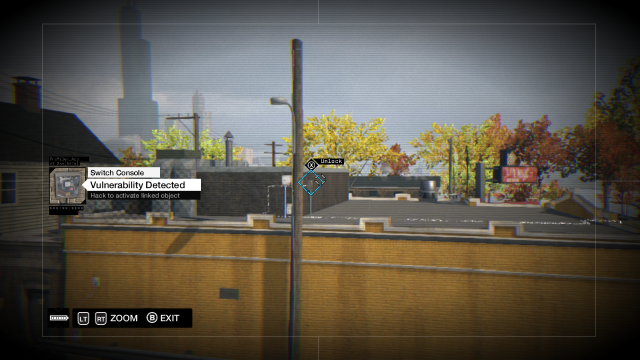
Once you reach the location marked on the map, find the building with garage door. Just like the smaller ones, also this entrance is blocked and you need to find the switch to activate it.

The camera on the building at the neighboring crossroads lets you see the switch on the building's roof.

The activator is on the edge of the building with the garage. You can tell it by its big windows.

After you activate the activator, you can walk inside. On the floor, or in the basic unit, there always is an audiolog with a recording that concerns missions.
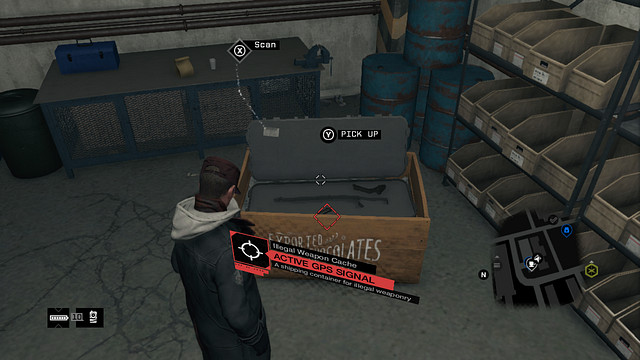
And the most important thing. In each garage, there is a weapon crate, which you need to scan. It is a good idea to collect the crates at an early stage of the game, because their contents may be collected by you. Once you scan all of the crates, you will gain access to the special mission.
#2

The second switch is on the rooftop of the building, over the fence. Climb onto the rooftop, over the palettes, from the Eastern side of the building. Then, onto a smaller rooftop. Past it, there is a control panel.
#3

You can capture the third switch from the camera opposite, next to the crossroads.
#4

The next switch is several tens of meters away, to the North-West of the garage, on the same level.
#5

The fifth switch can be accessed via the camera opposite. It is the topmost camera in the alley.
#6

The next switch is right next to the garage. Walk several meters to the North. It is next to the red container.
#7

The seventh activator is attached on the rooftop of the neighboring garage. You will be able to access it after you walk away from the building, Southwards.
#8
Once you get there, you will see the garage and an alley separating the buildings. Opposite, there is a yellow-brick house. On the rooftop of that building, there is a switch that you can access via the camera behind the building, in the alley.
#9

To access this one, you need to climb up the stairs, onto the rooftop of the building that neighbors this one from the Southern side.
The special mission

In the special mission, you need to deal with all of the enemies in the location. In the first place, you need to climb up the stairs - there are five enemies there. Take them out in the first place, best by using the Spec Ops Goblin, which you have unlocked after finding all of the previous c rates with weapons.

At the other side of the warehouse, there is a sniper - eliminate him, because this may be more difficult later on and he can be quite a nuisance.

In the center of the warehouse, several enemies are bundled together and you cannot eliminate them without being spotted. Therefore, you should pick the optimal location for conducting fire. Before that, use all of the surprise elements - distract them with the lure, attached to a gas tank, throw grenades or activate explosives attached to the enemies.

This is not the end to this mission, yet. From the West, there will arrive reinforcements in cars, which park at both sides of the warehouse and inside. There is not enough time to get prepared, which is why you should take a good position and get prepared to conduct fire. What is especially useful here are explosives and, if you have it on you, the grenade launcher. Two shots from the grenade launcher destroy a car with the enemies inside.

What makes the second wave more of a threat is the fact that there are really heavily-armored opponents in the cars. Again, you should use the grenade launcher and do not be stingy about ammo. Then, hide and eliminate the heavily armored bosses in the first place. A good idea is to use the sniper rifle and shoot to the head. After you finish fighting, the mission draws to an end.