Mission 1: Rats are coming | Imperial Campaign: Act II Warhammer MOC Guide
Last update: 11 May 2016
This mission is more difficult than all previous - it took four times to me to do it properly. Ok, we begin preparations. Before the battle, in the camp, put the Stefan on the horse. When it comes to deployment phase, add von Kessel to the cavalry and the wizard to shooters. Place troops as on the following picture and switch to the run mode.
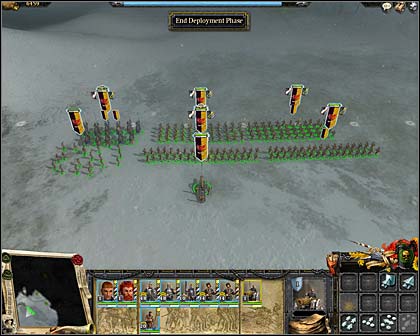
We move forward after beginning the battle and place all armies, with except of the cavalry, near the edge of the slope seen before us. Knights go down from the slope, at its bottom they turn left, and soon right again, to have the cloud of the green gas to right side. Cannon shooting green rays will stand before them, order them to attack and destroy it. Don't bother the squad standing next to it - it will not move on you. However cavalry, as soon as it finishes smashing the cannon, should withdraw to our main forces, which, in a lap time, were attacked. Rats in this mission are able to pull themselves together after breaking down morale very quickly. This reason and large quantity of attacking enemies draws us to continuous defence and quick change of targets. Do not chase defeated hostiles, neither distract strengths excessively. Manoeuvring the cavalry and using the wizards' Fireball is very important. First thing is especially significant for the efficient leadership in this battle. Do not throw it alone in the enemy, because it will most probably stick and be massacred. Some Skaven regiment will appear on your backs and attack cannon in a certain moment - it is good to destroy it using cavalry. If some of your units take large losses during the fight, withdraw it - it is important to have at least one man in each regiment.
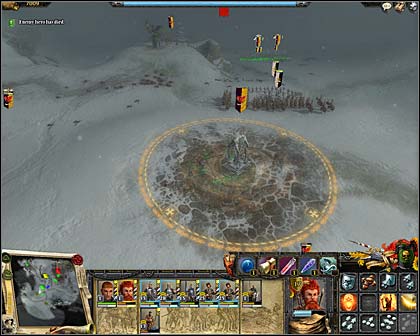
When rats' wave weakens a bit, it's time to move ahead. Go in the direction of the shrine visible on the picture above. Do not enter clouds of gas and fight off rodents. When we reach the altar, we have to destroy it and build up new one (this happens automatically). When it's done, put nearby the most damaged unit - best the cavalry, because there is a large chance that it earned new level which would enlarge its knights' number above the initial state. After the regeneration of strengths (attention, the power of the shrine is not infinite - use her with judicious) we head in the direction of the horn. It is best to divide a little our forces in this moment. Put archers and handgunners with the wizard near the hill. Leave halberdiers insured by knights near the shrine, and remaining troops on the right side of the hill with the horn.
Prepared we wait for the enemy. Fortunately reinforcements will come from the eastern direction and support us very effectively on the main front. Rats' squad will approach in a lap time from the left side - attack them with halberdiers first and then charge from the side with the cavalry. When enemies' morale breaks down, shift the infantry to the main front, and let knights chase survivors to the edge of the map. Some of rodents' squad probably waits there. Break it down and come back to the shrine.
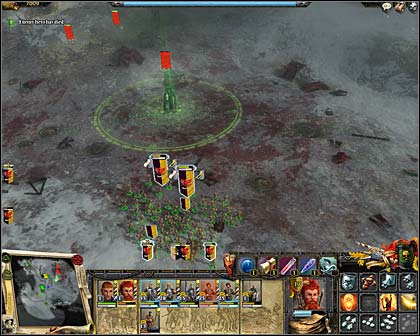
Order the defence for the main forces, until you do not defeat the Skaven hero. The horn, which helped rats restoring their morale, will fall out from him. When you already deal with boss, move all accessible troops (leaving behind regiments, that are decimated strongly) and attack the altar seen above. The battle is won after its destruction. During this battle Stefan earned 19th level, spending 5 points in Tenacity, Warmonger and Battle cry and 4 in Deadly strike. The wizard climbed on 17th level, putting 5 points in Fireball, Master of Agsha and Burning icon and 2 in Divine sight. The last two abilities belong to the command tree.
After this mission we still have only a field camp. We should regenerate strengths and then march forward. Now we lose the control over Imperial forces and we start leading Elven mage. She does not have any troops with her, but she is level 15, which should be spent on following skills: Khaine's wrath, Master of Hoeth, and Magic mastery - all from the Combat tree.