
Valheim: Day 1 - how to survive? Where to start? Valheim guide, walkthrough
Last update: 18 February 2021
On this page of the guide, you will learn how to survive your first day in the vast and dangerous world of Valheim.
Valheim is a survival action game with a large open world. While exploring these vast expanses, you will have to face increasingly difficult threats. At the beginning of the game, your character doesn't really have anything – you must do everything to survive. The first 24 hours can be the hardest for new players – below are tips on how to make the most of them.
- Get food
- Obtain your first resources
- Defeat your first opponent
- Mark important places on the map
- Craft your first tools
- Build a Workbench
- Build a shelter and light a campfire
- Sleep
Get food

One of the most important things to do when you start playing Valheim is to get food. Fortunately, you don't have to hunt right away to get the provisions you need as you will find plenty of raspberries and mushrooms around.
Obtain your first resources
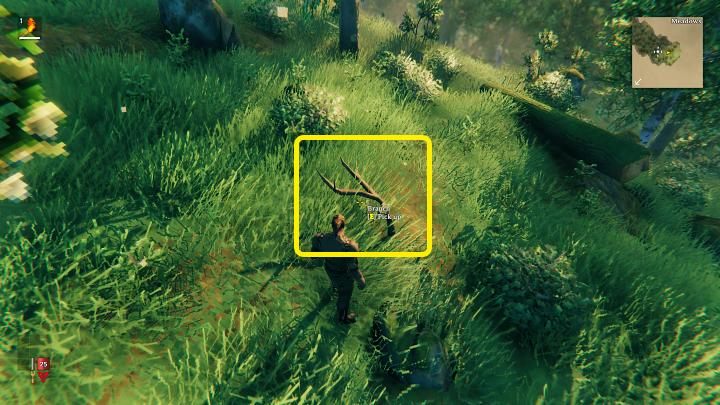
Another important matter is obtaining your first resources – wood and stone. There are numerous branches and cobbles on the forest floor, ready to be collected.
However, this is not the only way to get wood at the beginning of the game. You can break small trees with your fists - you only need to hit them a few times.
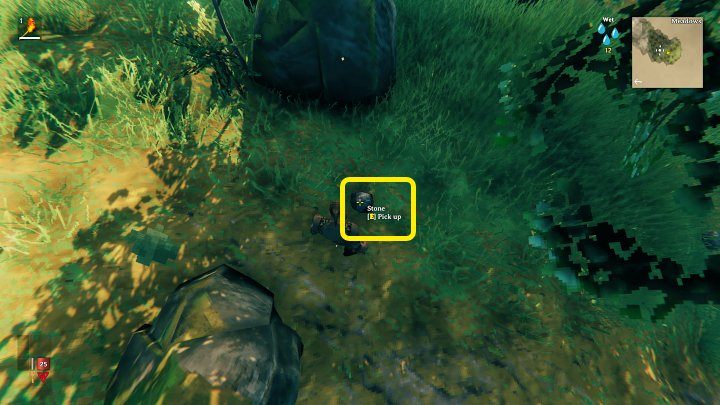
You will find stones in different places so look around carefully, especially near tall grass.
Defeat your first opponent
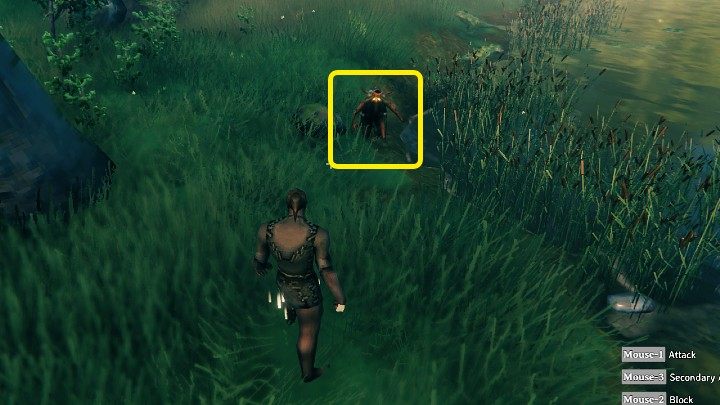
When you start the game, try to avoid aggressive animals such as boars. If you are attacked by a Greyling, you can try to fight him – this enemy isn't really challenging. The tactic for fighting a Greyling is very simple - attack once or twice and then back away a bit. Your opponent will most likely attempt to attack you, but it will miss as you are out of its range. Respond with a counterattack and then move away again.
Mark important places on the map
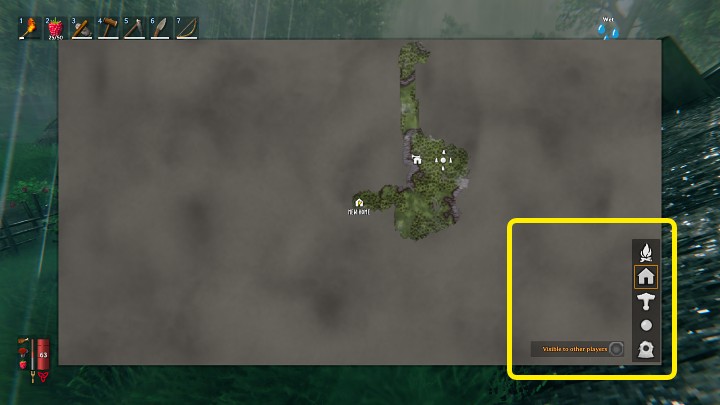
The world of Valheim is very vast and rife with both secrets and dangers. When you open the map (M), you can mark important places on it so you can return to them later. With this simple solution, you will be able to immediately locate your destination without having to wander around the area.
Craft your first tools
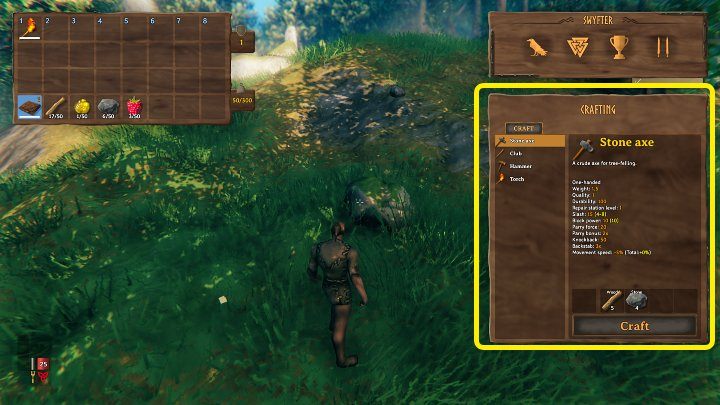
After getting the resources, it is time to make the first important tools – Stone Axe, Hammer, and Hoe.
- With a simple axe, you can cut down larger trees and thus get wood faster;
- Creating a hammer will unlock new crafting recipes. The item is also useful for building a shelter and setting up a campfire;
- A hoe will be useful to flatten the ground for your first shelter.
Build a Workbench
The Workbench grants you access to a variety of crafting recipes, allowing you to build your first shelters, but also create other useful items and repair your tools. It is important to note here that the workbench must be placed under a roof before you can use it.

A roof for a workbench is very easy to make – you just need 4 wooden walls and two pieces of thatch roof.
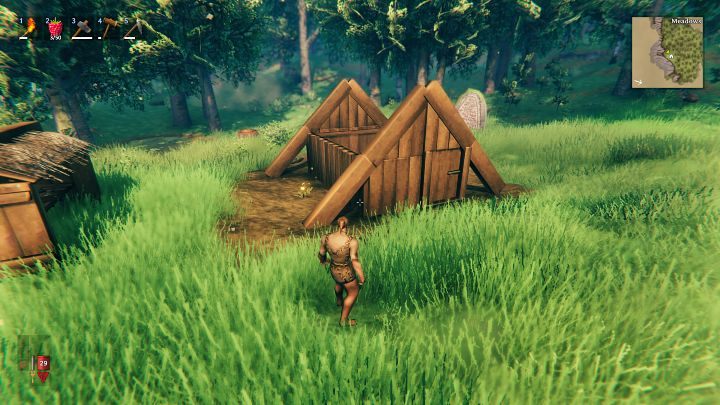
Build a shelter and light a campfire
To build a basic shelter you will need a workbench, a hoe, a hammer, about 130-150 pieces of wood, and at least 5 stones (for the campfire). You can easily collect all the necessary resources during the first day if you focus on gathering them. It is worth mentioning here that there are many abandoned and usually ruined buildings near the starting location, which you can claim and repair - this requires less work and consumes much fewer resources.
Before you start building your first shelter in Valheim, you will need to select a suitable location. When choosing a place to build, make sure that the shelter won't be too close to the Black Forest, as the creatures living there may start attacking you - you certainly don't want to deal with that situation during your first day.
If you place an item in the wrong place when building your first shelter, remember that you can always destroy it by selecting the hammer and clicking on the item with the MMB. This will refund some or all of the materials used in its construction.
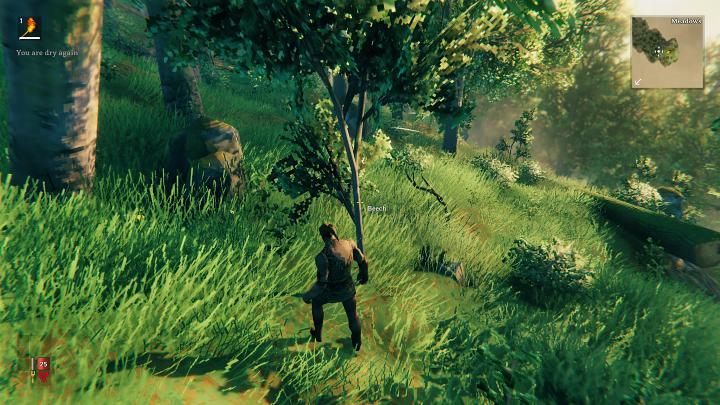
The best place to build your first shelter is the Meadows biome – this is the safest and most hospitable biome in Valheim. The meadow area is covered with grass. Here, you can find various species of trees (Beech, Birch, Oak) and encounter plenty of animals (Deer, Boar) that will provide you with valuable food.
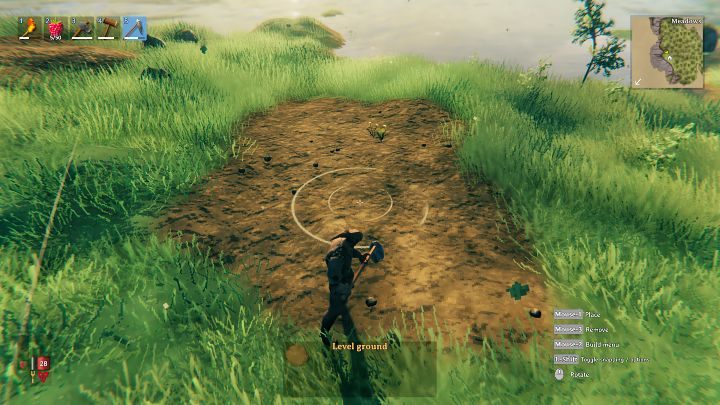
Once you've chosen a location, it's time to begin preparing the land for construction. Equip your character with a hoe, open the action menu (RMB), and select Level ground to raise the ground level a bit - this step is required before you can place flooring. Create a rectangle of flat land that is at least 3x2 in size.
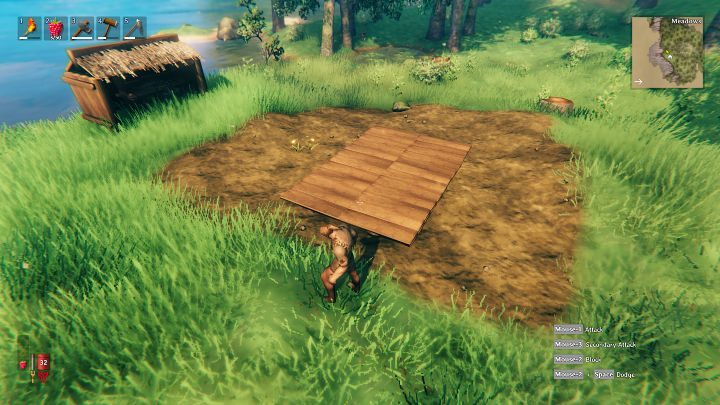
Equip your character with a hammer, open the action menu (RMB), and select the Wood floor 2x2 from the build tab. Create a floor in the shape of a 3x2 rectangle, just like in the picture above.
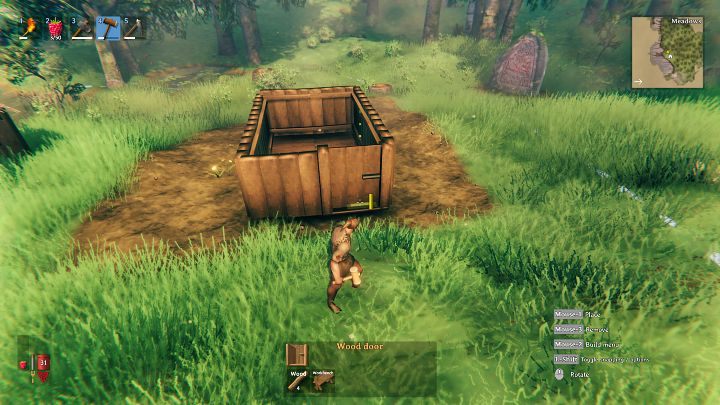
After placing the floor, it's time to put up the walls. Select the Wood wall from the available items and build it on the edge of the floor. Remember to leave empty space for the door and then insert it here so your character can enter the building.
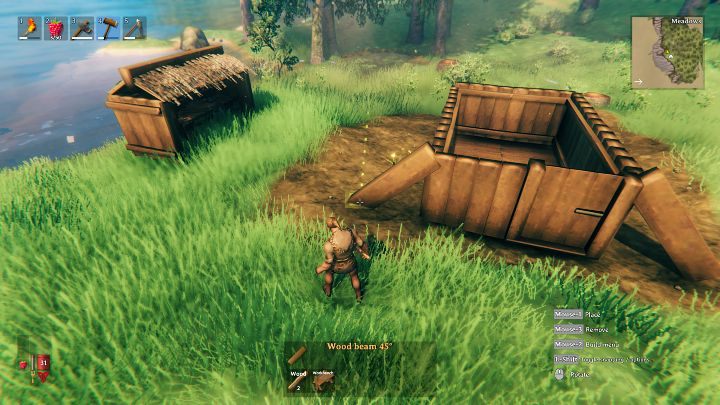
Select the Wood beam 45° from the build menu and use them to support the walls on both sides of the building's entrance. Then circle around the house and similarly support the back wall.
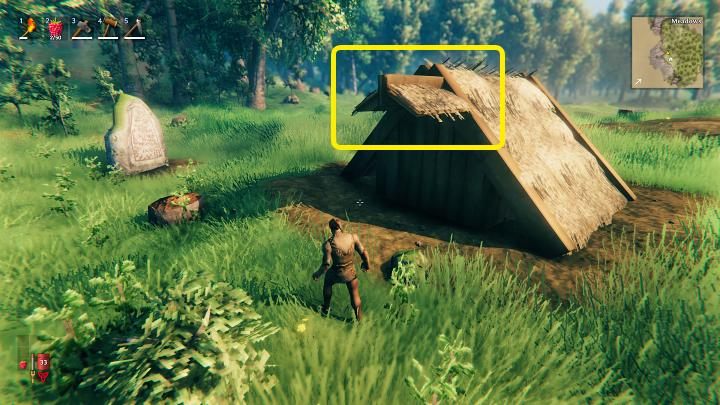
Select the Wood wall 45° from the build menu and place two walls above the entrance to create the top of the house. Then go around the building and construct the same structure on the back wall to create support for the roof you are about to build.
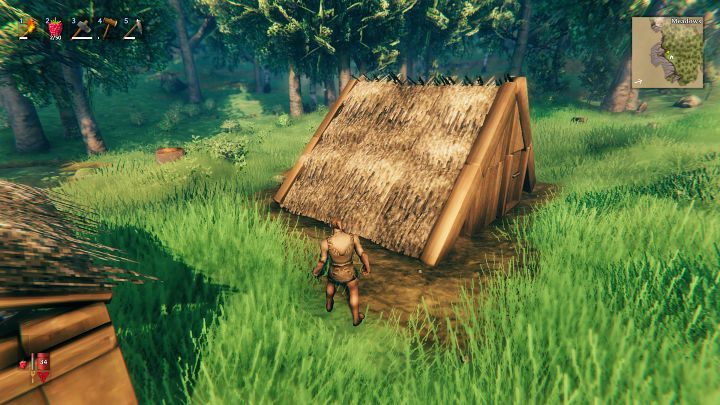
Select the Thatch roof 45° from the build menu and use it to cover the roof of your shelter – from the ground to the top of the roof.
You cannot use flooring to make the roof, as this item does not count as a roof – the shelter will not function as it should.
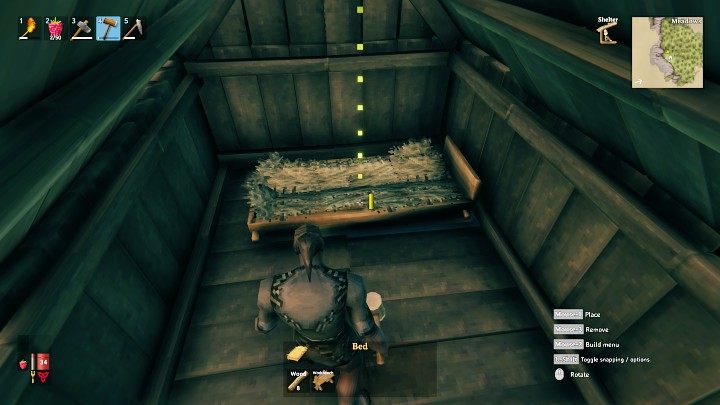
Go inside the building, open the Furniture menu, select the bed and then place it near the back wall of the shelter.
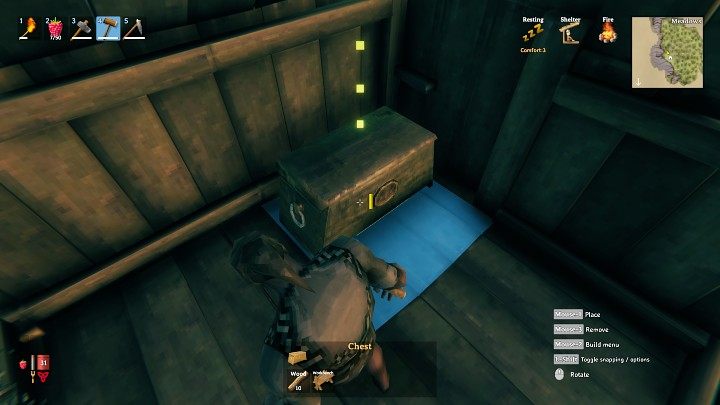
It's also a good idea to put at least one chest inside where you can store resources or other items you don't want to take with you when exploring the map.
The last important element of the first shelter in Valheim is a campfire. It is important to note here that the campfire must be lit near the resting place (but not inside a closed building) to have any effect on your character while sleeping. Go around your newly constructed house, select the Thatch roof ridge 45° from the build menu and add a piece of roof. You can also add two walls on the sides so that the fire can burn even during gusty winds.
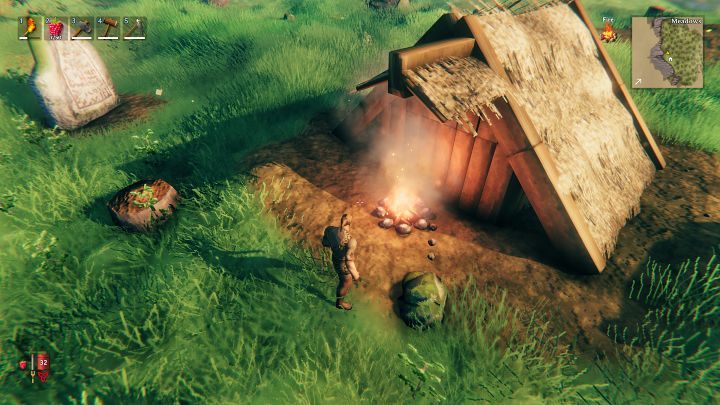
Select the Campfire from the Misc menu and place it under the roof you created earlier. This way the fire won't go out when it rains and your character can rest comfortably - the bed is right behind the wall so it will remain within the range of the fire.
Sleep
Your first day in the world of Valheim was very busy – you managed to obtain some food and materials, crafted your first tools, and built a shelter. You may have even made some clothes or started exploring the map – you definitely earned some rest.
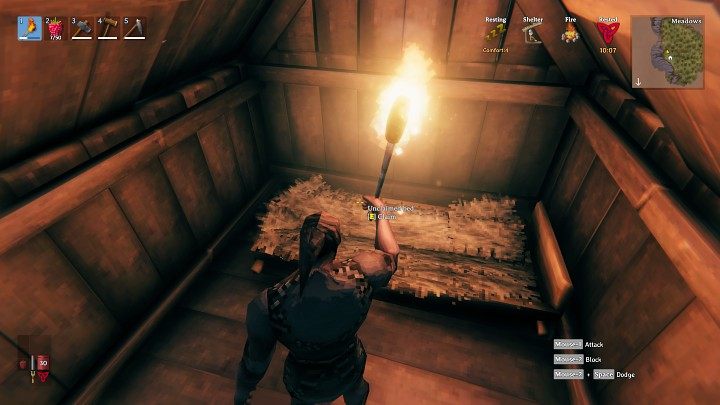
Enter your shelter and interact with the bed. Your character will claim the bed and thus establish a new respawn point in case you die. When your character goes to sleep, they will wake up the next morning – rested and ready to face new dangers.