
Uncharted 4: Chapter 9 Those Who Prove Worthy - walkthrough Uncharted 4 Guide
This page of the Uncharted 4 guide has a walkthrough for chapter 9 – Those Who Prove Worthy (puzzle with rotating mechanism, caves, catacombs).
Last update: 27 January 2022
This page of the Uncharted 4: A Thief's End guide has a walkthrough for chapter 9 - Those Who Prove Worthy. You will learn, e.g. how to solve the puzzle with rotating mechanisms, how to go through the pirates' cave and catacombs, how to escape from the cave and avoid mercenaries, and how to reach Sully's plane.
- Chapter 9 information
- The turning mechanism puzzle
- Exploring the first part of the cave
- Exploring the catacombs
- Exploring further parts of the cave
- Exit the cave
Chapter 9 information
The ninth chapter focuses on exploring pirate caves and catacombs connected to them. The last part involves some fighting. While moving through the location, remember to look around; there are six treasures to be found (and two of them are well-hidden), two more journal entries, one note, and an optional conversation.
The turning mechanism puzzle

Start by investigating the right cage with a sing on it; this will unlock the first entry. Use the right ramification, and when you get to another cave, ignore the drawbridge for a while. Jump down and investigate a hole on the left (see screenshot), because the first available treasure (Lantern Mounted Flintlock) is there. Only now return up and walk across the drawbridge. Get to a place where you have to slide down and jump towards interactive edges. Use them to reach to solid ground and continue your journey.

You will get to a chamber with a huge round mechanism on one of the walls, and a difficult puzzle that needs to be solved. Investigate the switch by the left closed door (one with spikes and a skeleton). When you activate the middle mechanism, approach it and pick up the bucket. Take it to the left reservoir and fill it with water. Pass it to Sam and wait for him to place it in the spot, from which it was taken in the first place.
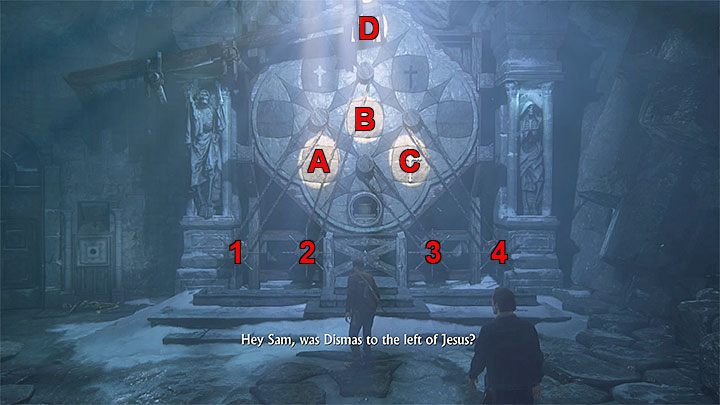
You may now open your journal, which will provide you with some tips on how to solve the puzzle. You are supposed to turn the minor elements in such a way, that certain objects end up in illuminated positions. To be more specific, the white cross (Jesus) needs to land in position A, the grey cross (Dismas) in position B, the black one (Gestas) in position C, and the bucket filled with water in position D.
Winders, situated bellow (1-4 in the presented screenshot), can be used to turn objects. There are several methods to solve this puzzle, and we provide you with one of them:
- turn winder 2 left
- turn winder 3 left twice
- turn winder 2 right twice
- turn winder 3 right

Perform all the mentioned steps, and approach the left door once again. Use the mechanism. If you followed our tips, you should unlock the door (if not, spikes will slide out of the wall and hurt Nate). BEFORE you exit the chamber, investigate the right mechanism again and unlock the second entry.
Exploring the first part of the cave

Head right when you get to the new part of the cave. Look around to find a well-hidden tap (see screenshot). Although you won't see the L1 icon, you can use it to activate your grappling hook. Do it, turn right and swing your rope to reach the nearby stone shelf. You will find another treasure (Strange Pendant). Collect the secret and use the rope to get back to the main path.

Follow Sam and soon you will reach a viewpoint. Use this opportunity to have an optional conversation. Move forward till you get to another place that requires you to use the grappling hook. Do it and reach another part of the location. Go left and stop by the edge to lower yourself in a position presented in the screenshot. Use edges to reach the third treasure (Amatory Box). Do it, and go back from where you came.

Draw your attention to the dilapidated bridge on your right (another secret is located right under it, but you will collect it later on). Place yourself under the ladder, lift Sam, and wait for him to drop a large container. Push this container by the left wall and climb on it. You will get to a small hole. Move along a narrow tunnel and get to the catacombs.
Exploring the catacombs

Go through the couple first chambers and squeeze through the upper corridor, located on the left, in the last room. Jump towards a vertical wall and wait for Nate to place himself automatically in a position where a conversation between Nadine and Rafe can be heard. Regain control over your hero and move right. Don't leave this location too quickly, as in a small side room there is a treasure (Pewter Box) (you need to crouch to reach it).

Head to the opposite corner and use your grappling hook. You will get to a vertical wall with a supposedly unreachable edge. Listen to Sam's comment and get back to the tap. Turn towards the edge presented in the screenshot and hold L1 to climb down the rope (to the very bottom). Only now swing your rope and get to the edge. Climb up and get to a place with another interactive container. Push it off the edge, join Sam and push the container to the right position. Use it to climb up.
Exploring further parts of the cave

Draw your attention to the fact that you ended up near the dilapidated bridge that you had a chance to see from a distance. There is a treasure nearby. Place yourself on the right of the bridge, lower yourself (see screenshot) and access a small hole. Collect Memento Mori Skull Watch, return up and use the passage on the left of the bridge.

You will get to a large drawbridge that has been destroyed. Turn right and locate an interactive container on a nearby higher shelf. Use your grappling hook to grab it and climb up. Look around to find the last treasure (Scottish Tipstaff), hidden behind the crate. Push the container; you are supposed to move it to the position presented in the screenshot. Use your grappling hook once again, jump of the shelf and run along the right vertical wall. Reach interactive edges and continue your journey to the other side of the bridge.

Squeeze between the rocks and jump down. Investigate the skeleton that you will come across and obtain a note from a diary. Try to cross the moveable plank, and after you fail to reach the upper shelf, wait for Sam to ballast the plank. Continue to climb up. Get to an interactive tap and reach another shelf. Locate a container and push it towards the moveable mechanism. When you throw it down, Sam will be able to move. Jump down to him. Continue your journey till you get to a large chamber where an important cut scene will begin.
Exit the cave
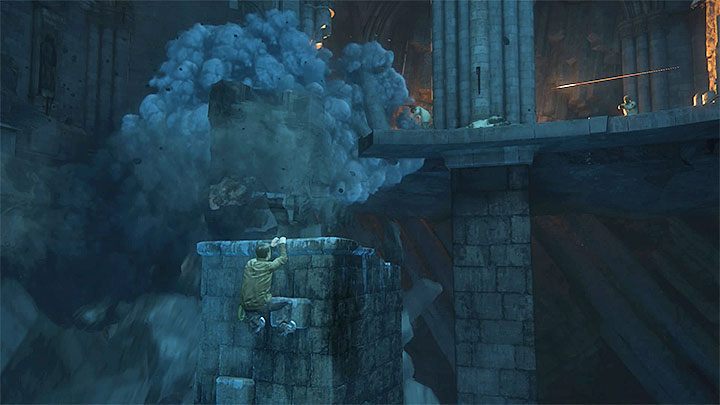
As Nate starts without a weapon, run towards Sam and hide on the right. Jump over the missing part of the floor. Now you will have to climb a falling pole. Grab interactive edges and move aside when needed. When you get to the top, leap towards the closest enemy, and while in mid-air, press X to attack him. You will neutralize your opponent and gain his pistol.

From this moment on, you can use your weapon to help Sam deal with the bad guys, but always take cover. You need to escape the collapsing cave, so use your grappling hook. In one of the further corridors you need to stay sharp as one of the mercenaries has a shotgun. Don't just stand in the open field, and when you kill this foe, pick up his gun if possible. Carefully clear the rest of the corridors and chambers. Destroy explosive objects to help yourself and search for additional guns (e.g. AK-47).

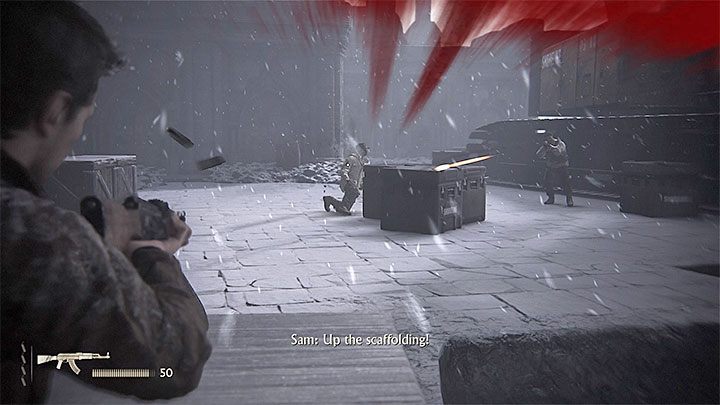
Exit the cave, climb some more, and draw your attention to the fact that more enemies appeared in the ruins. The biggest threat is the machine gun station that will make you hide behind poles and other indestructible objects. Get to the dynamite as quickly as possible; it's not far from the machine gun (see screenshot). Pick it up and throw some dynamite at the machine gun. Move left and stop the remaining mercenaries from reaching the devastating gun. When you deal with the majority of scattered foes, you may actually try to take over the machine gun position and use it to eliminate the rest of your opponents (not recommended if you play on a high difficulty level).

Continue your journey. Quickly kill the sharpshooter located on the right shelf. You may use the upper tap to get to this shelf and pick up his sniper rifle - Mazur LDR. If you want, you can use it and take down your foes from a safe distance or return to the starting point. The latter option requires rapid movement, but will save you from incoming grenades. Regardless of your decision, start killing opponents that appear at the highest shelves. Some of them will be snipers, and they should be the ones that you kill first.
Clear the area and use the tap to reach shelves that were full of opponents, moments ago. Get to the top and fire at foes that will come from the right. You need to be aggressive to give yourself enough time to reach more durable crates. Continue your journey through the ruins and reach further stone shelves. You will come across Mettler M-30, which may come in handy when you meet another group of enemies. Move forward and use dynamite whenever you get close to a group of mercenaries.

Use your grappling hook during one of the slides. In the next ruins you will run into a larger group of opponents. You can head right and try to flank them. Win the battle, and move forward. You will need to perform a long slide down, during which you have to avoid deadly rocks. Use your grappling hook and perform a jump towards the water. Swim to the plane as fast as possible before Nate gets killed by incoming bullets.